Sign In
Upload
Manuals
Brands
Sharp Manuals
All in One Printer
MX-M753
Sharp MX-M753 Manuals
Manuals and User Guides for Sharp MX-M753. We have
6
Sharp MX-M753 manuals available for free PDF download: Operation Manual, Brochure & Specs, Specifications
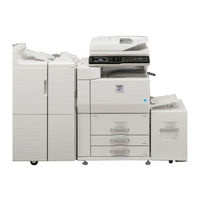
Sharp MX-M753 Operation Manual (879 pages)
DIGITAL MULTIFUNCTIONAL SYSTEM
Brand:
Sharp
| Category:
All in One Printer
| Size: 27.13 MB
Table of Contents
Chapter 1 Before Using the Machine
42
Operation Guide
1
Make a Copy
2
Other Convenient Functions
9
Print a Document
10
Clean the Machine
37
How to Use this Manual
39
Manuals Provided with the Machine
40
Printed Manuals
40
Table of Contents
42
Part Names and Functions
44
Exterior
44
Interior
46
Automatic Document Feeder and Document Glass
47
Side and Back
48
Operation Panel
49
Touch Panel
51
Status Display
53
System Bar
54
Turning the Power on and off
56
Restarting the Machine
56
Energy Save Functions
57
[Power Save] Key
57
User Authentication
58
Authentication by User Number
58
Authentication by Login Name / Password
60
Home Screen
63
Remote Operation of the Machine
64
Items Recorded in the Job Log
65
Loading Paper
68
Important Points about Paper
68
Names and Locations of Trays
68
The Meaning of "R" in Paper Sizes
68
Useable Paper
69
Print Side Face up or Face down
70
Tray Settings for Tray 1 to 4
71
Loading Paper in Paper Tray 1 - Tray 2
71
Changing the Paper Size in Paper Tray 1 - Tray 2
72
Loading Paper in Paper Tray 3
73
Changing the Paper Size in Paper Tray 3
74
Changing the Paper Size in Paper Tray 4
76
Tray Settings of Tray 5 (A4 Large Capacity Tray)
77
Loading Paper
77
Tray Settings of Tray 5 (A3 Large Capacity Tray)
79
Loading Paper
79
Paper Table
80
Changing the Paper Size
81
Loading Paper in the Bypass Tray
83
Important Points When Using the Bypass Tray
84
Inserting Tab Paper
84
Originals
85
Placing the Original
85
Placing Originals in the Automatic Document Feeder
85
Placing the Original on the Document Glass
87
Placing a Thick Book
88
Peripheral Devices
89
Finisher and Saddle Stitch Finisher
91
Part Names
91
Specifications
92
Staple Cartridge Replacement and Staple Jam Removal
93
Finisher (3 Trays)
97
Part Names
97
Supplies
97
Specifications
98
Replacing the Staple Cartridge
100
Inserter
102
Part Names
102
Specifications
103
Loading Paper
103
Manual Operation of the Inserter
104
Sharp Osa
107
Application Communication Module (MX-Amx2)
107
Selecting a Standard Application
107
Standard Application Setup
107
External Account Module (MX-Amx3)
108
External Account Application Setup
108
Operation in External Account Mode
108
Regular Maintenance
110
Cleaning the Document Glass and Automatic Document Feeder
110
Cleaning the Bypass Feed Roller
112
Replacing the Toner Cartridges
113
Replacing the Stamp Cartridge
116
Automatic Document Feeder
117
Entering Text
118
Functions of the Main Keys
118
Entering Text from a Keyboard
120
Software Setup
121
Before Installing the Software
121
Setup in a Windows Environment
122
Opening the Software Selection Screen (for All Software)
122
Installing the Printer Driver / Pc-Fax Driver
123
When the Machine Is Connected to a Network
123
Standard Installation
124
When the Machine will be Connected with a Usb Cable
132
Using the Machine as a Shared Printer
137
Installing the Printer Status Monitor
142
Installing the Scanner Driver
143
Installing the Ps Display Fonts
145
Changing the Port
146
Setup in a Macintosh Environment
150
Mac os X
150
Mac os 9.0 - 9.2.2
150
Mac os
156
Removing the Software
159
Chapter 2 Copier
161
Convenient Copy Functions
162
Base Screen of Copy Mode
163
Tray During Paper Feeding
164
Before Using the Machine as Acopier
163
Copying Sequence
166
Basic Copy Settings
166
Output Settings
167
Start Copying
167
Originals
169
Checking the Original Size
169
Standard Original Placement Orientations
170
Paper Trays
171
Basic Procedure for Making Copies
172
Making Copies
172
Using the Automatic Document Feeder to Make Copies
172
Making a Copy Using the Document Glass
174
Automatic 2-Sided Copying
176
Using the Automatic Document Feeder to Make 2-Sided Copies
176
Using the [Binding Change] Key
178
Automatic 2-Sided Copying Using the Document Glass
179
Changing the Exposure and Original Image Type
182
Automatic Adjustment of the Exposure and Original Type
182
Selecting the Original Type and Manually Adjusting the Exposure
182
Reduction/Enlargement/Zoom
184
AUTOMATIC RATIO SELECTION (Auto Image)
184
MANUALLY SELECTING the RATIO (Preset Ratios/Zoom)
185
ENLARGING/REDUCING the LENGTH and WIDTH SEPARATELY (XY Zoom)
187
Original Sizes
188
Specifying the Original Size
188
Storing Frequently Used Original Sizes
189
Retrieving a Stored Original Size
191
Output
192
Output Modes
194
Offset Function
194
Sort Mode
194
Staple Sort Function / Saddle Stitch Function
195
Paper Folding Function
197
Punch Function
198
Making Copies Using the Bypass Tray
199
Set the Paper Size
200
Special Modes
202
ADDING MARGINS (Margin Shift)
205
ERASING PERIPHERAL SHADOWS (Erase)
207
COPYING each FACING PAGE of ABOUND DOCUMENT (Dual
209
MAKING COPIES in PAMPHLET FORMAT (Pamphlet Copy)
211
COPYING a LARGE NUMBER of ORIGINALS at ONCE (Job Build)
214
Document Feeder Tray
214
USING TWO MACHINES to MAKE a LARGE NUMBER of COPIES (Tandem Copy)
217
USING a DIFFERENT PAPER TYPE for COVERS (Covers/Inserts)
220
INSERTING COVERS in COPIES (Cover Settings)
221
INSERTING INSERT SHEETS in COPIES (Insert Settings)
224
Changing Cover/Insert Settings
227
Changing Cover/Insert Settings
228
Adding Inserts When Copying on Transparency Film
231
Inserts
231
COPYING MULTIPLE ORIGINALS ONTO ONE SHEET (Multi Shot)
233
COPYING a PAMPHLET (Book Copy)
235
COPYING CAPTIONS ONTO TAB PAPER (Tab Copy)
239
Relation between the Originals and the Tab Paper
239
Tab Copying with a Right Binding
240
COPYING both SIDES of a CARD on ONE SHEET of PAPER (Card Shot)
242
PRINTING the DATE and a STAMP on COPIES (Stamp)
245
General Procedure for Using Stamp
246
Select the Print Position
246
ADDING the DATE to COPIES (Date)
249
Set the Date Format
249
STAMPING COPIES (Stamp)
251
Printing Page Numbers on Copies
253
Page Numbering
253
PRINTING TEXT on COPIES (Text)
257
CHECKING the STAMP LAYOUT (Layout)
261
ADDING a WATERMARK to ACOPY (Watermark)
263
[Image Edit] KEY
265
Image Edit Menu Screen
265
REPEATING PHOTOS on a COPY (Photo Repeat)
266
CREATING a LARGE POSTER (Multi
268
REVERSING the IMAGE (Mirror Image)
271
COPYING in the CENTRE of the PAPER (Centring)
272
REVERSING WHITE and BLACK in ACOPY (B/W Reverse)
274
ADJUSTING the SHARPNESS of an IMAGE (Sharpness)
276
Adjust the Image
276
CHECKING COPIES before PRINTING (Proof Copy)
277
CHECKING the NUMBER of SCANNED ORIGINAL SHEETS before COPYING (Original Count)
280
COPYING ORIGINALS of DIFFERENT SIZES (Mixed Size Original)
282
COPYING THIN ORIGINALS (Slow Scan Mode)
285
Convenient Copy Functions
287
Interrupting a Copy Run
287
Interrupt Copy
287
CHECKING a PREVIEW IMAGE of a COPY (Preview)
289
Preview Screen
291
Job Status Screen
292
Job Queue Screen and Completed Job Screen
293
Cancelling a Job that Is Waiting in the Queue
295
Giving Priority to a Job in the Queue
296
Checking Information on a Copy Job Waiting in the Queue
297
STORING COPY OPERATIONS (Job Programs)
298
Storing (Editing/Deleting) a Job Program
299
Appendix
301
Chapter 3 Printer
307
Printer Function of the Machine
309
Printing from Windows
310
Basic Printing Procedure
310
Selecting the Paper
312
Printing When the User Authentication Function Is Enabled
313
Start Printing
314
Viewing Printer Driver Help
316
Saving Frequently Used Print Settings
317
Saving Settings at the Time of Printing
317
Using Saved Settings
319
Changing the Printer Driver Default Settings
320
Printing from a Macintosh
322
Basic Printing Procedure
322
Selecting Paper Settings
322
Printing
323
Selecting the Paper
325
Printing When the User Authentication Function Is Enabled
326
Frequently Used Functions
328
Selecting a Print Mode Setting
328
Two-Sided Printing
330
Fitting the Print Image to the Paper
332
Printing Multiple Pages on One Page
333
Stapling Output/Punching Holes in Output
335
Staple Function
335
Convenient Printing Functions
337
Convenient Functions for Creating Pamphlets and Posters
337
CREATING a PAMPHLET (Pamphlet/Pamphlet Staple)
337
INCREASING the MARGIN (Margin Shift)
339
CREATING a LARGE POSTER (Poster Printing)
340
Functions to Adjust the Size and Orientation of the Image
341
ROTATING the PRINT IMAGE 180 DEGREES (Rotate 180 Degrees)
341
ENLARGING/REDUCING the PRINT IMAGE (Zoom/Xy-Zoom)
342
ADJUSTING LINE WIDTHS WHEN PRINTING (Line Width Settings)
343
REVERSING the IMAGE (Mirror Image)
344
Image Adjustment Function
345
ADJUSTING the BRIGHTNESS and CONTRAST of the IMAGE (Image Adjustment)
345
PRINTING FAINT TEXT and LINES in BLACK (Text to Black/Vector to Black)
346
Functions that Combine Text and Images
347
ADDING a WATERMARK to PRINTED PAGES (Watermark)
347
PRINTING an IMAGE over the PRINT DATA (Image Stamp)
348
CREATING OVERLAYS for PRINT DATA (Overlays)
349
Print Functions for Special Purposes
350
PRINTING SPECIFIED PAGES on DIFFERENT PAPER (Different Paper)
350
ADDING INSERTS WHEN PRINTING on TRANSPARENCY FILM (Transparency Inserts)
352
PRINTING a CARBON COPY (Carbon Copy)
353
PRINTING TEXT on TABS of TAB PAPER (Tab Paper Print/Tab Paper Settings)
354
TWO-SIDED PRINTING with SPECIFIC PAGES PRINTED on the FRONT SIDE (Chapter Inserts)
357
FOLDING PRINTED PAPER in HALF (Fold)
358
Convenient Printer Functions
359
USING TWO MACHINES to PRINT ALARGE PRINT JOB (Tandem Print)
359
SAVING and USING PRINT FILES (Retention/Document Filing)
360
Automatically Print All Stored Data
362
Printing Without the Printer Driver
363
Directly Printing from the Machine
363
Directly Printing a File on an Ftp Server
364
Directly Printing a File in Usb Memory
365
Print the Selected File
366
Directly Printing a File in Anetwork Folder
367
Directly Printing from a Computer
370
Submit Print Job
370
Ftp Print
370
E-Mail Print
371
Checking the Print Status
372
Job Status Screen
372
Spool Screen/Job Queue Screen/Completed Job Screen
373
Printing an Encrypted Pdf File
375
Giving a Print Job Priority/Cancelling a Print Job
376
Giving a Print Job Priority
376
Cancelling a Print Job
377
Changing to Another Paper Size and Printing When Paper Runs out
378
Appendix
379
Printer Driver Specification List
379
Printer Specifications
381
Chapter 4 Facsimile
382
Before Using the Machine as Afax
385
Preparations for Fax
385
Connection to the Telephone Line
385
Setting the Telephone Line Type
386
Make Sure the Main Power Switch Is in the "On" Position
386
Checking the Date and Time
387
Storing the Sender Fax Number
387
Base Screen of Fax Mode
388
[R] Key
391
Changing the Display of One-Touch Keys in the Address Book Screen
393
Fax Transmission Sequence
395
Begin Transmission
397
Entering Destinations
398
Entering a Fax Number with the Numeric Keys
398
Retrieving a Fax Number from the Address Book
399
Retrieving a Stored Destination
400
Checking and Deleting Entered Destinations
401
Using a Search Number to Retrievea Destination
402
Retrieving a Destination from Aglobal Address Book
403
Using the Resend Function
405
Chain Dialling
406
Basic Transmission Methods
407
Transmission Methods
407
Placement Orientation of the Original
410
Automatic Reduction of the Transmitted Image
410
Transmittable Original Sizes
411
The Size of the Placed Original
411
When the Line Is Busy
412
When a Communication Error Occurs
412
Fax Destination Confirmation Mode
413
Functions that Cannot be Used
413
Using the Automatic Document Feeder for Transmission
414
Using the Automatic Document Feeder to Send a Fax in Direct Transmission Mode
415
Using the Document Glass for Transmission
417
Using the Document Glass to Send a Fax in Direct Transmission Mode
419
Transmission Using the Speaker
421
SENDING the same FAX to MULTIPLE DESTINATIONS (Broadcast Transmission)
422
SENDING a FAX DIRECTLY from ACOMPUTER (PC-Fax)
427
Image Settings
428
AUTOMATICALLY SCANNING both SIDES of an ORIGINAL (2-Sided Original)
429
SPECIFYING the SCAN SIZE and SEND SIZE (Enlarge/Reduce)
430
Changing the Exposure
437
Select the Exposure
437
Changing the Resolution
438
Resolution Settings
438
CHECKING the IMAGE to be TRANSMITTED (Preview)
439
Preview Check Screen
440
Fax Reception
441
Receiving Faxes
441
Receiving a Fax
442
Receiving a Fax Manually
443
PRINTING a PASSWORD-PROTECTED FAX (Hold Setting for Received Data Print)
444
Checking the Image before Printing
445
Image Check Screen
446
FORWARDING RECEIVED FAXES (Fax Data Forward)
447
FORWARDING RECEIVED FAXES to ANETWORK ADDRESS (Inbound Routing Settings)
448
Configuring Inbound Routing Settings
448
Special Modes
452
STORING FAX OPERATIONS (Program)
454
ERASING PERIPHERAL SHADOWS on the IMAGE (Erase)
456
TRANSMITTING an ORIGINAL as TWO SEPARATE PAGES (Dual
458
SENDING a FAX at a SPECIFIED TIME (Timer)
460
(2In1)
462
Sending Two Pages as a Single Page
462
SENDING both SIDES of a CARD as ASINGLE PAGE (Card Shot)
465
SENDING a LARGE NUMBER of PAGES (Job Build)
468
TRANSMITTING ORIGINALS of DIFFERENT SIZES (Mixed Size Original)
470
FAXING THIN ORIGINALS (Slow Scan Mode)
472
CHECKING the NUMBER of SCANNED ORIGINAL SHEETS before TRANSMISSION (Original Count)
474
STAMPING SCANNED ORIGINALS (Verif. Stamp)
476
Changing the Print Settings for the Transaction Report
478
ADDING YOUR SENDER INFORMATION to FAXES (Own Number Sending)
480
TEMPORARILY CHANGING the SENDER INFORMATION (Own Name Select)
481
CALLING a FAX MACHINE and INITIATING RECEPTION (Polling)
482
Initiating Polling Reception Manually
484
Receive the Fax
484
SENDING a FAX WHEN ANOTHER MACHINE POLLS YOUR MACHINE (Polling Memory)
485
RESTRICTING POLLING ACCESS (Polling Security)
485
Scanning a Document into Polling Memory
486
Checking the Document in the Public Box
488
Deleting a Document from the Public Box
489
Performing F-Code Communication
490
F-Code Communication
490
How F-Codes Work
490
Creating Memory Boxes in the Machine for F-Code Communication
491
F-Code Dialling
491
Confidential Communication Using F-Codes
492
F-Code Confidential Transmission
493
Checking Faxes Received by F-Code Confidential Reception
494
Polling Reception Using F-Codes
496
Polling Memory Transmission Using F-Codes
498
Scanning a Document into Amemory Box for F-Code Polling Transmission
498
Checking the Document in the F-Code Memory Polling Box
501
Deleting a Document Stored for F-Code Polling Transmission
502
Relay Request Transmission Using F-Codes
503
Relay Broadcast Transmission Using F-Codes
505
Using an Extension Phone
506
CONNECTING and USING an EXISTING PHONE (Extension Phone Connection)
506
RECEIVING a FAX after ANSWERINGA CALL on the EXTENSION PHONE (Remote Reception)
507
Making and Receiving Phone Calls
507
Checking the Status of Fax Jobs
508
Job Status Screen
508
Job Queue Screen and Completed Job Screen
509
Operation When a Job in the Job Queue Is Completed
512
Checking a Reserved Job or the Job in Progress
513
Checking Completed Jobs
514
Cancelling a Fax in Progress or Areserved Fax
515
Giving Priority to a Reserved Fax
516
Job
516
CHECKING the ACTIVITY LOG (Image Sending Activity Report)
517
Image Sending Activity Report
517
Information Appearing in the Result Column
518
Facsimile Specifications
519
Chapter 5 Scanner/Internet Fax
520
Before Using the Machine as Anetwork Scanner
522
Network Scanner Function
522
Scan Modes
522
Preparations for Use as a Network Scanner
524
Make Sure the Main Power Switch Is in the "On" Position
524
Checking the Date and Time
524
Storing Sender Information
524
Settings Required in the Web Pages
525
Storing Destination Addresses for each Scan Mode in the Address Book
525
Adding Destinations
526
Storing a Destination for Scan to Desktop
526
Before Sending to a Direct Smtp Address
527
Base Screen
528
Address Book Screen
531
Changing the Display of One-Touch Keys in the Address Book Screen
532
Scan Send Sequence
534
Original Sizes
536
Transmittable Original Sizes
536
The Size of the Placed Original
536
Entering Destinations
537
Retrieving a Destination from the Address Book
537
Retrieving a Destination
538
Checking and Deleting the Selected Destinations
539
Using a Search Number to Retrievea Destination
540
Entering an Address Manually
541
Specifying a Network Folder
542
Retrieving a Destination from Aglobal Address Book
544
Using the Resend Function
546
Transmitting an Image
547
Sending an Image in Scan Mode
547
Specify the Destination
548
Changing the Subject, File Name, Reply-To, and Body Text
551
Sending an Image in Usb Memory Mode
554
Specify the Folder in Which the File will be Stored
558
Entering a File Name
559
Sending a Fax in Internet Fax Mode
560
Changing the Subject, File Name, and Body Text
563
SENDING the same IMAGE to MULTIPLE DESTINATIONS (Broadcast Transmission)
566
Broadcast Transmissions that Include Internet Fax Destinations
569
SENDING an INTERNET FAX from ACOMPUTER (PC-I-Fax)
571
Image Settings
572
AUTOMATICALLY SCANNING both SIDES of an ORIGINAL (2-Sided Original)
573
SPECIFYING the ORIGINAL SCAN SIZE and SEND SIZE (Enlarge/Reduce)
574
Specifying the Send Size of the Image
578
Changing the Exposure and Original Image Type
580
Changing the Resolution
582
How to Select the Resolution
583
Changing the File Format
583
Changing the Format (Internet Fax Mode)
586
Changing the Colour Mode
587
CHECKING the IMAGE to be TRANSMITTED (Preview)
588
Preview Check Screen
589
Special Modes
590
Scan Mode, Usb Memory Mode, Data Entry Mode
590
STORING SCAN OPERATIONS (Programs)
592
ERASING PERIPHERAL SHADOWS on the IMAGE (Erase)
594
SCANNING an ORIGINAL as TWO SEPARATE PAGES (Dual
596
SENDING an IMAGE at a SPECIFIED TIME (Timer Transmission)
598
WHITENING FAINT COLOURS in the IMAGE (Suppress Background)
600
SCANNING both SIDES of a CARD ONTOA SINGLE PAGE (Card Shot)
602
SCANNING MANY ORIGINALS at ONCE (Job Build)
605
SCANNING ORIGINALS of DIFFERENT SIZES (Mixed Size Original)
607
SCANNING THIN ORIGINALS (Slow Scan Mode)
609
CHECKING the NUMBER of SCANNED ORIGINAL SHEETS before TRANSMISSION (Original Count)
611
STAMPING SCANNED ORIGINALS (Verif. Stamp)
613
ELIMINATING BLANK PAGES from ATRANSMISSION (Blank
615
(2In1)
617
Sending Two Pages as a Single Page
617
CHANGING the PRINT SETTINGS for the TRANSACTION REPORT (Transaction Report)
620
Checking the Status of Transmission/Reception Jobs
622
Job Status Screen
622
Job Queue Screen and Completed Job Screen
623
Operation When a Job in the Job Queue Is Completed
626
Checking Completed Jobs
627
Stopping a Scan Job Being Transmitted or Waiting to be Transmitted
628
Giving Priority to a Scan Transmission Job
629
Checking the Internet Fax Activity
630
LOG (Image Sending Activity Report)
630
Image Sending Activity Report
630
Information Appearing in the Result Column
630
Internet Fax Reception Functions
631
Receiving an Internet Fax
631
Manually Receiving Internet Faxes
632
PRINTING a PASSWORD-PROTECTED FAX (Hold Setting for Received Data Print)
633
Checking the Image before Printing
634
Image Check Screen
635
FORWARDING RECEIVED INTERNET FAXES to a NETWORK ADDRESS (Inbound Routing Settings)
636
Settings
637
Scanning from a Computer
640
SCANNING from a COMPUTER (PC Scan Mode)
640
Basic Scanning Procedure
640
At the Machine
640
Preview the Image
643
Select Scanning Settings While Viewing the Image
644
Metadata Delivery
646
METADATA DELIVERY (Data Entry)
646
Preparations for Metadata
647
Transmission
647
Settings Required in the Web Pages
647
Metadata Transmission for Scan to Desktop
647
Transmitting Metadata
648
Metadata Fields
650
Network Scanner / Internet Fax*1
651
Pull Scan Function (Twain) Specifications
651
Specifications
651
Advertisement
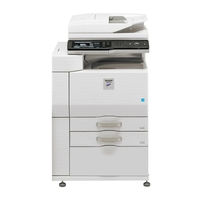
Sharp MX-M753 Operation Manual (877 pages)
Brand:
Sharp
| Category:
All in One Printer
| Size: 22.34 MB
Table of Contents
Chapter 1 Before Using the Machine
42
Operation Guide
1
Make a Copy
2
Other Convenient Functions
9
Print a Document
10
Send a Fax
18
Clean the Machine
37
How to Use this Manual
39
Manuals Provided with the Machine
40
Printed Manuals
40
Table of Contents
42
Part Names and Functions
44
Exterior
44
Interior
46
Automatic Document Feeder and Document Glass
47
Side and Back
48
Operation Panel
49
Touch Panel
51
Status Display
53
System Bar
54
Turning the Power on and off
56
Restarting the Machine
56
Energy Save Functions
57
[Power Save] Key
57
User Authentication
58
Authentication by User Number
58
Authentication by Login Name / Password
60
Home Screen
63
Remote Operation of the Machine
64
Items Recorded in the Job Log
65
Loading Paper
68
Important Points about Paper
68
Names and Locations of Trays
68
The Meaning of "R" in Paper Sizes
68
Useable Paper
69
Print Side Face up or Face down
70
Set the Paper Type
71
Tray Settings for Tray 1 to 4
71
Loading Paper in Paper Tray 1 - Tray 2
71
Changing the Paper Size in Paper Tray 1 - Tray 2
72
Loading Paper in Paper Tray 3
73
Changing the Paper Size in Paper Tray 3
74
Changing the Paper Size in Paper Tray 4
76
Tray Settings of Tray
77
Tray Settings of Tray 5 (A4 Large Capacity Tray)
77
Loading Paper
77
Capacity Tray)
79
Loading Paper
79
Paper Table
80
Changing the Paper Size
81
Loading Paper in the Bypass Tray
83
Important Points When Using the Bypass Tray
84
Inserting Tab Paper
84
Originals
85
Placing the Original
85
Placing Originals in the Automatic Document Feeder
85
Placing the Original on the Document Glass
87
Placing a Thick Book
88
Peripheral Devices
89
Finisher and Saddle Stitch Finisher
91
Part Names
91
Specifications
92
Staple Cartridge Replacement and Staple Jam Removal
93
Finisher (3 Trays)
97
Part Names
97
Supplies
97
Specifications
98
Replacing the Staple Cartridge
100
Inserter
102
Part Names
102
Specifications
103
Loading Paper
103
Manual Operation of the Inserter
104
Sharp Osa
107
Application Communication Module (MX-Amx2)
107
Standard Application Setup
107
Selecting a Standard Application
107
External Account Module (MX-Amx3)
108
External Account Application Setup
108
Operation in External Account Mode
108
Regular Maintenance
110
Cleaning the Document Glass and Automatic Document Feeder
110
Cleaning the Bypass Feed Roller
112
Replacing the Toner Cartridges
113
Replacing the Stamp Cartridge
116
Automatic Document Feeder
117
Entering Text
118
Functions of the Main Keys
118
Entering Text from a Keyboard
120
Software Setup
121
Before Installing the Software
121
Setup in a Windows Environment
122
Opening the Software Selection Screen (for All Software)
122
Installing the Printer Driver / Pc-Fax Driver
123
When the Machine Is Connected to a Network
123
Standard Installation
124
When the Machine will be Connected with a Usb Cable
132
Using the Machine as a Shared Printer
137
Installing the Printer Status Monitor
142
Installing the Scanner Driver
143
Installing the Ps Display Fonts
145
Changing the Port
146
Setup in a Macintosh Environment
150
Mac os X
150
Mac os 9.0 - 9.2.2
150
Printing Using the Ipp Function
155
Mac os
156
Removing the Software
159
Chapter 2 Copier
161
Convenient Copy Functions
162
Base Screen of Copy Mode
163
Tray During Paper Feeding
164
Identifying the Tray that Is Being Used to Feed Paper
164
Before Using the Machine as Acopier
163
Copying Sequence
166
Basic Copy Settings
166
Output Settings
167
Start Copying
167
Originals
169
Checking the Original Size
169
Standard Original Placement Orientations
170
Paper Trays
171
Basic Procedure for Making Copies
172
Making Copies
172
Using the Automatic Document Feeder to Make Copies
172
Making a Copy Using the Document Glass
174
Automatic 2-Sided Copying
176
Using the Automatic Document Feeder to Make 2-Sided Copies
176
Using the [Binding Change] Key
178
Automatic 2-Sided Copying Using the Document Glass
179
Changing the Exposure and Original Image Type
182
Automatic Adjustment of the Exposure and Original Type
182
Selecting the Original Type and Manually Adjusting the Exposure
182
Reduction/Enlargement/Zoom
184
AUTOMATIC RATIO SELECTION (Auto Image)
184
MANUALLY SELECTING the RATIO (Preset Ratios/Zoom)
185
ENLARGING/REDUCING the LENGTH and WIDTH SEPARATELY (XY Zoom)
187
Original Sizes
188
Specifying the Original Size
188
Storing Frequently Used Original Sizes
189
Storing Original Sizes (Editing/Clearing)
189
Retrieving a Stored Original Size
191
Output
192
Output Modes
194
Sort Mode
194
Offset Function
194
Staple Sort Function / Saddle Stitch Function
195
Paper Folding Function
197
Punch Function
198
Making Copies Using the Bypass Tray
199
Set the Paper Size
200
Special Modes
202
ADDING MARGINS (Margin Shift)
205
ERASING PERIPHERAL SHADOWS (Erase)
207
COPYING each FACING PAGE of ABOUND DOCUMENT (Dual
209
MAKING COPIES in PAMPHLET FORMAT (Pamphlet Copy)
211
COPYING a LARGE NUMBER of ORIGINALS at ONCE (Job Build)
214
USING TWO MACHINES to MAKE a LARGE NUMBER of COPIES (Tandem Copy)
217
USING a DIFFERENT PAPER TYPE for COVERS (Covers/Inserts)
220
INSERTING COVERS in COPIES (Cover Settings)
221
Document Feeder Tray
221
INSERTING INSERT SHEETS in COPIES (Insert Settings)
224
Changing Cover/Insert Settings
227
Changing Cover/Insert Settings
228
Adding Inserts When Copying on Transparency Film
231
Inserts
231
COPYING MULTIPLE ORIGINALS ONTO ONE SHEET (Multi Shot)
233
COPYING a PAMPHLET (Book Copy)
235
COPYING CAPTIONS ONTO TAB PAPER (Tab Copy)
239
Relation between the Originals and the Tab Paper
239
Tab Copying with a Right Binding
240
COPYING both SIDES of a CARD on ONE SHEET of PAPER (Card Shot)
242
PRINTING the DATE and a STAMP on COPIES (Stamp)
245
General Procedure for Using Stamp
246
Select the Print Position
246
ADDING the DATE to COPIES (Date)
249
Set the Date Format
249
STAMPING COPIES (Stamp)
251
Printing Page Numbers on Copies
253
Page Numbering
253
PRINTING TEXT on COPIES (Text)
257
CHECKING the STAMP LAYOUT (Layout)
261
ADDING a WATERMARK to ACOPY (Watermark)
263
[Image Edit] KEY
265
Image Edit Menu Screen
265
REPEATING PHOTOS on a COPY (Photo Repeat)
266
CREATING a LARGE POSTER (Multi
268
REVERSING the IMAGE (Mirror Image)
271
COPYING in the CENTER of the PAPER (Centering)
272
REVERSING WHITE and BLACK in ACOPY (B/W Reverse)
274
ADJUSTING the SHARPNESS of an IMAGE (Sharpness)
276
Adjust the Image
276
CHECKING COPIES before PRINTING (Proof Copy)
277
CHECKING the NUMBER of SCANNED ORIGINAL SHEETS before COPYING (Original Count)
280
COPYING ORIGINALS of DIFFERENT SIZES (Mixed Size Original)
282
Copying Thin Originals
285
Mode)
285
Convenient Copy Functions
287
Interrupting a Copy Run
287
Interrupt Copy
287
CHECKING a PREVIEW IMAGE of a COPY (Preview)
289
Preview Screen
291
Job Status Screen
292
Job Queue Screen and Completed Job Screen
293
Canceling a Job that Is Waiting in the Queue
295
Cancel the Job
295
Giving Priority to a Job in the Queue
296
Checking Information on a Copy Job Waiting in the Queue
297
Checking Job Details
297
STORING COPY OPERATIONS (Job Programs)
298
Storing (Editing/Deleting) a Job Program
299
Appendix
301
Chapter 3 Printer
307
Printer Function of the Machine
309
Printing from Windows
310
Basic Printing Procedure
310
Selecting the Paper
312
Printing When the User Authentication Function Is Enabled
313
Start Printing
314
Viewing Printer Driver Help
316
Saving Frequently Used Print Settings
317
Saving Settings at the Time of Printing
317
Using Saved Settings
319
Changing the Printer Driver Default Settings
320
Printing from a Macintosh
322
Basic Printing Procedure
322
Selecting Paper Settings
322
Printing
323
Selecting the Paper
325
Printing When the User Authentication Function Is Enabled
326
Frequently Used Functions
328
Selecting a Print Mode Setting
328
Two-Sided Printing
330
Fitting the Print Image to the Paper
332
Printing Multiple Pages on One Page
333
Stapling Output/Punching Holes in Output
335
Staple Function
335
Convenient Printing Functions
337
Convenient Functions for Creating Pamphlets and Posters
337
CREATING a PAMPHLET (Pamphlet/Pamphlet Staple)
337
INCREASING the MARGIN (Margin Shift)
339
CREATING a LARGE POSTER (Poster Printing)
340
Functions to Adjust the Size and Orientation of the Image
341
ROTATING the PRINT IMAGE 180 DEGREES (Rotate 180 Degrees)
341
ENLARGING/REDUCING the PRINT IMAGE (Zoom/Xy-Zoom)
342
ADJUSTING LINE WIDTHS WHEN PRINTING (Line Width Settings)
343
REVERSING the IMAGE (Mirror Image)
344
Image Adjustment Function
345
ADJUSTING the BRIGHTNESS and CONTRAST of the IMAGE (Image Adjustment)
345
PRINTING FAINT TEXT and LINES in BLACK (Text to Black/Vector to Black)
346
Functions that Combine Text and Images
347
ADDING a WATERMARK to PRINTED PAGES (Watermark)
347
PRINTING an IMAGE over the PRINT DATA (Image Stamp)
348
CREATING OVERLAYS for PRINT DATA (Overlays)
349
Print Functions for Special Purposes
350
PRINTING SPECIFIED PAGES on DIFFERENT PAPER (Different Paper)
350
ADDING INSERTS WHEN PRINTING on TRANSPARENCY FILM (Transparency Inserts)
352
PRINTING a CARBON COPY (Carbon Copy)
353
PRINTING TEXT on TABS of TAB PAPER (Tab Paper Print/Tab Paper Settings)
354
TWO-SIDED PRINTING with SPECIFIC PAGES PRINTED on the FRONT SIDE (Chapter Inserts)
357
FOLDING PRINTED PAPER in HALF (Fold)
358
Convenient Printer Functions
359
USING TWO MACHINES to PRINT ALARGE PRINT JOB (Tandem Print)
359
SAVING and USING PRINT FILES (Retention/Document Filing)
360
Automatically Print All Stored Data
362
Printing Without the Printer Driver
363
Directly Printing from the Machine
363
Directly Printing a File on an Ftp Server
364
Directly Printing a File in Usb Memory
365
Print the Selected File
366
Directly Printing a File in Anetwork Folder
367
Directly Printing from a Computer
370
Submit Print Job
370
Ftp Print
370
E-Mail Print
371
Checking the Print Status
372
Job Status Screen
372
Spool Screen/Job Queue Screen/Completed Job Screen
373
Printing an Encrypted Pdf File
375
Giving a Print Job Priority/Canceling a Print Job
376
Giving a Print Job Priority
376
Canceling a Print Job
377
Changing to Another Paper Size and Printing When Paper Runs out
378
Appendix
379
Printer Driver Specification List
379
Chapter 4 Facsimile
382
Before Using the Machine as a Fax
385
Preparations for Fax
385
Setting the Telephone Line Type
386
Base Screen of Fax Mode
388
Fax Transmission Sequence
394
Begin Transmission
396
Entering Destinations
397
Entering a Fax Number with the Numeric Keys
397
Retrieving a Fax Number from the Address Book
398
Retrieving a Stored Destination
399
Checking and Deleting Entered Destinations
400
Address Book
403
Using the Resend Function
404
Chain Dialing
405
Basic Transmission Methods
406
When the Line Is Busy
411
Functions that Cannot be Used
412
Using the Automatic Document Feeder for Transmission
413
Using the Document Glass for Transmission
416
Direct Transmission Mode
418
Transmission Methods
406
Transmission Using the Speaker
420
Sending the same Fax to Multiple Destinations (Broadcast Transmission)
421
Image Settings
427
Specifying the Scan Size and Send Size
429
Changing the Exposure
436
Select the Exposure
436
Resolution Settings
437
Fax Reception
440
Receiving Faxes
440
Receiving a Fax
441
Receiving a Fax Manually
442
Hold Setting for Received Data Print
443
Forwarding Received Faxes
446
Configuring Inbound Routing Settings
447
Storing Fax Operations (Program)
453
Transmitting an Original as Two Separate Pages (Dual Page Scan)
457
Sending a Fax at a Specified Time
459
Sending both Sides of a Card as a
464
Job Build
467
Faxing Thin Originals (Slow Scan Mode)
471
Checking the Number of Scanned Original Sheets before Transmission
473
Adding Your Sender Information to Faxes (Own Number Sending)
479
Temporarily Changing the Sender Information (Own Name Select)
480
Calling a Fax Machine and Initiating Reception (Polling)
481
Initiating Polling Reception Manually
483
Receive the Fax
483
Polling Memory
484
Scanning a Document into Polling Memory
485
Checking the Document in the Public Box
487
Deleting a Document from the Public Box
488
Numeric Keys
494
Polling Reception Using F-Codes
495
Checking the Document in the F-Code Memory Polling Box
500
Deleting a Document Stored for F-Code Polling Transmission
501
Using an Extension Phone
505
Making and Receiving Phone Calls
506
Checking the Status of Fax Jobs
507
Canceling a Fax in Progress or a Reserved Fax
514
Giving Priority to a Reserved Fax Job
515
Checking the Activity Log
516
Facsimile Specifications
518
Chapter 5 Scanner/Internet Fax
519
Before Using the Machine as Anetwork Scanner
521
Network Scanner Function
521
Scan Modes
521
Usb Memory Scan
522
Pc Scan
522
Preparations for Use as a Network Scanner
523
Make Sure the Main Power Switch Is in the "On" Position
523
Checking the Date and Time
523
Storing Sender Information
523
Settings Required in the Web Pages
524
Storing Destination Addresses for each Scan Mode in the Address Book
524
Storing a Destination for Scan to Desktop
525
Adding Destinations
525
Before Sending to a Direct Smtp Address
526
When a Communication Error Occurs
526
Base Screen
527
Address Book Screen
530
Changing the Display of One-Touch Keys in the Address Book Screen
531
Scan Send Sequence
533
Original Sizes
535
Transmittable Original Sizes
535
The Size of the Placed Original
535
Entering Destinations
536
Retrieving a Destination from the Address Book
536
Retrieving a Destination
537
Checking and Deleting the Selected Destinations
538
Using a Search Number to Retrievea Destination
539
Entering an Address Manually
540
Specifying a Network Folder
541
Retrieving a Destination from Aglobal Address Book
543
Using the Resend Function
545
Transmitting an Image
546
Sending an Image in Scan Mode
546
Specify the Destination
547
Changing the Subject, File Name, Reply-To, and Body Text
550
Sending an Image in Usb Memory Mode
553
Mode
555
Specify the Folder in Which the File will be Stored
557
Entering a File Name
558
Sending a Fax in Internet Fax Mode
559
Changing the Subject, File Name, and Body Text
562
SENDING the same IMAGE to MULTIPLE DESTINATIONS (Broadcast Transmission)
565
Broadcast Transmissions that Include Internet Fax Destinations
568
SENDING an INTERNET FAX from ACOMPUTER (PC-I-Fax)
570
Image Settings
571
AUTOMATICALLY SCANNING both SIDES of an ORIGINAL (2-Sided Original)
572
SPECIFYING the ORIGINAL SCAN SIZE and SEND SIZE (Enlarge/Reduce)
573
Specifying the Send Size of the Image
577
Changing the Exposure and Original Image Type
579
Changing the Resolution
581
How to Select the Resolution
582
Changing the File Format
582
Changing the Format (Internet Fax Mode)
585
Changing the Color Mode
586
CHECKING the IMAGE to be TRANSMITTED (Preview)
587
Preview Check Screen
588
Special Modes
589
Scan Mode, Usb Memory Mode, Data Entry Mode
589
Internet Fax Mode
590
STORING SCAN OPERATIONS (Programs)
591
ERASING PERIPHERAL SHADOWS on the IMAGE (Erase)
593
SCANNING an ORIGINAL as TWO SEPARATE PAGES (Dual
595
SENDING an IMAGE at a SPECIFIED TIME (Timer Transmission)
597
WHITENING FAINT COLORS in the IMAGE (Suppress Background)
599
SCANNING both SIDES of a CARD ONTOA SINGLE PAGE (Card Shot)
601
SCANNING MANY ORIGINALS at ONCE (Job Build)
604
SCANNING ORIGINALS of DIFFERENT SIZES (Mixed Size Original)
606
SCANNING THIN ORIGINALS (Slow Scan Mode)
608
CHECKING the NUMBER of SCANNED ORIGINAL SHEETS before TRANSMISSION (Original Count)
610
STAMPING SCANNED ORIGINALS (Verif. Stamp)
612
ELIMINATING BLANK PAGES from ATRANSMISSION (Blank
614
(2In1)
616
Sending Two Pages as a Single Page
616
CHANGING the PRINT SETTINGS for the TRANSACTION REPORT (Transaction Report)
619
Checking the Status of Transmission/Reception Jobs
621
Job Status Screen
621
Job Queue Screen and Completed Job Screen
622
Operation When a Job in the Job Queue Is Completed
625
Checking Completed Jobs
626
Stopping a Scan Job Being Transmitted or Waiting to be Transmitted
627
Select the Job that You Wish to Stop
627
Giving Priority to a Scan Transmission Job
628
Checking the Internet Fax Activity
629
LOG (Image Sending Activity Report)
629
Image Sending Activity Report
629
Information Appearing in the Result Column
629
Internet Fax Reception Functions
630
Receiving an Internet Fax
630
Manually Receiving Internet Faxes
631
PRINTING a PASSWORD-PROTECTED FAX (Hold Setting for Received Data Print)
632
Checking the Image before Printing
633
Image Check Screen
634
FORWARDING RECEIVED INTERNET FAXES to a NETWORK ADDRESS (Inbound Routing Settings)
635
Configuring Inbound Routing Settings
635
Scanning from a Computer
639
SCANNING from a COMPUTER (PC Scan Mode)
639
Basic Scanning Procedure
639
Scan Mode
640
Preview the Image
642
Select Scanning Settings While Viewing the Image
643
At the Machine
644
Metadata Delivery
645
METADATA DELIVERY (Data Entry)
645
Preparations for Metadata
646
Transmission
646
Settings Required in the Web Pages
646
Metadata Transmission for Scan to Desktop
646
Transmitting Metadata
647
Metadata Fields
649
Network Scanner / Internet Fax*1
650
Pull Scan Function (Twain) Specifications
650
Specifications
650
Sharp MX-M753 Specifications (12 pages)
Brand:
Sharp
| Category:
All in One Printer
| Size: 3.34 MB
Advertisement
sharp MX-M753 Brochure & Specs (12 pages)
HIGH-SPEED MONOCHROME WORKGROUP DOCUMENT SYSTEMS
Brand:
sharp
| Category:
All in One Printer
| Size: 7.41 MB
Sharp MX-M753 Brochure & Specs (12 pages)
HIGH-SPEED MONOCHROME WORKGROUP DOCUMENT SYSTEMS
Brand:
Sharp
| Category:
All in One Printer
| Size: 3.15 MB
Sharp MX-M753 Specifications (2 pages)
Brand:
Sharp
| Category:
All in One Printer
| Size: 2.61 MB
Advertisement
Related Products
Sharp MX-M700
Sharp MX-M700N
Sharp MX-M700U
Sharp MX-M753N
Sharp MX-M753U
Sharp MX-M754N
Sharp MX-M7570
Sharp MX-M160D
Sharp MX-M363F
Sharp MX-M3551
Sharp Categories
Microwave Oven
LCD TV
TV
Stereo System
All in One Printer
More Sharp Manuals
Login
Sign In
OR
Sign in with Facebook
Sign in with Google
Upload manual
Upload from disk
Upload from URL