Icom IC-E7 Instruction Manual
Vhf/uhf dual band fm transceiver
Hide thumbs
Also See for IC-E7:
- Service manual (35 pages) ,
- Service manual (6 pages) ,
- Instruction manual (12 pages)
Table of Contents
Advertisement
Quick Links
INSTRUCTION MANUAL
VHF/UHF DUAL BAND FM TRANSCEIVER
iE7
This device complies with Part 15 of the FCC rules. Operation is sub-
ject to the following two conditions: (1) This device may not cause
harmful interference, and (2) this device must accept any interference
received, including interference that may cause undesired operation.
WARNING: MODIFICATION OF THIS DEVICE TO RECEIVE CEL-
LULAR RADIO TELEPHONE SERVICE SIGNALS IS PROHIBITED
UNDER FCC RULES AND FEDERAL LAW.
Advertisement
Table of Contents

Related Manuals for Icom IC-E7


Summary of Contents for Icom IC-E7
- Page 1 INSTRUCTION MANUAL VHF/UHF DUAL BAND FM TRANSCEIVER This device complies with Part 15 of the FCC rules. Operation is sub- ject to the following two conditions: (1) This device may not cause harmful interference, and (2) this device must accept any interference received, including interference that may cause undesired operation.
-
Page 2: Explicit Definitions
We want to take a couple of moments of your time to thank you the IC-E7. for making your IC-E7 your radio of choice, and hope you agree with Icom’s philosophy of “technology first.” Many hours of re- search and development went into the design of your IC-E7. - Page 3 PRECAUTION RWARNING RF EXPOSURE! NEVER expose the transceiver to rain, snow or any liquids. This device emits The transceiver may be damaged. Radio Frequency (RF) energy. Caution should be observed when operating this device. If you have any questions re- NEVER operate or touch the transceiver with wet hands.
-
Page 4: Table Of Contents
SUPPLIED ACCESSORIES TABLE OF CONTENTS FOREWORD ..................... i IMPORTANT ..................... i EXPLICIT DEFINITIONS ................i PRECAUTION ..................ii SUPPLIED ACCESSORIES ..............iii TABLE OF CONTENTS ................iii QUICK REFERENCE GUIDE ............I–VIII ■ Preparation..................I ■ Your first contact................III ■... - Page 5 ■ Transmitting..................16 ■ Priority watch operation..............43 ■ Transmit power selection ............... 16 9 TONE SQUELCH AND POCKET BEEP ........45–48 ■ Dial select step ................17 ■ Tone/DTCS squelch operation ............45 ■ Lock function .................. 18 ■ Tone squelch frequency/DTCS code setting ........46 ■...
-
Page 6: Quick Reference Guide
QUICK REFERENCE GUIDE ■ Preparation D Battery installation D D Antenna qRemove the battery cover from the transceiver. Insert the supplied antenna into the wInstall the BP-243 (Li-Ion battery pack). antenna connector and screw down • Be sure to observe the correct polarity. the antenna as shown at right. -
Page 7: Charging The Battery
QUICK REFERENCE GUIDE D Charging the battery D Charging description qPlug the AC adapter into an AC outlet; or the optional CP- 21LR into a cigarette lighter socket. wInsert the adapter plug into [12~16V DC INPUT] of the BC- Transceiver to [12~16V DC INPUT] jack BATTERY CHARGER eInstall the BP-243... -
Page 8: Your First Contact
■ Your first contact 2. Adjusting audio level Now that you have your IC-E7 ready, you are probably ex- cited to get on the air. We would like to take you through a ➥ Push [Y Y ]/[Z Z ] to set the desired audio level. - Page 9 QUICK REFERENCE GUIDE 4. Tune the desired frequency 5. Operating mode selection The tuning dial will allow you to dial in the frequency you want ➥ While pushing and holding to use. Pages 11 and 17 will instruct you on how to set the push [FUNC], [CALL]...
-
Page 10: Repeater Operation
QUICK REFERENCE GUIDE ■ Repeater operation 1. Setting duplex 2. Repeater tone qWhile pushing and holding [DIAL] qWhile pushing and holding [DIAL] [FUNC], push and hold [SQL] [FUNC], push and hold [SQL] ) for 1 sec. to enter set ) for 1 sec. to enter set •... -
Page 11: Memory Programming
QUICK REFERENCE GUIDE ■ Memory programming The IC-E7 has a total of 1250 memory channels (including 3. Writing a memory channel 200 auto write channels and 50 scan edges) for storing often Push and hold [V/M] ( ) for 1 sec. until 3 beeps •... -
Page 12: Programmed Scan Operation
QUICK REFERENCE GUIDE ■ Programmed scan operation 3. Writing a memory channel 50 channels of memories in 25 pairs are used to specify scanning ranges for programmed scan operation. The pro- Push and hold [V/M] ( ) for 1 sec. until 3 beeps •... - Page 13 QUICK REFERENCE GUIDE D D Starting scan 3. Starting scan 1. Select VFO mode. Push [CALL] ( ) to start the scan. Push [V/M] ( ) to select the VFO mode for full, band • • MODE SCAN SKIP • Rotate [DIAL] to change the scanning direction. and programmed scan operation.
-
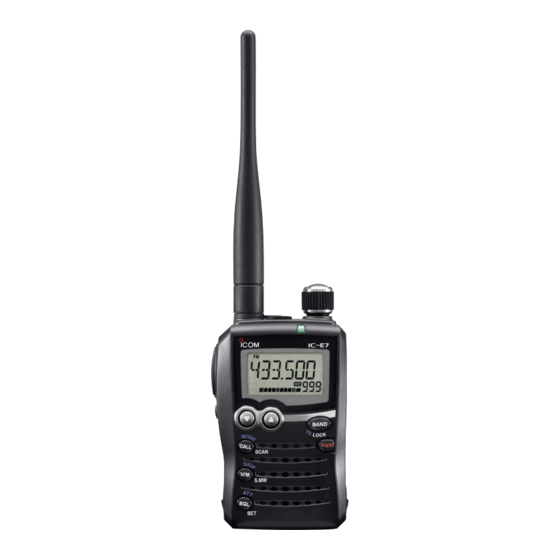
Page 14: Panel Description
† An optional HM-153P can be connected to PIN MICROPHONE the IC-E7 directly (without the OPC-782). e PTT SWITCH [PTT] (p. 16) ➥ Push and hold to transmit, release to receive. SCAN ➥ Push briefly, then push and hold to transmit a 1750 Hz Microphone tone burst. - Page 15 PANEL DESCRIPTION y CALL•MODE•SCAN KEY [CALL] ( !0 BAND•TUNING STEP•LOCK KEY [BAND] ( • • MODE SCAN LOCK ➥ Push momentarily to select the call channel. (p. 12) ➥ Push to select the operating frequency band. (p. 9) ➥ Push and hold for 1 sec. to enter the scan type selection ➥...
-
Page 16: Function Display
PANEL DESCRIPTION ■ Function display WFMAM - DUP T SQL DTCS VOL PRIO P SKIP q FREQUENCY READOUT e BATTERY INDICATOR ➥ No indicator appears when the installed battery pack Displays a variety of information, such as an operating fre- quency, set mode contents, memory names. -
Page 17: Panel Description
PANEL DESCRIPTION r PRIORITY WATCH INDICATOR (p. 43) !1 ATTENUATOR INDICATOR (p. 15) Appears when priority watch is in use. Appears when the RF attenuator is in use. t LOW POWER INDICATOR (p. 16) !2 TONE INDICATORS ➥ “LOW” appears when the low output power is selected. ➥... -
Page 18: Battery Charging
• R DANGER! NEVER incinerate used battery pack since in- ternal battery gas may cause it to rupture, or may cause an • R DANGER! Use and charge only specified Icom battery explosion. packs with Icom radios. Only Icom battery packs are tested •... - Page 19 +5˚C to +35˚C (+41˚F to +95˚F). shows half-capacity, then keep it safely in a cool dry place Icom recommends charging the battery at +20˚C (+68˚F). with the temperature between –20˚C to +20˚C (–4˚F to The battery may heat up or rupture if charged out of the +68˚F).
-
Page 20: Battery Installation
BATTERY CHARGING ■ Battery installation eReplace the battery cover to the transceiver. Before installing, or replacing the battery pack, be sure to turn OFF the transceiver. If it’s ON, push and hold [PWR] for 1 sec. to turn the power OFF. qRemove the battery cover from the transceiver. -
Page 21: Battery Charging
BATTERY CHARGING ■ Battery charging D Charging connections D Charging description qPlug the AC adapter into an AC outlet; or the optional CP- 21LR into a cigarette lighter socket. wInsert the adapter plug into [12~16V DC INPUT] of the BC- Transceiver to [12~16V DC INPUT] jack BATTERY CHARGER... -
Page 22: Frequency And Channel Setting
FREQUENCY AND CHANNEL SETTING ■ VFO and memory channels ■ Operating band selection The IC-E7 has two primary operating modes: VFO mode and The transceiver can receive the *AM broadcast, *HF band, *50 MHz, *FM broadcast, *VHF air, 144 MHz, *300 MHz, memory mode. - Page 23 FREQUENCY AND CHANNEL SETTING • Available frequency bands AM broadcast band HF band 50 MHz band FM broadcast band : Push VHF air band : Rotating while pushing Initial frequencies shown differ according to version. † TV channels † Appears only when TV channels are programmed using the optional CS-P7.
-
Page 24: Setting A Frequency
The tuning step can be selected for each frequency band. • SKIP w Select the desired frequency band with [BAND] ( The following tuning steps are available for the IC-E7. • LOCK • Or, while pushing and holding [BAND] ( •... -
Page 25: Selecting A Memory Channel
FREQUENCY AND CHANNEL SETTING ■ Selecting a memory channel ■ Selecting a call channel qPush [V/M] ( qPush [CALL] ( ) momentarily to select memory ) momentarily to select a call • • SKIP MODE SCAN channel. mode. wRotate [DIAL] to select the desired call channel. •... -
Page 26: Basic Operation
BASIC OPERATION ■ Receiving ■ Setting audio volume Make sure charged battery pack (BP-243) is installed (p. 7). The audio level can be adjusted to one of 40 levels. ➥ Push [Y Y ] or [Z Z ] to adjust the audio level. q Push and hold [PWR] for 1 sec. -
Page 27: Squelch Level Setting
BASIC OPERATION ■ Squelch level setting ■ Operating mode selection The squelch circuit mutes the received audio signal depend- Operating modes are determined by the modulation of the ing on the signal strength. The transceiver has 9 squelch lev- radio signals. The transceiver has 3 operating modes: FM, els, a continuously open setting and an automatic squelch AM and WFM modes. -
Page 28: Monitor Function
BASIC OPERATION ■ Monitor function ■ Attenuator function This function is used to listen to weak signals without disturb- The attenuator prevents distortion of a desired signal when ing the squelch setting or to open the squelch manually even very strong RF signals are near the desired frequency or when mute functions such as the tone squelch are in use. -
Page 29: Transmitting
BASIC OPERATION ■ Transmitting ■ Transmit power selection The transceiver has two output power levels to suit your op- CAUTION: Transmitting without an antenna will damage erating requirements. Low output power during short-range the transceiver. communications may reduce the possibility of interference to other stations and will reduce current consumption. -
Page 30: Dial Select Step
BASIC OPERATION ■ Dial select step This transceiver has a 1 MHz tuning step for quick frequency rWhile pushing and holding [FUNC], rotate [DIAL] to select setting. This dial select step can be set to 100 kHz, 1 MHz or the desired dial select step. -
Page 31: Lock Function
BASIC OPERATION ■ Lock function ■ [DIAL] function assignment To prevent accidental frequency changes and unnecessary The [DIAL] control can be used as an audio volume control function activation, use the lock function. instead of [Y Y ]/[Z Z ] keys to suit your preference. However, while [DIAL] functions as an audio volume, [Y Y ]/[Z Z ] keys func- ➥... -
Page 32: Repeater Operation
REPEATER OPERATION ■ General When using a repeater, the transmit frequency is shifted from D D Setting duplex and duplex direction the receive frequency by the amount of the offset frequency. It qWhile pushing and holding [FUNC], push and hold is convenient to program repeater information, such as offset ) for 1 sec. -
Page 33: Offset Frequency
REPEATER OPERATION ■ Offset frequency When communicating through a repeater, the transmit fre- wRotate [DIAL] to select “OFFSET.” quency is shifted from the receive frequency by the amount of WFMAM - DUP WFMAM - DUP T SQL DTCS T SQL DTCS the offset frequency. -
Page 34: Subaudible Tones
REPEATER OPERATION ■ Subaudible tones To be accessed, some repeaters require subaudible tones on • Available tone frequency list the input signal. Subaudible tones are added to your normal 67.0 79.7 94.8 110.9 131.8 156.7 171.3 186.2 203.5 229.1 signal and must be set in advance. 69.3 82.5 97.4... - Page 35 REPEATER OPERATION D D Setting the subaudible tone encoder ON/OFF eWhile pushing and holding [FUNC], rotate [DIAL] to select qWhile pushing and holding [FUNC], push and hold the repeater tone from “TONE” or “OFF.” ) for 1 sec. to enter set mode. [SQL] ( •...
-
Page 36: 1750 Hz Tone
REPEATER OPERATION ■ 1750 Hz tone Some European repeaters require a 1750 Hz tone burst to be accessed. For such European repeaters, perform the follow- ing. q Set the receive frequency (repeater output frequency). ✔ CONVENIENT! wSet the shift direction of the transmit frequency. (–DUP or qSet the receive frequency, or shift direction (see p.19 for +DUP;... -
Page 37: Memory/Call Channels
MEMORY/CALL CHANNELS ■ General description ■ Memory channel programming q Push [V/M] ( The IC-E7 has 1050 memory channels including 50 scan ) to select VFO mode. • SKIP w Set the desired frequency: edge memory channels (25 pairs) for storage of often-used ➥... -
Page 38: Memory Bank Setting
MEMORY/CALL CHANNELS ■ Memory bank setting The IC-E7 has a total of 18 banks rWhile pushing and holding [BAND] ( (A to H, J, L, N, O to R, T, U • ), rotate LOCK . Regular memory channels, 000 to 999, may assigned and Y) [DIAL] to select the desired bank. -
Page 39: Memory Bank Selection
MEMORY/CALL CHANNELS ■ Memory bank selection qPush [V/M] ( • ) to select memory mode, if desired. SKIP WFMAM - DUP T SQL DTCS - DUP DTCS WFMAM T SQL wWhile pushing and holding [BAND] ( ), rotate • LOCK [DIAL] to select the desired bank (A to H, J, L, N, O to R, T, U VOL PRIO P SKIP... -
Page 40: Programming Memory/Bank Name
MEMORY/CALL CHANNELS ■ Programming memory/bank name Each memory channel can be programmed with an alphanu- tWhile pushing and holding [FUNC], rotate [DIAL] to select meric channel name for easy recognition and that can be indi- the desired character. cated independently by channel. Names can be a maximum of •... -
Page 41: Selecting Display Type
MEMORY/CALL CHANNELS ■ Selecting display type During memory mode operation, the programmed memory D D Selecting bank channel indication name, bank name or the channel number can be displayed During bank channel operation, the bank channel number can instead of the frequency at your preference. also be displayed instead of the memory channel number in- dication. -
Page 42: Copying Memory Contents
MEMORY/CALL CHANNELS ■ Copying memory contents This function transfers a memory channel’s contents to a VFO Pushing and holding [V/M] ( • ) for 2 sec. at the SKIP step w, can also copies the memory contents to VFO. In (or another memory channel). -
Page 43: Memory Clearing
MEMORY/CALL CHANNELS ■ Memory clearing Contents of programmed memories can be cleared (blanked), rPush and hold [V/M] ( • ) for 1 sec. to clear the SKIP if desired. contents. • 3 beeps sound. qPush and hold [V/M] ( ) for 1 sec. to enter select •... -
Page 44: Transferring Memory Contents
MEMORY/CALL CHANNELS ■ Transferring memory contents Contents of programmed memory channels can be trans- • Example— Transferring ferred to another memory channels. [DIAL] the contents of memory channel 20 to channel 30. qPush and hold [V/M] ( ) for 1 sec. to enter select •... -
Page 45: Erasing/Transferring Bank Contents
MEMORY/CALL CHANNELS ■ Erasing/transferring bank contents The bank contents of programmed memory channels can be eWhile pushing and holding [CALL] ( • ), rotate MODE SCAN cleared or reassigned to another memory bank. [DIAL] to select “BANK.” • Pushing [CALL] ( ) several times, “BANK”... -
Page 46: Call Channel Programming
MEMORY/CALL CHANNELS ■ Call channel programming ■ Copying call channel contents q Push [V/M] ( qPush [CALL] ( ) to select VFO mode, if necessary. ) momentarily to select a call • • SKIP MODE SCAN w Set the desired frequency: channel. -
Page 47: Scan Operation
SCAN OPERATION ■ Scan types Scanning searches for signals automatically and makes it There are 7 scan types and 4 resume conditions to suit your easier to locate new stations for contact or listening purposes. operating needs. Repeatedly scans all frequen- Repeatedly scans all frequen- FULL SCAN (p. -
Page 48: Full/Band/Programmed Scan
SCAN OPERATION ■ Full/band/programmed scan q Select VFO mode with [V/M] ( tPush [CALL] ( • ), if necessary. • ) again to start the scan SKIP MODE SCAN • Select the desired frequency band with [BAND] ( ), if de- •... -
Page 49: Scan Edges Programming
SCAN OPERATION ■ Scan edges programming Scan edges can be programmed in the same manner as t Push and hold [V/M] ( • ) for 1 sec. SKIP memory channels. Scan edge frequencies are programmed • 3 beeps sound • The other scan edge channel “b,” 00b to 24b, is automatically into scan edges, 00A/00b to 24A/24b, in memory channels. -
Page 50: Memory/Bank Scan
SCAN OPERATION ■ Memory/bank scan q Select memory mode with [V/M] ( • • All memory scan selection • All bank scan selection SKIP w Set the squelch to the point where noise is just muted. WFMAM - DUP WFMAM - DUP T SQL DTCS T SQL... -
Page 51: Auto Memory Write Scan
SCAN OPERATION ■ Auto memory write scan D D During auto-memory write scanning: • When a signal is received, scan pauses and the frequency ♦ ♦ This scan is useful for searching a specified frequency range is stored into auto memory write channel group (000 –199 and automatically storing busy frequencies into memory - 2 short beeps sound when stored. -
Page 52: Skip Channel/Frequency Setting
SCAN OPERATION ■ Skip channel/frequency setting You can set the selected memory channel as a skip channel ePush [CALL] ( • ) several times to select “SKIP.” MODE SCAN which is skipped during memory skip scan. In addition, it can •... - Page 53 SCAN OPERATION tPush [CALL] ( ) several times; or while pushing • ✔ CONVENIENT! MODE SCAN and holding [CALL] ( • ), rotate [DIAL] to select MODE SCAN During VFO scanning, such as programmed scan, the skip “S.MW.” setting can be programmed into the highest blank memory yPush and hold [V/M] ( •...
-
Page 54: Scan Resume Condition
SCAN OPERATION ■ Scan resume condition EXPANDED SET MODE USING D D Scan pause timer D D Scan resume timer The scan pauses when receiving signals according to the The scan re-starts after a signal disappears according to the scan pause time. It can be set from 2–20 sec. or unlimited. resume time. -
Page 55: Priority Watch
PRIORITY WATCH ■ Priority watch types Priority watch checks for signals on a frequency every 5 sec. while operating on a VFO frequency or scanning. The trans- MEMORY CHANNEL WATCH ceiver has 3 priority watch types to suit your needs. While operating on a VFO fre- 5 sec. -
Page 56: Priority Watch Operation
PRIORITY WATCH ■ Priority watch operation D D Memory channel watch and memory scan watch tWhile pushing and holding [FUNC], rotate [DIAL] to turn q Select VFO mode, then set an operating frequency. the priority watch ON. • Select “BELL” if the priority beep function is necessary. •... -
Page 57: Priority Watch
PRIORITY WATCH D D VFO scan watch o Push [CALL] ( qPush [V/M] ( • ) to start the VFO scan watch. ) to enter memory mode, then rotate • MODE SCAN SKIP • The transceiver checks the memory channel(s) every 5 sec. [DIAL] to select the memory channel. -
Page 58: Tone Squelch And Pocket Beep
TONE SQUELCH AND POCKET BEEP ■ Tone/DTCS squelch operation The tone or DTCS squelch opens only when receiving a sig- t Push [SQL] ( • ) to exit set mode. nal with the same pre-programmed subaudible tone or DTCS • One of “TSQL,” TSQLS,” “DTCS” or “SDTCS” appears ac- cording to the tone selection in the step r. -
Page 59: Tone Squelch Frequency/Dtcs Code Setting
TONE SQUELCH AND POCKET BEEP ■ Tone squelch frequency/DTCS code setting 88.5 Hz and 023 is set as the default for the tone squelch fre- • Available tone frequency quency and the DTCS code, respectively. The frequency and 67.0 79.7 94.8 110.9 131.8... -
Page 60: Dtcs Polarity Setting
TONE SQUELCH AND POCKET BEEP ■ DTCS polarity setting As well as a code setting, the polarity setting is also available tWhile pushing and holding [FUNC], rotate [DIAL] to select for the DTCS operation. When a different polarity is set, the the polarity from “BOTH N”... -
Page 61: Tone Scan
TONE SQUELCH AND POCKET BEEP ■ Tone scan By monitoring a signal that is being operated with pocket Repeater tone scan Tone squelch scan DTCS scan beep, tone or DTCS squelch function, you can determine the WFMAM - DUP T SQL DTCS WFMAM - DUP T SQL... -
Page 62: Set Mode
) for 1 sec. to enter set mode. [SQL] ( • In addition, the IC-E7 has an expanded set mode which is w Rotate [DIAL] to select “EXPAND.” used for programming even more infrequently changed val- WFMAM - DUP... -
Page 63: Set Mode Items
SET MODE ■ Set mode items The following items are available in the set mode and ex- panded set mode. D D General set mode items • DTCS code (p. 52) • Dial select step (p. 53) • Repeater tone (p. 52) •... - Page 64 SET MODE D D Expanded set mode items • Monitor key action (p. 56) • Auto power OFF (p. 57) • Key lock effect (p. 56) • Dial speed acceleration (p. 56) • Scan resume timer (p. 57) • Scan pause timer (p. 57) •...
-
Page 65: D Repeater Tone Frequency
SET MODE D D Repeater tone frequency D D DTCS code Selects subaudible tone frequency for ac- Selects DTCS (both encoder/decoder) code cessing a repeater, etc. Total of 50 tone fre- for DTCS squelch operation. Total of 104 quencies (67.0–254.1 Hz) are available. codes (023–754) are available. - Page 66 SET MODE D D Dial select step D D Tone selection Select the tuning step while pushing and Sets the tone encoder, tone squelch or DTCS holding [FUNC] from 100 kHz, 1 MHz (de- squelch operation and pocket beep capabil- fault) and 10 MHz.
- Page 67 SET MODE D D Duplex direction D D Key-touch beep Sets the duplex direction. The transmit fre- The key-touch beep can be turned OFF for quency is shifted from the receive frequency by silent operation. the offset frequency when transmitting or when (default: ON) the monitor function is in use.
- Page 68 SET MODE D D Display backlighting D D Power save The transceiver has display backlighting with The power save function reduces the current a 5 sec. timer for night time operation. The drain to conserve battery power. This power backlighting can be turned ON continuously save function can be turned OFF, if desired.
- Page 69 SET MODE D D Key lock effect D D Dial speed acceleration While the key lock function is ON, [Y Y ]/[Z Z ] and The dial speed acceleration automatically ) can still be accessed. Accessible keys can speeds up the tuning dial speed when rotating [DIAL] rapidly. [SQL] ( •...
- Page 70 SET MODE D D Auto power OFF D D Scan resume timer The transceiver can be set to automatically Selects scan resume time. Scan resumes turn OFF after a specified period with a beep when no key after the specified period when the received signal disap- operations are performed.
- Page 71 SET MODE D D DTCS polarity D D Memory bank link function Sets DTCS polarity from “BOTH N” (TX/RX: Sets the memory bank link function ON (de- normal), “TN-RR” (TX: normal, RX: reverse), fault) and OFF. The link function provides “TR-RN”...
- Page 72 SET MODE D D LCD contrast Sets the LCD contrast within 1 to 4 levels as desired. (default: 3) WFMAM - DUP DTCS WFMAM - DUP DTCS T SQL T SQL VOL PRIO P SKIP VOL PRIO P SKIP Contrast 3 setting Contrast 4 setting Push Push and hold...
-
Page 73: Other Functions
OTHER FUNCTIONS ■ Data cloning POWER ON Cloning allows you to quickly and easily transfer the pro- wConnect the OPC-474 cloning cable to the [MIC/SP] jack grammed contents from one transceiver to another; or data of the master and sub-transceivers. from a personal computer to a transceiver using the optional CS-P7 CLONING SOFTWARE... -
Page 74: Auto Power-Off Function
® 98/98SE/Me/2000/XP) using the optional CS-P7 and the optional OPC-478/478U CLONING SOFTWARE The IC-E7 can be set to automatically turn OFF after a spec- . Consult the CS-P7 HELP CLONING CABLE CLONING SOFTWARE ified period in which no operation is performed. -
Page 75: Tv Channel Operation
OTHER FUNCTIONS ■ TV channel operation TV channel operation is available only when TV channels are programmed using the optional CS-P7 CLONING SOFTWARE (p. 61) D TV channel receiving D Skip channel setting q Push [V/M] ( • ) to select VFO mode, if necessary. Unwanted channels can be skipped for rapid selection, etc. -
Page 76: All Reset
OTHER FUNCTIONS ■ All reset POWER ON The function display may occasionally display erroneous in- formation (e.g. when first applying power). This may be caused externally by static electricity or by other factors. If this problem occurs, turn power OFF. After waiting a few WFMAM - DUP T SQL DTCS... -
Page 77: Partial Reset
OTHER FUNCTIONS ■ Partial reset POWER ON If you want to initialize the operating conditions (VFO fre- quency, VFO settings, set mode contents) without clearing the memory contents, a partial reset function is available for the transceiver. ➥ While pushing and holding [FUNC] and [V/M] ( •... -
Page 78: Frequency Table
FREQUENCY TABLE ■ TV channels D D CCIR channels D D Australian channels (unit: MHz) (unit: MHz) Freq. Freq. The following tables show the channels versus 46.75 628.75 Freq. Freq. video and audio frequencies depending on each 51.75 637.75 53.75 636.75 60.75 644.75... - Page 79 FREQUENCY TABLE D D China channels D D UK channels D D French channels (unit: MHz) (unit: MHz) (unit: MHz) Freq. Freq. Freq. Freq. Freq. Freq. Freq. 56.25 669.75 917.75 477.25 725.25 49.25 653.75 64.25 677.75 925.75 485.25 733.25 54.00 661.75 72.25 685.75...
- Page 80 FREQUENCY TABLE D D Indonesian channels D D Italian channels D D Taiwan channels (unit: MHz) (unit: MHz) (unit: MHz) Freq. Freq. 59.25 644.75 Freq. Freq. Freq. 67.75 652.75 53.75 628.75 179.75 87.75 660.75 60.75 636.75 185.75 180.75 668.75 67.75 644.75 191.75 188.75...
-
Page 81: Vhf Marine Channels
FREQUENCY TABLE ■ VHF marine channels ■ Weather channels (unit: MHz) (unit: MHz) Ship Ship Ship Ship Ship Ship WX CH Frequency No. Transmit Receive No. Transmit Receive No. Transmit Receive 162.550 162.400 156.050 160.650 157.050 157.050 156.525 156.525 162.475 156.050 156.050 161.650... -
Page 82: Other Communications In The Usa
FREQUENCY TABLE ■ Other communications in the USA D D HF CB D D GMRS D D BRS (Citizens Band) channels (General Mobile (Business Radio channels channels Frequency Frequency Radio Service) Service) 26.965 MHz 27.215 MHz Transceiver Transceiver Dot color Frequency 26.975 MHz 27.225 MHz... - Page 83 FREQUENCY TABLE D D General aviation frequencies D D Cable TV (IRC) (unit: MHz) (unit: MHz) Frequency Description Frequency Remarks range 121.500 Emergencies 122.000 Flight Advisory Service 2– 13 54–216 (same as broadcast VHF) 122.200 Flight Service Stations 14– 22 120–174 Mid band Ch.
-
Page 84: Other Communications-Other Countries
FREQUENCY TABLE ■ Other communications— other countries D D LPD D D PMR446 channels (Low Power Device) channels (unit: MHz) (unit: MHz) Frequency Frequency Frequency Frequency 433.800 434.525 433.075 446.00625 433.825 434.550 433.100 446.01875 433.850 434.575 433.125 446.03125 433.875 434.600 433.150 446.04375 433.900... - Page 85 FREQUENCY TABLE D D UHF C.R.S channels (Citizen Radio Service) Frequency Frequency 476.425 MHz 476.925 MHz 476.450 MHz 476.950 MHz 476.475 MHz 476.975 MHz 476.500 MHz 477.000 MHz 476.525 MHz 477.025 MHz 476.550 MHz 477.050 MHz 476.575 MHz 477.075 MHz 476.600 MHz 477.100 MHz 476.625 MHz...
-
Page 86: Maintenance
MAINTENANCE ■ Troubleshooting If your transceiver seems to be malfunctioning, please check the following points before sending it to a service center. PROBLEM POSSIBLE CAUSE SOLUTION REF. No power comes on. • The batteries are exhausted. • Charge the battery pack. p. -
Page 87: Optional Cp-21Lr Fuse Replacement
MAINTENANCE Troubleshooting (continued) PROBLEM POSSIBLE CAUSE SOLUTION REF. Desired set mode item • “EXPAND” item is set to OFF. • Turn “EXPAND” item ON. p. 49 cannot be selected. Programmed scan does • Program scan edges are not programmed. • Program a pair of scan edge channels. p. -
Page 88: Specifications
SPECIFICATIONS ■ Transceiver D General • Frequency coverage (unit: MHz) • Current drain (at 3.7 V DC) Tx High 144, 430 MHz Less than 1.5 A Transmit Receive Tx Low 144 MHz 0.4 A (approx.) Europe 144–146, 430–440 0.495–999.990* 430 MHz 0.5 A (approx.) Rx max.power Less than 150 mA... -
Page 89: Battery Pack (Bp-243)
■ Battery charger (BC-164) distortion with an 8 Ω load (at 3.7 V DC) D Transmitter • Power supply : 12 to 16 V DC or the specified Icom • Modulation system : Variable reactance frequency AC adapter (BC-145LE/LUK) modulation •... -
Page 90: Options
Allows you to charge the trans- Used for connection with an Provides clear receive audio in Allows you to connect an exter- ceiver using supplied BC-164 Icom speaker-microphone or noisy environments. An optional nal antenna with a BNC con- BATTERY CHARGER earphone. - Page 91 D D HM-153P PIN MICROPHONE PIN MICROPHONE An optional OPC-782 is required for connection. Connects to the IC-E7 directly (without the OPC-782). NOTE: Connect the OPC-782 after removing NOTE: Connect the HM-153P after removing the [MIC/SP] cap (MIC/SP jack cover).
- Page 92 OPTIONS D D HM-128 D D LC-161 EARPHONE MICROPHONE CARRYING CASE An optional OPC-782 is required for connection. Helps protect the transceiver from scratches, etc. NOTE: When using as below illustration, tension release loop protects the [MIC/SP] connector from being damaged by cable stress or vibration OPC-782 HM-128...
-
Page 93: Pocket Guide
POCKET GUIDE Important operating instructions are summed up in this and the following page for your simple reference. By cutting along the line and folding on the dotted line, it will become a card sized operating guide which q Cut w Fold e Fold r Complete... -
Page 94: Pocket Guide
POCKET GUIDE ■ Memory bank channel selection ■ Memory channel programming ■ VFO scans ■ Memory scans Push [V/M] to select memory Set the desired frequency and Push [V/M] to select VFO Push [V/M] to select memory mode . other functions in VFO mode . mode . -
Page 95: Installation Notes
ABOUT CE Versions of the IC-E7 which display the “CE” symbol on the serial number DECLARATION seal, comply with the essential re- OF CONFORMITY quirements of the European Radio and Telecommunication Terminal Di- rective 1999/5/EC. We Icom Inc. Japan 1-1-32, Kamiminami, Hirano-ku... - Page 96 ■ ■ ■ ■ ■ ■ ■ ■ ■ GBR ■ ■ ■ ■ ■ ■ ■ ■ ■ ■ ■ ■ ■ ■ ■ ■ A-6468D-1EU Printed in Japan 1-1-32 Kamiminami, Hirano-ku, Osaka 547-0003, Japan 2005 Icom Inc. ©...