Dimplex MULTIFIRE DF3215 Practical User's Manual
Dimplex electric fireplace user's guide
Hide thumbs
Also See for MULTIFIRE DF3215:
- Owner's manual (22 pages) ,
- Parts & service manual (19 pages) ,
- Service manual (18 pages)
Table of Contents
Advertisement
PRACTICAL USER'S GUIDE
FOR THE DIMPLEX MULTIFIRE™
Serial Number _________________
Model Number _________________
CAT Number
__________________
Valued Customer,
We are pleased that you have chosen to purchase an electric fireplace
manufactured by Dimplex North America Ltd.
Over the years, valuable memories will occur around the warmth and comfort
of your hearth. Thank you for allowing our product to be the backdrop for
those special moments.
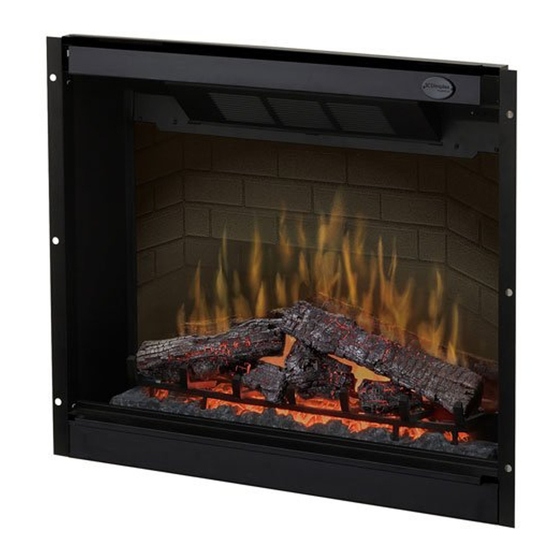
ELECTRIC FIREPLACE
MODEL NUMBER:
DF3215
Quality checked by:
7207030100REV05
Advertisement
Table of Contents

Related Manuals for Dimplex MULTIFIRE DF3215


Summary of Contents for Dimplex MULTIFIRE DF3215
- Page 1 Valued Customer, We are pleased that you have chosen to purchase an electric fireplace manufactured by Dimplex North America Ltd. Over the years, valuable memories will occur around the warmth and comfort of your hearth. Thank you for allowing our product to be the backdrop for those special moments.
- Page 2 4. If you have any technical questions regarding the operation or service of your fireplace have your Model and Serial Number ready, and contact Dimplex North America technical support at 1-888-DIMPLEX (1-888-346-7539) before returning the product to the point of purchase.
- Page 3 IMPORTANT INSTRUCTIONS SAVE THESE INSTRUCTIONS PLEASE RETAIN THIS USER’S GUIDE FOR FUTURE REFERENCE When using electrical appliances, basic precautions should always be followed to reduce the risk of fire, electric shock, and injury to persons, including the following: 1. Read all instructions before using the electric fireplace. 2.
-
Page 4: Important Instructions
If you have any questions regarding our products please have the product model and serial numbers available upon calling Dimplex customer service or technical support. To locate the model and serial number labels see below. Record the Model number, Serial number, and CAT number on the front cover of this manual for future reference. -
Page 5: Site Selection And Preparation
SITE SELECTION AND PREPARATION This section provides instructions for selecting a location and preparing the site to install the fireplace into your Dimplex mantel surround. 1. Select a suitable location that is not susceptible to moisture and is away from drapes, furniture and high traffic. -
Page 6: Fireplace Installation
6. Repeat steps 2-5 for the other side. Bi-fold Door 2. Install the fireplace assembly into the mantel. (refer to mantel assembly instructions) IMPORTANT If not using a Dimplex mantel, the fireplace must be installed in an enclosure with the following MINIMUM internal/opening dimensions. Door Spacer Screw... - Page 7 3. Ensure the MANUAL CONTROL on the unit is in the Remote position (left position). (refer to electric fireplace manual control instruction section) 4. Plug the unit into a 15Amp/120Volt outlet. If the cord does not reach, you may use an extension cord rated for a minimum of 1875 watts.
-
Page 8: Remote Control
The temperature cutoff switch can be reset by unplugging the unit, waiting 5 minutes and plugging the unit back in. CAUTION If you need to continuously reset the heater, unplug the unit and call Dimplex North America Limited at 1-800-668-6663 and press 4 for technical support. REMOTE CONTROL The remote control has a range of approximately 50 ft. - Page 9 NOTE When the Low Battery icon the batteries promptly, to maintain full functionality of the remote/fireplace (FIGURE 5). INITIALIZING THE REMOTE CONTROL 1. Plug cord into 120 volt wall outlet. 2. Turn ON the electrical power at the circuit breaker. 3.
- Page 10 REMOTE CONTROL FUNCTIONS Room temperature Set temperature Day of week Remote display Up direction button Enter button Left direction button Flame/Heat ON/OFF button Purifire™ ON/OFF button Occupancy Sensor FLAME/HEAT ON/OFF BUTTON Press the Flame/Heat On/Off button function is ON, the icon is displayed on the remote control in the upper left hand corner.
- Page 11 Firelight Occupancy Sensor Temperature Setting SET CLOCK 1. Press the ENTER button, the middle display 2. Use the direction buttons on the hand held remote to move the cursor to the and press the ENTER button. 3. A day of the week will flash. 4.
- Page 12 LIGHT DIMMER 1. Press the Flame/Heat button 2. Press the ENTER button, the middle display 3. Use the direction buttons on the hand held remote to move the cursor to ENTER. 4. Repeatedly press the brightness of the upper lights. NOTE The bar graph located on the top of the display screen indicates the upper light brightness range.
- Page 13 CHILD LOCK 1. Press the ENTER button, the middle display 2. Use the direction buttons on the hand held remote to move the cursor to ENTER. 3. Press and hold the child lock function has been turned ON. 4. To turn the child lock function OFF, hold the PURIFIRE™...
- Page 14 PERSONAL PROGRAM SCHEDULE Before programming the heater use the personal program schedule below to determine which time and temperature settings meet your schedule. Use a pencil to be able to revise your records each time you are required to change your program settings.
- Page 15 MAINTENANCE WARNING Disconnect power before attempting any maintenance or cleaning to reduce the risk of fire, electric shock or damage to persons. LIGHT BULB REPLACEMENT Allow at least 5 minutes for light bulbs to cool before touching bulbs to avoid accidental burning of skin.
- Page 16 UPPER LIGHT BULB REQUIREMENTS Quantity of 2 clear chandelier or candelabra bulbs with an E-12 (small) socket base, 25 watt rating. DO NOT EXCEED 25 WATTS PER BULB To access the upper light bulb area: 1. Open the bi-fold doors. 2.
- Page 17 GLASS CLEANING The glass is cleaned in the factory during the assembly operation. During shipment, installation, handling, etc., the glass may collect dust particles, these can be removed by dusting lightly with a clean dry cloth. To remove fingerprints or other marks, the glass can be cleaned with a damp cloth. To prevent scratching, do not use abrasive cleaners or spray liquids on the glass surface.
- Page 18 Subject to the provisions of this warranty, Dimplex warrants such products to be free from defects in material and workmanship for a period of 10 years from the date of the first purchase of such products as follows: (a) a repair or replacement warranty on defective products or parts, including in-home services, for the first three years following the date of first purchase;...
- Page 19 If Dimplex is unable to repair or replace such product or part, or if repair or replacement is not commercially practicable or cannot be timely made, Dimplex may, in lieu of repair or replacement, choose to refund the purchase price for such product or part.
- Page 20 (mantels) and trims or part thereof without charge. If Dimplex is unable to repair or replace such product or part, or if repair or replacement is not commercially practicable or cannot be timely made, Dimplex may, in lieu of repair or replacement, choose to refund the purchase price for such product or part.