Yamaha RX-V765 Owner's Manual
Yamaha rx-v765: user guide
Hide thumbs
Also See for RX-V765:
- Owner's manual (324 pages) ,
- Service manual (156 pages) ,
- Product bulletin (2 pages)
Table of Contents
Advertisement
Advertisement
Table of Contents

Related Manuals for Yamaha RX-V765


Summary of Contents for Yamaha RX-V765
- Page 1 OWNER'S MANUAL...
- Page 2 FCC requirements. Modifications turning the unit "OFP' and "ON", please try to eliminate the not expressly approved by Yamaha may void your authority, problem by using one of the following measures: granted by the FCC, to use the product.
- Page 3 Pour eviter les chocs electriques, introduire la lame la cause fire, damage to this unit, and/or personal injury. Yamaha plus large de la fiche dans la borne correspondante de will not be held responsible for any damage resulting from use la prise et pousser jusqu'au fond.
-
Page 4: Table Of Contents
Connecting an external amplifier Outputting a video signal input from another Using REMOTE IN/OUT jacks input source during reproducing a multi-channel Connecting a Yamaha iPod universal dock or audio signal Bluetooth™ wireless audio receiver. Editing surround decoders/sound field Connecting a camcorder or portable audio player... -
Page 5: Features
• Audio output • DOCK jack Analog x I • DOCK jack to connect a Yamaha iPod universal dock • Zone2 output (such as YDS-II, sold separately) or Bluetooth wireless Analog x I audio receiver (such as YBA-l 0, sold separately) Other terminals •... -
Page 6: About This Manual
HD Master A.udio are trademark of DTS. Inc. © 1996-2007 DTS, Inc. CINEMA All Rights Rescrvcd. "SILENT CINEMA' is a trademark of Yamaha Corporation. ~u~~S~~. SIRIUSiJ Neural Surround'" namc and related logos are trademarks owned eural Audio Corporation. XM Mini-1i.Jner iPod™... -
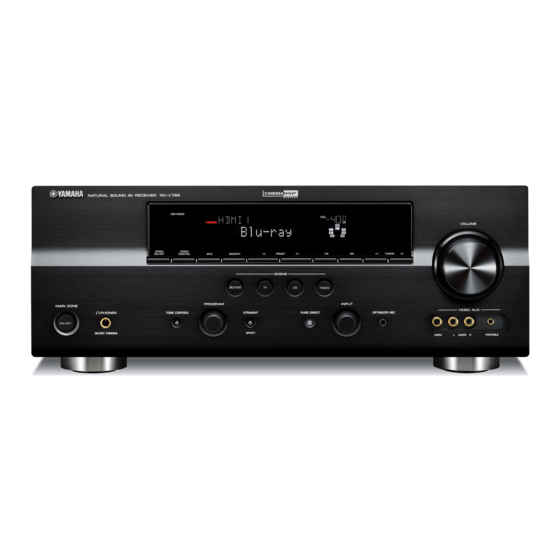
Page 7: Part Names And Functions
Part names and functions ® © ® ® ~---~._--{--;-_¥ " ~$;;;RV.\\1IDIi.\;;;'='=' 1---- - i!I.- • - - - I _..I j~;=!~\F========= ===========1==========;====="1\ ® ® ® ® MAIN ZONE ON/OFF TONE CONTROL Turns this unit on and off (see page 20). Adjusts high-frequency/low-frequency output of speakersl ®... - Page 8 (see page 17). DOCl(jack MONITOR OUT terminals For connecting a Yamaha iPod universal dock (YDS-II, sold Outputs video signals from this unit to a video monitor, such as separately) or a Bluetooth wireless audio receiver (YBA-I 0, a TV (see page 15).
- Page 9 Part names and functions ® (J) ® CD® ® 00000 00000 HOMI indicator Lights up during normal communication when HDMI is selected as an input source. XM indicator Lights up when an XM tuner is selected as an input source. SIRIUS indicator Lights up when a SiriusConnect tuner is selected as an input source.
-
Page 10: Remote Control
When an iPod is connected: Changes the operation mode of the V-AU Selects the V-AUX jack on the front panel of this iPod connected to the Yamaha iPod universal dock (see page 42). unit. MUTE Turns the mute function of the sound output on and otT (see page 25). -
Page 11: Quick Start Guide
• Connecting speakers Front right speaker ~<il~ Video monitor • This unit has a YPAO (Yamaha Parametric Room Acoustic Optimizer) that automatically optimizes this unit based on room acoustic Surround right speaker Front left speaker characteristics (audio characteristics of the speakers, speaker positions, and room acoustics, etc.). - Page 12 PREPARATION Preparing remote control The remote control transmits a directional infrared ray. Be sure to aim the remote control directly at the remote control sensor on this unit during operation. Remote control sensor window within 6 m (20 tt) Take l>ff the battery compartment cover. Insert the two supplied batteries (AAA, R03, UM-4)1 according to the polarity markings (+ Notes...
- Page 13 The subwoofer speaker outputs bass sounds and low- frequency effect (LFE) sounds included in Dolby Digital and DTS signals. Use a subwoofer with a built-in amplifier, such as the Yamaha Active Servo Processing " SL Subwoofer System. Place it exterior to the front left and right speakers facing slightly inward to reduce reflections from a wall.
- Page 14 Connections When you connect speakers, connect them to the respective jacks as follows, according to your speaker layout. '" ~"'~ • You can connect up to two snbwoofers. When two subwoofers are connected, the same sound is output from them. •...
- Page 15 Connections Presence speakers You can connect presence speakers (PLIPR) that output front effect sounds to this unit. With CINEMA DSP sound field programs (see page 27) and their CINEMA DSP 3D functions, a sound with a richer and more spacial presence can be created.
- Page 16 Connections Connec1ting the speaker cable Caution • A speaker cable is a pair of insulated cables running side by side in general. One of the cables is colored differently "+" or striped to indicate a polarity. Connect one end of the colored/striped cable to the (red) terminal of this unit and the other end to that of your speaker, and connect one end of the other cable to the "-"...
- Page 17 Connections This unit has the following input and output jacks. Use jacks and cables appropriate for components that you are connecting. • Audio jacks • Video/audio jacks Jack and cables Description Jack and cables Description AUDIO jacks HDMI jacks To transmit conventional analog To transmit digital video and (stereo) signals.
- Page 18 Connections Connect a video monitor such as a TV or projector to an output jack of this unit. You can select one of the following three types according to the input signal format supported by the video monitor: HDM! OUT, COMPONENT VIDEO and VIDEO (composite video).
- Page 19 Connections This unit has input and output jacks for respective input and output sources. You can reproduce sound and movies from input sources selected with the front panel display or remote control. Note • Make sure that this unit and other components are unplugged from the AC wall outlets. Audio/video input (AV 1-6) Audio/video output (AV OUT) HDMI input...
- Page 20 Connections • Audio player Output jacks on the connected external component Input sources/jacks of this unit Ex.ternal components Output jacks External component with optical digital Optical digital output AV I (TV) OPTICAL output OPTICAL Coaxial digital output AV 2 COAXIAL External component with coaxial digital output AV 3 (CD)
- Page 21 Connections The same channel signals are output from the jacks of the PRE OUT terminals as from their corresponding This unit has 8 sets of input jacks (FRONT L/R, CENTER, SURROUND L/R, SUR. BACK and SPEAKERS terminals. When connecting an external SUBWOOFER) to input multi-channel analog sound power amplifier (pre-main amplifier) to enhance speaker signals.
-
Page 22: Bluetooth™ Wireless Audio Receiver
(0SCENE (or [IDSCENE) to select a SCENE. • If the component connected to the REMOTE OUT jack is not a Yamaha product. set "SCENE fR" in the ADVANCED SETUP menu to "OFF"... -
Page 23: Connecting The Power Cable
IlIDPOWER) to turn on this unit. • Position the AM loop antenna away from this unit. • If you cannot get good reception. we recommend that you use an outdoor antenna. For more details, consult the nearest authorized Yamaha dealer Press @MAIN ZONE ON/OFF or service center. - Page 24 (YPAO) This unit has a Yamaha Parametric Room Acoustic Optimizer (YPAO). With the YPAO, this unit automatically adjusts the output characteristics of your speakers based on speaker position, speaker performance, and the acoustic characteristics of the room.
-
Page 25: Optimizing The Speaker Setting For Your
Optimizing the speaker setting for your listening room (YPAOj DIST To select a sound character for adjustment, Displays the speaker distance from the listening position press [j]Cursor to select "EO Type" and in the following order: then press [j]Cursor <l C>. - Page 26 Optimizing the speaker setting for your listening room (YPAO) If a problem occurs during measurement, "WARNING" is Press [DJCursor once, and select "Retry" or displayed on the result display screen. Check the error and "Exit" using [DJCursor II> and then press <J solve the problems.
-
Page 27: Playback
(or [IDSCENE) is pressed during Turn the (QVOLUME control to adjust the standby. • If a Yamaha DVD player that can receive seEN E control signals is volume (or press []]]VOLUME +/-). connected to the REMOTE OUT jack of this unit. the DVD player... -
Page 28: Setting Remote Control Codes
Playback Registering input source/sound field program Select the! desired input source/sound field You can adjust the balance of the high frequency range (Treble) and low frequency range (Bass) of sounds output program, and press down @SCENE (or from the front left and right speakers to obtain desired rnJSCENE:) until "SET Complete"... - Page 29 Playback ~~Di"Jl;'li1iilo1ii/atililrili;"fiJflli;;nt . ..' :1l~~~t~tSIJ!!!"';~ ,'. ,.' . Plug your headphones in the @PHONES jack on You can display information on the front panel display the front panel. such as the names of the currently selected sound field When you select a sound tield program while using the program and surround decoders on the front panel display.
-
Page 30: Enjoy The Sound Field Programs
Enjoy the sound field programs This unit is also equipped with a Yamaha digital sound field processing (DSP) chip. You can enjoy multi-channel sounds for almost II input sources using various sound field programs stored on the chip and a variety of surround decoders. - Page 31 Enjoy the sound field programs Program Descriptions Drama Creates a calm sound field suitable for different genres of movies, from serious dramas to musicals and comedies. Sound is produced with discreet reverberation yet with a three-dimensional feeling. Spatial sound effects and background music are reproduced with soft reverberations around the center position.
- Page 32 Enjoy the sound field programs The Compressed Music Enhancer (ENHNCR) Program Descriptions Straight Enhancer Dynamically reproduces sound from 2-channel or multi-channel compressed sound data with the same number of channels as its source sound. 7ch Enhancer Dynamically reproduces sound from compressed sound data in 7 channels regardless of the source sound channels. Surround decode mode (SUR.
- Page 33 Enjoy the sound field programs _ - : T i 0""0 In straight decoding mode, sounds are reproduced without SILENT CINEMA allows you to enjoy multi-channel sound field effect. 2-channel stereo sources are output sources with your headphones. SILENT CINEMA mode from only the front left and right speakers.
- Page 34 FM/AM tuning The FM/AM tuner of this unit provides the following two To tune in by direct frequency tuning, enter modes for tuning. the frequency of the desired station using • Frequency tuning mode IJ]]Numeric keys on the remote control. You can tune into a desired FM/AM station by searching Enter only integers.
-
Page 35: Fm/Am Tuning
FM/AM tuning Status Calling a preset station (Preset tuning) You can call preset stations registered by automatic station preset or manual station preset. Press @PRESET (or [IDPRESET <J / [> Preset number Frequency select a preset number. During the automatic station preset, the upper area of ~<il~ the screen changes as follows: SEARCH •... -
Page 36: Xm® Satellite Radio Tuning (U.s.a. Model Only)
XM® Satellite Radio tuning (U.S.A. model only) Listening to Satellite Radio To listen to Satellite Radio, you'll need to connect either a SIRIUS or XM Satellite Radio tuner (sold separately) to your satellite-ready receiver. Satellite Radio is available to residents of the US (except Alaska and Hawaii). Satellite Radio delivers a variety of commercial-free music from categories ranging from Pop, Rock, Country, R&B, Dance, Jazz, Classical and many more plus coverage of all the top professional and college sports including play by play games from select leagues and teams. - Page 37 XM® Satellite Radio tuning (U.S.A. model only) • Category Search mode ([)CATEGORY Press C> <:] [§]CATEGORY to select the channel C» <:] Rotate the ®I NPUT selector (or press category. [IDXM) to select "XM" as the input source. "CAT" is displayed on the front panel display during The XM Satellite Radio information (such as channel the channel category selection.
-
Page 38: Xm Satellite Radio Operations
XM@ Satellite Radio tuning (U.S.A. model only) Calling a preset channel (Preset Search mode) Prior to selecting a preset number in Preset Search mode, You can use this feature to store up to 40 XM Satellite you must register an XM Satellite Radio channel to the Radio channels. - Page 39 XM@ Satellite Radio tuning (U.S.A. model only) • Video monitor (050) Press IWIDISPLAY on the remote control to turn on or off the information display. You can display the XM Satellite Radio information on The following information is displayed on the video the front panel display or on the video monitor.
-
Page 40: Sirius Satellite Radio™ Tuning (U.s.a. Model Only)
SIRIUS Satellite Radio™ tuning (U .S.A. model only) Displaying the Sirius 10 of your SiriusConnect tuner Connect the SiriusConnect tuner (sold separately) to the SIRIUS jack on the rear panel of this unit. For details, see Rotate the @INPUT selector (or press the instruction manuals provided with the SiriusConnect [IDSIRIUS) to select "SIRIUS"... - Page 41 SIRIUS Satellite Radio™ tuning (U.S.A. model only) Search for a channel by using one of the While "CAT" is displayed on the front panel SIRIUS Satellite Radio search modes. display, press Q)TUNING/CH <J C> IIJ) [IDTUN./CH repeatedly to search for a •...
- Page 42 SIRIUS Satellite Radio™ tuning (U.S.A. model only) Calling a preset channel (Preset Search mode) Prior to selecting a preset number in Preset Search mode, You can use this feature to store up to 40 SIRIUS Satellite you must register a SIRIUS Satellite Radio channel to the Radio channels.
-
Page 43: Channels
SIRIUS Satellite Radio™ tuning (U.S.A. model only) Press ITIJCursor to select a channel you I' . ::, want to lock. You can use the Parental Lock feature to limit the access Notes to the desired SIRIUS Satellite channels. This unit [IDCATEGORY •... - Page 44 SIRIUS Satellite Radio™ tuning (U.S.A. model only) Front Panel Display (example) I I I I Ii 'I I SIRIUS rOt t_ I_'I!.-II!...J ·:::i You can display the SIRIUS Satellite Radio information ." on the front panel display or on the video monitor. ~(jl~ •...
-
Page 45: Using Ipod
• Some features may not be compatible depending on the model or the software version of your iPod. • Some features may not be available depending on the model of Yamaha iPod universal dock. The following sections describe the procedure when lIsing the YDS-II ,:-'(,<-:. - Page 46 Using iPod™ I::. / V Shuffle/repeat playback Press []]Cursor to select a <J / C> menu item and then []]ENTER to start You can use a special playback function such as shuffle playback. playback and repeat playback by setting the OPTION menu.
-
Page 47: Using Bluetooth™ Components
Using Bluetooth™ components This unit supports A2DP (Advanced Audio Distribution Profile) of the Bluetooth profile. You can connect a Yamaha Bluetooth wireless audio receiver (such as YBA-l 0, sold separately) to the DOCK jack of this unit and enjoy the music contents stored in your Bluetooth component (such as a portable music player) without wiring between this unit and the Bluetooth component. -
Page 48: Other Functions
Other functions Check the settings of those components and enable the HOMI control function. You can set this unit to automatically return to standby This unit: Set "Control (SETUP menu Function after a set time has passed. Setup I HOM])" to "On" in the SETUP menu The sleep timer is useful if you want to go to sleep while (see page 57). -
Page 49: Advanced Operation
ADVANCED OPERATION Setting the option l11enu for each input source (OPTION menu) This unit has the OPTION menu of frequently used menu items for input sources compatible with this unit. The procedure for setting the OPTION menu items is described below. Select an input source using the @INPUT ~Input selector (or... -
Page 50: Setting The Option Menu For Each Input Source (Option Menu)
Setting the option menu for each input source (OPTION menu) • Decoder' t'kll::le Input source: HDMII-4. AV 1-4 Input source: HDMII-4, AV 1-4 Rut.o*/DTS Choices: Displays information on audio and video signals on the Selects DTS digital audio signals for reproduction. video monitor and front panel display. -
Page 51: Outputting A Video Signal Input From Another Input Source During Reproducing A Multi-Channel Audio Signal
Setting the option menu for each input source (OPTION menu) Input source: TUNER Choices: 5ter'eo*/t'iono Sets FM broadcasting receiving mode. 5+",,,t-'eo keceives in stereo mode. r'1ono Receives in monaural mode. You can get a When "MULTI CH" is selected as the input source, a better reception in monaural mode. -
Page 52: Editing Surround Decoders/Sound Field Programs
Editing surround decoders/sound field programs To end the edit, press []]]SETUP. To initialize the parameters of the selected sound field Although the sound field programs would satisfy you as program, !TIJCursor repeatedly to select "Initialize" they are with the default parameters, you can arrange and then press, !TIJCursor When the confirmation C>. -
Page 53: Sound Field Parameters
Editing surround decoders/sound field programs Adjust attenuation characteristics of early-reflected sound. You can create a lively sound field (with a high Choices: reverberant sound level) as you increase the value, and a Adjusts the vertical position of center sound such as dead sound field (with a low reverberant sound level) as dialogues when presence speakers are used. - Page 54 Editing surround decoders/sound field ro ra Rev.Time parameter adjusts the attenuation time of the rear reverberant sound based on the time that about IkHz Source sound reverberant sound takes for 60dB of attenuation. Early reflections Reverberant sound attenuates faster as you decrease the value.
- Page 55 Editing surround decoders/sound field programs Rev.Level parameter adjusts the reverberation sound level. Decoder parameters Increasing the value of Rev.Level makes the reverbration sound level higher, which allows you to create more echo. You can customize decoder effects by setting the following parameters.
-
Page 56: Changing Various Settings Of This Unit (Setup Menu)
Changing various settings of this unit (SETUP menu) You can change various settings of this unit using the SETUP menu. See "Basic operation of the SETUP menu" on the next page, and other respective pages to change the settings. • List of SETUP menu items Function Page... - Page 57 Changing various settings of this unit (SETUP menu) Example: A)Config I=!)Conf'i9 The SETUP menu screen appears on both video display Center SF' (OS D) and front panel display. Video display (050) t'~one >Svl.::ill L.::lt"'ge 'Speaker Setup ~<i><' ·Sound Setup • You can change other ilems by repeating slep 4 . ,-~nc i on Setup DSP Par-ar;lelet-·...
- Page 58 Changing various settings of this unit (SETUP menu) LFE.····E:.::t:::.:::. OUt.. t'~onel5r"la Choices: 51!JF FUFt"ont../E:ot..h* Choices: 11 */L.:;t'·ge Selects speaker(s) for outputting low-frequency Sets the size of center speaker. components of the LFE (low-frequency effect sound) Select this when no center speaker is channel or other channels.
- Page 59 Changing various settings of this unit (SETUP menu) ·4l..·j·~ zl~r' • [) E: Adjusts sound quality and tone using a parametric graphic Choices: 0~::1Hz/ll 40Hz/60Hz/:::(}Hz*/90Hz/l OHz/120HzI equalizer. 6~::1Hz/200Hz Sets the lower limit of the low frequency component I::G! T'::~F'e ~~e:l. ec.+...
- Page 60 Changing various settings of this unit (SETUP menu) • ;: L 5tandb~ Throul~h • F::::.'::lt"iC Adjusts delay between video output and audio output. Choices: On/Off* Selects on or off of output of HOMI signals input from the HDt'1 I Hi)t.o HOM I 1-4 jacks to the HOMI OUT jack when this unit is Choices: Off*/On...
- Page 61 Changing various settings of this unit (SETUP menu) 3 Volume Choices: Thr·':Jh*/1;:': 9/Sr"3r·t Set a horizontal to vertical ratio (aspect ratio) of images You can change some parameters for volumes. reproduced by HDMI signals output from the HDMI OUT I)l:~ •...
- Page 62 Changing various settings of this unit (SETUP menu) 4 Input Rename Note • If the selling of "Max Volume" is lower than the selling of "Ini!. You can change input source names to be displayed on the Volume," the selling of "Max Volume" becomes effective. For example. when you set "Max Volume"...
-
Page 63: Using Multi-Zone Configuration
Compliance with minimum speaker impedance connections that best meet your requirements. • Some Yamaha models can be directly connected to the REMOTEjacks information for all channels must be maintained at all of this uni!. These models may not require an infrared signal emiller. Up times. -
Page 64: Controlling Zone2
(U.S.A. model only). • Playing back music stored on your iPod stationed in a • Turning on Zone2 Yamaha iPod universal dock (such as YDS-I I sold Set [I]MAIN/ZONE2 to the ZONE2 position, and separately) connected to the DOCK jack. press [ffiJPOWER. -
Page 65: Controlling Other Components With The Remote Control
Input source Category Manufacturer ~CuBo~ENTER,RETURN code Operates the menus of external components. fHDMII] Blu-ray Disc Yamaha 2018 ImlDISPLAY [HDMI2] Switches between the screens of external components. [HDMI3] IJ1JExternal component operation keys [HDMI4] Function as a recording or playback key of an external component, or a menu display key. - Page 66 Controlling other components with the remote control You can control other components by setting the You can clear all the remote control codes previously set, appropriate remote control codes. For a complete list of and reset all of them the initial factory settings. available remote control codes, refer to "List of remote ,:oW,: control codes"...
-
Page 67: Advanced Setup
SCENE function is selected. If "ON" is selected and a Set this unit to standby. playback component that supports the SCENE link playback, such as a Yamaha DVD player, is ®MAIN ZONE ON/OFF while Press connected to the REMOTE OUT jack of this unit, pressing and holding ®STRAIGHT on the... - Page 68 Advanced setup Setting a remote control 10 Two IDs are provided for the remote control of this unit. If another Yamaha amplifier is in the same room, setting a different remote control ID this unit prevents unwanted operation of the other amplifier.
-
Page 69: Appendix
Refer to the table below when this unit does not function properly. If the problem you are experiencing is not listed below or if the instruction below does not help, turn off this unit, disconnect the power cable, and contact the nearest authorized Yamaha dealer or service center. Problem... - Page 70 Troubleshooting Remedy Problem Cause page No sound. Incorrect input or output cable Connect the cables properly. If the problem persists, 15-19 connections. the cables may be defective. Speaker connections are not secure. Secure the connections. The HDMI components connected to this Connect HDM! components that support the HDCP unit do not support the HDCP copy copy protection standards.
- Page 71 Troubleshooting Problem Cause Remedy page No sound is output The speaker is in malfunction. Check the Speaker indicators on the front panel 6. 10 from a specific display. If the corresponding indicator lights up. speaker. connect another speaker and check if sound is output. If sound is not output, this unit may be malfunction.
- Page 72 Troubleshooting Problem Cause Remedy page No sound is heard "Extended Surround" in the OPTION Set "Extended Surround" other than "Off' or "Auto," from the surround menu is set to "Off." or an input signal back speakers. does not contain a surround back flag with "Extended Surround"...
- Page 73 Troubleshooting Problem Cause Remedy page FM stereo reception is You are too far from the station Check the antenna connections. noisy. transmitter or the input from the Replace the outdoor antenna with a more antenna is weak. sensitive multi-element antenna. Switch to monaural mode.
-
Page 74: Tuner (Fm/Am)
Troubleshooting Status message Cause Remedy page tKi SI t·H=iL. The XM Mini-Tuner is not receiving the Check for antenna obstructions and reposition the XM satellite signal. Something may be XM antenna to get better signal reception. Check the blocking: the XM antenna's view of the antenna reception level from the "Antenna"... -
Page 75: Remote Control
Troubleshooting Status message Cause Remedy page The signal is too weak. Adjust the orientation of the antenna of the SiriusConnect tuner. Check the antenna reception level from the "Antenna" information on the front panel display, or "ANT' or "SIRIUS Information" on the video monitor. - Page 76 Connect E;.r·r·or· There is a problem with the signal path Turn off this unit and reconnect the Yamaha iPod from your iPod to this unit. universal dock to the DOCK jack of this unit. Remove your iPod in the Yamaha iPod universal dock and then place it back in the dock.
- Page 77 • Depending on the speakers, warning message "W-]" may appears even if the speaker connections are correcl. • If error message "E-I 0" occurs repeatedly, contact a qualified Yamaha service center. Before Auto Setup Error message Cause...
- Page 78 Check whether the speakers are properly placed and connected. The optimizer microphone or OPTIMIZER MIC jack may be defective. Contact the nearest Yamaha dealer or service center. If a monitor such as a TV is connected to this unit via HDMI connection, sound may not be output from this unit due to the HDMI control function.
- Page 79 Troubleshooting Error message Cause Remedy page 1.,J-4: CHECK F'F:~'6 Presence speakers were not detected Check the presence speaker connections and perform measurement again. during measurement with "Extra SP II' presence speakers are not connected, set the Assign" set ·'Presence." "Extra SP Assign" to other than "Presence." If presence speakers are connected, set the "Extra SP Assign"...
-
Page 80: Glossary
Glossary • Audio and video synchronization (lip sync) • Dolby Digital Surround EX Dolby Digital EX creates 6 full-bandwidth output channels from 5.1- Lip sync, an abbreviation for lip synchronization, is a technical term that involves both a problem and a capability of maintaining audio and channel sources. - Page 81 Glossary • • HDMI Direct Stream Digital (DSD) technology stores audio signals on HDMI (High-Definition Multimedia Interface) is the tirst industry- digital storage media, such as Super Audio CDs. Using DSD. signals supported, uncompressed, all-digital audio/video interface. Providing are stored as single bit values at a high-frequency sampling rate of an interface between any source (such as a set-top box or AV receiver) 2.8224 MHz.
-
Page 82: Sound Field Program Information
It is even room of your own home by using the Yamaha original sound field possible to enjoy Virtual CI EMA DSP using a minimal two-speaker technology combined with various digital audio systems. -
Page 83: Specifications
Specifications AUDIO SECTION • Fi Iter Characteristics (fc=40/60/80/90/ 1 0011 10/1201160/200 Hz) H.P.F. (Front, Center. Surround, Surround back: Small) • Minimum RMS Output Power for Front, Center, Surround, ........ 12 dB/oct. Surround back L.P.F. (SuhwoolCr). 24 dB/oct. 20 Hz - 20 kHz. 0.08% THD. 8 Q . 95 W •... -
Page 84: Displaying Input Signal Information
Index COAXIAL jack Frequency tuning mode. • Numerics CODE SET. remote control Front C)Distance. speaker setup ... I Dynamic Range, sound setup COMPONENT VIDEO jack Front left speaker ..I HDMI, function setup Connect. OPTIO menu..48 Front panel....2 Display. -
Page 85: Registering Xm Satellite Radio Channels
Index • Panorama. decoder parameter Sound field program registration Parental Lock. OPTION menu Sound selection key. remote control . YPAO PHONES jack. front panel Sound Setup. SETUP menu..56 YPAO, troubleshooting PL Level. sound field parameter SOURCE POWER, remote control..Placing speaker SP IMP.. -
Page 86: List Of Remote Control Codes I
List of remote control codes Ausind 0249 Clatronic 0243,0249,0259, Durabrand 0077,0097,0133, Autovox 0249,0257,0259, 0260, 0261, 0262, 0225 A.R. Systems 0274 0260,0328 0268,0269,0273, 0271 Acme 0260 Aventura 0097 0274,0328 Dwin 0224 Acura 0261. 0273 0327.0328 0327 Dynatron 0268, 0271, 0274 0259 Axion 0206 CMS Hightec... - Page 87 Fujitsu Siemens 0425,0426.0427. Hinari 0261. 0262. 0266, Kaisui 0260, 0261. 0262, Magnavox OOn. 0088. 0090. 0428.0429 0268. 0271. 0273. 0270, 0273, 0274, 0091.0095,0096. Funai 0033, 0034, 0035, 0274 0327,0328 0098,0114.0115. 0036,0037,0097. Hisawa 0262,0270,0275 Kamosonic 0260 0129.0134,0176. 0104,0105.0225. Hisense 0165 Kamp 0260.0327 0178,0189.0210 0259...
- Page 88 Neckennann 0243, 0257, 0260, 0114,0135.0143. 0071. 0012. 0073. SEI-Sinudyne 0257.0263.0265 0264.0268.0269, 0176,0178.0189, 0074.0075.0090. Seleco 0264.0265.0266 0271. 0274, 0328 0210,0212,0232. 0099.0102.0103. Sencora 0261.0273 0268.0271.0274 0233,0257,0260. 0109,0120.0179. Sentra 0273 et-TV 0226 0268.0271.0274. 0218 Serino 0327 Neufunk 0273.0274 0278, 0287. 030 I. Realistic 0065.0077.
- Page 89 0055,0056 Cybernex 1020 1079, 1090 Tokai 0268,0274,0328 Xrypton 0274 CyberPower 1066 Headquarter 1019 Tokyo 0260,0327 Yamaha 0000.0001.0002, Daewoo 1023, 1075, 1076, Hewlett Packard 1066 Tomashi 0270 0003, 0004, 0005, 1091. 1116, 1141 Hinari 1074. 1079. 1090, Toshiba 0027,0043,0053, 0072, 0090. 0096,...
- Page 90 Loewe Opta 1077, 1078 I I I I. I I 13, 1122, Solavox 1076 XR-lOOO 1022. 1023 Logik 1079, 1090 1124,1127.1128. Sonic Blue 1041, 1068 Yamaha 1018,1019 Lumatron 1075,1091 1129 SonnecJair 1090 Yamishi 1079. 1090 Luxor 1090 Philips Magnavox 1030...
- Page 91 23IS 2302 ATACOM 2080,2107,2115, Enzer 2252, 2256, 2260, 2199 Audiovox 2165 21 16, 2141, 218S, Epson 226S, 2282, 2332, 2317 Avious 2219 2211,2215,2237, 2333, 2343, 2344, 2313 2304,2312,2317 Finlux 2239,2285, 2293, 2345,2367,2371, 2171 Axion 2299 Fintec 2295,2348,2370 2373,2380,2382, Bang & Olufsen 2210 2212 Fisher...
- Page 92 Xoro 2300 Archer 3020 3018 Sony 2005, 2006, 2007. Yamada 2097.2313,2315 Arcon 3048 NET Brazil 3007 2020, 2021. 2022, Yamaha 200f!. 200 I, 2002, AT&T 3013 Nokia 3051 2023. 2024, 2025, 2003.2011,2018. Axis 3048 Noos 3055 2069, 2072, 2073. 2019.2036,2106,...
- Page 93 View master 3045 Condor 4074.4090.4137 Fuba 4074.4083,4090, Lasat 4074.4088.4090, Vision 3045 Connexions 4074,4092 4092,4093,4101, 4100,4133.4134. Visiopass 3051,3054,3055 Conrad 4074,4133,4136, 4133 4137 Vortex View 3045 4137 Galaxis 4074,4087,4090, Lasonic 4062 Wittenberg 3048 Conrad Electronic 4137,4139 4091, 4096, 4098, Lenco 4074,4083,4099. Zenith 3035.3040,3046 Contec 4096...
- Page 94 Supennax 4052.4057.4145 Zenith 4090.4138 4102 Tandberg 4086 Zodiac Quelle 4093.4133,4137 4086 Tandy 4102 Quiero Tantec 4084 4065 RadioShack 4090 Yamaha 5000.5013 4101. 4103 4094 Radiola Techniland CD Recoder Radix 4092.4119 TechniSat 4071.4072.4073. 4086 Rainhow 4092.4103.4116. Yamaha 5001 4015.4016.4034. 4117.4134.4135. 4035.4036.4037.
- Page 95 _YAMAHA YAMAHA CORPORATION © 2009 Yamaha Corporation All rights reserved. Printed in Malaysia WQ95120...
- Page 96 UABG English © 2009 Yamaha Corporation All rights reserved. Printed in Malaysia WT92500 Addendum for audio/video connection ■ When AV3, AV4, AUDIO1 or AUDIO2 is selected as the input source, a video signal input from an external component connected to the HDMI1-4, AV1-6 or V-AUX jack can be output to the video monitor.
- Page 97 Part 2: Assigning the video input jacks Example 1: Connecting a game console COMPONENT VIDEO AV3-4 AUDIO1-2 Select the input source that the audio output jack of the external component is connected to. When you made the connection same as the SPEAKERS example 1, press AUDIO1.
- Page 98 < IMPORTANT NOTICE > Do not attempt to update your Yamaha receiver using any other data file except those provided directly from the Yamaha website. Follow the instructions carefully and do not attempt any other procedures not specified in the instructions provided by Yamaha.
- Page 99 Firmware Update Procedure for RX-V465/565/665/765 Instructions for Firmware Update: STEP1 Download from YAMAHA website. Unzip the downloaded content and burn the WAV file as an Audio-CD. This will be your update disc. 1a) If you need instructions on creating this firmware update CD, see your Personal Computer ("PC") CD burning software instructions on how to...
- Page 100 Firmware Update Procedure for RX-V465/565/665/765 STEP3 Plug the AC power cable of the CD/DVD player to the wall outlet. Insert the Firmware Update CD (Audio CD) into the CD/DVD player and close the tray. If the disc begins to play automatically, press STOP button on the CD/DVD player.
- Page 101 ‹ Receiver doesn't power up after the update. Solution: Try the following recovery method Step PL1. Unplug the AC power cable of the Yamaha receiver from wall outlet. Step PL2. On the front panel of the AV receiver, press and hold the [STRAIGHT] button and keep it pressed, which you plug the AC power cord of the Yamaha receiver to the wall outlet.
- Page 102 ·YAMAHA RX-V765 The letters in circles and the numbers in squares correspond to those in the Owner's Manual. • Front panel ® ® ® ® ® ® ";..\'t':. . . /aOIlf*lTlllW)OGH ,ONEZ """' " '" """"" CONTROL ">':.~ oa . . • . . ' ra .
- Page 103 • Remote control 131--~ ,.., ~ ~ ~+·'."~"I. TV VOL TVCH ~.,..;,..~, MUTE.l •••,m.-." @YAMAHA YAMAHA CORPORATION Printed in Malaysia @ WQ95220...
- Page 106 Registering Your New Yamaha Product is Fast and Easy Thank you for purchasing a new product from Yamaha Electronics.We'd like to continue providing you with high quality products and better service. So, we've made it simple to register your new product purchase online. Please take a few minutes to www.yamaha.comIYEC/registration/...
- Page 107 ;,.~ Do not rdurn any product to the ahove address; it is not a service location. YAMAHA products are backed by a nationwide network of high quality YAlvlAHA authorized Service Centers. providing prompt. courteous and professional service. For referral to your nearest authorized Y AMAHA ~~-<t.