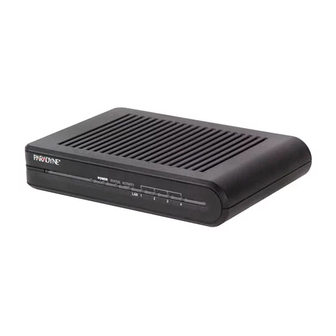
Paradyne 6210 User Manual
Bridge and bridge/router
Hide thumbs
Also See for 6210:
- User manual (46 pages) ,
- Quick installation instructions (1 page) ,
- Quick installation instructions (2 pages)

Related Manuals for Paradyne 6210


Summary of Contents for Paradyne 6210
- Page 1 6210 Bridge and 6211 Bridge/Router User’s Guide Document No. 6210-A2-GB23-00 January 2005...
- Page 2 ADSL/R, Connect to Success, Hotwire Connected, JetFusion, JetVision, MicroBurst, PacketSurfer, Quick Channel, Reverse Gateway, Spectrum Manager, and StormTracker are trademarks of Paradyne Corporation. All other products or services mentioned herein are the trademarks, service marks, registered trademarks, or registered service marks of their respective owners. January 2005 6210-A2-GB23-00...
- Page 3 The authority to operate this equipment is conditioned by the requirement that no modifications will be made to the equipment unless the changes or modifications are expressly approved by the responsible party. 6210-A2-GB23-00 January 2005...
- Page 4 If the site has specially wired alarm equipment connected to the telephone line, ensure the installation of the modem does not disable the alarm equipment. If you have questions about what will disable alarm equipment, consult your Telephone Company or a qualified installer. January 2005 6210-A2-GB23-00...
- Page 5 Date of Issue: 4/2/2004 Paradyne Corporation, located at the above address, hereby certifies that Model Numbers 6210-A2-200 and 6211-A2-200, bearing labeling identification number US:AW2DL03B6381-AX, comply with: the Federal Communications Commission's ("FCC") Rules and Regulations 47 CFR Part 68, the Administrative Council on Terminal Attachments ("ACTA")-adopted technical criteria TIA-968-A, "Telecommunications - Telephone Terminal...
- Page 6 This is a Class B product based on the standard of the Voluntary Control Council for Interference from Information Technology Equipment (VCCI). If this is used near a radio or television receiver in a domestic environment, it may cause radio interference. Install and use the equipment according to the instruction manual. January 2005 6210-A2-GB23-00...
-
Page 7: Table Of Contents
Definitions ..........Features of the 6210 Bridge and 6211 Bridge/Router ... . . - Page 8 LEDs Blink in a Sequential Pattern ......January 2005 3-10 3-12 3-13 3-13 3-15 3-15 3-17 3-18 3-19 3-19 3-20 3-20 3-22 3-23 3-23 3-24 3-25 3-26 3-27 3-29 3-29 3-30 3-30 3-31 3-32 3-33 3-34 3-35 3-36 6210-A2-GB23-00...
- Page 9 What is a Router? ........
- Page 10 Contents January 2005 6210-A2-GB23-00...
-
Page 11: About This Guide
About This Guide Document Purpose and Intended Audience This guide contains detailed information about the 6210-A3 bridge and 6211-A3 router. It is intended for all users of the bridge or router. Document Summary Section Chapter 1, Introduction Chapter 2, Hardware... -
Page 12: Product-Related Documents
About This Guide Product-Related Documents Complete documentation for Paradyne products is available online at www.paradyne.com. Select Support → Technical Manuals. To order a paper copy of a Paradyne document, or to speak with a sales representative, please call 1-727-530-2000. January 2005 6210-A2-GB23-00... -
Page 13: Introduction
(“downstream”) than it does for information going to the Internet from your PC (“upstream”). Both the 6210 and 6211 contain an ADSL2+ modem, so they often are referred to as modems in this manual. Features of the 6210 Bridge and 6211 Bridge/Router... -
Page 14: System Requirements
LAN (Local Area Network) port: This is used to connect to Ethernet network devices, such as a PC, hub, switch, or router. USB (Universal Serial Bus port): Connects to a PC's serial port. The modem supports Windows-based PCs using an RNDIS driver (included on the CD). -
Page 15: Led Description (Front Panel)
USB LED: The USB LED serves two purposes. If the LED is continuously lit, the USB interface is successfully connected to a device through the LAN port. If the LED is flickering, it is an indication of network activity. 6210-A2-GB23-00 January 2005 1. Introduction... -
Page 16: Packing List
1. Introduction Packing List Your modem is shipped with the following: Power adapter Ethernet cable (RJ45, straight-through wiring) Phone cable (RJ11) USB cable CD-ROM containing this manual and USB drivers January 2005 6210-A2-GB23-00... -
Page 17: Hardware Installation And Pc Setup
Found New Hardware Wizard. Follow the instructions under — Alternatively, you can use the included Ethernet cable to connect your computer directly to the modem. Attach one end of the supplied Ethernet 6210-A2-GB23-00 Chapter 3, Using the Web Interface Windows USB Driver Installation January 2005 for modem on page 2-3. - Page 18 The supplied power adapter may look different than the one illustrated here. 5. Turn on your PC any other LAN devices, such as hubs or switches. Figure 2-1. Hardware Installation January 2005 6210-A2-GB23-00...
-
Page 19: Configuring Your Pc
Windows will detect new hardware and the Found New Hardware Wizard will pop up. To install the USB driver: Procedure 1. Choose "Install from a list or specific location" and click on Next Figure 2-2. 6210-A2-GB23-00 2. Hardware Installation and PC Setup Windows USB Driver Found New Hardware Wizard January 2005... - Page 20 3. The Wizard will ask you to confirm the hardware installation. Choose Continue Anyway. Windows will then install the supplied USB driver on your PC (Figure 2-4 Figure 2-4. New Hardware Installation Options Figure 2-5). Hardware Installation Confirmation January 2005 (Figure 2-3). 6210-A2-GB23-00...
- Page 21 2. Hardware Installation and PC Setup Figure 2-5. Hardware Installation 4. Click on Finish to close the Wizard at the completion page (Figure 2-6). Figure 2-6. Completing the Found New Hardware Wizard 6210-A2-GB23-00 January 2005...
-
Page 22: Configuring Your Pc's Ip Address
3. In the LAN or High-Speed Internet window, right-click on the icon corresponding to your network interface card (NIC) and select Properties. (Often this icon is labeled Local Area Connection). The Local Area Connection dialog box is displayed with a list of currently installed network items. January 2005 6210-A2-GB23-00... - Page 23 4. Ensure that the check box to the left of the item labeled Internet Protocol (TCP/IP) is checked, and click on Properties. Figure 2-7. Network Connections in Windows XP Figure 2-8. Local Area Connection Properties in Windows XP 6210-A2-GB23-00 January 2005...
-
Page 24: Windows 2000
The Local Area Connection Properties dialog box is displayed with a list of currently installed network components. If the list includes Internet Protocol (TCP/IP), the protocol has already been enabled, in which case you can skip Step TCP/IP Properties in Windows XP January 2005 6210-A2-GB23-00... -
Page 25: Windows Me
5. In the Select Network Component Type dialog box, select Protocol, and then click on Add. 6. Select Microsoft in the Manufacturers box. 7. Select Internet Protocol (TCP/IP) in the Network Protocols list, and then click on OK. 6210-A2-GB23-00 2. Hardware Installation and PC Setup January 2005 Step... -
Page 26: Windows 95
8. After restarting your PC, open the Control Panel window, and then click on the Network icon. 9. Select the network component labeled TCP/IP, and then click on Properties. If you have multiple TCP/IP listings, select the listing associated with your network card or adapter. 2-10 Step January 2005 6210-A2-GB23-00... -
Page 27: Windows Nt 4.0
2 and 254) in the IP Address field. Type 255.255.255.0 in the Subnet Mask field. 11. Click on OK twice to confirm and save your changes, and then close the Control Panel. 6210-A2-GB23-00 2. Hardware Installation and PC Setup Step January 2005... - Page 28 2. Hardware Installation and PC Setup 2-12 January 2005 6210-A2-GB23-00...
-
Page 29: Using The Web Interface
If you see a login redirection screen when you access the web interface, verify that JavaScript support is enabled in your browser. Also, if you do not get the screen shown in temporary Internet files. 6210-A2-GB23-00 Login Screen Chapter 2, Hardware Installation and PC Figure... -
Page 30: Home Page
The footer displays modem status, connection information, and other useful information. Click on Log Out to close the session, or Refresh to update the status display. (Figure 3-2) that appears after the log in screen is the Home page. Home Page January 2005 6210-A2-GB23-00... -
Page 31: Setup
Note that the Apply button temporarily saves changes you make. To make changes permanent, click on Tools (at the top of the page) and select System Commands. At the System Commands page, click on Save All. 6210-A2-GB23-00 Setup Page January 2005 3. -
Page 32: Configuring The Wan
Since multiple users can use the modem, the modem can simultaneously support multiple connection types. You must set up different profiles for each connection. The 6211 router supports the following protocols: DHCP PPPoA (RFC 2364) PPPoE (RFC 2516) Static Bridged The 6210 supports only bridged connections. January 2005 6210-A2-GB23-00... -
Page 33: New Connection
Username - The username for the PPPoE access. This is provided by your DSL service provider or your ISP. Password - The password for the PPPoE access. This is provided by your DSL service provider or your ISP. 6210-A2-GB23-00 Firewall/NAT Services January 2005 3. Using the Web Interface... - Page 34 PPP MTU by changing TCP Maximum Segment Size to the PPP MTU. Debug - Enables PPPoE connection debugging facilities. See page 3-31. PPP Unnumbered – Specifies that the calling and answering modems will not request IP addresses. Figure 3-4. PPPoE Connection Setup January 2005 Remote Log 6210-A2-GB23-00...
-
Page 35: Pppoa Connection Setup (6211 Only)
— CDVT (Cell Delay Variation Tolerance) Following is a description of the different options: Username – The username for the PPPoA access. This is provided by your DSL service provider or your ISP. 6210-A2-GB23-00 Firewall/NAT Services January 2005 3. Using the Web Interface... - Page 36 PPP Unnumbered – Specifies that the calling and answering modems will not request IP addresses. Figure 3-5. To complete the connection you must now click the Apply button. The Apply button will temporarily save this connection. To make the change permanent, click on PPPoA Connection Setup January 2005 Remote Log 6210-A2-GB23-00...
-
Page 37: Static Connection Setup (6211 Only)
9. Select the quality of service (QOS). Leave the default value if your ISP did not provide this information. 10. Set the mode to Bridged or Routed as instructed by your ISP. 6210-A2-GB23-00 Firewall/NAT Services January 2005 3. Using the Web Interface... -
Page 38: Dhcp Connection Setup (6211 Only)
VLAN ID and priority. 6. Select NAT and Firewall if you want them active for this connection. Firewall and NAT services must be enabled. See 3-10 Static IP Connection Setup Firewall/NAT Services January 2005 on page 3-18. 6210-A2-GB23-00... - Page 39 To make the change permanent, click on Tools (at the top of the page) and select System Commands. At the System Commands page, click on Save All. 6210-A2-GB23-00 DHCP Connection Setup January 2005 3. Using the Web Interface...
-
Page 40: Bridged Connection
ISP did not provide this information. Depending on the QoS you select, you may also enter: — PCR (Peak Cell Rate) — SCR (Sustainable Cell Rate) — MBS (Maximum Burst Size) — CDVT (Cell Delay Variation Tolerance) Figure 3-8. 3-12 Figure 3-8). Bridged Connection Setup January 2005 6210-A2-GB23-00... -
Page 41: Modify An Existing Connection
The Apply button will temporarily save these settings. To make the change permanent, click on Tools (at the top of the page) and select System Commands. At the System Commands page, click on Save All. 6210-A2-GB23-00 January 2005 3. Using the Web Interface... - Page 42 3. Using the Web Interface Figure 3-9. Modem Setup 3-14 January 2005 6210-A2-GB23-00...
-
Page 43: Configuring The Lan
LAN Group 1 and added to LAN Group 2 for separate configuration. Enable/Disable DHCP By default, the router has DHCP server (LAN side) disabled. If you already have a DHCP server running on your network, do not enable the router’s DHCP server. To enable DHCP: Procedure 1. - Page 44 — Specify an End IP address. The End IP Address is the last address the DHCP server can issue. The ending address cannot exceed a subnet limit of 254. The maximum IP address for a router using the default address is 192.168.1.254. If the DHCP server runs out of DHCP addresses, users will not get access to network resources.
-
Page 45: Changing The Modem's Ip Address
The Apply button will temporarily save these settings. To make the change permanent, click on Tools (at the top of the page) and select System Commands. At the System Commands page, click on Save All. 6210-A2-GB23-00 Figure 3-10, LAN Configuration Screen. -
Page 46: Firewall/Nat Services
Figure 3-12. Firewall/NAT Services Screen The Apply button will temporarily save this setting. To make the change permanent, click on Tools (at the top of the page) and select System Commands. At the System Commands page, click on Save All. 3-18 January 2005 6210-A2-GB23-00... -
Page 47: Advanced
Advanced Your modem supports certain advanced features. For basic router functionality, you do not need to utilize these advanced features. The features help with routing, security, port configuration, and plug and play capability. UPnP (6211 Only) UPnP NAT and Firewall Traversal allow traffic to pass through the modem for applications using the UPnP protocol. -
Page 48: Sntp (6211 Only)
WAN IP address into a LAN IP address. You can use the LAN Clients screen to reserve an IP address for a DHCP client. LAN Clients (6211 Only) 3-20 on page 3-23. January 2005 6210-A2-GB23-00... - Page 49 5. The Apply button will temporarily save these settings. To make the change permanent, click on Tools and select System Commands. On the System Commands page, click on Save All. Figure 3-15. Port Forwarding: Netmeeting 6210-A2-GB23-00 January 2005 3. Using the Web Interface 3-21...
-
Page 50: Ip Filters (6211 Only)
5. Click on Apply. The Apply button will temporarily save these settings. To make the change permanent, click on Tools and select System Commands. On the System Commands page, click on Save All. Figure 3-16. IP Filters 3-22 January 2005 6210-A2-GB23-00... -
Page 51: Lan Clients (6211 Only)
2. Click in the Disable check box to prohibit traffic between the LANs. 3. The Apply button will temporarily save these settings. To make the change permanent, click on Tools and select System Commands. On the System Commands page, click on Save All. 6210-A2-GB23-00 January 2005 3. Using the Web Interface 3-23... -
Page 52: Bridge Filters
To delete a filter rules, select the filter rule entry to delete in the Delete selection box. Note that multiple deletions are possible. Once all the desired filter rules are selected for deletion, click on the Apply button. The Select All select box can also 3-24 Figure 3-19, Bridge Filters. January 2005 6210-A2-GB23-00... -
Page 53: Multicast (6211 Only)
This option enables the IGMP proxy, which allows NAT clients to participate in IGMP multicast groups. It should only be enabled if NAT is also enabled. To enable Multicasting: Procedure 1. From the Home screen, click on Advanced. 2. Under Advanced, select Muliticast. 6210-A2-GB23-00 January 2005 3. Using the Web Interface 3-25... -
Page 54: Static Routing (6211 Only)
IP address is the network portion, and which portion is the host portion. For a full Class C Subnet, the Subnet Mask is 255.255.255.0. 4. Specify the Gateway address. This is the IP address of the device that allows contact between the modem and the remote network or host. 3-26 January 2005 6210-A2-GB23-00... -
Page 55: Dynamic Routing (6211 Only)
RIP v2 format using multicasting. 4. Specify the Direction. This determines the direction that RIP routes will be updated. Selecting In means that the router will only incorporate received RIP information. Selecting Out means that the router will only send out RIP information. - Page 56 3. Using the Web Interface 5. The Apply button will temporarily save these settings. To make the change permanent, click on Tools and select System Commands. On the System Commands page, click on Save All. Figure 3-22. Dynamic Routing 3-28 January 2005 6210-A2-GB23-00...
-
Page 57: Access Control (6211 Only)
Tools and select System Commands. On the System Commands page, click on Save All. Figure 3-23. Access Control Log Out Click on Log Out to close the session. 6210-A2-GB23-00 Firewall/NAT Services on page 3-18) and enabled on that WAN January 2005 3. Using the Web Interface... -
Page 58: Tools
Connectivity to the unit will be lost. You can reconnect after the unit reboots. Restore Defaults: Use this button to restore factory default configuration. Connectivity to the unit will be lost. You can reconnect after the unit reboots. Figure 3-24. System Commands 3-30 January 2005 6210-A2-GB23-00... -
Page 59: Remote Log
Error Warning Notice Info Debug To forward logging information, click on Tools and select Remote Log. 6210-A2-GB23-00 defines the different severity levels. Severity Levels Description System panic or other condition that causes the modem to stop functioning. Conditions that require immediate correction, such as a corrupted system database. -
Page 60: User Management
If you forget your password, you can press and hold the reset to factory defaults button for 10 seconds. The modem will be reset to its factory default configuration and all custom configurations will be lost. Figure 3-25. User Management 3-32 January 2005 6210-A2-GB23-00... -
Page 61: Update Gateway
The firmware upgrade should take less that 5 minutes to complete. If it takes longer than 5 minutes, something has gone wrong. Caution: Do not remove power from the modem during the firmware upgrade procedure. Figure 3-26. Update Gateway 6210-A2-GB23-00 January 2005 3. Using the Web Interface 3-33... -
Page 62: Ping Test
3. Using the Web Interface Ping Test Once you have your router configured, it is a good idea to make sure you can ping the network. If you have your PC connected to the router via the default DHCP configuration, you should be able to ping the network address 192.168.1.2. If your ISP has provided their server address you can try to ping that address. -
Page 63: Modem Test
Before running this test, make sure you have a valid DSL link; if the DSL link is not connected, this test will always fail. Also, the DSLAM must support this feature. Not all DSLAMs have OAM F4 and F5 support. Figure 3-28. Modem Test 6210-A2-GB23-00 January 2005 3. Using the Web Interface 3-35... -
Page 64: Status
DHCP Clients – Select to view the list of DHCP clients. Modem Status – Select to view the Status and Statistics of your broadband (DSL) connection. Product Information – Select to view the modem's driver and run-time information, as shown in 3-36 Figure 3-30. January 2005 6210-A2-GB23-00... - Page 65 3. Using the Web Interface Figure 3-30. Product Information System Log – Select to view all logged information. Depending upon the severity level, this logged information will generate log reports to a remote host (if remote logging is enabled). 3-37 6210-A2-GB23-00 January 2005...
- Page 66 3. Using the Web Interface 3-38 January 2005 6210-A2-GB23-00...
-
Page 67: Troubleshooting
Make sure that it is within the same 192.168.1.x subnet. Your PC's subnet mask must match the modem's subnet mask. The modem has a default subnet mask of 255.255.255.0. 6210-A2-GB23-00 Chapter 2, Hardware Installation and PC Configuring Your PC January 2005 Setup. -
Page 68: Leds Blink In A Sequential Pattern
2. Verify that the phone line is connected directly to the wall and to the line input on the modem. If the phone line is connected to the phone side of the modem or you have a splitter installed on the phone line, the Status LED will not come January 2005 6210-A2-GB23-00... -
Page 69: What Is A Firewall?
Normal servers like these are blocked from working by the NAT functionality. The solution is to isolate the single local computer into a DMZ. This makes the single computer look like it is directly on the Internet, and others can access this machine. 6210-A2-GB23-00 January 2005... -
Page 70: What Is A Router?
If your machine can reach all stations on the same subnet (usually a building or a sector within a building), but cannot communicate outside of this area, it is usually because of an incorrectly configured default gateway. January 2005 6210-A2-GB23-00... - Page 71 Purpose and Intended Audience, v Summary, v Driver Installation, 2-3 DSL Link LED Always Off, 4-2 Continues to Blink, 4-2 Dynamic Routing, 3-27 6210-A2-GB23-00 EMI Notice Canada, D Japan, E end-to-end test, 3-35 FCC Part 15 Declaration, B Features, 1-1...
- Page 72 LED, 1-3 User Management, 3-32 Username, 3-1 Configuring, 3-4 Connection, 3-3 WAN Bridge, 3-3 Warranty, Sales, Service, and Training Information, A Windows 2000, 2-8 95, 98, 2-10 ME, 2-9 NT 4.0, 2-11 USB Driver Installation, 2-3 XP, 2-6 January 2005 6210-A2-GB23-00...