Xerox 8830 Operator's Manual
Folder
Hide thumbs
Also See for 8830:
- Service manual (629 pages) ,
- User manual (128 pages) ,
- System introduction (98 pages)
Table of Contents
Advertisement
Quick Links
Advertisement
Table of Contents

Subscribe to Our Youtube Channel
Related Manuals for Xerox 8830


Summary of Contents for Xerox 8830
- Page 1 88XX Series Folder Operator Manual D692103X Rev 1.6...
-
Page 2: Table Of Contents
Table of Contents Table of Contents...1 Notes ...2 Safety Notes ...3 Folder Overview ...4 Reference Information ...4 Folded Print Dimensions...4 Rotation...4 Media ...4 Printing...5 Feeding...5 Title Block Input Position...5 Folded Package Output Orientation...6 Output Style ...6 Folding Style Definitions...6 Reference Symbols ...7 Folder Description ...8 Folder Options ...9 Sizes Reference Chart ...10... -
Page 3: Notes
Notes _______________________________________________________________________________________________________________________ _______________________________________________________________________________________________________________________ _______________________________________________________________________________________________________________________ _______________________________________________________________________________________________________________________ _______________________________________________________________________________________________________________________ _______________________________________________________________________________________________________________________ _______________________________________________________________________________________________________________________ _______________________________________________________________________________________________________________________ _______________________________________________________________________________________________________________________ _______________________________________________________________________________________________________________________ _______________________________________________________________________________________________________________________ _______________________________________________________________________________________________________________________ _______________________________________________________________________________________________________________________ _______________________________________________________________________________________________________________________ _______________________________________________________________________________________________________________________ _______________________________________________________________________________________________________________________ _______________________________________________________________________________________________________________________ _______________________________________________________________________________________________________________________ _______________________________________________________________________________________________________________________ _______________________________________________________________________________________________________________________ _______________________________________________________________________________________________________________________ _______________________________________________________________________________________________________________________ _______________________________________________________________________________________________________________________ _______________________________________________________________________________________________________________________ _______________________________________________________________________________________________________________________ _______________________________________________________________________________________________________________________ _______________________________________________________________________________________________________________________ _______________________________________________________________________________________________________________________ _______________________________________________________________________________________________________________________ September 2001 88XX Series Folder Operator Manual 2... -
Page 4: Safety Notes
• If the folder is producing unusual noises or odors • If the folder or the cabinet has been damaged If you need additional safety information concerning the folder or XEROX supplied materials, call your authorized XEROX dealer. 88XX Series Folder Operator Manual 3... -
Page 5: Folder Overview
100gsm) paper. Paper that does not meet this specification will result in poor folding performance and an increased occurrence of jams. All non-Bond (ordinary paper) Media delivered by the printer will not be folded, but it will be automatically bypassed and stacked on the bridge. -
Page 6: Printing
Printing The prints exit from the printer in two different ways. The term 'leading' is used for the print edge that exits the printer into the Bridge: LEL (Long Edge Leading) SEL (Short Edge Leading) 111128 Feeding After the Bridge Transport (with or without rotation), the copy will be fed into the folder in two ways. -
Page 7: Folded Package Output Orientation
Folded Package Output Orientation The Title block Input Position will define the Folded Package Output Orientation. All prints entering the folder with the Title block in positions 1 and 2 will be delivered in the output bin with the title page “Face Down”. -
Page 8: Reference Symbols
Reference Symbols Folder Messages To differentiate the messages of the Numeric Control Panel and the messages of the Alphanumeric Control Panel, they will appear in this manual with the following different characters: Numeric Control Panel “IDLE” messages: Alphanumeric Control Panel “IDLE” message: Acronyms Acronyms are used throughout this documentation to denote common terminology. -
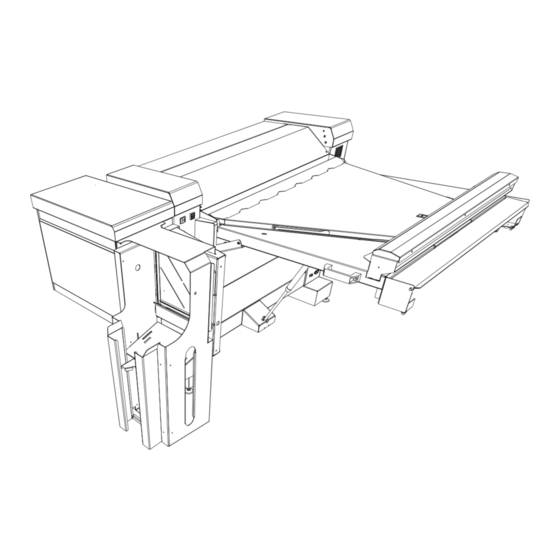
Page 9: Folder Description
Folder Description 111328 NON-FOLDED PRINT DRIVE Feeds the print over the bridge in the no-fold operation BRIDGE DOOR Opens to remove media jams. Unfolded prints are delivered to the top surface. CONTROL PANEL Used to select folding features and diagnostic September 2001 RESET BUTTON ON/OFF BUTTON... -
Page 10: Folder Options
Folder Options 112674 OPTIONAL BRIDGE ROTATION Provides a 90° degree rotation of A2/C size ALPHANUMERIC CONTROL OPTIONAL PUNCHING DEVICE Punching of three or four holes in the binding margin OPTIONAL SECOND BIN September 2001 88XX Series Folder Operator Manual 9... -
Page 11: Sizes Reference Chart
Sizes Reference Chart Ansi Architectural E - 44x34inches E - 48x36inches D - 34x22inches D - 36x24inches C - 22x17inches C - 24x18inches B - 17x11inches B - 18x12inches A - 11x8.5inches A - 12x9inches September 2001 Ericsson A0 - 1189x841mm A0 - 1189x841mm A1 - 841x594mm A1 - 841x594mm... -
Page 12: Folding Styles
Folding Styles Program 185 Message Dimensions Appearance Face Up a=185mm U1-01 b=297mm Program 185+25 Message Dimensions Appearance Face Up a=185mm U1-02 b=297mm 185+25 m=25mm Program 190 Message Dimensions Appearance Face Up a=190mm U1-03 b=297mm September 2001 Message Dimensions Face Down U1-04 190+20 Message Dimensions... - Page 13 Program AFNOR Message Dimensions Appearance Face Up a=297/210 b=210/297 U1-07 only perfect AFNOR sizes±2mm Program ERICSSON Message Dimensions Appearance a=190mm U1-08 b=297mm ERICSSON m=20mm Program FRENCH Message Dimensions Appearance Face Up a=210mm U1-09 b=300mm FRENCH September 2001 Message Dimensions Face Down U1-10 CUSTOM Message Dimensions...
- Page 14 Program 8 ½” Message Dimensions Appearance Face Up U1-13 a=8 ½” b=11” or ## 8 ½” Program 9” Message Dimensions Appearance Face Up a=9” U1-14 b=12” or ## 9” Program 11” WALLET Message Dimensions Appearance Face Up a=11 or 8 ½” U1-15 b=8 ½...
-
Page 15: Operating Hints
Operating Hints Before printing, be sure that: − The media rolls are positioned correctly in the center of the IOT. − The lead edges on the paper rolls are straight. If necessary, trim the edge. − The doors are not opened, and that the folding program on the folder is not changed during folding. -
Page 16: Numeric Control Panel
Folder. Located on the back panel of the Folder, it contains a red four-digit display, three buttons and two LED indicators and is available on all folders. [See the 8825/8830 Printer Operator Manual for Finishing Communications using the Printer User Interface.] The buttons are used by the Operator to select the folding program and by Service while in the diagnostic mode. -
Page 17: Switching On The Folder
Switching on the Folder At power on, the Firmware release will be displayed for two seconds: − as a code in the Numeric Control Panel [RX.XX ] − as message in the Alphanumeric Control Panel “REV. X.XX“ When 2 - 3 seconds has expired, the control panels will show either “idle”, an alarm status or (if the system has already submitted a job), the program selected. -
Page 18: Operator Menu
Operator Menu Without any selection in the AccXES Client Tools, the setting in this menu are considered as default for the folding process. To access the first level of the menu structure, set the Folder in “Pause Mode”. Press the “Pause” key on the Alphanumeric Control Panel, or press “Enter”... -
Page 19: Fan Programs Submenu
The “Custom” folding program can be selected by the operator but its values, (fan folding depth, cross folding depth and margin), can be changed only by the Xerox Customer Service Engineer. 4. Select “EXIT” [ u1.00 ] to rise one level... -
Page 20: Cross Programs Submenu
Cross Programs Submenu Use this submenu to select the cross folding options. 1. Go to the “Cross Programs” submenu in the Numeric Control Panel in the Alphanumeric Control Panel CROSS PROGRAMS 2. The default option is shown : in the Numeric Control Panel in the Alphanumeric Control Panel u 20 2 Lower right dot... -
Page 21: Face Submenu
Face Submenu Use this menu to obtain the folded prints Face Up or Face Down in the print tray. 1. Go to the “Face” submenu. in the Numeric Control Panel in the Alphanumeric Control Panel 2. The default option is shown : in the Numeric Control Panel in the Alphanumeric Control Panel u 30 1... -
Page 22: Stacker Submenu
Stacker Submenu Use this submenu to define how the folder organizes the prints in the output bins. 1. Go to the “Stacker” submenu. in the Numeric Control Panel in the Alphanumeric Control Panel 2. The default option is shown: in the Numeric Control Panel in the Alphanumeric Control Panel u 40 1 Lower right dot... -
Page 23: Punching Submenu
Punching Submenu Use this submenu to activate the punching system if it is available. 1. Go to the “Punching” submenu. in the Numeric Control Panel in the Alphanumeric Control Panel 2. The default option is shown. in the Numeric Control Panel in the Alphanumeric Control Panel u5 0 2 PUNCHING OFF... -
Page 24: Manual Feed Submenu
Manual Feed Submenu Use this submenu to set the size and the title block location of the print that has to be manually fed. 1. Go to the “Manual Feed” submenu. in the Numeric Control Panel in the Alphanumeric Control Panel 2. -
Page 25: Counter Submenu
Counter Submenu Use this submenu to view the number of copies folded since the last power on. 3. Go to the “Counter” submenu. in the Numeric Control Panel in the Alphanumeric Control Panel 4. Enter the last level of the menu to see: −... -
Page 26: Manual Feed Procedure
Manual Feed Procedure The following Manual Feed Mode sequence describes the detailed steps to be used, and where to find supporting information: 1. Refer to Fan Programs Submenu Cross Programs Submenu select the folded output package style and to return to complete the set up process*. - Page 27 “Enter”. Let the display show “FEED IN” message, which allows the Bridge Entry Flap to go down. 5. Lift the bridge level to the top of the printer as shown in the picture. The safety lever will support it.
-
Page 28: Folding Using Host Or Scanner
Client Tools provide this information automatically through a serial communications interface. Refer to the “XES Synergix 8825/8830/8850 Controller Setup Manual for Firmware x.x” for more detail on how it works. All the selections made on any of the drivers listed above, will override the selection made on the Web Printer Manager Tool (Web PMT). -
Page 29: Using The Rtl Drivers
1. Open any application. Open the document to be printed and folded. 2. Access to the Print menu, which is usually inside the file pulldown menu. Select the 88XX Printer. 3. Click on the “Property” button to set the options for the 88XX Printer. -
Page 30: Using The Scanner
Using the Scanner This procedure considers a standard A1/D size, without scale modification or other scanner options. Refer to the “XES Synergix 8825/8830/8850/8855 Digital Solution User Guide” for more details on Scanner usage. 1. Get the A1 ISO document. 2. Select mode “Copier” on the Scanner Keyboard. - Page 31 Selecting “ Always On,” with folding methods without margin, does not activate the punching device. The activation/deactivation of the punching works only if on the folder control panel the “Punching On” option is selected. − Title Block Location Choose the location of the title block. With this information, the AccXES will provide a correct document feeding orientation to satisfy the folding requests.
-
Page 32: Scanner Job Templates
The “Job Template” option is used to simplify the finisher use. All of the finisher settings can be stored in nine different Job Templates. (refer to the “XES Synergix 8825/8830/8850/8855 Digital Solution User Guide” for details). By recalling a template number, all of the selections that are stored (Folding method, Cross, Punch, Title Block Location…) are... -
Page 33: Accxes Client Tools
AccXES Client Tools Sometimes the document exits the printer with a different orientation from the orientation on the screen. Using this procedure, is possible to understand how the native application produces the print files and creates files that respect the desired orientation. - Page 34 Similar Document Job This procedure describes the steps to print and fold four ISO documents. Only the finishing options are considered; other printing options are explained in the “AccXES Client Tools User Guide”. 1. Open AccXES Client Tools. 2. Insert four documents, for example, A0, A1, A2, A3. September 2001 3.
- Page 35 − Choose Sort Bin to select where the folded print must be stacked. The selection “default” lets the folder use the setting defined in Stacker Submenu, which is in the folder control panel. With the selection “Bin #,” the print will be delivered in the specified bin.
-
Page 36: Advanced Settings
3. Click on the Job Options icon and choose the Finishing Tab to set the folder options. − Choose the Folder Type. − Choose the Folding Method “AFNOR” − Choose the Sort Bin. − Choose the Title Block “Lower Right” The document A0 AFNOR, in landscape orientation, has the Title Block in Upper Right corner. -
Page 37: Suspending The Print Queue
ACT. September 2001 To do this, select the “Printer Queue” tab in ACT. Select the second toolbar button to update the print que status. Select (highlight) all of the listed files. Select the Delete toolbar button to remove them from the print queue. -
Page 38: Notes
Notes _______________________________________________________________________________________________________________________ _______________________________________________________________________________________________________________________ _______________________________________________________________________________________________________________________ _______________________________________________________________________________________________________________________ _______________________________________________________________________________________________________________________ _______________________________________________________________________________________________________________________ _______________________________________________________________________________________________________________________ _______________________________________________________________________________________________________________________ _______________________________________________________________________________________________________________________ _______________________________________________________________________________________________________________________ _______________________________________________________________________________________________________________________ _______________________________________________________________________________________________________________________ _______________________________________________________________________________________________________________________ _______________________________________________________________________________________________________________________ _______________________________________________________________________________________________________________________ _______________________________________________________________________________________________________________________ _______________________________________________________________________________________________________________________ _______________________________________________________________________________________________________________________ _______________________________________________________________________________________________________________________ _______________________________________________________________________________________________________________________ _______________________________________________________________________________________________________________________ _______________________________________________________________________________________________________________________ _______________________________________________________________________________________________________________________ _______________________________________________________________________________________________________________________ _______________________________________________________________________________________________________________________ September 2001 88XX Series Folder Operator Manual 37... -
Page 39: Jam Clearance Procedures
Jam Clearance Procedures Message Display Messages will be displayed on the Alphanumeric Control Panel, or a code will be displayed on the Numeric Control Panel. The message will scroll from right to left. Alarm messages and the required actions are listed below. a-01 DOOR OPEN Close door. - Page 40 Error messages and the required actions are listed below. e-01 ENTRY ALARM 1 Remove the paper jam between the printer exit and the folder entry. Press “Reset”. e-02 ENTRY ALARM 2 e-03 BRIDGE ALARM Remove the paper from the bridge and press “Reset”. Refer to the Clearing Bridge Jams procedure.
-
Page 41: Introduction To Jam Clearance Procedures
To let down the bridge: 1. Release the bridge safety lever. 2. Lower the bridge to the horizontal position. 3. Make sure that the bridge engages the printer brackets. 111378 88XX Series Folder Operator Manual 40 position, the bridge could... -
Page 42: Clearing Bridge Jams
Clearing Bridge Jams When the folder emits a single alarm tone and stops, there is probably a strip of media stuck on the bridge. 112619 To clear the jam: 1. Open the bridge door (A). 2. Insert the safety lever (B). 3. -
Page 43: Clearing Upper And Lower Pocket Jams
Clearing Upper and Lower Pocket Jams If the jam cannot be cleared using the Fan Folder Jam Clearance Procedure, switch Off the Folder and open the upper or the lower pockets. Clearing Upper Pocket Jams 112611 1. Raise the upper pocket cover (A). 2. -
Page 44: Clearing Mobile Roller Jams
Clearing Mobile Roller Jams When a media jam occurs near the Mobile Pinch Roller, the Mobile Pinch Roller can be removed as follows: 112617 1. Switch off the Folder. 2. Open the door (B) and remove the conveyor guide .(A) September 2001 112501 Unscrew the Adjusting Pin .(D) -
Page 45: Clearing Cross Folder Jam
Clearing Cross Folder Jam Only for folders with TAG3 If a jam occurs in the cross folder and it is not clearable with the Manual Eject Procedure, it is possible to remove the knife group and one of the entry shafts to access to the jammed print. 112821/2/3 1. - Page 46 3. Check that the harnesses coming from the hole (D) are free to follow the Knife Assembly movement and lay all of the group down on the floor. 112824 September 2001 4. Try to remove the jam. If not possible, operate on the spring support (E) to remove the entry shaft.
-
Page 47: Problem Solving
A. Follow the alarm and jam clearance procedure. A. Follow the instructions in the 8830 Printer Operator Manual to reload the media. A. Check the job for a mistake regarding the Title Block corner indication. B. Check the job for: •... - Page 48 (Wallet, Afnor) are always stacked in the second bin. A. Probably a job queue is stopped or waiting to be sent to the printer. SOLUTION A. Scan A2/C size LEL with Title Block leading edge and print LEL. Sheet delivered always Face Down output Landscape.
-
Page 49: Miscellaneous Information
Miscellaneous Information Specifications Space Requirement With 8830/8825 Printer A (Depth) = 2130 mm / 83 ¾ inches A (Depth) = 2610 mm / 102 ¾ inches B (Height) = 1030 mm / 40 ½ inches B (Height) = 1030 mm / 40 ½ inches... -
Page 50: Folding
Rotation: • The Rotation enables the Folder to rotate the A2/C size. This allows the folder to be combined with a printer that has three media rolls. It can then make five standard sizes without the need to replace the media roll. -
Page 51: Fcc Compliance In The Usa
FCC Compliance in the USA WARNING: This equipment has been tested and found to comply with the limits for a Class A computing device pursuant to Subpart J of Part 15 FCC Rules. This equipment generates, uses, and can radiate radio frequency energy. If it is not installed and used in accordance with the instruction manual, it may cause interference with radio communications.
Need help?
Do you have a question about the 8830 and is the answer not in the manual?
Questions and answers