Table of Contents
Advertisement
Quick Links
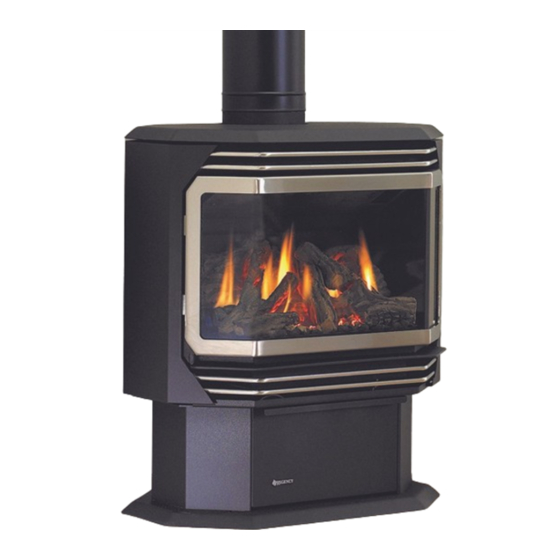
Ultimate™ U39E Freestanding Gas Stove
MODELS: U39E-NG12 Natural Gas
WARNING
FIRE OR EXPLOSION HAZARD
Failure to follow safety warnings exactly could result in serious
injury, death, or property damage.
- Do not store or use gasoline or other flammable vapors and liquids in the vicinity of this or any
other appliance.
- WHAT TO DO IF YOU SMELL GAS
• Do not try to light any appliance.
• Do not touch any electrical switch: do not use any phone in your building.
Leave the building immediately.
• Immediately call your gas supplier from a neighbour's phone. Follow the gas supplier's
instructions.
• If you cannot reach your gas supplier, call the fire department.
Installation and service must be performed by a qualified installer, service agency or the gas
supplier.
Tested by:
Certified to/Certifié pour: CSA 2.17-2017
2019
920-137e
FPI FIREPLACE PRODUCTS INTERNATIONAL LTD. 6988 Venture St., Delta, BC Canada, V4G 1H4
U39E-LP12 Propane
Installer: Please complete the details on the back cover
ANSI Z21.88-
and leave this manual with the homeowner.
Homeowner: Please keep these instructions for future reference.
CSA 2.33-2019
Owners &
Installation Manual
www.regency-fire.com
08.23.22
Advertisement
Table of Contents

Related Manuals for Regency Ultimate U39E-NG12


Summary of Contents for Regency Ultimate U39E-NG12
- Page 1 Owners & Ultimate™ U39E Freestanding Gas Stove Installation Manual www.regency-fire.com MODELS: U39E-NG12 Natural Gas U39E-LP12 Propane WARNING FIRE OR EXPLOSION HAZARD Failure to follow safety warnings exactly could result in serious injury, death, or property damage. - Do not store or use gasoline or other flammable vapors and liquids in the vicinity of this or any other appliance.
- Page 2 Congratulations! You are the owner of a state-of-the-art ULTIMATE Direct Vent Gas Stove by FPI Fireplace Products International Ltd. The Regency Gas Series of hand crafted appliances has been designed to provide you with all the warmth and charm of ®...
-
Page 3: Table Of Contents
If the unit is being operated in IPI (intermittent pilot) mode, neither the above instructions nor the seven day timer will apply. See the instructions in this manual and on the Lighting Instructions plate on the appliance to light or re-light the pilot. Regency U39E-12 ULTIMATE™ Freestanding Gas Stove... -
Page 4: Dimensions Unit Dimensions
9 13 16 " (250mm) ALL PICTURES / DIAGRAMS SHOWN THROUGHOUT THIS MANUAL ARE FOR ILLUSTRATION PURPOSES ONLY. ACTUAL PRODUCT MAY VARY DUE TO PRODUCT ENHANCEMENTS. Regency U39E-12 ULTIMATE™ Freestanding Gas Stove ®... -
Page 5: Copy Of Safety Label For U39E Gas Stove
NOTE: Regency units are constantly being ® This is a copy of the label that accompanies each ULTIMATE Direct Vent improved. Check the label on the unit and if there is Freestanding Gas Stove. We have printed a copy of the contents here for your a difference, the label on the unit is the correct one. -
Page 6: Installation Gas Installation Checklist
This general checklist does not contain all pertinent installation details or specifics and does not supersede the guidelines in this manual. Your Regency dealer/installer should use it in conjunction with manual instructions. Please follow all local codes and jurisdictions in authority. - Page 7 REGENCY GAS INSTALLATION CHECKLIST Finishing If applicable, is only noncombustible material installed in the noncombustible areas? Do clearances meet installation and manual requirements? Do the mantels and/or projections comply with the installation manual? If applicable, was the solid fuel fireplace warning plate installed?
-
Page 8: Before You Start
R E M O V E D F O R ESPECIALLY THE FIREPLACE GLASS, SERVICING AN APPLIANCE MUST AND SHOULD STAY AWAY TO AVOID BE REPLACED PRIOR TO OPERATING BURNS OR CLOTHING IGNITION. THE APPLIANCE. Regency U39E-12 ULTIMATE™ Freestanding Gas Stove ®... -
Page 9: Lighting Procedure
If the unit is being operated in IPI (intermittent pilot) mode, neither the above instructions nor the seven day timer will apply. See the instructions in this manual and on the Lighting Instructions plate on the appliance to light or re-light the pilot. Regency U39E-12 ULTIMATE™ Freestanding Gas Stove... -
Page 10: Copy Of The Lighting Plate Instructions
DO NOT REMOVE THIS INSTRUCTION PLATE NE PAS ENLEVER CETTE ÉTIQUETTE D’INSTRUCTIONS 919-649b Part #: 919-649b Regency U39E-12 ULTIMATE™ Freestanding Gas Stove ® Colours: Black on Grey, except for parts indicated as being Red. Punch out .25" hole top right corner where indicated. -
Page 11: Proflame Ii Remote Control Operating Instructions
(*) The receiver may be independent or integral jto the IFC hearth appliance control module. The receiver instruction may not be independent when part of the IFC. Figure 2: Transmitter LCD Display Figure 3: Battery Compartment Regency U39E-12 ULTIMATE™ Freestanding Gas Stove ®... - Page 12 Transmitter LCD display will only show the room temperature (Fig. 6). At the same time the IFC will turn off the appliance. A single “beep” from the IFC confirms reception of the command. Figure 9 Figure 10 Regency U39E-12 ULTIMATE™ Freestanding Gas Stove ®...
- Page 13 14). A single “beep” will confirm reception of the command. ing the Down Arrow Key will turn the secondary burner off. A single “beep” will confirm the reception of the command. Figure 13 Figure 14 Figure 17 Figure 18 Regency U39E-12 ULTIMATE™ Freestanding Gas Stove ®...
- Page 14 3. Reinstall battery removed in Step 1 while holding both buttons— keep holding buttons, then release the MODE button only. 4. The screen will show either "Clr" or "Set" as the first option avail- able is to disable or enable a mode. Regency U39E-12 ULTIMATE™ Freestanding Gas Stove ®...
-
Page 15: Proflame Ii Battery Holder Battery Replacement & Battery Pack Up
STEP 3 Keeping the battery compartment pressed in, close the left slide Close the right slide STEP 4 Reinstall wall cover plate with 2 Phillips head screws. Regency U39E-12 ULTIMATE™ Freestanding Gas Stove ®... -
Page 16: Installer's Information
(e) A copy of all installation instructions for all Product Approved side wall horizontally vented gas fueled equipm ent, all venting instructions, all parts lists for venting instructions, and/or all venting design instructions shall remain with the appliance or equipment at the completion of the installation. Regency U39E-12 ULTIMATE™ Freestanding Gas Stove ®... -
Page 17: Important Information
This Regency Mobile/Manufactured ® because the appliance's metal pedestal base Home Listed appliance comes factory Note: Failure to follow the instructions extends the full width and depth of the appliance. -
Page 18: General Safety Information
D Side Wall to Flue Centerline 20-1/2"/521 mm F Side Wall to Flue Centerline 11"/280 mm Minimum ceiling height is 36" / 914 mm from top of unit. Vent pipe clearances to combustibles1-1/4” (32mm) Regency U39E-12 ULTIMATE™ Freestanding Gas Stove ®... -
Page 19: Manufactured Mobile Home Requirements
Consult your local building codes before beginning installation. The location of the termination cap must conform to the requirements in the "Exterior Vent Terminal Locations" section. Regency U39E-12 ULTIMATE™ Freestanding Gas Stove ®... -
Page 20: Exterior Vent Terminal Locations
* Clearance in accordance with local installation codes and the requirements of the gas supplier 3 feet (91cm) within a height of 15 feet (4.5m) above the meter / regulator assembly 3 feet (91cm) above - if within 10 feet (3m) horizontally Regency U39E-12 ULTIMATE™ Freestanding Gas Stove ®... -
Page 21: 4" X 6-5/8" Rigid Pipe Cross Reference Chart
Note: Olympia Ventis DV venting is only approved for certain models. See list of approved models in cross-reference chart. Components from different Manufacturers may not be mixed. Not all rigid pipe components are available directly from Regency. Note: Olympia Ventis DV venting is only approved for certain models. See list of approved models in cross-reference chart. - Page 22 TM-4TR VDV-FS04 * Not available from Regency ***Olympia Ventis DV application for the following units only when using 4" x 6-5/8" vent system: B36XTE, B36XTCE, all City Series 40 models, CV72E/CB72E (power-vented models only), G600C, G600C-1, G600EC, G800C, G800C-1, G800EC, P36, P36E, and RC500E.
-
Page 23: Rigid Pipe Venting Systems
Metal Products Ameri Vent Direct Vent, Security Secure Vent , Selkirk Direct-Temp. AstroCap is a proprietary trademark of FPI Fireplace Products ® International Ltd. Dura-Vent® and Direct Vent are registered and/or proprietary trademarks of Simpson Dura-Vent Co. Inc. Regency U39E-12 ULTIMATE™ Freestanding Gas Stove ®... -
Page 24: Installation Precautions
Safety Precautions for the Installer Wear gloves and safety glasses for protection. Exercise extreme caution when using ladders or on roof tops. Be aware of electrical wiring locations in walls and ceilings. Regency U39E-12 ULTIMATE™ Freestanding Gas Stove ®... -
Page 25: Rigid Pipe Venting Arrangements
1'(0.3m) 2' (.6m) 3' (.9m) Horizontal Run (Feet) Horizontal Run (Feet) 0-4500' 0-2000' NG - @35,000 Btu/hr #35 NG - @38,000 Btu/hr #32 LP - @32,500 Btu/hr #51 LP - @38,000 Btu/hr #49 Regency U39E-12 ULTIMATE™ Freestanding Gas Stove ®... - Page 26 With these options, max. total pipe length is 30 feet with min. of 4 feet total vertical and max. 4 feet total horizontal. Please note min. 1 foot between 90 elbows is required. Lengths do not include elbow indicated Regency U39E-12 ULTIMATE™ Freestanding Gas Stove ®...
-
Page 27: Dv Stove Horizontal Vent Kit Installation
When using Note: if the centerline cannot be met, the adjustable sections will have to Regency U39E-12 ULTIMATE™ Freestanding Gas Stove ®... - Page 28 15. Attach the pipe section onto the starter collar by sealing with Mill-Pac and securing with 3 of the #8 x 1/2" (black) screws. Pipe seams should 6. A bead of non-hardening mastic should be run be facing the wall. Regency U39E-12 ULTIMATE™ Freestanding Gas Stove ®...
-
Page 29: Dura-Vent Termination Kit
Planning Your Dura-Vent Dura-Vent Horizontal Termination Kit Installation You will require the following components with your Wall Thimble (required for combus- new Regency Direct Vent Freestanding Gas Stove. ® tible walls) Please review your product to make sure you have There are two basic types of Dura-Vent Direct everything you need. -
Page 30: Dura-Vent Horizontal Terminations
7" diameter hole is acceptable. N o t e : R i s e r Vent is only f o r u s e above grade terminations. Diagram 3a Diagram 2 Regency U39E-12 ULTIMATE™ Freestanding Gas Stove ®... -
Page 31: Dura-Vent Vertical Terminations
2. Frame the hole as shown in diagram 10. attach with screws provided. Apply decorative brass or chrome trim if desired. See diagram Diagram 5 Diagram 7 Diagram 10 Regency U39E-12 ULTIMATE™ Freestanding Gas Stove ®... -
Page 32: Cathedral Ceilings
7. Ensure vent is vertical and secure the base of 2/12-7/12 5-1/2" the flashing to the roof with roofing rails, slide 7/12-12/12 6-3/4" storm collar over the pipe section and seal with a mastic. 12/12-24/12 7-1/2" Diagram 13 24/12+ 12-1/2" Diagram 12 Regency U39E-12 ULTIMATE™ Freestanding Gas Stove ®... -
Page 33: Converting A Class-A Metal Chimney To A
Insure that you are in fact, drilling into the metal on the chimney. Twist- lock the Termination Cap onto the Adaptor. (Diagram 3 and 4). Diagram 2 Regency U39E-12 ULTIMATE™ Freestanding Gas Stove ®... -
Page 34: System Date
Circulation: Variable speed fan, 125/75 CFM. 7. The connection between the appliance and Log Set: Ceramic fiber, 7 per set. the Retro Connector may be completed with sections of black direct vent pipe, together with an adjustable length. Regency U39E-12 ULTIMATE™ Freestanding Gas Stove ®... -
Page 35: Conversion From Ng To Lp
4. Open pedestal door and remove the chain from door which will allow door to 20. The burner aeration should be set to full fall. 10. Unscrew the pilot orifice with the allen open for LP. key and replace with the LPG pilot See aeration adjustment details in the 5. R emove 2 screws that secure the front orifice in the kit. manual. door to the unit. One screw is on the left hand side and the other on the right hand 11. Reinstall new burner orifice LPG 21. Check for proper flame appearance and side. (Left side shown). stamped #49 and tighten. glow on logs. Installer Notice: These instructions must be left with the appliance. Regency U39E-12 ULTIMATE™ Freestanding Gas Stove ® 07.02.19 920-143... -
Page 36: Conversion To High Elevation
(clockwise) with a 1/8" flat screwdriver. Note: Screw should be snug, but do 9. Check inlet and outlet pressures. not over tighten 10. Check operation of flame control. Check for proper flame appearance and glow on logs. Note: Use a magnetic type screwdriver if 11. The burner aeration should be set to 3/8” open possible. for NG and 1/2” open for LP. See aeration adjustment details in the manual. Regency U39E-12 ULTIMATE™ Freestanding Gas Stove ® 06.27.19 920-140... -
Page 37: 885 S.i.t. Valve Description
NOT covered under warranty. Note: Aeration Adjustment should only be performed by an authorized Regency Installer at the time of ® installation or service. To adjust the aeration: use the Allen key to turn the turning gear which will adjust the air shutter. -
Page 38: Log Set Installation
Place Rear Log A on the two pins on the rear log support. Place the Left Top Log D on the pin on Log B and on top of the cut-out on Log A. Pins on Rear Log Support Cutout Regency U39E-12 ULTIMATE™ Freestanding Gas Stove ® 918-039b 04.05.18... - Page 39 10. Next, take the white Platinum Ember material (provided) and gently separate the layers until you have a fi ne layer to place onto the Embaglow (steel wool type media). Platinum Embers Notch 918-039b 04.05.18 Regency U39E-12 ULTIMATE™ Freestanding Gas Stove ®...
- Page 40 12. Test fi re to ensure proper light off (make sure fl ame fl ows smoothly from one end of burner to the other. If there is any fl ame hesitation, check that area for any blockage of the burner port. A)02-65 B)02-56 E)02-45 C)02-44 918-039b 04.05.18 Regency U39E-12 ULTIMATE™ Freestanding Gas Stove ®...
-
Page 41: Driftwood Log Set Installation
Place Rear Log A on the two pins on the rear log support. Place the Left Top Log D on the pin on Log B and on top of the cut-out on Log A. Pins on Rear Log Support Cutout Regency U39E-12 ULTIMATE™ Freestanding Gas Stove ® 919-939 10.15.18... - Page 42 10. Next, take the white Platinum Ember material (provided) and gently separate the layers until you have a fi ne layer to place onto the Embaglow (steel wool type media). Platinum Embers Notch Regency U39E-12 ULTIMATE™ Freestanding Gas Stove ® 919-939 10.15.18...
- Page 43 12. Test fi re to ensure proper light off (make sure fl ame fl ows smoothly from one end of burner to the other. If there is any fl ame hesitation, check that area for any burner port blockage. 919-939 10.15.18 Regency U39E-12 ULTIMATE™ Freestanding Gas Stove ®...
-
Page 44: Wiring Diagram Without Thermostat
The fan will not a properly grounded three- operate during a power outage. prong receptacle. Do not cut or remove the grounding prong from this plug. EXTERNAL ANTENNA Regency U39E-12 ULTIMATE™ Freestanding Gas Stove ®... -
Page 45: Optional Wall Thermostat
Connect the wires as per the wiring diagrams. to the 120V wires. Note: Preferable if the thermostat is installed on an interior wall. Regency offers an optional programmable ® thermostat but any 250-750 millivolt rated non- anticipator type thermostat that is CSA, ULC or UL approved may be used. -
Page 46: First Fire
This is the recommended procedure for operating the unit with a thermostatic set point. If a millivolt wall thermostat is required for bedroom installation or as preferred method of controlling the stove, see noted option. Regency U39E-12 ULTIMATE™ Freestanding Gas Stove ®... -
Page 47: Proflame Ii Battery Holder Battery Replacement & Battery Backup
STEP 3 Keeping the battery compartment pressed in, close the left slide Close the right slide STEP 4 Reinstall wall cover plate with 2 Phillips head screws. Regency U39E-12 ULTIMATE™ Freestanding Gas Stove ®... -
Page 48: Automatic Convection Fan Operation
Blower: Adjusting Flame Height Regency gas appliances use high tech blowers ® to push heated air farther into the room. It is not Your heater has an adjustable flame to tailor the unusual for the fan to make a "whirring"... -
Page 49: Maintenance
THE HAZARDS OF HIGH SURFACE "cracking" and "ticking" sounds will be heard ote: If you have an incorrect flame pattern, TEMPERATURE AND SHOULD throughout the cycling process. contact your Regency dealer for ® STAY AWAY TO AVOID BURNS OR further instructions. -
Page 50: Log Replacement
The glass requires 7/8’’ flat glass gasket (Part 8. Repeat step 7 for other side panel. 7. Put gasket glue on the retainers, but do not put #846-682). See your Regency dealer. ® glue on the screws. Replace the door gasket, 9. -
Page 51: Fan Maintenance
5. Lift fan off of the 2 pins, tip back and pull through firebox opening. Disconnect the green ground wire from the right side of the fan as soon as Regency U39E-12 ULTIMATE™ Freestanding Gas Stove ®... -
Page 52: Valve Replacement
13. Remove the valve tray and replace. 14. Reverse Steps 1-11 to complete. Stepper motor wire 6. If the fan is installed–disconnect the "COM" wire from the valve. 7. Disconnect the DC spark generator wires from the valve. Regency U39E-12 ULTIMATE™ Freestanding Gas Stove ®... -
Page 53: Gas Maintenance
Gas Maintenance Gas Maintenance Recommended Annual Routine Maintenance for Gas Fireplaces, Stoves and Inserts In order for your Regency appliance to continue to provide comfort to your home periodic maintenance must be performed to ensure it is operating at peak efficiency. The items in the list should be checked by a licensed gas service technician during the annual service check. Your unit may require more frequent maintenance checks if you notice any changes in how it operates. Operational changes to look for can include, but are not limited to, extended start up time, increased fan noise, residue/carbon build up, white build up on the glass/firebox, increased operating noise etc. Should any of these or other conditions arise, discontinue use and schedule a service check with your local licensed gas technician. The list below shows items your licensed service technician will need to check and service at least annually. Clean Inspect Check • Glass • Pilot assembly • Voltage on thermocouple/thermopile (mil- • Interior bricks / panels • Burner livolt models) • Burner ports & burner air shutter • Pressure relief gaskets/doors •... -
Page 54: Main Assembly
Hinge for Side Panel 904-258 Side Panel Door Magnet 948-255 Door Latch c/w Hook Flex Pipe 3" ID Hose Clamp 630-021 Fan Access Panel 730-019 Rear Panel 730-565 Firebox Baffle (SEPARATE ILLUSTRATION ON GLASS DOOR FRONTS) Regency U39E-12 ULTIMATE™ Freestanding Gas Stove ®... -
Page 55: Burner & Log Assembly
Wire Harness Battery Box Proflame II .584.922 911-037 Flame sensor 911-038 Flame Electrode 910-432 Pilot Tube with Nuts 911-337/P Remote Battery Box 911-193 IFC Connector With Jumper *Not available as a replacement part. Regency U39E-12 ULTIMATE™ Freestanding Gas Stove ®... -
Page 56: Door Assembly
Door Gasket Kit 105. Ceramic Paper 107. 846-682 7/8” Window Adhesive Gasket Tape (12’) (936-243) 111. Door Frame Fibre Paper 208. 940-325/P Wrap Glass 209. 732-020 Door Mounting Bracket *Not available as a replacement part. Regency U39E-12 ULTIMATE™ Freestanding Gas Stove ®... - Page 57 Regency U39E-12 ULTIMATE™ Freestanding Gas Stove ®...
-
Page 58: Warranty
FPI is not responsible for results or costs of workmanship of unauthorized FPI dealers or agents in the negligence of their service work. Revision Date: February 2019 Regency Gas Products Warranty Regency U39E-12 ULTIMATE™ Freestanding Gas Stove... - Page 59 Freight damages for products or parts are not covered under the terms of the warranty. Products made or provided by other manufacturers and used in conjunction with the FPI appliance without prior authorization from FPI may void this warranty. Revision Date: February 2019 Regency Gas Products Warranty Regency U39E-12 ULTIMATE™ Freestanding Gas Stove ®...
- Page 60 Product Registration and Customer Support: Thank you for choosing a Regency Fireplace. Regency strives to be a world leader in the design, manufacture, and marketing of hearth products. To provide the best support for your product, we request that you complete a product registration form at http://www.regency-fire.com/Customer-Care/Warranty-Registration.aspx...
- Page 61 Product Registration and Customer Support: Thank you for choosing a Regency Fireplace. Regency strives to be a world leader in the design, manufacture, and marketing of hearth products. To provide the best support for your product, we request that you complete a product registration form found on our Web Site under Customer Care within ninety (90) days of purchase.
- Page 62 Regency U39E-12 ULTIMATE™ Freestanding Gas Stove ®...
- Page 64 Dealer Name & Address: _______________________________________ ___________________________________________________________ Installer: ___________________________________________________ Phone #: ___________________________________________________ Date Installed: _______________________________________________ Serial #: ____________________________________________________ U38-39 Video Printed in Canada Regency is a trademark of FPI Fireplace Products International Ltd. ® © Copyright 2022, FPI Fireplace Products International Ltd. All rights reserved.