Table of Contents
Advertisement
Quick Links
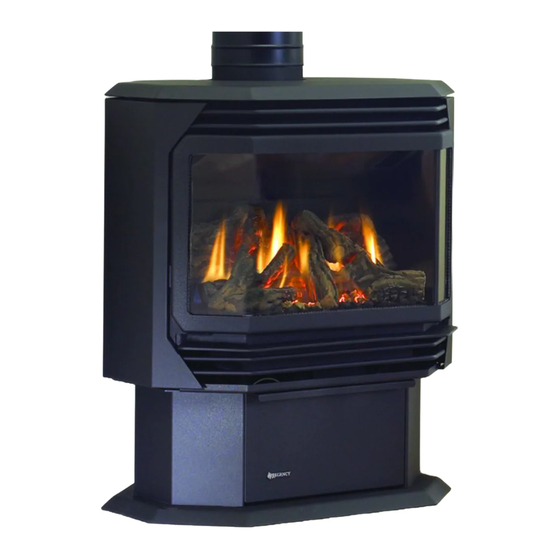
ULTIMATE U38 Freestanding Gas Stove
WARNING:
If the information in these instructions are not followed exactly,
a fire or explosion may result causing property damage,
personal injury or loss of life.
FOR YOUR SAFETY
Do not store or use gasoline or other flammable vapors and
liquids in the vicinity of this or any other appliance.
Installation and service must be performed by a qualified
installer, service agency or the gas supplier.
Tested by:
918-026
FPI FIREPLACE PRODUCTS INTERNATIONAL LTD. 6988 Venture St., Delta, BC Canada, V4G 1H4
www.regency-fire.com
MODELS: U38-NG Natural Gas U38-LP Propane
Installer: Please complete the details on the back cover
and leave this manual with the homeowner.
Homeowner: Please keep these instructions for future reference.
Owners &
Installation Manual
FOR YOUR SAFETY
What to do if you smell gas:
Do not try to light any appliance
Do not touch any electrical switch:
do not use any phone in your
building.
Immediately call your gas supplier
from a neighbour's phone. Follow
the gas supplier's instructions.
If you
cannot reach your gas
supplier, call the fire department.
10/06/03
Advertisement
Table of Contents

Related Manuals for Regency ULTIMATE U38-LP


Summary of Contents for Regency ULTIMATE U38-LP
- Page 1 918-026 FPI FIREPLACE PRODUCTS INTERNATIONAL LTD. 6988 Venture St., Delta, BC Canada, V4G 1H4 www.regency-fire.com MODELS: U38-NG Natural Gas U38-LP Propane Installer: Please complete the details on the back cover and leave this manual with the homeowner. Homeowner: Please keep these instructions for future reference.
-
Page 2: Specifications
The models U38-NG, and U38-LP of this series has been approved by Warnock Hersey for both safety and efficiency. As it also bears our own mark, it promises to provide you with economy, comfort and security for many trouble free years to follow. -
Page 3: Table Of Contents
Safety Label Specifications ... 2 Safety Label ... 4 Installation General Installation Information ... 5 Installation Checklist ... 5 Minimum Clearances to Combustibles ... 6 Optional Outside Air ... 6 - Outside Air through Bottom of Pedestal ... 6 - Outside Air through Rear of Pedestal ... 7 Draft Hood ... -
Page 4: Safety Label
Orifice size Altitude 0-2,000 ft/pi Maximum Input 38,000 BTU/h (11.14Kw/h) Minimum Input 20,000 BTU/h (5.86Kw/h) Model U38-LP: Convertible to 30,000 Btu for Altitude 0-4500 ft. Orifice size Maximum Input 30,000 Btu/h Minimum Input 15,000 Btu/h GAS FIRED VENTED ROOM HEATER This appliance must be installed in accordance with local codes, if any;... -
Page 5: General Installation Information
Regency U38 ULTIMATE Freestanding Gas Heater IMPORTANT: SAVE THESE INSTRUCTIONS The ULTIMATE Freestanding Gas Stove must be installed in accordance with these instruc- tions. Carefully read all the instructions in this manual first. Consult the "authority having juris- diction" to determine the need for a permit prior to starting the installation. -
Page 6: Minimum Clearances To Combustibles
Use the minimum clearances shown in the diagrams below for installation with "B" vent. U38-NG & U38-LP Clearances A Side Wall to Unit 7-1/2" / 190 mm B Back Wall to Unit 6"... -
Page 7: Outside Air Through Rear Of Pedestal
DRAFT HOOD This heater has a draft hood built in. It must not be altered, obstructed, or blocked in any way, and the unit must be installed so that the draft hood is in the same atmospheric pressure zone as the combustion air inlet to the burner. This heater must be properly connected to a venting system. -
Page 8: Gas Connection
System Data Table. System Data U38 with 40,000 BTU U38-NG: For 0 to 2000 feet altitude U38-LP: For 0 to 4500 feet alttitude Burner Inlet Orifice Sizes: Natural Gas Propane Burner Max. Input... -
Page 9: Conversion From Natural Gas To Propane
CONVERSION FROM NATUAL GAS TO PROPANE THIS CONVERSION MUST BE DONE BY A QUALIFIED GAS FITTER IF IN DOUBT DO NOT DO THIS CONVERSION !! Conversion Kit 730-969 Contains: Qty. Part # Description 1 910-018 SIT Conversion Kit- 50% Turndown LP 1 910-037 LP Injector (Pilot Orifice) 1 904-641 Burner Orifice #50 1 908-528 Red "PROPANE"... -
Page 10: Conversion To Lower Btu
1) Carefully remove the logs from the box and unwrap them. The logs are fragile, handle with care - do not force into position. 2) Sprinkle the embers on the left and right sides of the firebox base. Embers. Embers Regency U38 ULTIMATE Freestanding Gas Stove... - Page 11 3) Place Rear Log A)02-65 on the two pins on the rear log support. A)02-65 Pins on Rear Log Support 4) Place the Middle Left Log B)02-56 on the two pins as shown. B)02-56 5) Sprinkle some lava rock just in front of B) 02-56 on the burner holes.
-
Page 12: Door Installation And Door Latch
LOUVER INSTALLATION 1) Attach the top & bottom louvers to the side stove panel using 2 screws per side. TEST FOR FLUE SPILLAGE A "spillage" test must be made before the installed unit is left with the customer. Follow... -
Page 13: Optional Remote Control Installation
Thermostat Wire Table Recommended Maximum Lead Length (Two-Wire) When Using Wall Thermostat (CP-2 System) Wire Size Max. Length 14 GA. 50 Ft. 16 GA. 32 Ft. 18 GA. 20 Ft. 20 GA. 12 Ft. 22 GA. 9 Ft. OPTIONAL REMOTE CONTROL Use the Regency Remote Control Kit approved for this unit. -
Page 14: Operating Instructions
3) Turn off all electric power to the appliance if service is to be performed. FIRST FIRE The FIRST FIRE in your stove is part of the paint curing process. To ensure that the paint is properly cured, it is recommended that you burn your fireplace for at least four (4) hours the first time you use it with the fan on. -
Page 15: Copy Of The Lighting Plate Instructions
COPY OF THE LIGHTING PLATE INSTRUCTIONS This appliance must be installed in accordance with local codes, if any; if not, follow the current CAN1-B149/ANSI Z 223.1 (Australia: AG601, New Zealand: NZS 5261) WARNING: If you do not follow these instructions exactly, a fire or explosion may result causing property damage, personal injury or loss of life. -
Page 16: Pilot Adjustment
The burner aeration is factory set but may need adjusting due to either the local gas supply or altitude. U38 with 40,000 Btu/h U38-NG Natural Gas: 1/4" open U38-LP Propane: 1/2" open U38 with 30,000 Btu/h U38-NG Natural Gas 3/16" open... -
Page 17: Maintenance
MAINTENANCE GLASS REPLACEMENT Your Regency stove is supplied with high temperature, 5 mm Neoceram ceramic glass that will withstand the highest heat that your unit will produce. In the event that you break your glass, purchase your replacement from an authorized Regency dealer only, and follow the step-by-step instructions for replacement. -
Page 18: Panel Door
8) Tighten the 10 nuts on center glass retainer. 9) Repeat step 7 for other side panel. 10) Replace new gasket by gluing it in place. 11) Install door onto stove and check the seal. PANEL DOOR 1) Remove the door from the unit and place on a soft surface to prevent scratching. -
Page 19: Removing Valve
If your valve requires maintenance or replace- ment, follow these instructions: NOTE: Always shut off the gas supply before removing the valve. 1) Open front pedestal door and unhook chain. You may want to put a soft cloth on the base of the unit so that when the pedestal door is open it doesn't scratch the paint. -
Page 20: Parts List
*Not available as a replacement part. Spill Switch Thermodisc - Fan Auto/On/Off Mounting Bracket - Fan Thermodisc Rear Panel Firebox Baffle False Top Assembly Flue Attachement Bracket Ult. 6" Flue Collar (Optional) Pedestal Base Cover Logo Plate Manual Regency U38 ULTIMATE Freestanding Gas Stove... - Page 21 U38 BURNER & LOG ASSEMBLY Part # Description 910-241 Burner ON/OFF Switch (3-way) 910-190 Piezo Ignitor & Nut 904-586 Knob - Fan Control Switch 910-373 Knob - Pilot Valve Extension 910-372 Flame Adjusting Knob 908-646 Control Panel Decal 650-220 Control Panel Plate 910-330 Fan Speed Control (120 V) 750-524/P Valve Assembly - Natural Gas...
- Page 22 Side Glass 107) 936-243 Glass Gasket 108) 940-322/P Centre Glass 111) * Door Frame Fibre Paper 112) 750-015 Door Glass Extrusion 208) 940-325/P Wrap Glass *Not available as a replacement part. U38 DOOR ASSEMBLIES Regency U38 ULTIMATE Freestanding Gas Stove...
-
Page 23: Warranty
WARRANTY Regency Fireplace Products, are designed with reliability and simplicity in mind. In addition, our internal Quality Assurance Team carefully inspects each unit thoroughly before it leaves our door. Regency Industries Ltd. is pleased to extend this limited lifetime warranty to the original purchaser of a Regency Product. The Warranty: Lifetime Covered under the agreement are the following components: Combustion chamber, heat exchanger, burner tubes, logs, embers, glass (thermal breakage) and all gold plating (against defective manufacture). - Page 24 Register your Regency online at Installer: Please complete the following information Dealer Name & Address: ______________________________________________ __________________________________________________________________ Installer: ___________________________________________________________ Phone #: ___________________________________________________________ Date Installed: ______________________________________________________ Serial No.: _________________________________________________________ Regency and Ultimate are trademarks of FPI Fireplace Products International Ltd. © FPI Fireplace Products International Ltd. 2003 Regency fireplace products are designed with reliability and simplicity in mind.