Table of Contents

Related Manuals for Endress+Hauser promag 50 PROFIBUS-PA


Summary of Contents for Endress+Hauser promag 50 PROFIBUS-PA
- Page 1 promag 50 KA 014D/06/en/04.01 PROFIBUS-PA Valid as of software version: V 1.01.XX (Amplifier) V 1.00.XX (Communication) Electromagnetic Flow Measuring System Brief Operating Instructions Commissioning the PROFIBUS-PA interface...
- Page 2 Promag 50 PROFIBUS-PA This brief operating instruction serves for commissioning the Promag 501 interface. You will find complete information in the Promag 50 Operating Instructions BA 055D/06/en/ 04.01. Warning: For safety instructions regarding the installation, commissioning and operation, as well as operational safety and returns of Promag 50 see the Promag 50 Operating Instruc- tions BA 055D/06/en/04.01.
-
Page 3: Table Of Contents
Software history ..... . . 58 Technical data ....59 Endress+Hauser... - Page 4 Table of contents Promag 53 PROFIBUS-DP/-PA Endress+Hauser...
-
Page 5: Safety Instructions
Strict compliance with the instructions in the Operating Instruction is mandatory. • Endress+Hauser will be happy to assist in clarifying the chemical resistance proper- ties of parts wetted by special fluids, including fluids used for cleaning. • If welding work is performed on the piping system, do not ground the welding appli- ance through the Promag flowmeter. - Page 6 1 Safety instructions Promag 50 PROFIBUS-PA Endress+Hauser...
-
Page 7: Wiring
Promag 50 PROFIBUS-PA 2 Wiring Wiring Warning: • When connecting Ex-certified devices, see the notes and diagrams in the Ex-specific supplement. Please do not hesitate to contact your E+H representative if you have any questions. • If you use remote versions, connect each sensor only to the transmitter having the same serial number. - Page 8 2 Wiring Promag 50 PROFIBUS-PA Suitable fieldbus cables from various manufacturers for the non-hazardous area are listed below: • Siemens: 6XV1 830-5BH10 • Belden: 3076F • Kerpen: CeL-PE/OSCR/PVC/FRLA FB-02YS(ST)YFL Maximum overall cable length The maximum network expansion depends on the type of ignition protection and the cable specifications.
- Page 9 Promag 50 PROFIBUS-PA 2 Wiring This approach, which provides the best electromagnetic compatibility and personnel safety, can be used without restriction in plants with good potential equalisation. In the case of plants without potential equalisation, a mains frequency (50 Hz) equalis- ing current can flow between two grounding points, which in unfavorable cases, e.g.
-
Page 10: Connecting The Measurement Device
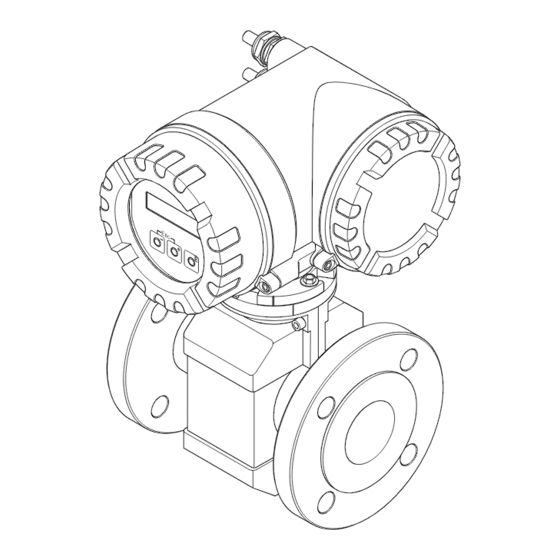
2 Wiring Promag 50 PROFIBUS-PA Connecting the measurement device 2.2.1 Connecting the transmitter Warning: • Risk of electric shock. Switch off the power supply before opening the device. Do not install or wire the device while it is connected to the power supply. Failure to comply with this precaution can result in irreparable damage to the electronics. - Page 11 Promag 50 PROFIBUS-PA 2 Wiring PA(–) PA(+) N (L-) L1 (L+) Fig. 1: Connecting the transmitter (field housing), conductor cross-section: max. 2.5 mm A = Aluminium field housing B = Stainless steel field housing Cable for power supply: 85...260 V AC, 20...55 V AC, 16...62 V DC Terminal No.
-
Page 12: Terminal Assignment
2 Wiring Promag 50 PROFIBUS-PA N (L–) L1 (L+) PA (+) PA (–) 24 25 26 27 20 21 22 23 Fig. 2: Connecting the transmitter (wall-mount housing), conductor cross-section: max. 2.5 mm Cable for power supply: 85...260 V AC, 20...55 V AC, 16...62 V DC Terminal No. -
Page 13: Fieldbus Connector
Promag 50 PROFIBUS-PA 2 Wiring 2.2.3 Fieldbus connector The connection technology of PROFIBUS-PA allows measuring devices to be con- nected to the fieldbus via uniform mechanical connections such as T-boxes, junction boxes, etc. This connection technology using prefabricated distribution modules and plug-in connectors offers substantial advantages over conventional wiring: •... - Page 14 2 Wiring Promag 50 PROFIBUS-PA Technical data (connector): Conductor size 0.75 mm Connector thread PG 13.5 Degree of protection IP 67 in accordance with DIN 40 050 IEC 529 Contact surface CuZnAu Housing material Cu Zn, surface Ni Flammability V - 2 in accordance with UL - 94 Operating temperature –40...+85 °C...
-
Page 15: Electrical Connection Check
Promag 50 PROFIBUS-PA 2 Wiring Electrical connection check Perform the following checks after completing electrical installation of the measuring device: Device condition and specifications Notes − Are cables or the device damaged (visual inspection)? Electrical Connection Notes Does the supply voltage match the specifications on the nameplate? 85...260 V AC (45...65 Hz) - Page 16 2 Wiring Promag 50 PROFIBUS-PA Endress+Hauser...
-
Page 17: Operation
• Switch the hardware write protection on or off Fig. 4: Options for operating the Promag 50 PROFIBUS-PA Configuration / operation programs for operating the device via the PROFIBUS-PA Jumpers or miniature switches for hardware settings (write protection, device address) -
Page 18: Operation Via The Local Display
3 Operation Promag 50 PROFIBUS-PA Operation via the local display 3.2.1 Display and operating elements The local display enables you to read all important parameters directly at the measuring point and also configure the device. The display consists of two lines; this is where measured values and/or status variables (direction of flow, empty pipe, bar graph, etc.) are displayed. -
Page 19: Brief Description Of The Function Matrix
Promag 50 PROFIBUS-PA 3 Operation 3.2.2 Brief description of the function matrix Note: • See the general notes on Page 20. • Function descriptions → see the “Description of Device Functions” manual HOME position → → Enter the function matrix Select a function group (e.g. - Page 20 There is no need to change these parameters under normal circumstances and conse- quently, they are protected by a special code known only to the E+H service organisa- tion. Please contact Endress+Hauser if you have any questions. Disabling the programming mode Programming will be disabled again if you do not press a key within 60 seconds follow- ing a return to the HOME position.
-
Page 21: Group Communication
Promag 50 PROFIBUS-PA 3 Operation Group COMMUNICATION Function description COMMUNICATION TAG NAME Use this function to assign a tag name to the measuring device. You can edit and read this tag name at the local display or by means of the PROFIBUS protocol (class 2 master). - Page 22 3 Operation Promag 50 PROFIBUS-PA Function description COMMUNICATION SET UNIT TO BUS Use this function to enable transmission of the preset system units to the process-control system. Press the <Flo 7 pt.>1<Flo 7 pt.> button to send the preset system units to the process-control system.
-
Page 23: Group Totalizers
Promag 50 PROFIBUS-PA 3 Operation Group TOTALIZERS Function description COMMUNICATION SELECT TOTALIZER Use this function to select a totalizer. Note: The Promag 50 has only one totalizer. Options: TOTALIZER 1 Factory setting: TOTALIZER 1 TOTALIZER OUT VALUE Use this function to view the TOTAL value (output measured value) and the corresponding unit of the totalizer. - Page 24 3 Operation Promag 50 PROFIBUS-PA Function description COMMUNICATION PRESET TOTALIZER Use this function to define a (start-) value for the totalizer. Note: The totalizer does not accept this value unless the PRESET option was selected beforehand in the SET TOTALIZER function.
-
Page 25: Communication: Profibus-Pa
Promag 50 PROFIBUS-PA 3 Operation Communication: PROFIBUS-PA 3.5.1 PROFIBUS-PA technology PROFIBUS (Process Field Bus) is a standardised bus system based on the European standard EN 50170, Volume 2, which has been successfully used for many years in pro- duction and process automation (chemical industry and process engineering). - Page 26 3 Operation Promag 50 PROFIBUS-PA Communications partner In an automation control system, the Promag always serves as a slave and can thus, depending on the type of application, exchange data with one or more masters. The master can be an automation control system, a PLC or a PC with a PROFIBUS-DP communications adapter card.
-
Page 27: Acyclic Data Exchange
A Class 2 master can access the blocks that are shown in the illustration below. The parameters, which can be accessed by the Endress+Hauser operating program (Commuwin II), are shown Page 28 ff. in the form of a matrix. -
Page 28: Operation Using The Profibus Configuration Program
3 Operation Promag 50 PROFIBUS-PA Operation using the PROFIBUS configuration program The user can obtain special configuration and operating programs offered by the differ- ent manufacturers for use in configuration. These can be used for configuring both the PROFIBUS-PA parameters and all of the device-specific parameters. The predefined function blocks allow uniform access to all the network and device data. - Page 29 Promag 50 PROFIBUS-PA 3 Operation Device Matrix Endress+Hauser...
- Page 30 3 Operation Promag 50 PROFIBUS-PA Display functions (partial matrix) Endress+Hauser...
- Page 31 Promag 50 PROFIBUS-PA 3 Operation Diagnosis/Alarm/Simulation/Version Info/Service&Analysis (partial matrix) Endress+Hauser...
- Page 32 3 Operation Promag 50 PROFIBUS-PA Physical Block (operation via profile) Endress+Hauser...
- Page 33 Promag 50 PROFIBUS-PA 3 Operation Transducer Block Flow (operation via profile) Endress+Hauser...
- Page 34 3 Operation Promag 50 PROFIBUS-PA Analog Input Block (operation via profile) Endress+Hauser...
- Page 35 Promag 50 PROFIBUS-PA 3 Operation Totalizer Block (operation via profile) Endress+Hauser...
-
Page 36: Hardware Settings
3 Operation Promag 50 PROFIBUS-PA Hardware settings 3.7.1 Setting the write protection A jumper on the I/O board provides the means of activating or deactivating hardware write protection. Warning: Risk of electric shock. Exposed components carry dangerous voltages. Make sure that the power supply is switched off before you remove the cover of the electronics com- partment. -
Page 37: Setting The Device Address For Profibus
Promag 50 PROFIBUS-PA 3 Operation 3.7.2 Setting the device address for PROFIBUS-PA Note the following points: • In the case of a PROFIBUS-PA device, the address must always be configured. Valid device addresses are in the range 0…125. In a PROFIBUS-PA network, each address may only be given once. - Page 38 3 Operation Promag 50 PROFIBUS-PA Endress+Hauser...
-
Page 39: Commissioning
Promag 50 PROFIBUS-PA 4 Commissioning Commissioning Function check Make sure that all final checks have been completed before you start up your measuring point: • Checklist for “Installation check” (see Operating Instructions page 42) • Checklist for “Electrical connection check” → Page 15 Note: •... -
Page 40: Commissioning Via The Local Display
4 Commissioning Promag 50 PROFIBUS-PA Commissioning via the local display Note: It will be necessary to enter the numerical code (factory setting: 50) before altering device functions, numerical values or factory settings. The following steps have to be carried out one after the other: Check the hardware write protection: COMMUNICATION →... -
Page 41: Commissioning Via A Class 2 Master (Commuwin Ii)
Promag 50 PROFIBUS-PA 4 Commissioning Commissioning via a Class 2 Master (Commuwin II) Operation with Commuwin II is described in the E+H documentation BA 124F/00/a2/. Steps 1-5 can be dealt with in the same order as described in Chap. 4.2 “Commission- ing via the local display”. -
Page 42: Rescaling The Input Value
– All the relevant data is described in Chapter “System Integration”(see Page 43). – We recommend that the “Coupling Documentation” be used for step-by-step configuration. This can be obtained from Endress+Hauser Process Solutions for various automation control systems and programmable logic controls. -
Page 43: System Integration
Promag 50 PROFIBUS-PA 4 Commissioning System integration The device will be ready for system integration once commissioning has been effected via the local display or the Class 2 master (Commuwin II). The PROFIBUS-PA system will require a description of the device parameters, e.g. output data, input data, data for- mat and supported transmission rate so that it can integrate the field devices into the bus system. - Page 44 3 = Profile 3.0 x = extended identification 15xx = ID No. The GSD files for all Endress+Hauser devices can be acquired in the following manner: • Internet (Endress+Hauser) → http://www.endress.com (Products → Process Solutions → PROFIBUS → GSD files) •...
- Page 45 If, however, the integration is not successful, the standard GSD should be used. This differentiation is the result of a specific implementation in the master systems. Contents of the download file from the Internet and the CD-ROM: • All Endress+Hauser GSD files • Endress+Hauser type files • Endress+Hauser bitmap files •...
-
Page 46: Cyclic Data Exchange
4 Commissioning Promag 50 PROFIBUS-PA 4.4.1 Cyclic data exchange In the case of PROFIBUS-PA, the cyclic transmission of analog values to the automation control system is effected in data blocks of 5 bytes. The measured value is portrayed in the first 4 bytes in the form of flowing point numbers in acc. with IEEE 754 standard (see IEEE floating point number). - Page 47 Analog Input OUT VALUE Function block Value/Status PROFILE Signal processing Sensor Totalizer TOT. OUT VALUE Parameter Function block Value/Status DISPLAY VALUE Manufacturer Value/Status specific Physical Block parameter CONTROL Fig. 12: Block model of the Promag 50 PROFIBUS-PA Profile 3.0 Endress+Hauser...
- Page 48 4 Commissioning Promag 50 PROFIBUS-PA Input data The input data are: volume flow and totalizer 1. The current volume flow and totalizer 1 can be displayed on the basis of these meas- ured variables. Data transfer from Promag to the automation control system The input and output bytes are structured in a fixed sequence.
- Page 49 Promag 50 PROFIBUS-PA 4 Commissioning Example: The concentration is calculated in % f in the automation control sys- (temperature/density) tem. The temperature and density status is transferred with the two cyclic measured values and can therefore be shown directly in the automation control system together with the calculated concentration.
- Page 50 4 Commissioning Promag 50 PROFIBUS-PA Control variables for the totalizer (output data) These functions allow the totalizer to be controlled from the automation control system. The following control variables are possible: totalizing, resetting, activation of a prede- fined value, balancing, positive flow detection, negative flow detection and stopping of totalizing.
- Page 51 Promag 50 PROFIBUS-PA 4 Commissioning Caution: • It is essential that the following sequence be adhered to when configuring the meas- ured variables – volume flow, totalizer, display value and control! • The device will have to be reset once a new measured variable has been configured.
-
Page 52: S7 Hw Config
4 Commissioning Promag 50 PROFIBUS-PA 4.4.2 Configuration examples with the Simatic S7 HW Config Example 1: Full configuration using the manufacturer-specific GSD file Slot 0: AI-volume flow Slot 1: Totalizer 1 + Control variable (SET_TOT, MODE_TOT) Slot 2: Display value (DISPLAY_VALUE) - Page 53 Promag 50 PROFIBUS-PA 4 Commissioning Example 2: Replacing measured variables with placeholders (EMPTY_MODULE) using the manufacturer-specific GSD file: Slot 0: Placeholder (EMPTY_MODULE) Slot 1: Totalizer “without control variable“ Slot 2: Placeholder (EMPTY_MODULE) Slot 3: Control block (CONTROL_BLOCK) manufacturer-specific This form of configuration activates the totalizer and the control blocks (manufacturer- specific).
- Page 54 4 Commissioning Promag 50 PROFIBUS-PA Example 3: Configuration of the measured variables without placeholders (EMPTY_MODULE) using the manufacturer-specific GSD file. Slot 0: AI-volume flow Slot 1: Totalizer 1 + Control variable (SET_TOT) This form of configuration transfers the volume flow and the totalizer with control variable (SET_TOT).
- Page 55 Promag 50 PROFIBUS-PA 4 Commissioning Example 4: Full configuration via the profile GSD file PA139740.gsd (IEC 61158-2). Slot 0: AI-volume flow Slot 1: Totalizer 1 + Control variable (SET_TOT, MODE_TOT) This form of configuration transfers the volume flow and the totalizer with control variable.
- Page 56 4 Commissioning Promag 50 PROFIBUS-PA Status code The status codes which are supported by the blocks AI (Analog Input), TOT (Totalizer) and display value are listed in the following table. The coding of the status corresponds to “PROFIBUS-PA Profile for Process Control Devices - General Requirements”...
-
Page 57: Trouble-Shooting
The procedures on (see Operating Instructions page 4) must be carried out before you return a flowmeter to Endress+Hauser. Always enclose a duly completed “Safety regulation” form. You will find a preprinted form at the back of this manual. -
Page 58: Software History
5 Trouble-shooting Promag 50 PROFIBUS-PA Current consumption Check the current consumption of the bus segment: Permissible supply current The current consumption of the bus segment in question (= total of basic currents of all fieldbus stations) must not exceed the max. permissible feed current of the fieldbus power supply. -
Page 59: Technical Data
• Technical Information Promag 50/53 W (TI 046D/06/en) • Technical Information Promag 50/53 P (TI 047D/06/en) • Technical Information Promag 50/53 H (TI 048D/06/en) • Description of Device Functions Promag 50 PROFIBUS-PA (BA 056D/06/en) • Supplementary documentation on Ex-ratings: ATEX, FM, CSA, etc. - Page 60 6 Technical data Promag 50 PROFIBUS-PA Endress+Hauser...
- Page 62 Canada Philippines Poland Minsk Endress+Hauser Ltd. Endress+Hauser Philippines Inc. Tel. (0172) 508473, Fax (0172) 508583 Endress+Hauser Polska Sp. z o.o. Burlington, Ontario Metro Manila Warszawy Belgium / Luxembourg Tel. (905) 6819292, Fax (905) 6819444 Tel. (2) 3723601-05, Fax (2) 4121944 Tel.