Table of Contents
Advertisement
Available languages
Available languages
EA01164D/06/A2/02.17
71389157
2018-08-01
Products
Installation Instructions
Activating application
packages, switching the I/O
function, upgrading with
additional I/O hardware
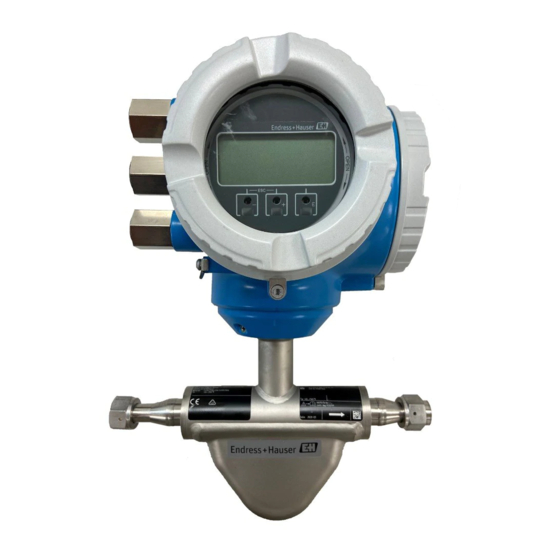
Promag/Promass 300, 500, 500-digital
EN Installation Instructions: EA01164D → 3
DE Einbauanleitung: EA01164D → 27
Solutions
Services
Advertisement
Chapters
Table of Contents

Related Manuals for Endress+Hauser Promag 300


Summary of Contents for Endress+Hauser Promag 300
- Page 1 Products Solutions Services EA01164D/06/A2/02.17 71389157 2018-08-01 Installation Instructions Activating application packages, switching the I/O function, upgrading with additional I/O hardware Promag/Promass 300, 500, 500-digital EN Installation Instructions: EA01164D → 3 DE Einbauanleitung: EA01164D → 27...
-
Page 3: Table Of Contents
Safety-related characteristic values ..........26 Endress+Hauser... -
Page 4: Overview Of Modification Kits
1, 2, 3 For custody transfer 1 = Qualified specialist on customer side, 2 = Service technician authorized by Endress+Hauser, 3 = Endress+Hauser (return measuring device to manufacturer) 4 = Check with local approval center if installation/modification must be performed under supervision. -
Page 5: Personnel Authorized To Fit New Nameplates
2, 3 For custody transfer 1 = Qualified specialist on customer side, 2 = Service technician authorized by Endress+Hauser, 3 = Endress+Hauser (return measuring device to manufacturer) 4 = Check with local approval center if installation/modification must be performed under supervision. -
Page 6: Safety Instructions
= NO, the modification kit may not be used for the measuring device. Safety instructions • Only use original parts from Endress+Hauser. • Comply with national regulations governing mounting, electrical installation, commissioning, maintenance and modification procedures. • The specialized technical staff involved in the mounting, electrical installation,... -
Page 7: Symbols Used
• Only open the housing for a brief period. Avoid the penetration of foreign bodies, moisture or contaminants. • Replace defect seals only with original seals from Endress+Hauser. • If threads are damaged or defective, the measuring device must be repaired. -
Page 8: Tools List
4. Expert → System → Administration → Activate software option: enter software license code (appl. package code) 5. Main menu → Expert → System → Administration → Software option overview: the activated software options are displayed Switch the I/O functionality, activate I/O hardware: 1. Unlock the keypad (2 sec) Endress+Hauser... - Page 9 • Modification kit serial number • Device modified with • New order code • Software license code to be entered (I/O alteration code) • Configuration • Connection data Fitting the wired-on tag plate (DK5009, DK50011, DK5009, DK50011, DKZ004): 1 → Endress+Hauser...
- Page 10 Replace the adhesive label with the new terminal designation in the connection compartment. Fit the nameplate: Fit the nameplate (optional) according to the existing device labeling (see also Section 3 → 5 Authorized personnel). Following modification, back up the data in the device memory or via Web server/ Fieldcare. Endress+Hauser...
- Page 11 7. I/O configuration 8. Alteration code: enter the software license code (I/O alteration code) 9. Click "OK" to confirm the software license code Check the data on the wired-on tag plate: Wired-on tag plate for DK5009, DK50011, DK8009, DK80011: Endress+Hauser...
- Page 12 • Software license code to be entered (I/O alteration code) • Configuration • Connection data Fitting the wired-on tag plate (DK5009, DK50011, DK5009, DK50011, DKZ004): 1 → Fit the adhesive label (DKZ004): Replace the adhesive label with the new terminal designation in the connection compartment. Endress+Hauser...
- Page 13 EA01164D Fit the nameplate: Fit the nameplate (optional) according to the existing device labeling (see also Section 3 → 5 Authorized personnel). Following modification, back up the data in the device memory or via Web server/ Fieldcare. Endress+Hauser...
- Page 14 7. Check that the new I/O function(s) is/are displayed in the subdirectory "I/O module" 2/3/4 Check the data on the wired-on tag plate: Wired-on tag plate for DK5009, DK50011, DK8009, DK80011: • Serial number of device • New order code • Software license code to be entered (appl. package code) Endress+Hauser...
- Page 15 Replace the adhesive label with the new terminal designation in the connection compartment. Fit the nameplate: Fit the nameplate (optional) according to the existing device labeling (see also Section 3 → 5 Authorized personnel). Following modification, back up the data in the device memory or via Web server/ Fieldcare. Endress+Hauser...
- Page 16 Technical changes such as upgrades, changes to configurations at inputs and outputs or modifications to Endress+Hauser flowmeters necessitate the modification of the product root (e.g. 5W4B => 5W4C) and/or the extended order code or the order code of the affected device.
-
Page 17: Promag, Promass 300, 500
EA01164D Promag, Promass 300, 500 Differentiating between the I/O hardware 4-20mA, puls./ freq./switch output Configurable I/O Relay A = Insertion direction Endress+Hauser... - Page 18 • It is possible to correctly distinguish between the I/O hardware. → 17 1 → 2 → 3 → N ic te r e r g ö ff iz e te n r ir s io I/ O 3 mm 2.5 Nm (1.8 lbf ft) 4 → I/O 3 I/O 2 Endress+Hauser...
- Page 19 Replace the adhesive label with the new terminal designation in the connection compartment. 9.3.4 Fit the nameplate: Fit the nameplate (optional) according to the existing device labeling (see also Section 3 → 5 Authorized personnel). Following modification, back up the data in the device memory or via Web server/ Fieldcare. Endress+Hauser...
- Page 20 EA01164D 9.3.5 Activating the new I/O hardware using the software license code (I/O alteration code) Proceed as described in Section 7.1 → 8 Endress+Hauser...
- Page 21 Technical changes such as upgrades, changes to configurations at inputs and outputs or modifications to Endress+Hauser flowmeters necessitate the modification of the product root (e.g. 5W4B => 5W4C) and/or the extended order code or the order code of the affected device.
-
Page 22: Promag, Promass 500-Digital
EA01164D Promag, Promass 500-digital 10.1 Differentiating between the I/O hardware 4-20mA, puls./ freq./switch output Configurable I/O Relay A = Insertion direction Endress+Hauser... - Page 23 • The assignment of the I/O hardware to the slots is known. → 5 • It is possible to correctly distinguish between the I/O hardware. → 17 1 → 2 → 3 → 4 → 5 → Endress+Hauser...
- Page 24 • Software license code to be entered (appl. package code) Wired-on tag plate for DKZ004: • Serial number of device • Modification kit serial number • Device modified with • New order code • Software license code to be entered (I/O alteration code) • Configuration • Connection data Endress+Hauser...
- Page 25 → 5 Authorized personnel). Following modification, back up the data in the device memory or via Web server/ Fieldcare. 10.3.5 Activating the new I/O hardware using the software license code (I/O alteration code) Proceed as described in Section 7.1 → 8 Endress+Hauser...
-
Page 26: Safety-Related Characteristic Values
Technical changes such as upgrades, changes to configurations at inputs and outputs or modifications to Endress+Hauser flowmeters necessitate the modification of the product root (e.g. 5W4B => 5W4C) and/or the extended order code or the order code of the affected device. - Page 27 Sicherheitstechnische Kenngrößen ..........50 Endress+Hauser...
-
Page 28: Übersicht Umbausätze
Mit Zulassung (z.B. IECEx) 1, 2, 3 Bei eichfähigem Verkehr 1 = Ausgebildete Fachkraft des Kunden, 2 = Von Endress+Hauser autorisierter Servicetechniker, 3 = Endress+Hauser (Messgerät an Hersteller zurücksenden) 4 = Mit der lokalen Zulassungsstelle prüfen, ob ein Ein-/Umbau unter Aufsicht erfolgen muss. -
Page 29: Autorisierter Personenkreis Zum Anbringen Neuer Typenschilder
Zulassung (z.B. IECEx) 2, 3 Bei eichfähigem Verkehr 1 = Ausgebildete Fachkraft des Kunden, 2 = Von Endress+Hauser autorisierter Servicetechniker, 3 = Endress+Hauser (Messgerät an Hersteller zurücksenden) 4 = Mit der lokalen Zulassungsstelle prüfen, ob ein Ein-/Umbau unter Aufsicht erfolgen muss. -
Page 30: Sicherheitshinweise
= NEIN, das Umbauset darf für das Messgerät nicht verwendet werden. Sicherheitshinweise • Nur Originalteile von Endress+Hauser verwenden. • Nationale Vorschriften bezüglich der Montage, elektrischen Installation, Inbetriebnahme, Wartung und Umbau einhalten. • Folgende Anforderungen an das Fachpersonal für Montage, elektrische Installation, Inbetriebnahme, Wartung und Umbau der Messgeräte müssen erfüllt sein:... -
Page 31: Verwendete Symbole
Messgerät ausschalten, bevor interne Abdeckungen entfernt werden. • Gehäuse nur kurzzeitig öffnen. Eindringen von Fremdkörpern, Feuchtigkeit oder Verunreinigung vermeiden. • Defekte Dichtungen nur durch Original-Dichtungen von Endress+Hauser ersetzen. • Defekte Gewinde erfordern eine Instandsetzung des Messgeräts. • Gewinde (z.B. von Elektronikraum- und Anschlussraumdeckel) müssen geschmiert sein, sofern keine abriebfeste Trockenschmierung vorhanden ist. -
Page 32: Promag, Promass 300, 500, 500-Digital
3. Hauptmenue → Experte → Eingabecode Werkseinstellung → 0000 oder vom Kunden definierten Eingabecode eingeben ( Nicht den Service Code eingeben) 4. Hauptmenue → Experte → I/O-Konfiguration → Umbaucode: Eingabe Software Lizenz Code (I/O alteration code) Daten auf dem Anhängeschild kontrollieren: Anhängeschild für DK5009, DK50011, DK8009, DK80011: Endress+Hauser... - Page 33 • Gerät umgebaut mit • Ordercode neu • Einzugebener Software Lizenz Code (I/O alteration code) • Konfiguration • Anschlusswerte Anhängeschild anbringen (DK5009, DK50011, DK5009, DK50011, DKZ004): 1 → Aufkleber anbringen (DKZ004): Aufkleber mit der neuen Anschlussklemmenbezeichnung im Anschlussraum ersetzen. Endress+Hauser...
- Page 34 EA01164D Typenschildsatz anbringen: Typenschildsatz (optional) gemäss bestehender Gerätebeschilderung anbringen (siehe auch Kapitel 3 → 29 Autorisierter Personenkreis). Nach Umbau Gerätebackup im Gerätespeicher oder via Webserver/Fieldcare zwecks Datensicherung. Endress+Hauser...
- Page 35 über Rolle "Instandhalter". 4. Menüleiste Menü! 5. Hauptmenü 6. Experte 7. I/O-Konfiguration 8. Umbaucode: Eingabe Software Lizenz Code (I/O alteration code) 9. Software Lizenz Code mit "OK" bestätigen Daten auf dem Anhängeschild kontrollieren: Anhängeschild für DK5009, DK50011, DK8009, DK80011: Endress+Hauser...
- Page 36 • Gerät umgebaut mit • Ordercode neu • Einzugebener Software Lizenz Code (I/O alteration code) • Konfiguration • Anschlusswerte Anhängeschild anbringen (DK5009, DK50011, DK5009, DK50011, DKZ004): 1 → Aufkleber anbringen (DKZ004): Aufkleber mit der neuen Anschlussklemmenbezeichnung im Anschlussraum ersetzen. Endress+Hauser...
- Page 37 EA01164D Typenschildsatz anbringen: Typenschildsatz (optional) gemäss bestehender Gerätebeschilderung anbringen (siehe auch Kapitel 3 → 29 Autorisierter Personenkreis). Nach Umbau Gerätebackup im Gerätespeicher oder via Webserver/Fieldcare zwecks Datensicherung. Endress+Hauser...
- Page 38 Enter bestätigen 7. Anzeige der neuen I/O Funktion(en) im Unterverzeichnis "I/O-Modul" 2/3/4 prüfen Daten auf dem Anhängeschild kontrollieren: Anhängeschild für DK5009, DK50011, DK8009, DK80011: • Seriennummer Gerät • Ordercode neu • Einzugebener Software Lizenz Code (Appl. package code) Endress+Hauser...
- Page 39 1 → Aufkleber anbringen (DKZ004): Aufkleber mit der neuen Anschlussklemmenbezeichnung im Anschlussraum ersetzen. Typenschildsatz anbringen: Typenschildsatz (optional) gemäss bestehender Gerätebeschilderung anbringen (siehe auch Kapitel 3 → 29 Autorisierter Personenkreis). Nach Umbau Gerätebackup im Gerätespeicher oder via Webserver/Fieldcare zwecks Datensicherung. Endress+Hauser...
- Page 40 Verpflichtende Anweisung Technische Änderungen wie Upgrades-, Änderungen von Konfigurationen an Ein-/ Ausgängen, sowie Umbauten an Endress+Hauser Durchflussmessgeräten führen zu einer notwendigen Anpassung der Gerätewurzel (z.B. 5W4B => 5W4C) und/oder des erweiterten Bestellcodes, bzw. des Bestellcodes des betroffenen Gerätes. Veränderungen dieser Art erfordern somit neue Typenschilder, welche jede technische Veränderung der genannten...
-
Page 41: Promag, Promass 300, 500
EA01164D Promag, Promass 300, 500 Unterscheidung der I/O Hardware 4-20mA, Imp./ Freq./Schaltausg. Konfigurierbares Relais A = Einsteckrichtung Endress+Hauser... - Page 42 • Die I/O Hardware kann richtig unterschieden werden. → 41 1 → 2 → 3 → N ic te r e r g ö ff iz e te n r ir s io I/ O 3 mm 2.5 Nm (1.8 lbf ft) 4 → I/O 3 I/O 2 Endress+Hauser...
- Page 43 Aufkleber anbringen (DKZ004): Aufkleber mit der neuen Anschlussklemmenbezeichnung im Anschlussraum ersetzen. 9.3.4 Typenschildsatz anbringen: Typenschildsatz (optional) gemäss bestehender Gerätebeschilderung anbringen (siehe auch Kapitel 3 → 29 Autorisierter Personenkreis). Nach Umbau Gerätebackup im Gerätespeicher oder via Webserver/Fieldcare zwecks Datensicherung. Endress+Hauser...
- Page 44 EA01164D 9.3.5 Freischalten der neuen I/O Hardware mittels Software Lizenz Code (I/O alteration code) Vorgehen wie in Kapitel 7.1 → 32 Endress+Hauser...
- Page 45 Verpflichtende Anweisung Technische Änderungen wie Upgrades-, Änderungen von Konfigurationen an Ein-/ Ausgängen, sowie Umbauten an Endress+Hauser Durchflussmessgeräten führen zu einer notwendigen Anpassung der Gerätewurzel (z.B. 5W4B => 5W4C) und/oder des erweiterten Bestellcodes, bzw. des Bestellcodes des betroffenen Gerätes. Veränderungen dieser Art erfordern somit neue Typenschilder, welche jede technische Veränderung der genannten...
-
Page 46: Promag, Promass 500-Digital
EA01164D Promag, Promass 500-digital 10.1 Unterscheidung der I/O Hardware 4-20mA, Imp./ Freq./Schaltausg. Konfigurierbares Relais A = Einsteckrichtung Endress+Hauser... - Page 47 Vor der Erweiterung mit zusätzlicher I/O Hardware sind folgende Informationen zwingend erforderlich: • Die Zuordnung der I/O Hardware zu den Steckplätzen ist bekannt. → 29 • Die I/O Hardware kann richtig unterschieden werden. → 41 1 → 2 → 3 → 4 → 5 → Endress+Hauser...
- Page 48 • Ordercode neu • Einzugebener Software Lizenz Code (Appl. package code) Anhängeschild für DKZ004: • Seriennummer Gerät • Seriennummer Umbausatz • Gerät umgebaut mit • Ordercode neu • Einzugebener Software Lizenz Code (I/O alteration code) • Konfiguration • Anschlusswerte Endress+Hauser...
- Page 49 Typenschildsatz (optional) gemäss bestehender Gerätebeschilderung anbringen (siehe auch Kapitel 3 → 29 Autorisierter Personenkreis). Nach Umbau Gerätebackup im Gerätespeicher oder via Webserver/Fieldcare zwecks Datensicherung. 10.3.5 Freischalten der neuen I/O Hardware mittels Software Lizenz Code (I/O alteration code) Vorgehen wie in Kapitel 7.1 → 32 Endress+Hauser...
-
Page 50: Sicherheitstechnische Kenngrößen
Verpflichtende Anweisung Technische Änderungen wie Upgrades-, Änderungen von Konfigurationen an Ein-/ Ausgängen, sowie Umbauten an Endress+Hauser Durchflussmessgeräten führen zu einer notwendigen Anpassung der Gerätewurzel (z.B. 5W4B => 5W4C) und/oder des erweiterten Bestellcodes, bzw. des Bestellcodes des betroffenen Gerätes. Veränderungen dieser Art erfordern somit neue Typenschilder, welche jede technische Veränderung der genannten... - Page 52 *71389157* 71389157 www.addresses.endress.com...