
Related Manuals for Haier GE GFW510SCN0


Summary of Contents for Haier GE GFW510SCN0
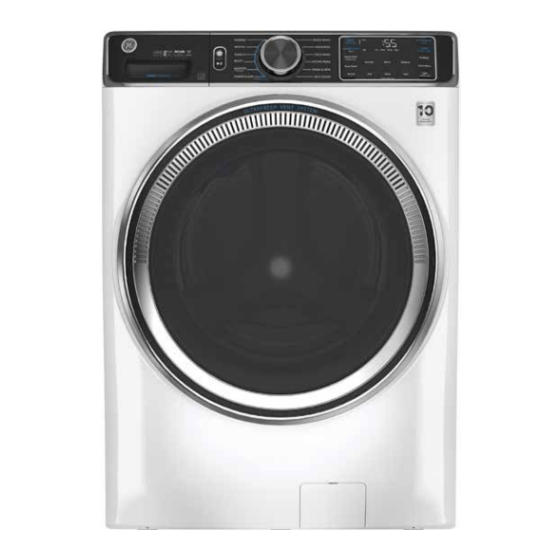
- Page 1 Technical Service Guide April 2020 UltraFresh Front Load Washer GFW510SCN0 GFW550SSN0 GFW550SPN0 GFW650SSN0 GFW650SPN0 GFW850SSN0 GFW850SPN0 31-9327 Rev. 1 ~ 4/27/20...
-
Page 2: Safety Information
5. Locate the Warranty page. GE Appliances, a Haier Company Copyright © 2020 All rights reserved. This service guide may not be reproduced in whole or in part in any form without written permission from GE Appliances, a Haier Company. – 2 –... -
Page 3: Table Of Contents
Table of Contents Safety Information ........................2 Warranty ............................2 Table of Contents..........................3 Safety Requirements ........................6 Nomenclature ..........................7 Specifications ..........................8 Thermistor Resistance ......................8 Control Features ...........................9 Quick Start ...........................9 Display and Status Indicators ....................10 Washer Features .........................11 Using the Washer .........................19 Drain Pump Filter ........................21 Drain Hose Extension ......................21 Washer Cycle Defaults ......................22 Stacking Instructions ........................23... - Page 4 Main Board ...........................29 User Interface Board (UI) .....................30 Accelerometer Board ......................30 Inverter Board ........................31 Wi-Fi Board ...........................31 Cabinet and Structure........................32 Control Panel ........................32 Top Panel ..........................33 Door ............................33 Door Reversal ........................34 Door Lock ..........................38 Back Cover ...........................40 Front Panel ...........................41 Damper ..........................42 Overnight Dry Fan ........................43 Tub Light ..........................44...
- Page 5 Drain Filter ..........................59 Drain Pump ...........................59 Drive System ..........................61 Motor Assembly ........................61 Suspension and Tub Assembly ....................63 Dampers ..........................63 Outer Tub Assembly ......................64 Diagnostics and Service Information ....................67 Consumer Fault Code Mode Entry ..................68 Service Mode Entry ......................68 Service Mode Tests ......................69 Fault Codes ..........................72 510 / 550 Schematic ........................79 650 / 850 Schematic ........................80...
-
Page 6: Safety Requirements
Safety Requirements GEA Factory Service Employees are required to use safety glasses with side shields, safety gloves and steel toe shoes for all repairs. Prescription Safety Glasses Brazing Glasses Safety Glasses must be ANSI Z87.1-2003 compliant Plano Type Safety Glasses Cut Resistant Sleeve(s) Electrically Rated Glove and Dyneema®Cut Resistant... -
Page 7: Nomenclature
Nomenclature Model Number G F W 8 5 0 S S N 0 W W Brand Series/ Color G: GE Appliances Features WW: White Configuration F: Front Load Engineering Revision Alpha or Numeric Platform Model Year W: Washer N: 2019 Partner Type S: Standard Product Type... -
Page 8: Specifications
Specifications Windings and Coils Resistance Values Thermistor Resistance Drain Pump 19.5±10% Temp Approx. Ω Door Lock (ohms) °C °F 70 at 77 °F/25 °C (Pin2, Pin 3) -10° 14° 548722 Water Valves -5° 23° 45778 1000±10% Hot and Cold 0° 32°... -
Page 9: Control Features
Control Features Quick Start 1. Load clothes into the washer and close the door. 2. If the screen is dark, press the Power pad or turn the knob to “wake up” the display. 3. Turn the knob to select the desired cycle. 4. -
Page 10: Display And Status Indicators
Display and Status Indicators (Features and appearances will vary) The display shows the approximate time remaining until the end of the cycle and the washer cycle status (Fill, Wash, Rinse and Spin). NOTE: The cycle time is affected by how long it takes the washer to fill. This depends on the water pressure in the home. -
Page 11: Washer Features
Washer Features Models: GFW850 Models: GFW650 Models: GFW550 Models: GFW510 (Continued next page) – 11 –... - Page 12 Power Press Power to "wake up" the display. If the display is active, press Power to put the washer in standby mode. NOTE: Pressing Power does not disconnect the appliance from the power supply. Start and Pause Press to start a wash cycle. If the washer is running, pressing it once will pause the washer and unlock the door.
- Page 13 Cold Wash Cycle for normal, regular, or typical use for washing up to a full load of normally soiled cotton clothing using only cold water. Active Medium to lightly soiled athletic wear items of technical or synthetic fabrics. Wear* Rinse and To quickly rinse out any items at any time.
- Page 14 Settings Individual settings for soil level (Level), water temperature (Temp) and spin speed (Spin) can be set from the minimum to maximum. In general, the higher up the column, the more energy will be used. Soil Changing the soil level increases or decreases the wash time to remove different amounts of soil.
- Page 15 Options SMARTDISPENSE™ (on some models): When selected, this feature will automatically add detergent to the wash, eliminating the need to add detergent for each load. See SmartDispense™ (on some models) under Using The Washer in this section for details. MY SETTINGS (on some models): To save favorite settings, set the desired settings for wash cycle, soil level, spin speed and wash temperature settings and hold down the My Settings pad for 3 seconds.
- Page 16 Wi-Fi (may be a shared pad with other options): Press and hold the Wi-Fi pad for 3 seconds to activate. See the Wi-Fi Connect section for details on how to get started with Wi-Fi connection. NOTE: If the door is not fully closed, a reminder signal will beep, reminding to do so. NOTE: If the door is opened when the delay is counting down, the machine will enter the pause state.
- Page 17 To select ULTRAFRESH VENT at any other point, power on the washer, ensure a cycle is not actively running, and remove any garments from the basket, then press and release the ULTRAFRESH VENT pad so that the notification tune plays and the ULTRAFRESH VENT pad LED begins to blink. Then press the ULTRAFRESH VENT pad again to start the feature.
- Page 18 Light (on some models) The basket light will turn on and remain on for 5 minutes when the door opens, Start/Pause pad is pressed, or by pressing the Light pad. The basket light can be turned off by pressing and holding the Light pad.
-
Page 19: Using The Washer
Do NOT put detergent packets in the dispenser Using the Washer drawer. Dispenser Drawer NOTE: Use only liquid or powder HE detergents and additives in the dispenser drawer. Laundry Slowly open the dispenser drawer by pulling it out detergent packets should only be added directly until it stops. - Page 20 Detergent Compartment Fabric Softener Compartment • Only use high-efficiency detergent in this If desired, pour the recommended amount of washer. Use the detergent manufacturer’s liquid fabric softener into the compartment labeled recommended amount. DO NOT fill above “Fabric Softener”. the MAX line. Use only liquid fabric softener in the dispenser.
-
Page 21: Drain Pump Filter
Drain Pump Filter Drain Hose Extension Clean EVERY MONTH to remove any items There is a drain hose kit to allow for additional that may have been caught in the filter or length to the washer drain hose. Only one should housing. -
Page 22: Washer Cycle Defaults
Washer Cycle Defaults When a cycle is initially set, the default cycle settings are displayed. The following table displays the default selections for each cycle. Times will also change depending if time saver has been selected and/or different options selected. Default Default Default... -
Page 23: Stacking Instructions
Stacking Instructions If you are planning to stack the washer and dryer, • Closet doors must be louvered or otherwise order Stacking Kit number GFA28KITN to be ventilated and have at least 60 square inches used for this dryer. of open area equally distributed. If the closet contains both a washer and a dryer, doors Kit sold separately. -
Page 24: Remove The Leveling Dryer Legs
Remove The Leveling Dryer Legs Install Spacers to Dryer Bottom 1. Carefully lay the dryer on its back or side. 1. Locate a spacer on the bottom side with its Use the packing material so not to scratch the holes over the leveling leg holes. Attach finish on the dryer. -
Page 25: Prepare The Washer And Dryer
32 Brackets for 32-Inch Washer and Dryer Prepare The Washer And Dryer Combinations 1. Place the washer in the approximate final Attach brackets to washer using four screws on installation location. each side. 2. Make sure the washer is level. Refer to the washer Installation Instructions for details. -
Page 26: Install Dryer And Bracket On Washer
Install Dryer And Bracket On Washer Finalize The Installation 1. Lift the dryer onto the top of the washer. Be CAUTION: Do not push on the dryer once sure to lift the dryer high enough to clear installed to top of the washer. Pushing on the the washer control panel. -
Page 27: Component Locator Views
Component Locator Views Top View Hot Water Cold Water Valves Valve UltraFresh Vent Fan Main Board Pressure Hose Dispenser Assembly Front View Door Glass hose Dispenser fill hose Front Counterweights Door Latch Connector Tub To Damper Pump Hose Heater Located At The Drain Filter Cleanout Bottom Front Of Tub (Continued next page) -
Page 28: Rear View (Back Cover Removed)
Rear View (Back Cover Removed) Pulley Belt Rear Bearing Ground Wire Pressure Drive Chamber Motor Dispenser View NOTE: Bulk Tank On GTW650 and GTW850 Models Only PreTreat Bleach Compartment Compartment Bulk Tank Detergent Fabric Softener Fabric Softener Bleach Compartment Compartment Compartment Compartment Detergent... -
Page 29: Main Board
Main Board NOTE: Wire colors in the following pictures may not be the same as the machine being serviced. To Wi-Fi Pressure Board J701 Sensor J801 J506 J702 J615 J512 J602 J502 J901 J513 J501 Wi-Fi Board J514 J101 J101 Board Line Voltage J501 Damper (Pin 1: Open Switched Line) (Pin 2: Neutral) (Pin 3: Closed Switched Line) J502 Damper (Pin 1: COM Switched Line) J506 AC Voltage to Heater, AC Voltage to Inverter... -
Page 30: User Interface Board (Ui)
User Interface Board (UI) J101 J101 DC Voltage in from Main Board and Communication Out to Main Board Accelerometer Board J901 DC Voltage Comm in from Main Board – 30 –... -
Page 31: Inverter Board
Inverter Board J502 J301 J101 J401 J101 Line and Neutral J301 Voltage Out to Stator J401 For Resistance Checking Only to Drive Motor J502 Output and Input to Hall Sensor in Motor Wi-Fi Board J101 DC Voltage in from Main Board –... -
Page 32: Cabinet And Structure
Cabinet and Structure 3. Remove the five Phillips-head screws from Control Panel the control panel dispenser recess. The control panel is held in place with five Phillips-head screws behind the dispenser drawer and two tabs on the right side of the control panel. Also when the dispenser drawer is removed, the RJ45 connector can be accessed. -
Page 33: Top Panel
6. Push in on the tab that secures the RJ45 3. Pull the top panel forward to disengage the connector to the control panel. rear guide posts and then lift up. RJ45 Connector Door Top Panel The door is reversible and can be ordered as WARNING: Sharp edges may be exposed when a complete assembly (hinge included). -
Page 34: Door Reversal
Step 2: Remove Hinge Cover And Door Hinge Door Reversal • Remove the three screws from the hinge WARNING: Shock Hazard Unplug the appliance cover and remove the cover. or turn off the circuit breaker before servicing. Pressing the Power pad DOES NOT disconnect •... - Page 35 Step 4: Remove, Reverse And Replace Door Step 5: Replace The Door Himge And The Striker Cover On The Opposite Side • Remove the two screws from the striker • Rotate the door hinge and replace it on the assembly and remove the assembly by pulling oppositeside with its screws.
- Page 36 Step 7: Remove Lock Assembly And Install On • Do NOT rotate lock assembly. Move it to The Other Side Of Washer the opposite side of the washer and connect the pin connector making sure it is fully • Remove the two screws from the lock cover snap locked together.
- Page 37 Step 8: Reconnect Pin Connector From The • Close the washer door. Washer And Replace The Terminal Holder NOTE: Make sure the door opens and closes • Reconnect the pin connector and press the correctly. If not, repeat all steps making sure terminal holder back into the washer face on all parts and screws are securely seated.
-
Page 38: Door Lock
Checking from the Main Board Door Lock 1. To check the door switch, with the door The door lock assembly consists of the door closed, pins 2 to 3 will read approximately switch and locking mechanism. The lock 127 ohms. Pin 1 to 2 will read open. If no mechanism functions are as follows: reading from pins 2 to 3, replace the door lock assembly. - Page 39 The image below shows the door lock assembly When reversing the door assembly, the lock in the locked position. If the door is locked with assembly will need to be moved to the opposite clothes in the washer, remove the top panel, side as well.
-
Page 40: Back Cover
3. Remove the lock assembly from the front Back Cover panel and disconnect the harness from the door lock assembly and set aside. The back cover must be removed to access the belt, pulley, pressure chamber, and motor. Back Cover Removal The back cover is attached to the washer with eight Phillips-head screws. -
Page 41: Front Panel
5. Remove three Phillips-head screws from the Front Panel bottom of the front panel. The front panel is inserted onto four posts that are attached to each side of the cabinet and held in place with four Phillips-head screws. A gasket provides a watertight seal between the front panel and outer tub. -
Page 42: Damper
3. Slide the damper toward the back releasing Damper the tabs from the panel. The damper is used to allow fresh air inside of the tub and basket to help eliminate odors, keep the tub and basket dry when not in use and allow air to circulate when using the 1-step wash and dry feature. -
Page 43: Overnight Dry Fan
3. Disconnect the fan harness connector. Overnight Dry Fan The overnight dry fan is used for the 1-step wash and dry of small loads. This cycle is the only cycle when the fan is used. It is not used for the UltraFresh or Tumble Care cycles. -
Page 44: Tub Light
6. Located inside the tub is a self-cleaning Tub Light screen filter. To access this filter if it needs to be replaced, remove the hose clamp The tub light is an LED light used to illuminate the securing the water tube to the nozzle in basket to make viewing easier for the consumer. -
Page 45: Tub Gasket
2. Disconnect the inline harness connector to Tub Gasket the tub light. The tub gasket provides a watertight seal between the front panel and the outer tub. The front of the tub gasket is secured to the front panel flange by a wire clamp located in the fold of the gasket. - Page 46 5. Disconnect the hose that connects to the 8. Remove the LED tub light by pushing it glass clean nozzle. through to the outside of the gasket. 9. To remove the damper from the gasket, 6. Pull the nozzle out from the inside of the gasket.
- Page 47 Tub Gasket Reinstallation 5. Ensure the gasket is properly positioned. The damper vent opening should be located at the 1. When reinstalling the gasket, lubricate both 12 o'clock position. inner and outer lips of the gasket with liquid detergent. This will make the gasket slip into position easily.
-
Page 48: Heater Assembly (650 And 850 Models)
8. With the spring of the wire clamp at the Heater Assembly (650 and 850 Models) bottom of the tub gasket (boot), insert the wire clamp into the lip of the gasket. • The heater operates only when Sanitize or Tub Wash is selected. - Page 49 The heater assembly is held in place by a bracket 5. Loosen the 10-mm hex-nut until it is flush with the end of the stud. attached to the outside of the outer tub, and a 10-mm hex-nut which presses a rubber gasket 6.
-
Page 50: Thermistor
Operation of the thermistor can be checked by Thermistor using Service Test Mode t08 (see the Service Mode Test in the Diagnostics and Service The control uses a water temperature sensor Information section of this guide). (thermistor) to regulate the wash water temperature. -
Page 51: Electronics
Electronics User Interface (UI) Board The User Interface (UI) Board is mounted to the control panel assembly under the plastic cover. It consists of the display board, cycle select board and the power/pause button board. They are all RJ45 connected together and come all as one part. Connector NOTE: The cycle select knob does not need to be removed as it will stay with the control... -
Page 52: Wi-Fi Board
Wi-Fi Board Main Board The Wi-Fi board is powered by the Main board The main board powers the User Interface (UI) from the J302 connector. It is located/mounted and Inverter boards. The main board receives on the housing of the Main board. commands from the User Interface board and controls washer operation, communicating with Touch Board Diagnosing... -
Page 53: Accelerometer Board
Main Board Removal Accelerometer Board Diagnosing 1. Remove the Top Panel (see Top Panel in the Check for 5 VDC from pin 1 to pin 4 at connector Cabinet and Structure section of this service J901 on the accelerometer board. If voltage is guide present, replace the accelerometer board. -
Page 54: Inverter Board
Inverter Board The inverter board converts AC to a high DC voltage to power the drive motor. It also receives a lower DC communication voltage from the main board which will make the motor rotate back and forth for agitation, or ramp up to a high speed spin. The inverter board is enclosed in a protective housing and cover located inside the cabinet, at the bottom left of the washer cabinet. -
Page 55: Fill System
Fill System Water Level Pressure Sensor Water Levels The wash water level is approximately 1.86 The water level sensor is located on the main inches deep at the bottom center of the wash board. It is connected by a hose to an air basket. -
Page 56: Water Valves
Water Valves Main Board There are different water valves that may be GFW650 and GFW850 found depending on the washer being serviced. A single hot water valve and a double cold, triple cold or quadruple cold water valve. Main Board GFW510 Main Board The valve is located at the rear of the cabinet... -
Page 57: Bulk Dispenser Assembly
Failures associated with the water valves can Bulk Dispenser Assembly initiate the Consumer Help Indicator if no water enters or is turned off at the house supply. Or The dispenser assembly provides automatic any of the following fault codes: 6, 8, 19, 20, 25, dispensing of detergent, prewash, bleach and 27 or 65. - Page 58 b. If necessary, carefully break each hose loose by inserting a small flat-blade screw- driver under the hose to break the seal. Reed Switch c. Remove the hoses. d. Disconnect the reed switch harness connector. Reed Switch Connector The bleach cup will always and automatically flush with water near the end of every wash cycle before going into rinse.
-
Page 59: Drain System
Drain System Drain Filter Drain Pump The drain pump comes with a consumer The pump consists of a 120 VAC, 60 Hz motor, cleanable filter. It is accessible through an impeller, impeller housing, and a removable filter access door at the bottom of the front panel. To that helps prevent foreign objects from entering access the filter: the pump impeller and drain outlet. - Page 60 Drain Pump Removal 1. Ensure water is drained from the washer as explained in the Drain Filter section. 2. Remove the front panel (see Front Panel in the Cabinet and Structure section of this service guide). 3. Remove the tub to pump hose and drain hose from the drain pump.
-
Page 61: Drive System
Drive System Motor Assembly Removal Motor Assembly 1. Remove the back cover (see Back Cover The motor assembly consists of a reversible, in the Cabinet and Structure section of this variable speed, 3-phase induction DC motor, and service guide). sensor. The motor drives the tub drive pulley with a 7-rib belt. - Page 62 5. Slide the motor toward the rear of the washer and set it on the washer base. 6. Push forward on the tub assembly and rotate the motor shaft upwards to remove the motor from the rear of the washer. Operation of the motor assembly can be checked by using Service Mode tests 15 and 26 (see the Service Mode Test in the Diagnostics and...
-
Page 63: Suspension And Tub Assembly
Suspension and Tub Assembly 4. If the damper bracket needs to be replaced, a Dampers Phillips-head or 8-mm socket can be used to remove the bolt. There are four dampers securing the tub to the bottom chassis. There are two dampers on the left side, and two damper on the right side. -
Page 64: Outer Tub Assembly
5. Disconnect the green ground wire from the Outer Tub Assembly tub bearing on the rear tub to the motor shield, the red and white wires from the The outer tub assembly is constructed in two heater, and the thermistor connector. halves and contains the wash basket. - Page 65 7. Remove the drain hose from the bottom of the 12. Remove the fifteen 10-mm bolts securing the rear half of the tub. tub front half to the tub rear half. 8. Remove the heater assembly from the front NOTE: There is a seal between the front and rear side of the tub (see Heater Removal under halves of the tub.
- Page 66 17. Disengage the springs supporting the rear half of the tub and remove the rear tub half. NOTE: Both the right and left springs connect to the tub in the front openings of the molded tub spring mounts. For proper balance, ensure that the springs are reinstalled in the original mounts.
-
Page 67: Diagnostics And Service Information
Diagnostics and Service Information The washer control has a Service Mode that can be utilized by the service technician in order to test critical components and to access fault codes. This Service Mode will help the service technician to quickly identify failed or improper operation of washer components. Diagnostic Guide Before testing the washer operation using the Service Mode, check the following: 1. -
Page 68: Consumer Fault Code Mode Entry
Consumer Fault Code Mode Entry • From an idle state only (all LED's off), press and hold Start pad for 10 seconds. • After holding Start pad for 10 seconds, all LED's will turn on, signifying user may release Start pad. Behaviors While In Consumer Fault Code Mode Entry •... -
Page 69: Service Mode Tests
Service Mode Tests Test Test Name Description All LED’s on All LED's on the display will blink including "88" on the SSD at a rate of Fault Codes • Pressing Start pad will blink the first fault code. • Display fault code in SSD. •... - Page 70 Test Test Name Description Pressure Sensor • Pressing Start/Pause will start the test. • Door will lock while test is active. • Pressure sensor test will have a timeout. • Cold valve will turn on at start of the test. •...
- Page 71 Test Test Name Description Heater and • Pressing Start/Pause will start the test. Thermistor • Heater test should perform child safety. • The door must be closed and locked during the test. If the door is open, the lock LED will blink. •...
-
Page 72: Fault Codes
Fault Codes Fault Description Trigger Condition Action Code No Faults Displayed in Service • Displayed when no faults are found. Mode only when there are no faults to display. Lock Monitor This fault is set if the • Check the door lock using Service motor shaft speed Mode spin test 14. - Page 73 Fault Description Trigger Condition Action Code Pressure Sensor Determines if appropriate • Check to make sure house water Loss pressure changes supply valves are turned on. are seen during fill. It • Check water valve operation. assumes there is a •...
- Page 74 Fault Description Trigger Condition Action Code Drain Pump Pressure sensor indicates • Fill tub using Service Mode test 7 and Clearing water in the tub after check drain pump operation using Algorithm Failed attempting to drain. Service Mode test 12. •...
- Page 75 Fault Description Trigger Condition Action Code Critical Door Cycle canceled due to • Verify the door is closed properly, if Lock Failure inability to reach desired door does not close freely, lift the door door lock state. until it closes freely. •...
- Page 76 Fault Description Trigger Condition Action Code IMP Overheated Inverter over temperature • Check whether drum is easy to tumble. (> 221°F) for 5 seconds • Check that motor has no signs of over temperature. • Reset inverter board by unplugging washer for 30 seconds.
- Page 77 Fault Description Trigger Condition Action Code 33, 34, Inverter Fault Any of these faults can be • Run Service Mode spin test 14 to full 41, 42, set if the inverter board completion. If cycle fully completes, no 43, 44, reports a fault.
- Page 78 Fault Description Trigger Condition Action Code ADC Health After drain control should • Replace main board. Check Fault go to idle End Cycle ADC Health Check Fault. This fault is set when any ADC Self-Diagnosis channel reports an out- of-tolerance value for 10 seconds.
-
Page 79: 510 / 550 Schematic
510 / 550 Schematic – 79 –... -
Page 80: 650 / 850 Schematic
650 / 850 Schematic – 80 –... -
Page 81: Index
Index Symbols 510 / 550 Schematic 79 Main Board 27, 29, 30, 31, 38, 42, 43, 51, 52, 53, 54, 55, 56, 650 / 850 Schematic 80 76, 78 Motor Assembly 61 Motor Diagnosing 61 Accelerometer Board 30, 53 Accelerometer Board Diagnosing 53 Nomenclature 7, 27 Back Cover 28, 40, 49, 53, 54, 61, 63, 64 Outer Tub Assembly 64... - Page 82 User Interface 52 User Interface Board 30, 51 User Interface Board Diagnosing 51 Using the Washer 19 Warranty 2 Wash Cycles 12 Washer Cycle 22 Washer Features 11 Water Levels 55 Water Temperature 50 Water Valves 56 Wi-Fi 52, 54 Wi-Fi Board 29, 31, 52, 54 –...