Table of Contents
Advertisement
Advertisement
Table of Contents
Troubleshooting

Related Manuals for LG WM3001HRA


Summary of Contents for LG WM3001HRA
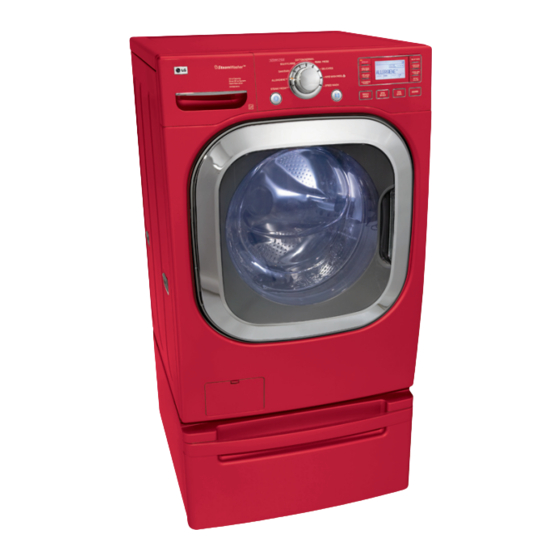
- Page 1 LG TRAINING MANUAL LG TRAINING MANUAL Spring 2009 Washer Training WM3001HRA...
- Page 2 The manufacturer and seller are not to be held responsible for any liability incurred from its use. COMPLIANCE The responsible party for this device’s compliance is LG Electronics Alabama, Inc.; 201 James Record Road, Huntsville, AL, 35813. WM3001H*A...
-
Page 3: Table Of Contents
TRAINING MANUAL WM3001H*A WM3001H*A SAFETY NOTICES (The Small Print Page) Contents Specifications Warranty Features Controls Fuzzy Logic Door Lock Child Lock, Steam, and Drum Light Load Sensing Function Water Circulation and Steam Parts Identification Accessories Shipping Bolts Connections (Water, Drain, Electricity) Pedestal Kit (Old Style) Pedestal Kit (New Style) Control Panel... - Page 4 TRAINING MANUAL WM3001H*A Disassembly and Repair, continued Tub and Drum Dampers Test Mode Test Mode Display Error Display Troubleshooting Summary Troubleshooting (with Error Codes) Inlet Valve Error Drain Error Heating Error (TE Error Code) Locked Motor Error (LE Error Code) Door Open Error Unbalance Error Overflow Error...
-
Page 5: Specifications
TRAINING MANUAL WM3001H*A INTRODUCTION The WM3001is a top-of-the-line front-loader washer with the optional cycles of Allergiene™, Steam, and Tub Clean. The new features include the larger, square door, the balancing ring, and the drum antivibration system. SPECIFICATIONS WM3001H*A Page 4 Washer... -
Page 6: Warranty
TRAINING MANUAL WM3001H*A WARRANTY Warranty statements vary by product. Be sure to check the warranty that was included with the product because that is the valid warranty. This statement is generic and intended for instructional purposes only. WM3001H*A Page 5 Washer... -
Page 7: Features
TRAINING MANUAL WM3001H*A FEATURES ULTRA CAPACITY The larger drum (4.2 cu. ft. IEC) allows higher head drop, greater centrifugal force, and washing of larger and heavier loads and oversized items (comforters, curtains, blankets, etc.) There is less wrinkling and tangling of the laundry. (See BULKY / LARGE, page 6.) DIRECT DRIVE The brushless DC motor drives the drum directly without... -
Page 8: Controls
TRAINING MANUAL WM3001H*A FEATURES, continued BUILT-IN HEATER The internal heater helps maintain the water at its optimal temperature for selected cycles. The SANITARY cycle kills most common germs and bacteria. The ALLERGIENE cycle is not quite as hot but kills most dust mites and other allergens in laundry. (See additional information on page 29.) CHILD LOCK This allows the user to lock the controls. -
Page 9: Fuzzy Logic
TRAINING MANUAL WM3001H*A FUZZY LOGIC To get the best washing performance, the user selects one of the standard cycles. Sensors in the WASHER make an infinitely variable number of adjustments as the cycle progresses. Adjustments are automatically made for load size, incoming water temperature, soil level, rinses required, and other variables. - Page 10 TRAINING MANUAL WM3001H*A CHILD LOCK The CHILD LOCK feature prevents unwanted use of the washer. Press and hold the PRE-WASH button for three seconds to lock or unlock the control panel. When the CHILD LOCK is set, all controls except the CHILD LOCK button are disabled. STEAM The STEAM feature offers enhanced washing performance with lower water and energy consumption.
-
Page 11: Load Sensing Function
TRAINING MANUAL WM3001H*A LOAD SENSING FUNCTION In order to determine the size and weight of the load, the machine begins each cycle by tumbling the load a couple of times. It spins up to approximately 120 rpm for approximately 6 seconds. (Speed and time may vary by model.) Load sensing occurs on NORMAL and SANITARY CYCLES only. - Page 12 TRAINING MANUAL WM3001H*A At the beginning of the cycle, the washer tumbles the load to determine its weight (see previous page) and displays the approximate load size via the LOAD SIZE ICON. The measurement suggested on the icon will allow you to adjust the amounts of detergent, bleach, and softener for improved economy and efficiency.
-
Page 13: Water Circulation And Steam
TRAINING MANUAL WM3001H*A WATER CIRCULATION and STEAM The recirculation pump circulates the water during most of the cycle. During the WASH cycle, it runs continuously for the first 3 minutes and then intermittently throughout the cycle. During the RINSE cycle, it runs continuously as soon as the appropriate amount of rinse water has been added. -
Page 14: Parts Identification
TRAINING MANUAL WM3001H*A PARTS IDENTIFICATION The air vent on the back of the machine must be left open and clear at all times. If the washer and dryer are installed in a closet or closed laundry alcove, there must be sufficient clearance and ventilation. -
Page 15: Accessories
TRAINING MANUAL WM3001H*A ACCESSORIES The washer comes with the two input hoses. The blue stripe is for cold water and the stripe is for hot water. The hoses are not mechanically identical. It is critical to the performance of the washer to have the hot and cold hoses connected correctly. The hot hose is a thicker material suitable for higher temperatures and pressure. - Page 16 TRAINING MANUAL WM3001H*A INSTALLATION REMOVE THE SHIPPING BOLTS. LEAVE THEM WITH THE CUSTOMER. The lower right bolt is equipped with a clip that secures the cord so it is impossible to plug in the machine without removing the bolt. The cord is further secured by an adhesive sticker which must be broken to free the cord to plug in the machine.
-
Page 17: Connections (Water, Drain, Electricity)
TRAINING MANUAL WM3001H*A CONNECTIONS WATER Be sure the rubber washer is inside the hose end. Attach the hoses to the washer (red is HOT, blue is COLD). Tighten them firmly but don’t strip the plastic threads on the washer connections. The hoses are clearly marked by temperature. The hose is thicker and has a higher temperature rating and burst strength. - Page 18 TRAINING MANUAL WM3001H*A INSTALLATION (PEDESTAL KIT) This procedure covers installing and leveling the 7½” and 13” pedestals for 27” washers, dryers, and combos. If the products are stacked, the washer must be below the dryer, and only one pedestal is required. Remove the pedestal, installation hardware, and instructions from the shipping carton.
- Page 19 TRAINING MANUAL WM3001H*A PEDESTAL, continued Depending upon the model, your pedestal may have straight or curved brackets. The curved ones are to be used on the rear positions when mounting a dryer to a pedestal, but can also be used in any other position on the pedestal.
- Page 20 TRAINING MANUAL WM3001H*A INSTALLATION (Pedestal, new style) For 27” Pedestals (Washer, Dryer, and Combo) Remove the pedestal, installation hardware, and instructions from the shipping container. (The style may vary among models.) The pedestal kit includes: 1 drawer divider 1 wrench 4 retainers (dryer only) 18 screws (8 for dryer) Level the pedestal on a solid, flat, level...
- Page 21 TRAINING MANUAL WM3001H*A INSTALLATION (Pedestal, new style, continued) Insert the T-clip of the four retainers into the dryer base, as shown. Press up on the back of the clip and pull outward to lock it into place. Set the dryer on the pedestal. (The dryer feet fit the innermost holes in the mounting brackets.) Make sure the screws on the pedestal align...
-
Page 22: Control Panel
TRAINING MANUAL WM3001H*A CONTROL PANEL The control panel is located on the front of the washer. All options are available from the control panel. The ESTIMATED TIME remaining is shown in the window. This may fluctuate during the cycle because the washer will make numerous adjustments based on fuzzy logic and the data supplied by various sensors in the machine. -
Page 23: Program Chart
TRAINING MANUAL WM3001H*A PROGRAM CHART This chart shows the components and their times of operation in the various wash cycles. The time estimates shown here are for the basic cycles before the fuzzy logic adjustments are made. See the cycle and option chart on the following page. WM3001H*A Page 22 Washer... -
Page 24: Display
TRAINING MANUAL WM3001H*A BEFORE PERFORMING SERVICE • Always unplug the washer to work on it. • Be careful to avoid electric shock when disconnecting parts for troubleshooting. • Some terminals in the steam washer have 120 Volts AC or DC on them, sometimes even when the washer is off. -
Page 25: Cycle And Option Chart
TRAINING MANUAL WM3001H*A CYCLE and OPTION CHART See also the section covering PROCESS TECHNICAL INFORMATION on pages 113 and 114 of this training manual. WM3001H*A Page 24 Washer... -
Page 26: Cycle And Option Information
TRAINING MANUAL WM3001H*A CYCLE and OPTION INFORMATION CYCLES and OPTIONS (in general) Every option is not available on every cycle. For example, steam and extra high spin cannot be selected with the HAND WASH/WOOL or DELICATES cycle. Similarly, certain hotter wash temperatures cannot be selected if that would be inappropriate for the materials or cycle selected. - Page 27 TRAINING MANUAL WM3001H*A ALLERGIENE™ The Allergiene™ cycle is designed to use hotter wash water (140° F or 60° C) than the regular HOT wash (112° F or 50° C) but not as hot as the SANITARY cycle (158° F or 70°...
- Page 28 TRAINING MANUAL WM3001H*A PERM. PRESS The permanent press cycle defaults to a 0:57 cycle time. The default selections can be overridden for wash temperature, spin speed, and soil level. Water level defaults to approximately 234, which is more water than a normal cycle. DELICATES The delicate cycle defaults to a 0:42 minute cycle.
- Page 29 TRAINING MANUAL WM3001H*A OPTIONS Press STEAM to add steam to any cycle that is marked by the STEAM indicator on the cycle knob. Note that not all cycles permit the addition of steam. Press WASH / RINSE OPTIMIZER® to make the machine set the optimum water level, wash time, rinse time, and detergent level.
- Page 30 TRAINING MANUAL WM3001H*A OPTIONS, continued After the cycle is set, press the DELAY WASH button from 1 to 19 times and it will delay the start of the cycle between 1 and 19 hours. A buildup of detergent and softener residue can occur over time and lead to a musty smell.
- Page 31 TRAINING MANUAL WM3001H*A SECONDARY FUNCTIONS, continued When the user inputs a custom program, press and hold CUSTOM PGM for three seconds until it beeps twice. Thereafter, this button will run that custom program. Press and hold the TUB CLEAN button for three seconds to turn the drum light ON.
- Page 32 TRAINING MANUAL WM3001H*A OPTION MENU, continued QUICK CYCLE Press OPTION and then PRE WASH to abbreviate the normal wash cycle. ™ ™ SPINSENSE SPINSENSE is used to help reduce or eliminate vibration, especially on wood floor installations. The SPINSENSE™ indicator remains lit while the washer is running to show that it is active.
-
Page 33: Water Temperature Control
TRAINING MANUAL WM3001H*A WATER TEMPERATURE CONTROL PREWASH CYCLE Cold water is supplied via the dispenser when the prewash valve opens. If COLD WASH / COLD RINSE is selected, the heater is not activated. If another WASH / RINSE temper- ature is selected, the heater still is not activated during the PREWASH unless the water temperature is lower than 85°... - Page 34 TRAINING MANUAL WM3001H*A Prewash valve opens, cold water is supplied. B, D, and F Hot valve opens to raise the water temperature to 131° F. C, E, and G Cold valve opens to lower the water temperature to 122° F. No water is supplied because the water level reaches the target.
-
Page 35: Detergent (And Other Laundry Product) Dispenser
TRAINING MANUAL WM3001H*A DETERGENT DISPENSER The dispenser drawer is a multi-chambered reservoir that allows the user to add all the appropriate laundry additives before starting the cycle. It has a place for pre-wash detergent, main wash detergent, fabric softener, and bleach. Powdered or liquid detergents may be used, but softener and bleach must be liquids. - Page 36 TRAINING MANUAL WM3001H*A It is mixed with water before contacting the laundry to prevent spotting or damaging the fabric. Notice that the pre-wash and main wash fill tubes enter the dispenser at an angle. If one or the other fill valve is opened, the water goes into the appropriate detergent compartment.
-
Page 37: The Rule Of Twos
4 ounces per load, this is entirely too much detergent for the LG machines. It will leave detergent film on your clothes, causing them to be dull and dingy. Over time, using too much detergent and softener will cause a thick film to build up on the inner surface of the tub. -
Page 38: Direct Drive Motor
TRAINING MANUAL WM3001H*A DIRECT DRIVE MOTOR The motor is a direct-drive, brushless, DC motor. It is attached to the drum via a splined shaft, eliminating belts, pulleys, transmissions, and the inherent problems associated with them. The rotor is attached to the shaft by one large bolt. The DC motor can be driven from stopped to maximum speed in infinite steps in either direction. -
Page 39: Disassembly And Repair
TRAINING MANUAL WM3001H*A DISASSEMBLY and REPAIR The following pages will show the instructions for disassembly, repair, replacement of parts, and re-assembly. Many times, electrical components may be tested by connecting the appropriate meter to the leads or connectors on the main PC Board. (Refer to the block wiring diagram, below.) Proper diagnosis will eliminate unnecessary labor and expedite repairs. -
Page 40: Control Board Connections Labeled
TRAINING MANUAL WM3001H*A CONTROL BOARD CONNECTIONS LABELED WM3001H*A Page 39 Washer... - Page 41 TRAINING MANUAL WM3001H*A DISASSEMBLY/REPAIR (Control Panel) Remove the screws securing the top plate (cover.) Push the top plate (cover) backward a couple of inches and then lift it off the machine. Disconnect the cables connecting the washer and the display board. Remove the dispenser drawer by pressing the release tab and pulling it all the way out.
-
Page 42: Main Control Board
TRAINING MANUAL WM3001H*A MAIN CONTROL BOARD Unplug the machine. Remove the top plate (cover.) (See page 40.) Remove the protective cover by prying the plastic clips open. Disconnect all electrical connectors. Note that all the connectors are different in pin count, color, and configuration. -
Page 43: Dispenser
TRAINING MANUAL WM3001H*A DISPENSER Remove the top plate (cover.) (See page 40.) Remove the dispenser drawer. Remove the two screws that secure the dispenser body. Remove the 5 hose clamps. If you squeeze them and slide them a couple of inches down the hose, they will not be lost while the repair is made. -
Page 44: Noise Filter
TRAINING MANUAL WM3001H*A NOISE FILTER To service the noise filter, remove the control panel cover. Unplug the two connectors of the noise filter and slide it out of the clips on the frame. See pages 67 and 75 for test information. FRONT COVER Remove the control panel and top cover as shown on page 40 and set them aside. - Page 45 TRAINING MANUAL WM3001H*A After removing the door gasket, you can reach inside the cabinet and unplug the electrical connector to the door switch. If you are replacing the door switch, you can do it without any disassembly other than the door gasket. Remove the two screws that hold the switch in place, pull it out through the opening, and replace it.
-
Page 46: Door And Hinge
TRAINING MANUAL WM3001H*A DOOR and HINGE Open the door. Remove the 7 screws that secure the hinge cover. Pry the cover off with a screwdriver. Remove the screws from the door hinge clips. Lift the door off the hinge and set it aside. Be sure to retain the plastic hinge shims. -
Page 47: Pumps And Filter Housing
TRAINING MANUAL WM3001H*A PUMPS and FILTER HOUSING Remove the front cabinet. (See page 43.) Drain the water from the sump. Remove the clamps and hoses. Since the pump sits on a platform assembly, no screws are used to attach it to the front of the machine frame. -
Page 48: Wash Heater
TRAINING MANUAL WM3001H*A DRAIN PUMP, continued The drain pump and the circulating pump are attached to either side of the filter housing. The drain pump is used to exhaust the water from the washer. The recirculating pump serves three purposes: it sprays water from the tub onto the laundry, creating a better saturation of detergent and better rinsing, it keeps the window clean, and it allows the customer to see water in the tub. -
Page 49: Water Level (Pressure) Switch
TRAINING MANUAL WM3001H*A DISASSEMBLY and REPAIR, continued WATER LEVEL SWITCH The water level detector switch monitors the water level and feeds this information to the main board. The sensor reads air pressure in an air chamber on the tub. The air pressure changes in relation to the depth of the water, moving a diaphragm in the switch. -
Page 50: Motor
TRAINING MANUAL WM3001H*A DISASSEMBLY and REPAIR, continued MOTOR Remove the back cover. Remove the large bolt in the center shaft. DO NOT stick a screwdriver or other object through the slots in the rotor. Pull the rotor off the shaft. Remove the ground screws and wire retainers from the stator wires. -
Page 51: Tub And Drum
TRAINING MANUAL WM3001H*A DISASSEMBLY and REPAIR, continued TUB and DRUM Removing the tub/drum assembly is major surgery. It is much lighter if you remove the weights and the motor. Generally speaking, you’ll have to remove all that anyway. Remove the motor. (See page 49.) Drain the water from the sump. -
Page 52: Dampers
TRAINING MANUAL WM3001H*A DISASSEMBLY and REPAIR, continued DAMPERS Disconnect the dampers from the tub and the base. Be sure to press in the safety tab before pushing the pin out of the damper. You can use a socket to hold the tab in while you squeeze the pin with the special tool 383EER4003A. -
Page 53: Test Mode
TRAINING MANUAL WM3001H*A TEST MODE The steam washer must be empty and off to enter the test mode. 1. Press and hold SPIN SPEED and SOIL LEVEL. 2. Press POWER. The buzzer will sound twice. 3. Press START/PAUSE to cycle through the test modes. (See chart, below.) Number of times Event Display... -
Page 54: Test Mode Display
TRAINING MANUAL WM3001H*A TEST MODE DISPLAY Press WASH / RINSE and SOIL LEVEL to display the test screen. The water level is displayed as a frequency. See page 48 for details. Wash temperature and steam temperature are displayed in degrees Celsius. WM3001H*A Page 53 Washer... -
Page 55: Error Display
TRAINING MANUAL WM3001H*A ERROR DISPLAY If you press START / PAUSE when an error code is displayed, any error except PE will disappear and the machine will revert to PAUSE status. In the cases of a PE, TE, or DE error code, if the error is not cleared within 20 seconds, the machine will be turned off automatically and the error code will blink on the display. -
Page 56: Troubleshooting Summary
TRAINING MANUAL WM3001H*A ERROR CODES, continued TROUBLESHOOTING SUMMARY See the troubleshooting summary guide at the end of the manual on an oversized, fold- out page. WM3001H*A Page 55 Washer... -
Page 57: Troubleshooting (With Error Codes)
TRAINING MANUAL WM3001H*A TROUBLESHOOTING (with error codes) INLET VALVE ERROR WM3001H*A Page 56 Washer... - Page 58 TRAINING MANUAL WM3001H*A TROUBLESHOOTING (with error codes) WM3001H*A Page 57 Washer...
-
Page 59: Drain Error
TRAINING MANUAL WM3001H*A DRAIN ERROR continued on next page WM3001H*A Page 58 Washer... - Page 60 TRAINING MANUAL WM3001H*A WM3001H*A Page 59 Washer...
-
Page 61: Heating Error (Te Error Code)
TRAINING MANUAL WM3001H*A HEATING ERROR (TE ERROR CODE) WM3001H*A Page 60 Washer... -
Page 62: Locked Motor Error (Le Error Code)
TRAINING MANUAL WM3001H*A LOCKED MOTOR ERROR (LE ERROR CODE) continued on next page WM3001H*A Page 61 Washer... - Page 63 TRAINING MANUAL WM3001H*A WM3001H*A Page 62 Washer...
-
Page 64: Door Open Error
TRAINING MANUAL WM3001H*A DOOR OPEN ERROR continued on next page WM3001H*A Page 63 Washer... -
Page 65: Unbalance Error
TRAINING MANUAL WM3001H*A DOOR OPEN ERROR (continued) UNBALANCE ERROR WM3001H*A Page 64 Washer... -
Page 66: Overflow Error
TRAINING MANUAL WM3001H*A OVERFLOW ERROR WM3001H*A Page 65 Washer... -
Page 67: Pressure Sensor Error
TRAINING MANUAL WM3001H*A PRESSURE SENSOR ERROR WM3001H*A Page 66 Washer... -
Page 68: No Power
TRAINING MANUAL WM3001H*A NO POWER Avoid electric shock while troubleshooting. Unplug the machine. Refer to the wiring diagram. Replace all ground wires and other connectors correctly. WM3001H*A Page 67 Washer... - Page 69 TRAINING MANUAL WM3001H*A WM3001H*A Page 68 Washer...
-
Page 70: Buttons Do Not Operate Properly
TRAINING MANUAL WM3001H*A BUTTONS DO NOT OPERATE PROPERLY WM3001H*A Page 69 Washer... - Page 71 TRAINING MANUAL WM3001H*A WM3001H*A Page 70 Washer...
-
Page 72: Vibration And Noise In Spin Cycle
TRAINING MANUAL WM3001H*A VIBRATION and NOISE IN SPIN CYCLE WM3001H*A Page 71 Washer... -
Page 73: Vibration Sensor Check
TRAINING MANUAL WM3001H*A VIBRATION SENSOR CHECK WM3001H*A Page 72 Washer... - Page 74 TRAINING MANUAL WM3001H*A WM3001H*A Page 73 Washer...
-
Page 75: Laundry Products Do Not Dispense
TRAINING MANUAL WM3001H*A LAUNDRY PRODUCTS DO NOT DISPENSE If the laundry products do not dispense properly, check the dispenser and related components. TEST MODE (page 52) will allow checking each solenoid to ensure it is getting power and dispensing water to the correct compartment. ABNORMAL SOUND If the motor stutters or makes an odd thumping or clicking noise without spinning, or appears to be locked up, check the hall sensor. -
Page 76: Component Test Procedures
TRAINING MANUAL WM3001H*A COMPONENT TEST PROCEDURES Several components of the machine can be tested before removing or exchanging them. Some test procedures can be completed without major disassembly other than to disconnect the component from its circuit; others may be tested from their connector on the control panel. -
Page 77: Door Lock
TRAINING MANUAL WM3001H*A DOOR LOCK SWITCH ASSEMBLY The door lock switch assembly includes a heating PTC, a bimetal, a protection PTC, and a solenoid. The assembly locks the door during the wash cycle and under certain other conditions. See page 76 for complete information on door locking. DOOR LOCKING When the system is energized through terminals 2 and 4, the PTCs begin heating. - Page 78 TRAINING MANUAL WM3001H*A At the connector on the main board, the wires are: ORANGE Door Switch (N) BLUE Door Switch (L1) WHITE Main Cold (N) The door switch solenoid operates by a pulse of 120 V between pins 3 and 4. With the switch out of the circuit, read the resistance between pins 3 and 4 (ORANGE and BLUE,) which should be...
-
Page 79: Stator Assembly
TRAINING MANUAL WM3001H*A STATOR ASSEMBLY The direct drive brushless DC motor can be driven from zero to maximum RPM in infinite steps in either direction. There are 36 poles on the stator and 12 permanent magnets on the inside of the rotor. A cracked magnet will cause the motor to stall. The stator can be tested either from its connector or from the connector at the main board. -
Page 80: Hall Sensor
TRAINING MANUAL WM3001H*A HALL SENSOR some Check the wiring diagram for your machine. The wiring diagrams on washing machines were incorrect in depicting the hall sensor wiring. The error involves wiring terminal designation. See the diagrams below. The correct wiring terminal colors are: White is (+) Gray is (-) Red is Hb... - Page 81 TRAINING MANUAL WM3001H*A Hall Sensor testing methods are now available on the following pages when LE error code hall sensor is out of order or defective. troubleshooting says “ ” Test FIRST!! 1 – BL (Ha) 2 – RD (Hb) 3 –...
- Page 82 TRAINING MANUAL WM3001H*A Terminal Designation / Ohm & Voltage Specifications Hall Sensor Testing The hall sensor can be tested from the control board or at the hall sensor. Ohm Testing the Hall Sensor If tested off the stator using the diagram on the previous page, check the resistors from pin 5 to pin 1 and pin 2.
- Page 83 TRAINING MANUAL WM3001H*A Testing the Hall Sensor from the Control Board Control Board Testing Location Control Board Output and Hall Sensor Input can be measured with the connector connected to the board and the machine operating. Also, these voltages can be measured by parking the meter leads on the desired terminals and spinning the tub briskly with the power cord disconnected.
- Page 84 TRAINING MANUAL WM3001H*A Actual Terminal Wiring The potting epoxy has been removed to show the PC board and components. Voltage Testing Hall Sensor at Control Board (See page 82.) 1. Unplug the power cord. 2. Remove the rear control panel cover. 3.
-
Page 85: Pump Motors
TRAINING MANUAL WM3001H*A PUMP MOTORS Two pump motors share a single housing at the machine sump. The motor on the left is to drain the machine; the motor on the right is to circulate the sump water back into the laundry. - Page 86 TRAINING MANUAL WM3001H*A At this connector on the main board, all four wires are the neutral side of the line. Voltage is applied to the solenoids by the BLACK wire and the neutral side is completed or broken to actuate each solenoid.
-
Page 87: Pump Test Points
TRAINING MANUAL WM3001H*A PUMP TEST POINTS Use an ohmmeter to test the resistance of the pump motor. Disconnect the pump from the circuit to test, either at the pump or at the connector on main board. DRAIN PUMP (Left) 10 ~ 20 Ω 1 to 2 CIRCULATION PUMP (Right) 1 to 2... -
Page 88: Inlet Valve Assembly
TRAINING MANUAL WM3001H*A INLET VALVE ASSEMBLY The valve assemblies introduce water to the tub and cause dispensing of the various laundry products. Hot water enters only through the main wash compartment. Cold water is directed by the four solenoids to the various laundry products. (See the dispenser section on pages 34 ~ 35.) The solenoids can be checked in TEST MODE. -
Page 89: Heater Driver Circuits
TRAINING MANUAL WM3001H*A HEATER DRIVER CIRCUIT (In General) The heater driver circuits are similar for both heaters on the machine: the wash heater, which heats the water in the tub to the specified temperature; and the steam generator heater, which boils water to make steam for the steam cycles. The elements are similar, but not interchangeable, approximately 1,000-watt electric heaters. -
Page 90: Wash Heater
TRAINING MANUAL WM3001H*A WASH HEATER The wash heater is at the bottom of the tub where it heats the water in the sump. Check the voltage to the wash heater by putting your voltmeter on the heater terminals and measuring the voltage, which should be approximately 120 V when operating. - Page 91 TRAINING MANUAL WM3001H*A STEAM GENERATOR HEATER The TSG (Turbo Steam Generator) is supplied as an assembly only; parts like the sensor, thermistor, or heater cannot be replaced individually. Diagnosis is limited to determining a malfunction and replacing the assembly. The steam generator does not have to be removed from the machine to be drained.
- Page 92 TRAINING MANUAL WM3001H*A The steam generator can be removed as an assembly for diagnosis and replacement or tested in place. Unplug the washer. Disconnect all electrical connections, including ground. Drain the water. (You can drain the water after removal from the washer and it is easier.) Remove all the cable straps by squeezing the tabs and pulling them out.
- Page 93 TRAINING MANUAL WM3001H*A When the Turbo Steam Generator is installed in the washer, the hoses to the dispenser should fit into the tubing guides. Be particularly careful when removing and replacing the water input hose to the steam generator. There is a check valve that fits into the input port.
-
Page 94: Steam Generator
TRAINING MANUAL WM3001H*A Sensor Wiring Diagram Steam Generator The Steam Generator is made up of 5 major components. They are the 1,100 watt heater @ 120 V , the low water sensor, the high water sensor, the temperature sensing thermistor, and the water tank. The water level sensors, the thermistor, along with the control board determine IF the steam generator heater will be activated. - Page 95 TRAINING MANUAL WM3001H*A High Water Sensor Sensing Low Water The photo to the left shows the high water sensor (VIOLET) wire. As the caption shows the meter is reading a voltage of 4.09 V Water in the housing is not touching the high water probe. When this occurs, the control board would activate the cold inlet valve for the steam generator before energizing the...
- Page 96 TRAINING MANUAL WM3001H*A Water Level Sensor The water level sensor is a simple device that signals the main board to trigger the solenoid to supply water to the steam generator. The steam generator heater is shown on the previous page. The heater operates on 120 V @ 1,100 watts, drawing approximately 9 amps.
-
Page 97: Thermistor Assembly (Wash)
TRAINING MANUAL WM3001H*A THERMISTOR ASSEMBLY Each heater includes a thermistor to regulate the heat and to power down the heater in the event of a failure. The sensors can be tested at their location or at their connectors on the main board. Use an ohmmeter to check the resistance of the sensor when it is disconnected from the circuit. - Page 98 TRAINING MANUAL WM3001H*A STEAM GENERATOR THERMISTOR The thermistor is located on the top of the steam generator. You can check it at the connector there. Test resistance across terminals 1 and 2. 39.5 kΩ ± 5% at 86° (30° C) 26.1 kΩ...
-
Page 99: Drum Lamp
TRAINING MANUAL WM3001H*A DRUM LAMP The drum lamp is an LED array. It comes on when the POWER button is presses and goes off when the door is locked at the beginning of a cycle. It can be turned on during washer operation by pressing and holding the RINSE+SPIN button for three seconds;... -
Page 100: Vibration Sensor
TRAINING MANUAL WM3001H*A VIBRATION SENSOR The vibration sensor is designed to decrease the vibration of the washing machine. It records movement on two axes (X, or lateral; and Y, or vertical) and sends the information to the main control board, which adjusts the rotational direction and speed of the drum to rebalance the load and control vibration, including the striking of harmonics within the structure of the building. -
Page 101: Balance Ring
TRAINING MANUAL WM3001H*A BALANCE RING Another part of the anti-vibration system is the balance ring attached to the front of the drum. This balance ring contains several heavy steel balls and is filled with a viscous fluid. When the tub spins, the balls drift naturally and slowly to a position opposite the out-of- balance load to compensate. -
Page 102: Tips And Tricks
TRAINING MANUAL WM3001H*A TIPS and TRICKS HOSES When replacing the large hoses, be sure to avoid getting the lip turned under the hose clamp. This will damage the hose and cause a leak. The large hoses have notches on the ends to index them on the connectors. -
Page 103: Wiring Diagram
TRAINING MANUAL WM3001H*A WIRING DIAGRAM WM3001H*A Page 102 Washer... -
Page 104: Exploded Views
TRAINING MANUAL WM3001H*A EXPLODED VIEW CABINET ASSEMBLY WM3001H*A Page 103 Washer... - Page 105 TRAINING MANUAL WM3001H*A DRUM and TUB ASSEMBLY WM3001H*A Page 104 Washer...
- Page 106 TRAINING MANUAL WM3001H*A DISPENSER ASSEMBLY WM3001H*A Page 105 Washer...
-
Page 107: Parts List
TRAINING MANUAL WM3001H*A PARTS LIST The parts list was correct at the time of publication, but change is inevitable. Always check GCSC for the current and accurate part numbers and availability. Loc # Part No Description *001 AFN30385137 Manual Assembly, Owners *002 MAY53533701 Box, Carton... - Page 108 TRAINING MANUAL WM3001H*A Loc # Part No Description A430 6411ER1005K Power Cord Assembly A440 EBF49827801 Switch Assembly, Locker A450 EBR44289802 PCB Assembly, Main A455 3550ER1032A Cover, Protective A485 6201EC1006L Filter Assembly (Noise) F110 EBR50614601 PCB Assembly, Display F120 EAD39334705 Harness, Multi F130 6850ER2002N Harness, Multi...
- Page 109 TRAINING MANUAL WM3001H*A Loc # Part No Description K111 4433ER1005A Lifter Assembly K115 4434ER0002A Spider K121 4280FR4048N Bearing, Ball (Inner) K122 4280FR4048J Bearing, Ball (Outer) K123 4040FR4051C Bolt Assembly X1 K125 4036ER2004A Gasket (Shaft Seal) K130 MAG47123901 Balance Weight (Top) K131 1SZZER4002A Screw, Customized...
- Page 110 TRAINING MANUAL WM3001H*A Loc # Part No Description K610 383EER3001S Parts Assembly X# (Damper) K611 4774FR3118B Hinge M400 3111ER1001D Steam Generator Assembly M410 3210ER1318A Frame Rail, Body (Steam Generator) 4769ER4002A Mushroom Valve 4769ER4001A Mushroom Valve 383EER4001A GASKET PLIER (SPECIAL TOOL) 383EER4003A DAMPER PLIER (SPECIAL TOOL) 383EER4004A...
-
Page 111: Serial Number Identification
TRAINING MANUAL WM3001H*A SERIAL NUMBER IDENTIFICATION The serial number is unique to each product. It gives information concerning the time and place of manufacture. The serial number is required to be paid for warranty service and to get the correct part in the event a running production change was made. Some models may have four (4) letters instead of two (2) for the product code number. - Page 112 TRAINING MANUAL WM3001H*A OHM’S LAW and WATT’S LAW P = WATTS I = AMPERES Watts = Volts / Ohms Amperes = Volts / Ohms Watts = Amperes x Ohms Amperes = Watts / Volts Watts = Volts x Amperes Amperes = E I •...
- Page 113 TRAINING MANUAL WM3001H*A CONVERSION INFORMATION FORMULAE °F = (9/5) °C + 32 °C = (5/9) x (°F – 32) WASH TEMPERATURES STAIN CYCLE Adds cycle time and increases wash Sanitary 158° F (70° C) temperature Allergiene 140° F (60° C) 122°...
- Page 114 TRAINING MANUAL WM3001H*A PROCESS TECHNICAL INFORMATION Standby * The washer is plugged in but turned off. Water Supply * Drum rotates and fill begins after a cycle is selected. * If PREWASH is selected, cold water is supplied via the PREWASH valve.
- Page 115 TRAINING MANUAL WM3001H*A Process Technical Information, continued Rinse Spin * The water remaining in the load is extracted by centrifugal force while the drum is spun at the selected speed. Remaining Spin * The power to the motor is cut off and the drum continues to spin by inertia until it stops.