Table of Contents
Advertisement
Quick Links
Advertisement
Table of Contents

Related Manuals for Uniden AT4801


Summary of Contents for Uniden AT4801
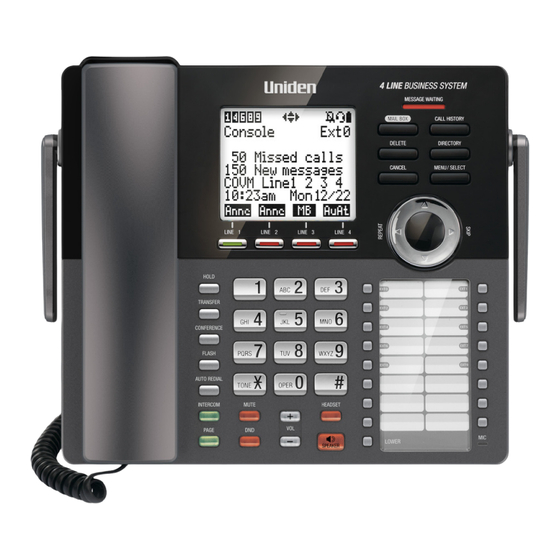
- Page 1 AT4801 4-Line Small Business System Main Console User’s manual...
- Page 2 Introduction System Overview The AT4801 is the main console of your new 4-line telephone system. It can be used as a standalone telephone when a single user monitors up to four telephone lines provided by your telephone service provider. You can also expand the system by adding a combination of up to nine...
- Page 3 Scenario 4-single-line connection, with nine AT480HS handsets Your AT4801 console is placed in the reception. There are only single-line wall jacks in your workplace. The 4 single-line cords (model RJ11; purchased separately) are connected to L1, L2, L3, and L4 jacks of the console and 4 single-line wall jacks.
- Page 4 Parts checklist Your telephone package contains the following items. Save your sales receipt and original packaging in the event warranty service is necessary. AT4801 4-Line Small Business System AT4801 Main Console 4-Line Small Business System Main Console Quick start guide User’s manual...
-
Page 5: Table Of Contents
Table of contents Installation setup Console overview ........31 Backup battery installation ......2 Table 1 - Main menu (Press MENU/ in idle screen) ......34 SELECT Assemble your new console .....3 Table 2 - Answering system setup sub- Connect your new console .......4 menu (Select Ans sys setup in main Mount your new console (optional) ...6 menu) ..........35... - Page 6 Switching between lines ......49 COVM (central office voicemail) ..65 Recording a call ........50 COVM reset .........65 Chain dialing ........51 Directory Redial .............52 About the directory .........66 View the 10 most recently dialed Capacity ..........66 numbers ..........52 Exit the directory ........66 Redial a number ........52 Create directory entries ......67 Copy a redial entry to directory ...52...
- Page 7 Call intercept ........81 Set remote access code ......81 Message alert tone ......82 Voice language ........82 Answering system operation ....83 New message indication .....83 Call screening ........83 Call intercept ........83 Message playback .......83 Options during playback ......84 Transfer messages ......84 Delete all general mailbox messages ..85 Record and deliver memos ....85 Remaining time ........85 Remote access ........86...
-
Page 8: Installation Setup
Installation setup Install the console close to the telephone jacks and a power outlet not controlled by a wall switch. The console can be placed on a flat surface or vertically mounted on the wall (pages 6-9). NOTE: If you subscribe to high-speed Internet service (DSL - digital subscriber line) through your telephone lines, you must install DSL filters between the telephone line cords and the telephone wall jacks (see page 4 or page 5). -
Page 9: Backup Battery Installation
Getting started Backup battery installation To maintain normal system operation in the event of a power failure, please purchase and install four AA alkaline batteries to this console before use. If power fails with working batteries installed, all functions work properly except for the display illumination. -
Page 10: Assemble Your New Console
Installation setup Assemble your new console Install the mounting bracket for tabletop use. Low tabletop position: Insert the fixed tabs of the mounting bracket into slots . Press the flexible tabs into slots until they click into place. Low tabletop position High tabletop position: Insert the fixed tabs of the mounting bracket into slots . -
Page 11: Connect Your New Console
Installation setup Connect your new console Option 1: If you have four single-line wall jacks, install your console, as shown below. Line 4 Line 3 Line 2 Line 1 One end of the coiled telephone line cord has already been plugged into the handset. - Page 12 Installation setup Connect your new console Option 2: If you have two 2-line wall jacks, install your console, as shown below. Line 3/4 Line 1/2 One end of the coiled telephone line cord has already been plugged into the handset. Make sure it is plugged in firmly. Plug the other end of the coiled handset cord into the left side of the console.
-
Page 13: Mount Your New Console (Optional)
Installation setup Mount your new console (optional) Tabletop to wall installation To install your console in the wall installation position, make sure you first unplug the power adapter from the electrical outlet and the telephone line cords from the wall outlet. Place your corded handset aside. - Page 14 Installation setup Mount your new console (optional) 4. Plug the telephone line cords into the wall jacks. Option 1: If you have four single-line wall jacks, connect the telephone line cords, as shown below. Line 1 Line 2 Line 3 Line 4 Option 2: If you have two 2-line wall jacks, connect the telephone line cords, as shown below.
- Page 15 Installation setup Mount your new console (optional) 5. Wrap the telephone line cords, as shown below. Mount the telephone on the mounting plate until it is held securely into position. Plug the large end of the power adapter into an electrical outlet not controlled by a wall switch.
-
Page 16: Wall To Tabletop Installation
Installation setup Mount your new console (optional) Wall to tabletop installation To return the console from wall installation to tabletop position: Unwrap the telephone line cords. Remove the console from the wall. Unplug the telephone line cords from the telephone wall jack and the power adapter cord from the electrical outlet. -
Page 17: Register Devices To Your New Console Add And Register A Cordless Handset
SELECT or SKIP . MENU/ SELECT or SKIP again to select 3. Press MENU/ Console AT4801 Register Ext. 4. On the handset, press #. The handset shows The handset shows Registering..5. The handset beeps once and begins registering to the console. -
Page 18: Adding A Corded Headset (Optional)
Register devices to your new console Adding a corded headset (optional) You can use this console handsfree when you install any industry-standard 2.5mm corded telephone headset (purchased separately). See page 47 for instructions on using the corded headset with this telephone. To add a corded headset to the console Side view of the console Lift open and rotate the plastic cover. -
Page 19: Answering System Basic Setup Date And Time For Messages
Answering system basic setup Date and time for messages Set date and time The answering system displays the date and time of the message while playing messages. Before using the answering system, follow the steps below to set the month, day, year and time. When the console is idle, press MENU /SELECT to scroll to Date and time, then press... -
Page 20: Line Mode For Unanswered Calls
Answering system basic setup Line mode for unanswered calls Set Line mode Use this feature to set each of the telephone lines to respond to unanswered incoming calls in one of the four possible line modes, as shown in the chart below. Incoming call - the called line flashes and rings on every extension... -
Page 21: Auto Attendant Setup
Answering system basic setup Auto attendant setup You can set up the auto attendant to answer outside calls, provide callers with a company directory, direct calls to a specified extension, and enable callers to record voice messages by forwarding the calls to the console’s general mailbox. -
Page 22: Announcement (Auto Attendant)
Answering system basic setup Auto attendant setup Announcement (auto attendant) Use this feature to record up to three new announcements so that you can have different announcements for daytime and after hours, and an announcement for the company directory. You can easily switch among the recorded announcements. - Page 23 Answering system basic setup Auto attendant setup To record the daytime or nighttime announcement: When the console is idle, press MENU /SELECT Press to scroll to Ans sys setup, then press SELECT or MENU/ /SKIP. Press to scroll to Auto att setup, then press SELECT or MENU/ /SKIP.
- Page 24 Answering system basic setup Auto attendant setup To set the start and end time of auto attendant announcement: You can set the start and end time of the daytime announcement. The system plays the nighttime announcement in the rest of the time. When the console is idle, press MENU /SELECT to scroll to Ans sys setup, then press...
- Page 25 Answering system basic setup Auto attendant setup To play the recorded auto attendant announcement: When the console is idle, press MENU /SELECT Press to scroll to Ans sys setup, then press SELECT or MENU/ /SKIP. Press to scroll to Auto att setup, then press SELECT or MENU/ /SKIP.
-
Page 26: Auto Attendant Operation
Answering system basic setup Auto attendant operation Using the auto attendant When auto attendant is on, it automatically picks up the ringing line after the number of rings you programmed (see Number of rings (auto attendant) on page 14, and plays the appropriate auto attendant announcement. You can choose from one of the following options. -
Page 27: Auto Attendant (Aa) Flow Chart
Answering system basic setup Auto attendant operation Auto attendant (AA) flow chart Incoming call AA answers and plays outgoing announcement Caller dials Caller dials Caller dials Caller enters extension remote access command twice twice number code entered AA plays Answering AA replays AA records AA calls... -
Page 28: General Mailbox Setup
Answering system basic setup General mailbox setup This console has a general mailbox that can answer calls and record messages when it is turned on. It also picks up unanswered intercom calls and calls forwarded from the auto attendant. Apart from being the general mailbox of the system, it also acts as the extension mailbox of the console. -
Page 29: Announcement (General Mailbox)
Answering system basic setup General mailbox setup Announcement (general mailbox) An announcement plays when calls are answered by the general mailbox. The system has a default announcement, “Hello. This is the general mailbox. Please leave a message after the tone.” You can use this announcement or record your own. - Page 30 Answering system basic setup General mailbox setup To play the recorded general mailbox announcement: When the console is idle, press MENU /SELECT to scroll to Ans sys setup, then press SELECT or Press MENU/ /SKIP. SELECT or /SKIP to select Gen MB setup. Press MENU/ to choose Anncment setup, then press...
-
Page 31: Announce Only Setup
Answering system basic setup Announce only setup If announce only is turned on, when there is an incoming call, the system plays an announcement after the number of rings you set in the Number of rings (announce only) section below. Then, the call is dropped. Activate announce only The console displays Annc above the line key(s) when the announce only mode is turned on for the particular line(s). -
Page 32: Announcement (Announce Only)
Answering system basic setup Announce only setup Announcement (announce only) An announcement plays when calls are answered by the announce only mode. The system has a default announcement, “Hello. Thank you for calling our company. We are not available to answer your call right now. Please call again later. -
Page 33: Telephone Operation Basic Setup Calls Management
Telephone operation basic setup Calls management Ring group Use this feature to specify which extensions ring and display the caller ID information when there is incoming call on a certain telephone line. By default, all extensions ring on all lines. You can exclude some extensions from the ring group, however, they can still be used to make outgoing calls on the non- ringing line. -
Page 34: Call Privacy
Telephone operation basic setup Calls management Call privacy The call privacy is set to Off by default. The console allows other extensions to join a call in progress. To turn call privacy on when the console is not in use: If you do not expect any other extension to join in the conversation when you are on a call, you can turn this setting on when the console is not in use to ensure that only one device uses a line at a time. -
Page 35: Music On Hold (M.o.h.)
Telephone operation basic setup Calls management Music on hold (M.O.H.) You can choose what callers hear when being placed on hold. You have four options: If you want callers to hear the hold reminder tone, select Hold tone in the •... - Page 36 Telephone operation basic setup Calls management Record music or a voice message: You can record audio or music from an audio source such as a computer, mobile phone or MP3 player with a 3.5mm audio jack using the audio cable provided. The recording can be up to three minutes long and plays repeatedly while a call is on hold.
- Page 37 Telephone operation basic setup Calls management NOTES: • If you want to record a piece of new music while the music on hold is in use, M.O.H. currently in use. Please try again later. displays on the screen. • If you fail to record a message, ensure that the audio cable is fully plugged into the MUSIC ON HOLD ( ) jack.
-
Page 38: Console Overview
Getting started Console overview MESSAGE WAITING LINE 1-LINE 4 keys indicator • Press to make or • Turns on when there are new answer a call on the messages in the general desired line. mailbox. MAIL BOX • When in idle mode, press to enter the general mailbox menu. - Page 39 Getting started Console overview Speed dial keys • Press to dial the desired speed dial number. LOWER • When assigning or dialing a speed dial number, press to switch to the lower location (the second 16 locations) of a speed dial key. SPEAKER MUTE •...
-
Page 40: Select
Getting started Console overview Directory card To write names on the directory card, follow the steps mentioned below: Write the information on a directory card that comes with the package. Insert the edge of the directory card in the slot at the front of the console, under the plastic cover. - Page 41 Overview Console overview The following tables provides you with more details on the main menu and answering system setup sub-menu of the console. Table 1 - Main menu (Press MENU/ in idle screen) SELECT Menu Description Reference Directory Review, add or delete directory entries. Pages 66-70 Call history Review, delete call history entries, or copy an...
-
Page 42: Menu
Overview Console overview Table 1 - Main menu (Press MENU/ in idle screen) (Continued) SELECT Menu Description Reference COVM Set whether the console will display if Central Page 65 Office has voicemail for you. Date and Set the date and time of the console. If you Page 12 time have subscribed to Caller ID Type I service, you... - Page 43 Overview Console overview Table 2 - Answering system setup sub-menu (Select Ans sys setup in main menu) (Continued) Menu Description Reference Auto att Set up the auto attendant. Pages 14-18 setup This mode allows callers on a particular line to reach any extensions within the system without the need to forward the call manually.
-
Page 44: Console Screen Icons
Overview Console screen icons On when any corresponding extensions are in use. Ringer off - On steadily when the ringer volume is set to off or the do not disturb function is on. Headset - On steadily when using a corded headset. COVM There is new voicemail for the telephone line(s) next to the COVM indicator. -
Page 45: Alert Tones And Lights
Getting started Alert tones and lights Alert tones One beep The console is recording an announcement or memo. Two beeps You have set the hold reminder on; a call has been on hold for more than three minutes. -OR- You have set the message alert tone on. -OR- There is an incoming call waiting. -
Page 46: Telephone Settings Console Setup
Telephone settings Console setup Menu settings Use this menu to change the telephone system settings. Press MENU when in idle mode (when the console is not in use) to console is not in use) to is not in use) to /SELECT enter the main menu. -
Page 47: Ringer Tone
Telephone settings Console setup Ringer tone Use this feature to choose one of the ten ringer tones for incoming calls. You can choose different ringer tones for different lines so you can easily identify which line is calling. When the console is idle, press MENU /SELECT to scroll to Ringer setting, then press SELECT or... -
Page 48: Lcd Contrast
Telephone settings Console setup LCD contrast Use this feature to adjust the screen contrast to one of five levels to optimize readability in different lighting conditions. When the console is idle, press MENU /SELECT to scroll to Console setup, then press SELECT or Press MENU/... -
Page 49: Lcd Language
Telephone settings Console setup LCD language This feature allows you to change the language used for all screen displays. The LCD language settings on the console, desksets and cordless handsets are independent. By default, the language is set to English. When the console is idle, press MENU /SELECT to scroll to Console setup, then press... -
Page 50: Console Name
Telephone settings Console setup Console name Use this feature to rename the console. When the console is idle, press MENU /SELECT to scroll to Console setup, then press SELECT or Press MENU/ /SKIP. to scroll to Console name, then press SELECT or Press MENU/... -
Page 51: Dial Mode
Telephone settings Console setup Dial mode The dial mode is preset to tone dialing. If you have pulse (rotary) service, you must change the dial mode to pulse dialing before using the telephone. When the console is idle, press MENU /SELECT to scroll to Dial mode, then press SELECT or... -
Page 52: Console Info
Telephone settings Console setup Console info Use this feature to view the current settings of the console. No editing is available in this menu. When the console is idle, press MENU /SELECT to scroll to Console info, then press SELECT or Press MENU/ /SKIP. -
Page 53: Telephone Operation Console Operation
Telephone operation Console operation The console comes programmed to select a line automatically for calls when you do not press a line key. To override the automatic line selection setting, see Primary line on page 42 for details. When you answer a call, the console automatically selects the ringing line. -
Page 54: On Hook Dialing (Predialing)
Telephone operation Console operation To make a call using a corded headset: Make sure a corded headset is connected to the console (page 11). Press HEADSET on the console. Wait for a dial tone, then dial the number. To hang up, press HEADSET. To make a call using a cordless headset or speakerphone: You can make a call using a registered cordless headset or speakerphone after it is linked with an extension device. -
Page 55: Options While On Calls
Telephone operation Options while on calls Call waiting If you subscribe to call waiting service with your telephone service provider, and someone calls while you are in the middle of a call, you hear two beeps. Press FLASH to put your current call on hold and take the •... -
Page 56: Hold
Telephone operation Options while on calls Hold Use this feature to hold one line while accessing another, or as part of the conference feature. While on a call, press HOLD. The corresponding line key (LINE 1-LINE 4) indicator for the line on hold flashes slowly. After the call has been put on hold for more than three minutes, a double beep sounds every 30 seconds. -
Page 57: Recording A Call
Telephone operation Options while on calls Recording a call Use this feature to record two-way phone conversations, conferences or intercom calls. The recording is treated the same as memos and is marked as a new message in the general mailbox. Listen to recorded conversation the same way as incoming messages or memos (see Message playback on page 83). -
Page 58: Chain Dialing
Telephone operation Options while on calls Chain dialing While you are on a call, you can initiate a dialing sequence from the numbers in the directory, caller ID history, redial list or speed dial memory. Chain dialing can be useful if you wish to access other numbers (such as bank account numbers or access codes) from the directory, caller ID history, redial list or speed dial memory. -
Page 59: Redial
Telephone operation Redial The last 10 telephone numbers dialed (up to 32 digits) are stored in the console. View the 10 most recently dialed numbers Press AUTO REDIAL to enter the redial list and display the most recently called number. Press to view other recently called numbers. -
Page 60: Delete A Number
Operation Redial Copy a redial entry to directory (continued) SELECT to save. To exit without making changes, press Press MENU/ CANCEL to return to the previous menu. Delete a number While the screen displays the desired number, press DELETE to delete the number from the redial memory. -
Page 61: Conference Call
Telephone operation Conference call The system can support 6-party conference with a maximum of four outside calls and two system extensions (including the initiating party). Establish a conference call There are two ways to establish a conference call. Hold an intercom call After establishing an intercom call with another system extension, the initiating party holds the intercom call and invites an external party to join the conference by making an outside call. -
Page 62: Options During A Conference Call
Operation Conference call Establish a conference call (Continued) 3. Press CONFERENCE at any time to begin the conference call. 4. If necessary, repeat step 2 (make another outside call) and step 3 above to invite another external party to join the conference until the maximum capacity is reached. -
Page 63: Intercom
Telephone operation Intercom You can use the intercom feature for conversations between the console and an accessory device, or between two accessory devices. When the system is on one or more external calls, accessory devices can make intercom calls with each other. If you have a cordless headset or speakerphone, it can only receive intercom calls. -
Page 64: Answer An Incoming Call During An Intercom Call
Operation Intercom Answer an incoming call during an intercom call If you receive an incoming outside call during an intercom call, there is an alert tone. To answer the call, press the corresponding line key (LINE 1-LINE 4). The intercom call is hold automatically. Hold an intercom call During an intercom call, press HOLD. -
Page 65: Call Transfer
Telephone operation Call transfer You can transfer a call to any other system telephone. Only the recipient extension can answer the transferred call. Blind transfer While on a call, you can transfer a call directly without notifying the desired extension: Press TRANSFER on the console while on a call. -
Page 66: Call Transfer Using Intercom
Telephone operation Call transfer using intercom Transfer a call and speak to the receiving party You can transfer a call and speak to the receiving party before completing the transfer while on a call: Press INTERCOM on the console while on a call. SELECT or Press to scroll to a desired extension, then press... -
Page 67: Paging
Telephone operation Paging You can directly broadcast messages to the speakerphone of any extension deskset and handset. The extension(s) you called can respond by pressing the PAGE key to begin a two-way communication. Make a paging call to an extension Press PAGE on the console when it is idle. -
Page 68: Set And Edit A Group For Paging Calls
Telephone operation Paging Set and edit a group for paging calls Use the group setting if you want to broadcast your voice to a group of extensions. When you page a group, only the selected extensions hear your voice. You can create up to three paging groups. Press PAGE on the console when it is idle. -
Page 69: Speed Dial
Telephone operation Speed dial This console has 32 speed dial locations where you can store and dial phone numbers or system extension numbers. You can store up to 32 digits in each location. You can access the first 16 locations using only the speed dial keys. - Page 70 Telephone operation Speed dial Assign a speed dial entry (continued) To add a new phone number: When the console is idle, press MENU/ SELECT to scroll to Speed dial, then press SELECT or /SKIP. Press MENU/ The screen displays Speed dial: Press a speed dial key to edit. Press the desired speed dial key, or press LOWER followed by the desired SELECT.
-
Page 71: Dial A Speed Dial Entry
Telephone operation Speed dial Dial a speed dial entry When the console is idle, press the desired speed dial key for the destination party in the upper location. -OR- When the console is idle, press LOWER followed by the speed dial key for the destination party in the lower location. -
Page 72: Covm
Telephone operation COVM COVM (central office voicemail) If you subscribe to voicemail service with your telephone service provider, turn on the COVM feature. When the console receives new voicemail messages on a particular line, the screen displays COVM Line X in idle mode (X represents the line number). -
Page 73: Directory About The Directory
Directory About the directory Use the directory to store names and phone numbers. Directory entries are not shared with other extensions. The console and each deskset have their own directories. Capacity The directory of this console can store up to 100 entries, with a maximum of 24 alphanumeric characters (including spaces) for names and 32 digits for telephone numbers. -
Page 74: Create Directory Entries
Directory Create directory entries Create a new directory entry Use the following steps to store a name and number in the directory. When the console is idle, enter the telephone number (up to 32 digits). Press SELECT. Use the dialing keys to edit the number, if necessary. MENU/ •... -
Page 75: Review Directory Entries
Directory Create directory entries Create a new directory entry (continued) -OR- When the console is idle, press DIRECTORY. SELECT. When a directory entry appears, press MENU/ SELECT and then go to step 4. • If the directory is empty, press MENU/ to scroll to Add contact, then press SELECT or /SKIP. -
Page 76: Search Directory
Directory Search directory Search by name The names appear in alphabetical order. Follow the steps below to search for directory entries on the console. Press DIRECTORY on the console. The screen displays the first entry in the directory. Press to browse through the directory. browse through the directory. -
Page 77: Dial, Delete Or Edit Entries
Directory Dial, delete or edit entries You can dial, delete or edit a directory entry (name and number) when it is shown on the console screen. You can use the directory review (page 68) or name search (page 69) to show an entry. Display dial When a number is displayed on the screen, you can dial the number by lifting SPEAKER or the desired line key (LINE 1-... -
Page 78: Call History About The Caller Id
Call history About the caller ID This console supports caller ID services that most telephone service providers offer. Caller ID allows you to see the name, number, date and time of calls. Depending on your service subscription, you might see the caller’s number, or the caller’s name and number from the telephone service provider after the first or second ring. -
Page 79: Caller Id Information
Call history Caller ID information How the caller ID information works The console stores caller ID information for the last 50 incoming calls in the console. Entries are stored in reverse chronological order. The console deletes the oldest entry when the log is full to make room for new calls. Each extension has independent caller ID information. -
Page 80: Caller Id Operation
Call history Caller ID operation Memory match If the incoming telephone number is an exact match with a telephone number in your directory, the name that appears on the screen matches the corresponding name in your directory. For example, if Christine Smith calls, her name appears as Chris if this is how you entered it into your directory. -
Page 81: View Dialing Options
Caller history Caller ID operation View dialing options Although the incoming call history entries have 10 digits (the area code plus the seven-digit number), in some areas, you may need to dial the seven digits only, 1 plus the seven digits, or 1 plus the area code plus the seven digits. -
Page 82: Save A Caller History Entry To The Directory
Call history Caller ID operation Save a caller history entry to the directory When in the caller ID history, press to browse the number you wish to save. SELECT. The screen displays Edit number. Use the dialing 2. Press MENU/ keys to enter the number (up to 32 digits). -
Page 83: Reasons For Missing Caller Id Information
Call history Reasons for missing caller ID information Reasons for missing caller ID information There are also occasions when other information or no information shows for various reasons: On-screen message Reason The number has been set as private. The name has been set as private. Both the name and number have been set as private. -
Page 84: Answering System About The Answering System
Answering system About the answering system Your console has separate indicators for two different types of voice messages: those left on its built-in answering system and those left at your service provider’s voicemail (fees may apply). Your console’s built-in answering system messages and voicemail messages are separate. -
Page 85: Answering System Capacity
Answering system About the answering system Answering system capacity Apart from the default announcements, you can record up to five new announcements for use in the answering system. Each announcement can be up to 90 seconds. The announcements of auto attendant, announce only answer mode, and general mailbox all require system memory to record, so we suggest recording brief announcements in order to leave more space for messages. - Page 86 Answering system Announce only setup To play the recorded announce only announcement: When the console is idle, press MENU /SELECT Press to scroll to Ans sys setup, then press SELECT or MENU/ /SKIP. Press to scroll to Annc only setup, then press SELECT or MENU/ /SKIP.
-
Page 87: Answering System Setup
Answering system Answering system setup All feature settings below apply to the auto attendant, announce only and general mailbox answer modes. Call screening Use this feature to choose whether incoming messages can be heard over the speaker when they are being recorded. This feature is set to On by default. You hear the incoming message on your console when a call comes in. -
Page 88: Call Intercept
Answering system Answering system setup Call intercept When a caller is leaving a message on your general mailbox, you can stop the recording and talk to the caller by pressing the corresponding line key (LINE 1- LINE 4). Choose whether private incoming messages can be intercepted by the console during recording. -
Page 89: Message Alert Tone
Answering system Answering system setup Message alert tone Use this feature to turn the audible message alert on or off. If the message alert tone is on, the console beeps every 10 seconds when there are new messages in the general mailbox. When the console is idle, press MENU /SELECT to scroll to Ans sys setup, then press... -
Page 90: Answering System Operation
Answering system Answering system operation New message indication The console displays XX New messages when there are new messages and/ or memos in the general mailbox. The MESSAGE WAITING indicator on the console turns on when there are new messages in the general mailbox. Call screening If the answering system and call screening are turned on (see Call screening on page 80), the incoming message broadcasts at the console when a call... -
Page 91: Options During Playback
Answering system Answering system operation Options during playback When a message is playing, you can adjust the playback volume, skip, repeat, delete the message, or switch between speakerphone and handset earpiece. When a message is playing on the console: Press +/VOL/- /VOL/- - to adjust the message playback volume. -
Page 92: Delete All General Mailbox Messages
Answering system Answering system operation Delete all general mailbox messages You can delete all messages stored in the general mailbox. When the console is idle, press MAIL BOX. to scroll to Delete all old, then press SELECT or Press MENU/ /SKIP. -
Page 93: Remote Access
Answering system Remote access Use this feature to reach your answering system remotely by calling any telephone line connected this console from any touch-tone telephone. Make sure the auto attendant, the announce only mode, or the general mailbox of the console is turned on for this feature to work. Remote access can only play messages stored in the general mailbox. - Page 94 All Caller ID history entries are deleted. All group settings for paging call are cleared. All old messages in the general mailbox are deleted. There are no entries in the caller ID history. The console is making an intercom call. A directory entry is deleted.
- Page 95 You have detached the cordless headset or speakerphone from an extension. The cordless headset or speakerphone you linked with the console is in use on a telephone line. The cordless headset or speakerphone you linked with the console is in a conference call. The cordless headset or speakerphone you linked with the console is in an intercom call.
- Page 96 You select HDST/SPK in the main menu but there is no registered cordless headset or speakerphone. The telephone number you have entered is already stored in the directory. A paging call is established to other system extensions. You set the primary line that is not plugged. Call privacy is activated on the line you are trying to reach.
-
Page 97: Frequently Asked Questions
I purchased 7 units of AT4801, how should I set up the system? • AT4801 is the main console of the system, and having seven of them will not enable you to set up the system. Instead, you need one AT4801 console and six AT480HS handsets. -
Page 98: Top Questions For Operations
Frequently asked questions • If you have 3-line or 4-line in a jack, then you need a splitter* before connecting. You can also have your telephone service provider to rewire for you. • After all lines are connected, you can connect the console to the power outlet. - Page 99 Relocate your telephone to a higher location. The telephone might have better reception in a high area. • If you purchased a new AT4801 Console for replacement, you must first deregister all devices registered to the old Console before you register them to the new Console.
-
Page 100: Top Questions For Features
Frequently asked questions I get noise, static, or weak signals even when I’m near the console. • If you subscribe to high-speed Internet service (DSL - digital subscriber line) through your telephone lines, you must install a DSL filter between each telephone line cord and telephone wall jack. - Page 101 Frequently asked questions NOTES: If the Auto attendant option is selected, make sure both the daytime and night time • announcements are recorded, and the announcement time is set for daytime announcement. Night time announcement will be played for unanswered incoming calls outside of the designated announcement time period.
-
Page 102: Top Questions Related To Telephone Service Providers
How to record announcment for each telephone line? • AT4801 allows you to record only one announcement of the same type, which is shared among all lines. To record different announcement for each line, please contact your telephone service provider for the details of voicemail announcement services. -
Page 103: Common Cure For Electronic Equipment
Frequently asked questions Common cure for electronic equipment. If the console does not seem to be responding normally, do the following (in the order listed): Disconnect the power from the console. Wait a few minutes. Connect power to the console. Wait for the console to synchronize its connection. -
Page 104: Maintenance
Maintenance Taking care of your telephone • Your console contains sophisticated electronic parts, so you must treat it with care. • Avoid rough treatment. • Place the corded handset down gently. • Save the original packing materials to protect your console if you ever need to ship it. Avoid water •... -
Page 105: Important Safety Information
Important safety information This symbol is to alert you to important operating or servicing instructions that may appear in this user’s manual. Always follow basic safety precautions when using this product to reduce the risk of injury, fire, or electric shock. Safety information •... -
Page 106: Technical Specifications
Technical specifications RF frequency band 1881.792 - 1897.344MHz Channels Console voltage 100V - 240V (AC voltage, 50/60Hz) Console voltage 6VDC @ 1000mA (AC adapter output) Backup batteries Four 1.5V AA size alkaline batteries Headset jack 2.5mm, 32-150ohm Adapter VT05EEU06100 Input: 100-240V AC 50/60Hz 150mA, Output: 6VDC 1000mA VT05EUK06100 Input: 100-240V AC 50/60Hz 150mA,... - Page 108 Distributor : US Telecom Limited info@ustel.com.hk www.ustel.com.hk Uniden is a trademark of Uniden Corporation and is used under licensed by US Telecom Limited Specifications are subject to change without notice.