
Related Manuals for Uniden FP1220


Summary of Contents for Uniden FP1220
-
Page 1: Lcd Display
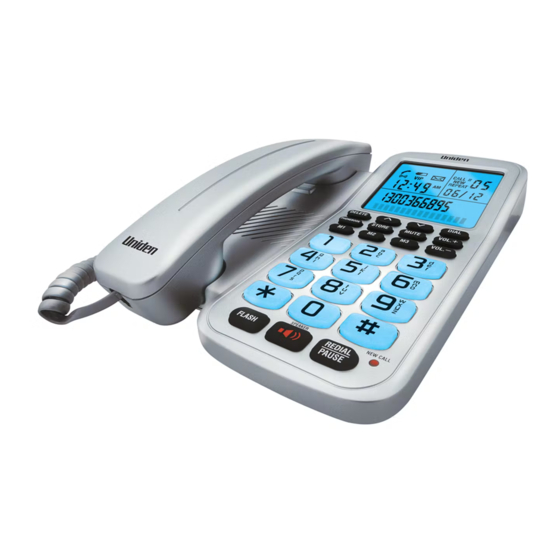
FP1220 LCD Display Caller ID Speaker Phone For more exciting new products please visit our website: Australia: www.uniden.com.au New Zealand: www.uniden.co.nz... - Page 2 SAFETY INSTRUCTIONS To reduce the risk of fire, electrical shock, and injury, please follow these basic safety precautions before you use this equipment. Carefully read the instructions in this manual. Follow all warnings and instructions marked on the unit. When cleaning, unplug the telephone jack from the wall outlet.
-
Page 3: Table Of Contents
TABLE OF CONTENTS Feature List ..............Introduction ..............What’s in the Box? ............Optional Battery Back Up Installation ......Connecting the Telephone Line Cords ......Location of Controls ............Mounting the phone on the Wall ........Key Buttons ..............Ringer Volume Switch ........... Ringer Pitch Switch ............ -
Page 4: Feature List
FEATURE LIST PHONE MEMORIES • Stores up to 10 outgoing calls number • Stores up to 70 names & numbers in phonebook • Last number redial • 10 two-touch memories • Three one-touch memories CALLER DISPLAY* • FSK standard Caller ID system •... -
Page 5: Introduction
INTRODUCTION WHAT’S IN THE BOX? Make sure your corded phone’s packaging includes the following items: Handset with handset cord and phone base Telephone line cord Wall Mount Bracket Owner's Manual AC Adaptor If any item is missing or damaged, contact your place of purchase immediately. -
Page 6: Location Of Controls
LOCATION OF CONTROLS 1 2 3 STORE MUTE VOL. PHONEBOOK VOL. SPEAKER NEW CALL REDIAL FLASH PAUSE STORE button FLASH button buttons (speaker) button MUTE button M1~M3 (memory) buttons LCD display Speaker DIAL button PHONEBOOK button VOL. / VOL. buttons DELETE button New call indicator 15. -
Page 7: Mounting The Phone On The Wall
LOCATION OF CONTROLS (cont’d) AC adaptor jack Telephone line jack Mounting Bracket location slots Ringer volume Battery switch Compartment Ringer pitch switch MOUNTING THE PHONE ON THE WALL Before doing this, consider the following: Avoid electrical cables, pipes, or other items behind the •... -
Page 8: Key Buttons
KEY BUTTONS 1. Ringer Volume Switch Set the ringer volume switch to the desired position ( - Maximum ringer volume - Low ringer volume - Ringer OFF 2. Ringer Pitch Switch Set the ringer pitch switch to the desired level (high or low). The switch is located at the back of the unit. -
Page 9: Mute Button
7. MUTE button Press MUTE to turn off the telephone's microphone so that the other party cannot hear you, but you can hear them. Press MUTE again to restore connection to the microphone so the other party can hear you again. The LCD will display "MUTE" while the function is active. -
Page 10: Speed Dial Numbers
SPEED DIAL NUMBERS Storing Two Touch Speed Dial Numbers To store a number in the two-touch speed dial memory, follow the steps below. In either on-hook or off-hook state: Press and hold STORE, the LCD shows -->. Enter the telephone number you want to store. Press STORE again, the LCD shows -->?. - Page 11 Method B. Store the number currently showing on the LCD In the on-hook state: 1. Enter the telephone number you want to store - or bring up a number from the Redial list, or Phonebook. 2. Then press and hold the (M1~M3) button until the LCD shows SAVE OK.
-
Page 12: Phonebook
PHONEBOOK To Store a Number in the Phonebook In standby mode, press and hold PHONEBOOK. Enter the telephone number by numeric keypad. Tip! Press DELETE to delete the previous digit if necessary. The maximum number of digits to be entered is 20. If the number exceeds 20, the LCD will show TOO LONG and the exceeding digits will not be stored. -
Page 13: To Edit A Phonebook Entry
To Review a Number/Name in the Phonebook Press PHONEBOOK in standby mode, then use review. You can also quickly review the call by the first letter of the name - press the first letter of the name, the LCD will display the matching name(s), then use to get the right one. -
Page 14: Setting The Date & Time
SETTING THE DATE & TIME If you subscribe to a Caller ID Service, your time and date will automatically be set for you when you receive your first call to this unit. Press and hold FLASH until the LCD shows SET TIME. to select the desired number. -
Page 15: Caller Id
CALLER ID A caller ID record consists of the following information: The total number of new calls 2:24 24/ 1 Time and Date Total number of calls and TOTAL 06 MON the week day For Caller ID feature to operate you must first subscribe to this service through your local telephone company. - Page 16 TOTAL & NEW CALLS - This shows you the total and new calls 2:24 to be reviewed. In this example, you have 24/1 6 calls in total, which includes 2 new calls and it is MONDAY. TOTAL 06 MON PRIVATE CALL# - If the caller has exercised the option 2:24...
-
Page 17: Caller Id Operation
CALLER ID OPERATION Subscription to the Caller ID service from your local phone company is required before the first use. New Call indicator The red New Call indicator will flash to indicate that you have new calls and it will flash until all the new calls have been reviewed. Insert 0 function To correctly display and dial Caller ID numbers, you may need to insert a digit at the beginning of your telephone number. -
Page 18: Using The Callback Feature
Using the Call back feature If the number is blocked or unavailable, it cannot be called back. NOTE Calling back a dialled number: The unit can store up to 10 dialled numbers. In the on-hook state, press DIAL once, the last dialled number will show on the LCD, then use to select the number that you want to dial out. -
Page 19: Delete Single Or All Record Numbers
Save the Caller ID Records Your phone stores minimum 66 Call Records before the memory becomes full. When the next call comes in, the oldest record automatically drops off and makes room for the new call record. Delete single or all record number(s) In the on-hook state;... -
Page 20: Troubleshooting
TROUBLESHOOTING If you are having problems with your phone, please check below for helpful hints: Blank or Check the line cord. Connect telephone cord. faint screen Caller ID Call your telephone company to verify that your does not Caller ID service is active. work properly Phone will... -
Page 21: One Year Limited Warranty
Please refer to our Uniden website for any details or warranty durations offered in addition to those contained below. Warrantor The warrantor is either Uniden Australia Pty Limited ABN 58 001 865 498 (“Uniden Aust”) or Uniden New Zealand Limited (“Uniden NZ”) as the case may be. - Page 22 Product does not conform with this warranty, you should deliver the Product, together with satisfactory evidence of your original purchase (such as a legible copy of the sales docket) to Uniden at the addresses shown below. You should contact Uniden regarding any compensation that may be payable for your expenses incurred in making a warranty claim.
- Page 24 ©2012 Uniden Australia Pty Ltd/Uniden New Zealand Limited Printed in PRC...