Table of Contents
Advertisement
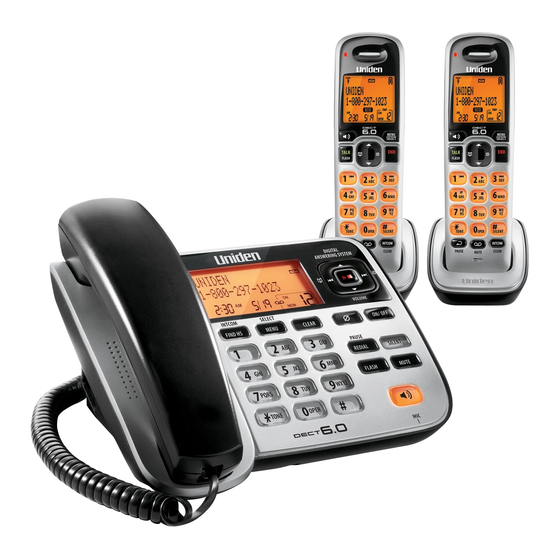
What's in the box?
D1688 corded base with answering
system and corded handset
Wall/Desk
Stand
♦ If any items are missing or damaged, contact our Customer Care Line
immediately. Never use damaged products!
♦ Need help? Get answers 24/7 at our website: www.uniden.com.
If You...
have a question or problem
need a replacement part or an
accessory
need special assistance due to
a disability
* During regular business hours, Central Standard Time; see our website for detailed
business hours.
© 2010 Uniden America Corp.
Ft. Worth, Texas
D1688 User's Guide
Not pictured:
x Coiled handset
cord
x AC adapter
(PS-0034)
x Telephone cord
Contact Uniden's...
Customer Care Line*
Parts Department*
Accessibility Help Line
You will also find:
Accessory handset
and charger
Not pictured:
x Rechargeable
x Battery cover
x AC adapter (PS-0035)
If you purchased
model number:*
D1688
D1688-2
D1688-11
D1688-12
* If the model number ends in R,
your package includes a DRX100
range extender. Refer to the
DRX100 User's Guide for details.
battery (BT-1021)
You should
have:
1 of each
2 of each
11 of each
12 of each
Phone Number
817-858-2929 or
800-297-1023
800-554-3988
800-874-9314
(voice or TTY)
Printed in Vietnam
U01UN210BZZ(0)
Advertisement
Table of Contents

Related Manuals for Uniden D1688


Summary of Contents for Uniden D1688
- Page 1 Telephone cord DRX100 User’s Guide for details. ♦ If any items are missing or damaged, contact our Customer Care Line immediately. Never use damaged products! ♦ Need help? Get answers 24/7 at our website: www.uniden.com. If You... Contact Uniden’s... Phone Number...
-
Page 2: Table Of Contents
What’s in the manual? Getting Started ........ 3 Using Your Phone During a Power Failure ............17 Set Up the Base ..........3 Using the Answering System ..17 Using the Menus ......10 Answering System Options (Ans. Basic Menu Operation ......10 Setup) ............17 Menu Functions ......... -
Page 3: Getting Started
GETTING STARTED Set Up the Base Attach the Stand For desktop use For wall mount use DESK WALL WALL DESK DESK DESK WALL WALL 1. Turn the stand so the word 1. Turn the stand so the word DESk WAll is right-side up (it will be on the right-side up (it will be on the left). - Page 4 Connect the Power and Telephone Cords Connect the base AC adapter to the jack and the telephone cord AC IN 7.8V to the jack. Route the cords as shown: TEL LINE For desktop use For wall mount use DESK WALL WALL DESK DESK...
-
Page 5: Set Up The Accessory Handsets
To send DTMF tones during a call (e.g., for an automated response system), press to temporarily switch to tone dialing. When you hang up, the phone automatically returns to pulse dialing. Set Up the Accessory Handsets Install and Charge the Battery 1. -
Page 6: Getting To Know Your Phone
Getting to know Your Phone Parts of the Base PLAY/STOP PHONEBOOK FIND HS/ Hook INTERCOM switch MENU/ SELECT Handset DOWN CLEAR clip DELETE ANS ON/ REDIAL/ PAUSE SILENT MUTE Twelve-key FLASH dial pad SPEAKER key (icon) What it does x In standby: page a handset or start an intercom call (see fInD hs/ page 15). - Page 7 key (icon) What it does x In standby: begin message playback. x While screening calls: mute Call Screen. PlAY/stoP x In any menu or list, or while a message is playing: stop the current operation and exit completely. x In standby: increase the ringer volume. x During a call or while a message is playing: increase the volume.
- Page 8 Parts of the Handset PHONEBOOK MENU/SELECT SPEAKER TALK/FLASH DOWN Twelve-key dial pad SILENT REDIAL/PAUSE INTERCOM/CLEAR Microphone MESSAGE/MUTE Charging contacts key (icon) What it does x In standby or during a call: open the phonebook. PhonebooK x In the menu: go back to the previous screen. x When entering text: move the cursor to the left.
- Page 9 key (icon) What it does x In standby: start an intercom call. IntercoM/ x During a call: put the call on hold and start a call transfer. cleAr x When entering text or numbers: erase the character at the cursor (press & hold to erase all characters). x In standby: access your answering system.
-
Page 10: Using The Menus
USING THE MENUS Basic Menu Operation ♦ The phone exits Press to open the menu. MENU/SELECT the menu after 30 Press MENU/SELECT to choose the Handset Setup seconds if no keys current option. Ans. Setup are pressed. Handset Setup ♦ Use PhonebooK Press T-coil... -
Page 11: Using Your Phone
Menu Date & Time This menu sets the clock (if you have Caller ID, the phone sets the date and time automatically). Enter the date and time; select or PM. Use move the cursor past a digit without changing it. Menu Global Setup Dial... -
Page 12: Changing The Volume
Changing the Volume You can adjust each station’s volume independently. Press Down increase or decrease the earpiece or speaker volume when you are on a call. You can adjust the ringer volume only when the phone is in standby. Turning the ringer volume all the way down turns off the ringer. Using the Caller ID and Redial lists Caller ID (CID) is a service available from your telephone provider that shows the phone number (and sometimes the caller’s name) of incoming... -
Page 13: Using Call Waiting
Using Call Waiting ♦ Call Waiting, a service available from your telephone provider, lets you receive calls while you are on another call. Caller ID on Call Waiting (CIDCW) service displays Caller ID information for a waiting call. ♦ If you get a Call Waiting call, the phone sounds a tone and displays any CID information received from the waiting call. -
Page 14: Using Special Features
Deleting all Phonebook Entries 1. With the phone in standby, open the phonebook. Delete All. 2. Press and select Menu/select 3. When the screen prompts you to confirm, select Yes. USING SPECIAl FEATURES Silent Mode You can silence the ringers on the base and all handsets for a specific period of time (1 to 9 hours) or set the ringers to be off all the time;... - Page 15 Call Transfer To... From the Base From a Cordless Handset 1. Press fInD hs/IntercoM 1. Press IntercoM/cleAr to put put the call on hold. the call on hold. 2. Select the station you want to transfer the call to, or transfer a select to page all the stations at the same time.
-
Page 16: Chain Dialing
To... From the Base From a Cordless Handset Press IntercoM/cleAr. Press fInD hs/IntercoM. make an intercom Select the station you want to talk with or page page all stations at the same time. Press fInD hs/IntercoM cancel a page Press enD. -
Page 17: Using Your Phone During A Power Failure
Using Your Phone During a Power Failure If there is a power failure, you can still make and receive phone calls using the base corded handset, including Call Waiting calls and changing the earpiece volume. All other features of the base and all cordless handsets will not function. -
Page 18: Recording The Outgoing Message
Recording the Outgoing Message Your personal outgoing message or greeting can be from 2 to 30 seconds long. If you don’t record a greeting, the system uses the pre-recorded greeting: Hello, no one is available to take your call. Please leave a message after the tone. -
Page 19: Getting Your Messages
Getting Your Messages To... From the Base From a Handset Press PlAY/stoP. Press MessAge/Mute play new The system announces the number of new & old messages messages, then plays each new message (followed by the day and time if set) in the order it was received. Wait 5 seconds after the message begins, then restart this message... -
Page 20: Using The System While You're Away
Using the System While You're Away from Home You can dial in to your answering system from any touch-tone phone. Before you can use this feature, you must program a security code. Programming a Security Code Ans. Setup, then select With the phone in standby, open the menu;... - Page 21 Audio issues Possible solutions x Check for interference from appliances (microwave ovens, TVs, etc.) or wireless devices (baby monitors, WiFi equipment, etc.). Move the handset or base away from the There is noise/ interference source. static on the cordless handset. x If you use a telecoil hearing aid, turn on T-coil mode in the Handset Setup menu.
-
Page 22: Resetting Stations
Installing a line Filter or DSl Filter A telephone line filter or DSL filter prevents services that use the phone line from causing interference on your phone. To get a line filter, contact your service provider or look in an electronics store. Plug the filter into the telephone wall jack and plug the base into the filter. -
Page 23: Adapter And Battery Information
Standby time about 7 days after handling. Battery life about 1 year Uniden works to reduce lead content in our products & accessories. x Replace the battery when the talk or standby time becomes noticeably Compliance Information reduced. For replacements, call the Parts Department (see the front cover). - Page 24 telephone network must comply with tion commission for information. This the applicable FCC Part 68 rules and equipment is hearing aid compatible. requirements adopted by the ACTA. A If you experience trouble with this compliant telephone cord and modular equipment, contact the manufacturer plug is provided with this product.
-
Page 25: 1-Year Limited Warranty
(unless approved by the manufacturer) WARRANTOR: UNIDEN AMERICA should be avoided as these might not CORPORATION ("Uniden") comply with FCC RF exposure guide- ELEMENTS OF WARRANTY: Uniden lines. warrants, for one year, to the original retail owner, this Uniden Product to English - 25... - Page 26 Product carefully or as part of any system not manufac- (preferably in its original packaging). tured by Uniden, or (F) installed or Disconnect the battery from the Product programmed by anyone other than as and separately secure the battery in its...