Table of Contents
Advertisement
Quick Links
Advertisement
Table of Contents

Related Manuals for NEFF B5ACH7AH0B


Summary of Contents for NEFF B5ACH7AH0B
- Page 1 Oven [en] User manual and installation instructions B5ACH7AH0B...
-
Page 2: Table Of Contents
en Safety ¡ Check the appliance after unpacking it. Do Table of contents not connect the appliance if it has been damaged in transit. 1.2 Intended use USER MANUAL Read the information on intended use to en- Safety .............. 2 sure that you use the appliance correctly and Preventing material damage ....... -
Page 3: Safety
Safety en ▶ Switch off the appliance and unplug it from ▶ Keep children at a safe distance. the mains or switch off the circuit breaker If there is water in the cooking compartment in the fuse box. when it is hot, this may create hot steam. Loose food remnants, fat and meat juices ▶... -
Page 4: Preventing Material Damage
en Preventing material damage ▶ Call Customer Service. → Page 26 ▶ Before you start the cleaning function, al- ways remove coarse dirt from the cooking ▶ Repairs to the appliance should only be carried out by trained specialist staff. compartment. ▶ Never clean accessories at the same time. WARNING ‒ Danger: Magnetism! The outside of the appliance gets very hot Permanent magnets are used in the control... -
Page 5: Environmental Protection And Saving En- Ergy
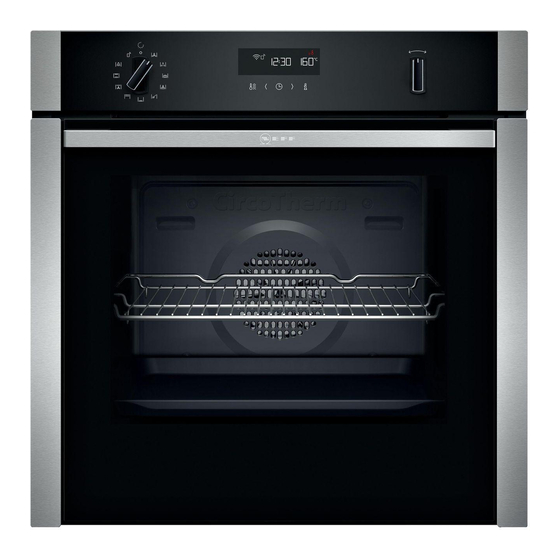
Environmental protection and saving energy en Always allow the cooking compartment to cool Remove all food remnants from the cooking com- ▶ ▶ down with the door closed after cooking at high partment and the appliance door before you next temperatures. heat up the appliance. - Page 6 en Familiarising yourself with your appliance 4 Familiarising yourself with your appliance 4.1 Controls Buttons → "Buttons", Page 6 You can use the control panel to configure all functions Function selector of your appliance and to obtain information about the You can turn the function selector clockwise or operating status.
-
Page 7: Familiarising Yourself With Your Appliance
Familiarising yourself with your appliance en Symbol Name Temperature display Appliance is heating → "Temperature display", Page 8 4.4 Types of heating Here you can find an overview of the types of heating. You can find recommendations on using the types of heating. Use the function selector to set the types of heating. Symbol Type of heating and What it's used for/how it works... - Page 8 en Accessories Note: For temperature settings above 275 °C for the 4.7 Cooking compartment Grill type of heating, the appliance reduces the temper- The functions in the cooking compartment make your ature to approx. 250 °C after approx. 20 minutes. appliance easier to use. Temperature display Rails The temperature display shows you the temperature in The rails in the cooking compartment enable you to...
-
Page 9: Accessories
You will find a comprehensive range of products for your appliance in our brochures and online: www.neff-international.com Accessories vary from one appliance to another. When Baking tray Slide the tray, e.g. the universal pan, purchasing accessories, always quote the exact E.g. -
Page 10: Before Using For The First Time
en Before using for the first time 6 Before using for the first time Configure the settings for initial start-up. Clean the ap- 6.2 Cleaning the appliance before using it pliance and accessories. for the first time Clean the cooking compartment and accessories be- 6.1 Initial use fore using the appliance to prepare food for the first You need to make settings for initial use before you... -
Page 11: Time-Setting Options
Time-setting options en 8 Time-setting options Your appliance has different time-setting options, with Use the button to reset the timer duration to zero. ▶ which you can control its operation. a After a few seconds, the appliance applies the change and goes out. -
Page 12: 9.2 Childproof Lock
en Childproof lock Press the button repeatedly until is highlighted is highlighted on the display. Requirement: in the display. Reset the end time to the current time plus the set ▶ Press the or button. cooking time using the button. a The display shows the calculated end time. a After a few seconds, the appliance applies the Use the or button to delay the end time. -
Page 13: Rapid Heating
Sabbath mode en Press the button. 10.1 Setting rapid heating a appears in the display and the arrows are filled To ensure an even cooking result, do not place the from the bottom to the top. food in the cooking compartment until rapid heating a Rapid heating starts after a few seconds. -
Page 14: Home Connect
en Home Connect Display Basic setting Selection Cooling fan run-on time = short = medium = long = extra long Telescopic shelves retrofitted = no (for rails and 1-level pull-out) = yes (for 2- and 3-level pull-out) Sabbath mode available = no = yes Reset all values to factory settings = no... - Page 15 Home Connect en 13.2 Home Connect Settings You can adjust the settings and network settings for Home Connect in the basic settings for your appliance. Setting Selection or display Explanation Connection to the network are displays that you cannot set. – Not connected – Connect automatically –...
- Page 16 Remote Diagnostics in your country, please visit the service/support section of your local website: 13.7 Declaration of Conformity www.home-connect.com Constructa Neff Vertriebs-GmbH hereby declares that 13.6 Data protection the appliance with Home Connect functionality meets the essential requirements and other relevant provi- Please see the information on data protection.
-
Page 17: Cleaning And Servicing
Cleaning and servicing en Appliance front Surface Suitable cleaning agents Notes Stainless steel ¡ Hot soapy water To prevent corrosion, remove any limescale, grease, starch or albu- min (e.g. egg white) stains on stainless steel fronts immediately. ¡ Special stainless steel cleaning products Apply a thin layer of the stainless steel cleaning product with a soft cloth. - Page 18 en Cleaning functions Before using the appliance, remove the worst of the ▶ 14.3 Checking the cooking compartment food residues and remnants from the cooking com- seal after cleaning partment, heating elements and accessories. If the cooking compartment seal is on the left or ▶...
- Page 19 Cleaning functions en Allow the appliance to cool down. Never pour water into the cooking compartment ▶ ▶ Keep children at a safe distance. when the cooking compartment is hot. ▶ Note: The oven light does not come on during the Notes cleaning function.
- Page 20 en Shelf supports If you are unable to remove stubborn dirt, repeat the You can also dry the cooking compartment ‒ cleaning aid after the cooking compartment has quickly. cooled down. → "Drying the cooking compartment quickly", To switch off, turn the function selector to the zero Page 20 setting.
- Page 21 Appliance door en Hold the screwdriver horizontally and use it to Insert the coin in the gap in the lock and rotate as push the door lock (black component) on each side far as it will go . of the door upwards as far as it will go ...
- Page 22 en Appliance door Rotate the door handle upwards slightly . WARNING ‒ Risk of injury! The appliance door has a weight of 7–10 kg and may fall if it is not handled carefully. Handle the appliance door carefully. ▶ The door handle is not suitable for carrying the ap- pliance door.
- Page 23 Appliance door en Remove the spacers and seals for cleaning, if 17.3 Removing the door panes required. To facilitate cleaning, you can remove the door pane. WARNING ‒ Risk of injury! Components inside the appliance door may have sharp edges. Wear protective gloves. ▶ Requirement: The appliance door is detached.
-
Page 24: Troubleshooting
en Troubleshooting Check the fit of the four spacers and two seals. Push down on the intermediate pane around Place the spacers on the centre of the lines . slide the retainer in at an angle and push down ‒... -
Page 25: Customer Service
Troubleshooting en 18.1 Malfunctions Fault Cause and troubleshooting The appliance is not working. The circuit breaker is faulty. Check the circuit breaker in the fuse box. ▶ There has been a power cut. Check whether the lighting in your kitchen or other appliances are working. ▶... - Page 26 en Disposal Pull out the halogen bulb without turning it . WARNING ‒ Risk of electric shock! When changing the bulb, the bulb socket contacts are live. Before replacing the bulb, unplug the appliance ▶ from the mains or switch off the circuit breaker in the fuse box.
- Page 27 How it works en 21 How it works Here, you can find the ideal settings for various types ¡ Add a little liquid to the poultry in the cookware. of food as well as the best accessories and cookware. Cover the bottom of the cookware with approx. 1– We have perfectly tailored these recommendations to 2 cm of liquid.
- Page 28 en How it works 21.4 Food selection Food Accessories/cookware Shelf pos- Type of Temperature Cooking ition heating in °C/grill set- time in mins ting Victoria sponge cake 2 pcs 150-170 15-25 Springform cake tin, diameter 20 cm Rich fruit cake Deep 23 cm diameter 140-150 180-210 Fruit pie...
- Page 29 How it works en Cover the containers with foil, e. g. with cling film. 21.5 Yoghurt Place the containers on the cooking compartment You can use your appliance to make your own yoghurt. floor. Set the appliance according to the recommended Preparing yoghurt setting.
-
Page 30: Installation Instructions
en Installation instructions Food Accessories/cookware Shelf pos- Type of Temperature in Cook- ition heating °C ing time in mins Small cakes, 2 levels Universal pan 3 + 1 30-40 Baking tray Small cakes, 3 levels Universal pan 4 + 3 + 1 30-40 Baking tray Hot water sponge cake Springform cake tin,... - Page 31 Installation instructions en 22.3 Installation below a worktop Observe the installation dimensions and the installation instructions when installing below a worktop. ¡ Wear protective gloves so that you do not cut yourself. Parts that are accessible dur- ing installation may have sharp edges. ¡...
- Page 32 en Installation instructions ¡ The power cable must be plugged in at the rear of 22.5 Installation in a tall unit the appliance until you hear a clicking sound. A 3 m Observe the installation dimensions and the installation power cable can be obtained from the after-sales instructions when installing in a tall unit.
- Page 33 Installation instructions en Push the appliance in fully. Screw the appliance into place. Do not kink or trap the connecting cable, or route it over sharp edges. Centre the appliance. Open the appliance door slightly, then refit the pan- els and screw them in place, first at the top and then at the bottom.
- Page 36 *9001580263* 9001580263 Constructa-Neff Vertriebs-GmbH Carl-Wery-Straße 34 001112 81739 München GERMANY...