Table of Contents
Advertisement
Quick Links
Advertisement
Table of Contents

Related Manuals for NEFF B5ACM7HH0B


Summary of Contents for NEFF B5ACM7HH0B
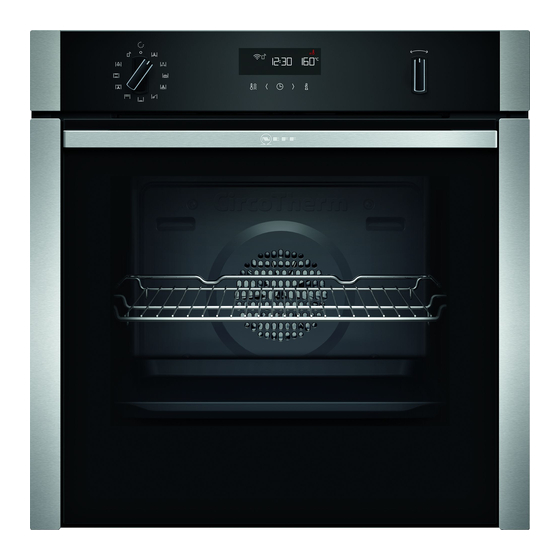
- Page 1 Oven [en] User manual and installation instructions B5ACM7HH0B...
-
Page 2: Table Of Contents
en Safety ¡ Keep the instruction manual and the Table of contents product information safe for future refer- ence or for the next owner. ¡ Check the appliance after unpacking it. Do USER MANUAL not connect the appliance if it has been damaged in transit. -
Page 3: Safety
Safety en ▶ Never open the appliance door if there is ▶ Do not stand too close to the appliance smoke inside. when opening the door. ▶ Switch off the appliance and unplug it from ▶ Open the appliance door carefully. the mains or switch off the circuit breaker ▶... -
Page 4: Preventing Material Damage
en Preventing material damage ▶ If the appliance or the power cord is dam- 1.7 Cleaning function aged, immediately unplug the power cord Follow these safety instructions when using or switch off the fuse in the fuse box. the cleaning function. ▶ Call Customer Service. → Page 29 WARNING ‒ Risk of fire! ▶... -
Page 5: Environmental Protection And Saving En- Ergy
Environmental protection and saving energy en The prolonged presence of moisture in the cooking Using oven cleaner in a hot cooking compartment compartment leads to corrosion. damages the enamel. Allow the cooking compartment to dry after use. Never use oven cleaner in the cooking compartment ▶... - Page 6 en Familiarising yourself with your appliance 4 Familiarising yourself with your appliance 4.1 Controls Buttons → "Buttons", Page 6 You can use the control panel to configure all functions Function selector of your appliance and to obtain information about the You can turn the function selector clockwise or operating status.
-
Page 7: Familiarising Yourself With Your Appliance
Familiarising yourself with your appliance en Symbol Name Temperature display Appliance is heating → "Temperature display", Page 8 4.4 Types of heating Here you can find an overview of the types of heating. You can find recommendations on using the types of heating. Use the function selector to set the types of heating. Symbol Type of heating and What it's used for/how it works... - Page 8 en Accessories Note: For temperature settings above 275 °C for the 4.7 Cooking compartment Grill type of heating, the appliance reduces the temper- The functions in the cooking compartment make your ature to approx. 250 °C after approx. 20 minutes. appliance easier to use. Temperature display Rails The temperature display shows you the temperature in The rails in the cooking compartment enable you to...
-
Page 9: Accessories
Accessories en Accessories Wire rack ¡ Cake tins ¡ Ovenproof dishes ¡ Cookware ¡ Meat, e.g. roasting joints or steak ¡ Frozen meals Universal pan ¡ Moist cakes ¡ Baked items ¡ Bread ¡ Large roasts ¡ Frozen meals ¡ Catching dripping liquids, e.g. fat when grilling food on the wire rack. -
Page 10: Before Using For The First Time
6 Before using for the first time Configure the settings for initial start-up. Clean the ap- 6.2 Cleaning the appliance before using it pliance and accessories. -
Page 11: Time-Setting Options
Time-setting options en 8 Time-setting options Your appliance has different time-setting options, with Use the button to reset the timer duration to zero. ▶ which you can control its operation. a After a few seconds, the appliance applies the change and goes out. -
Page 12: Meat Thermometer
en Meat thermometer Press the button repeatedly until is highlighted is highlighted on the display. Requirement: in the display. Reset the end time to the current time plus the set ▶ Press the or button. cooking time using the button. a The display shows the calculated end time. a After a few seconds, the appliance applies the Use the or button to delay the end time. -
Page 13: 10.2 Childproof Lock
Childproof lock en Set the cooking compartment temperature at least 9.3 Setting the meat probe 10 °C higher than the core temperature. The meat probe measures the temperature inside the Do not set the cooking compartment temperature to food between 30 °C and 99 °C. higher than 250 °C. -
Page 14: Sabbath Mode
en Sabbath mode 12 Sabbath mode You can set a time of over 70 hours using Sabbath Requirement: Sabbath mode is activated in the basic mode. You can use Top/bottom heating to keep food settings. warm between 85 °C and 140 °C during this time → "Basic settings", Page 14 without having to switch the appliance on or off. -
Page 15: Home Connect
Home Connect en Display Basic setting Selection Home Connect Settings → "Home Connect ", Page 15 Factory setting (may vary according to model) Depending on the appliance specifications To save the changes, press and hold the button 13.2 Changing basic settings for approx. four seconds. Requirement: The appliance is switched off. Note: Your changes to the basic settings will be re- Press and hold the button for approximately tained even after a power failure. - Page 16 en Home Connect Setting Selection or display Explanation Connection to the Home Connect are displays that you cannot set. – Ready – Connect – Connected Wi-Fi If Wi-Fi is activated, you can use Home Connect. – Off In networked standby mode, the appliance requires a max- –...
-
Page 17: Cleaning And Servicing
¡ Security certificate of the Wi-Fi communication mod- 14.7 Declaration of Conformity ule (to ensure a secure data connection). Constructa Neff Vertriebs-GmbH hereby declares that ¡ The current software and hardware version of your the appliance with Home Connect functionality meets appliance. -
Page 18: Shelf Supports
en Cleaning and servicing Appliance door Area Suitable cleaning agents Notes Door panels ¡ Hot soapy water Do not use a glass scraper or a stainless steel wool. Tip: Remove the door panels in order to clean them thoroughly. → "Appliance door", Page 23 Door cover ¡... - Page 19 Cleaning functions en For some surfaces, you can use alternative 15.3 Checking the cooking compartment ‒ cleaning agents. seal after cleaning → "Suitable cleaning agents", Page 17 If the cooking compartment seal is on the left or ▶ Dry with a soft cloth. right of the spacer , slide the cooking compart- ment seal inwards until it is beside the spacer ...
- Page 20 en Cleaning functions Allow the appliance to cool down. Never pour water into the cooking compartment ▶ ▶ when the cooking compartment is hot. Keep children at a safe distance. ▶ Note: The oven light does not come on during the Notes ¡...
- Page 21 Shelf supports en If you are unable to remove stubborn dirt, repeat the You can also dry the cooking compartment ‒ cleaning aid after the cooking compartment has quickly. cooled down. → "Drying the cooking compartment quickly", To switch off, turn the function selector to the zero Page 21 setting.
- Page 22 en Shelf supports Push on the tab marked PUSH behind the rail, and 17.4 Attaching the pull-out rail push the rail to the rear. Note: The pull-out rails only fit on the right or left. Make sure when you fit them that you can pull them out to- wards the front.
- Page 23 Appliance door en Pull the pull-out rail out as far as it will go and slide it back in. 18 Appliance door To ensure that your appliance retains its appearance Hold the screwdriver horizontally and use it to and remains fully functioning for a long time, you can push the door lock (black component) on each side detach the appliance door and clean it.
- Page 24 en Appliance door Open the appliance door approx. 45° wide. ATTENTION! Opening and closing the appliance door when it is in the lock position damages the door hinges. Never force the appliance door open or closed. ▶ If the door hinge has been damaged, call the ▶...
- Page 25 Appliance door en 18.2 Attaching the appliance door WARNING ‒ Risk of injury! If the door locks are unsecured, the appliance door Tip: Ensure that the appliance door is not wedged may become detached. at an angle and that it is properly fitted in place. After attaching the appliance door, close the left- ▶...
- Page 26 en Appliance door Push down on the intermediate pane in the area of Tip: When fitting the door panes, make sure that , and carefully lift the retainer until you are able they are in the original order. to pull it out. Insert the intermediate pane so that the arrow on the right-hand side is pointing upwards.
-
Page 27: Troubleshooting
Troubleshooting en Push down on the intermediate pane around Insert the inner pane into the fixing rail at an angle slide the retainer in at an angle and push down towards the back until it clicks into place. Push the inner pane downwards until it locks into place ... -
Page 28: Customer Service
en Troubleshooting Fault Cause and troubleshooting The appliance door cannot be The cleaning function locks the appliance door. opened; lights up in the dis- Allow the appliance to cool down until goes out in the display. ▶ play. → "Pyrolytic self-cleaning ", Page 19 The time flashes in the display. -
Page 29: How It Works
Disposal en Depending on the appliance model, the glass cover Screw the glass cover on. may have a sealing ring. Put the sealing ring in posi- Take the tea towel out of the cooking compartment. tion. Connect the appliance to the power supply. 20 ... - Page 30 en How it works ¡ Depending on the size and type of the food to be Baking tins/dishes on the wire rack: Height roasted, add up to 1/2 litre water to the universal First wire rack pan. Second wire rack You can make a sauce from the juices that are Baking tray caught.
- Page 31 How it works en Food Accessories/cookware Shelf pos- Type of Temperature Cooking ition heating in °C/grill set- time in mins ting Fruit pie 20 cm diameter plate or 160-170 60-70 pie tin Quiche Quiche tin (dark-coated) 3 180-200 40-55 (White) bread Loaf tin (1 x 900 g or 2 190-210 25-40...
- Page 32 en How it works Yoghurt Food Accessories/cookware Shelf position Type of Temperature in Cooking heating °C time in mins Yoghurt Individual moulds Cooking compartment 40-45 8–9 hrs floor ¡ Baking tins/dishes on the wire rack 22.6 Test dishes First wire rack: Level 3 These overviews have been produced for test institutes Second wire rack: Level 1 to facilitate appliance testing in accordance with EN...
-
Page 33: Installation Instructions
Installation instructions en Food Accessories/cookware Shelf pos- Type of Temperature in Cook- ition heating °C ing time in mins Hot water sponge cake Springform cake tin, 160-170 30-35 diameter 26 cm Hot water sponge cake, 2 levels Springform cake tin, 3 + 1 150-160 35-50 diameter 26 cm... - Page 34 en Installation instructions 23.2 Appliance dimensions 23.3 Installation below a worktop You will find the dimensions of the appliance here Observe the installation dimensions and the installation instructions when installing below a worktop. ¡ To ventilate the appliance, the intermediate floor must have a ventilation cut-out. ¡...
- Page 35 Installation instructions en ¡ The power cable must be plugged in at the rear of 23.5 Installation in a tall unit the appliance until you hear a clicking sound. A 3 m Observe the installation dimensions and the installation power cable can be obtained from the after-sales instructions when installing in a tall unit.
- Page 36 en Installation instructions Push the appliance in fully. Screw the appliance into place. Do not kink or trap the connecting cable, or route it over sharp edges. Centre the appliance. Open the appliance door slightly, then refit the pan- els and screw them in place, first at the top and then at the bottom.
- Page 40 *9001580262* 9001580262 Constructa-Neff Vertriebs-GmbH Carl-Wery-Straße 34 001112 81739 München GERMANY...