Table of Contents
Advertisement
Advertisement
Table of Contents

Related Manuals for Stamina Muuv Bike


Summary of Contents for Stamina Muuv Bike
- Page 1 We do the thinking, you do the moving Bike O W N E R S M A N U A L...
- Page 2 Stamina. Why müüv works müüv is based on science and experience - our team of kinesiologists have over 40 years of experience working with more than 3.7 million members.
- Page 3 Quickstart Guide To fully operate your müüv bike you will need the free müüv app. Download the app and get moving! Go to the App Store on your device or scan the QR Code for quick access. The required müüv app provides the ability to: Watch the short video for easy set-up.
- Page 4 Exclusive to the müüv bike müüv is not only a bike it’s your workout buddy Your bike uses LED lights on the smart mount to communicate with you your bike when mount lights will this happens White Glow. 2 seconds up, 2 seconds down Bike Turns On White Solid Full...
- Page 5 Exclusive to the müüv bike Control your müüv bike & your workout with your voice Stay engaged with your workout without having to keep reaching for your phone. To control your bike using your voice, download the müüv app on your device. Example commands include: “Hey Siri...
- Page 6 Weight on this product should not exceed 330 lbs. This Product is Distributed Exclusively by STAMINA PRODUCTS MADE IN CHINA 2040 N Alliance Ave, Springfield, MO 65803 Customer Care © 2021 Stamina Products, Inc. 1 (800) 375-7520 2021, 03 www.staminaproducts.com...
-
Page 7: Table Of Contents
TABLE OF CONTENTS Important Safety Instructions ....7 Maintenance ..........25 Safety Instructions ........8 Conditioning Guidelines ......26 Before You Begin ........10 Warm-Up and Cool-Down ......27 Equipment Warning, Caution & Notice Labels .. 11 Product Parts Drawing ......28 Hardware Identification Chart .... -
Page 8: Safety Instructions
BEFORE YOU BEGIN WARNING Cancer and Reproductive Harm www.P65Warnings.ca.gov Consult your physician before starting this or any exercise program. This is WARNING especially important if you are over the age of 35, have never exercised before, are pregnant, or suffer from any health problem. This product is for home use only. - Page 9 1 (800) 375-7520 customer.care@staminaproducts.com Hi! From all of us here at Stamina Products, thank you for your purchase. We know that you have big fitness goals in mind and we are here to help you along. Call us, email us, or send us a message on Facebook. Be sure to contact us if you have any questions on your new product.
-
Page 10: Before You Begin
Providing you with a quality product is Stamina's fullest. top priority. However, sometimes there could be a It's a proven fact that a regular exercise missing or incorrectly sized part. -
Page 11: Equipment Warning, Caution & Notice Labels
EQUIPMENT WARNING, CAUTION & NOTICE LABELS This chart is provided to help identify the warning, caution, and notice labels on the müüv bike. Please take a moment to familiarize yourself with all of the warning, caution, and notice labels. CAUTION LABEL(54) SERIAL DECAL(111) To best serve you, our Customer Care Representatives will need your serial number. -
Page 12: Hardware Identification Chart
HARDWARE IDENTIFICATION CHART This chart is provided to help identify the fasteners used in the assembly process. Place the washers or the ends of the bolts or screws on the circles to check for the correct diameter. Use the small scale to check the length of the bolts and screws. -
Page 13: Assembly Instructions
ASSEMBLY INSTRUCTIONS Place all parts from the box in a cleared area and position them on the floor in front of you. Remove all packing materials from your area and place them back into the box. Do not dispose of the packing materials until assembly is completed. - Page 14 ASSEMBLY INSTRUCTIONS STEP 2 Make the MOVING WHEELS(60) on the FRONT STABILIZER(2) face the front, then attach the FRONT STABILIZER(2) to the MAIN FRAME(1) with BUTTON HEAD BOLTS(M8x1.25x65mm)(63) and WASHERS(M8)(64). STEP 3 Attach the REAR STABILIZER(3) to the MAIN FRAME(1) with BUTTON HEAD BOLTS(M8x1.25x65mm) (63) and WASHERS(M8)(64).
- Page 15 ASSEMBLY INSTRUCTIONS STEP 5: There is a strap attached inside of the HANDLEBAR POST(13) to assist in pulling the CONTROL CABLE(103) and CONNECTING WIRE(104) through the HANDLEBAR POST(13). Tie the strap to the plug ends of the CONTROL CABLE(103) and CONNECTING WIRE(104). Pull the strap from the top end to pull the cables to through and extend out from the hole at the front of the HANDLEBAR POST(13) as shown in the below illustration.
- Page 16 ASSEMBLY INSTRUCTIONS STEP 7 Attach the WATER BOTTLE HOLDER(24) to the MAIN FRAME(1) with LARGE ROUND HEAD SCREWS (M5x0.8x8mm)(71). STEP 8 Plug the EXTENSION CONTROL CABLE(102) into the CONTROL CABLE(103). Plug the EXTENSION WIRE(101) into the CONNECTING WIRE(104). Push the excess wires back into the HANDLEBAR POST(13), then attach the MOUNTING POST(12) to the HANDLEBAR POST(13) with BUTTON HEAD BOLTS(M8x1.25x15mm)(72) and BUTTON HEAD BOLT(M6x1x12mm)(70).
- Page 17 ASSEMBLY INSTRUCTIONS STEP 10 Plug the EXTENSION CONTROL CABLE(102) and the EXTENSION WIRE(101) into the back of the SMART MOUNT(45). Attach the SMART MOUNT(45) to the MOUNTING BRACKET(11) with ROUND HEAD SCREWS(M5x0.8x8mm)(93). Attach the LIMIT BRACKET(121) to the MOUNTING POST(12) with BUTTON HEAD BOLTS(M6x1x12mm)(70).
-
Page 18: Set Up Instructions
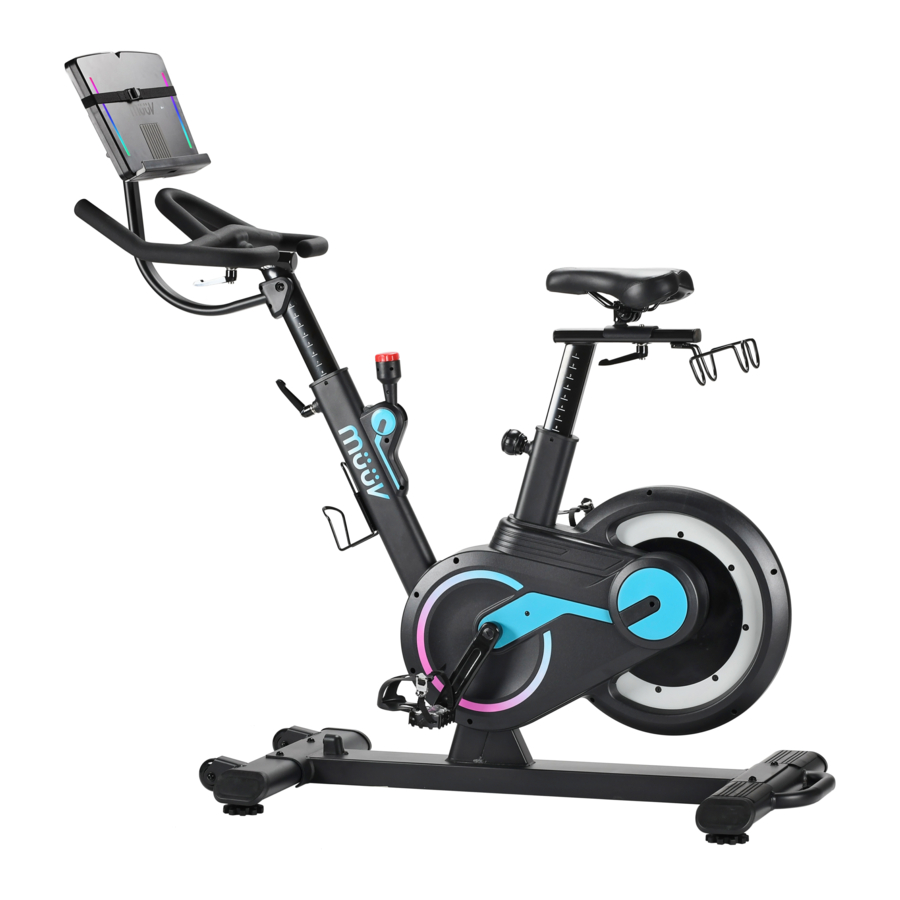
SET UP INSTRUCTIONS Place the müüv bike in the area where it will be used. It is recommended that the müüv bike be placed on an equipment mat. The müüv bike is approximately 58.8 inches long (max.) x 21.9 inches wide x 55.1 inches tall (max.). -
Page 19: Operational Instructions
The Smart Mount uses LED light language to let you OPERATIONAL INSTRUCTIONS know what’s going on in your workouts, what’s going on in your friends’ workouts, The Smart Mount is designed to work with smart phones and to celebrate your and tablets. - Page 20 OPERATIONAL INSTRUCTIONS HEART RATE TRANSMITTER The Bluetooth HEART RATE TRANSMITTER(106) is compatible with iPhone 4s or above, iPod Touch (5th or above generation), iPad (3rd or above generation). It is also compatible with Android 4.3 or above with Bluetooth smart support of smart phones and tablets. To connect the HEART RATE TRANSMITTER(106) to your device: 1.
- Page 21 OPERATIONAL INSTRUCTIONS To wear the HEART RATE TRANSMITTER(106) around the chest, make the red LED indicator on the HEART RATE TRANSMITTER(106) upward. Attach the clasp end of the ELASTIC SENSOR STRAP(107) to the loop end of the ELASTIC SENSOR STRAP(107), and adjust the ELASTIC SENSOR STRAP(107) to fit your chest snugly as shown in the illustration below.
- Page 22 OPERATIONAL INSTRUCTIONS Install the müüv app for fitting guidance. LOAD ADJUSTMENT Power on the SMART MOUNT(45). To increase the load, turn the TENSION KNOB(44) clockwise. To decrease the load, turn the TENSION KNOB(44) counterclockwise. CAUTION! When you want to slow down the pedal speed, gradually pull down the BREAK HANDLE(14).
- Page 23 OPERATIONAL INSTRUCTIONS HANDLEBAR HEIGHT ADJUSTMENT HANDLEBAR(10) height is a matter of preference. Start with the HANDLEBAR(10) at the same height as the seat. Adjusting the HANDLEBAR(10) higher will give the rider a more upright position; lowering the HANDLEBAR(10) will result in a more prone position. To adjust, loosen and pull the UPRIGHT LOCKING LEVER (49), then lower or raise the HANDLEBAR(10) to the desired height, and secure with the UPRIGHT LOCKING LEVER(49).
- Page 24 OPERATIONAL INSTRUCTIONS PEDAL STRAP ADJUSTMENT Use the following procedure to adjust the PEDAL STRAP: 1. Place the ball of each foot on the pedal and in the Toe Cage such that the ball of the foot is centered over the pedal spindle and under the Pedal Strap. 2.
-
Page 25: Storage
3. Verify that all nuts and bolts are present and properly tightened. Replace missing nuts and bolts. Tighten loose nuts and bolts. 4. Verify that the CAUTION LABEL(54) is in place and easy to read. Call Stamina Products immediately at 1-800-375-7520 for a replacement CAUTION LABEL(54) if it is missing or damaged. -
Page 26: Conditioning Guidelines
CONDITIONING GUIDELINES Install the müüv app How you begin your exercise program depends on your physical for personalized workouts condition. If you have been inactive for several years or are based on your fitness level. severely overweight, start slowly and increase your workout time gradually. -
Page 27: Warm-Up And Cool-Down
WARM-UP and COOL-DOWN Warm-Up The purpose of warming up is to prepare your body for exercise and to minimize injuries. Warm up for two to five minutes before strength training or aerobic exercising. Perform activities that raise your heart rate and warm the working muscles. Activities may include brisk walking, jogging, jumping jacks, jump rope, and running in place. -
Page 28: Product Parts Drawing
PRODUCT PARTS DRAWING FRONT BACK... -
Page 29: Parts List
PARTS LIST PART# PART NAME Main Frame Front Stabilizer Rear Stabilizer Flywheel (12kg) Magnetic Ring Seat Post Dumbbell Rack Seat Slider Seat Handlebar Mounting Bracket Mounting Post Handlebar Post Brake Handle Torsion Spring Screw, Round Head (ST4.2 x 16mm) Left Pedal Left Crank Pulley Shaft Pulley... - Page 30 PARTS LIST PART# PART NAME Upright Locking Lever Idler Wheel Brake Cable Tension Cable Control Motor Warning Label Right Support Left Support Flywheel Axle Eyebolt (M8 X 1.25 X 60MM) Idler Wheel Axle (ø25 x 50.5mm) Moving Wheel Nut (M10 x 1.5) Screw, Round Head (ST4.2 x 25mm) Bolt, Button Head (M8 x 1.25 x 65mm) Washer (M8)
- Page 31 PARTS LIST PART# PART NAME Bolt, Button Head (M6 x 1 x 45mm) Spring Adapter, Output 12V, 2A Power Wire (850mm long) Extension Wire (3P, 500mm long) Extension Control Cable (9P, 500mm long) Control Cable (9P, 1200mm long) Connecting Wire (3P, 900mm long) Plug Nut Heart Rate Transmitter Elastic Sensor Strap...
-
Page 32: Warranty
To implement this limited warranty, send a written notice stating your name, date, and place of purchase and a brief description of the defect along with your receipt to Stamina Products, Inc. 2040 N Alliance Ave, Springfield, Missouri, USA, MO 65803, or email us at customer.care@staminaproducts.com, or call us at 1-800-375-7520. -
Page 33: Notes
NOTES... -
Page 34: Fax/Mail Ordering Form
2040 N Alliance Ave, Springfield, MO 65803 Would you like to recieve email information or special offers from Stamina Products? Register at contact.staminaproducts.com TO REGISTER YOUR PRODUCT To enact your warranty, please register your product by going to register.staminaproducts.com. Please have your product model number (printed on the cover of this owner’s manual) and the serial number (printed on the black and white sticker on your...