Table of Contents
Advertisement
Advertisement
Table of Contents

Related Manuals for Fuji Xerox DocuCentre S2011


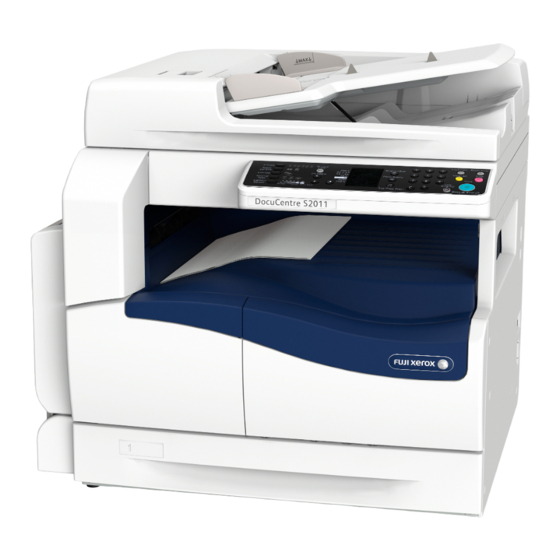
Summary of Contents for Fuji Xerox DocuCentre S2011
- Page 1 DocuCentre S2011 Basic Operation Guide...
-
Page 2: Preface
The data saved in the hard disk of the machine may be lost if there is any problem in the hard disk. Fuji Xerox is not responsible for any direct and indirect damages arising from or caused by such data loss. -
Page 3: Table Of Contents
Table of Contents Preface ..............................2 Table of Contents..........................3 Main Features on the Control Panel .................... 4 Informative Pointers .......................... 6 Before Using This Machine......................8 Safety Notes ........................8 Preparations............................16 Paper Types........................16 Loading Paper ........................17 Changing Paper Size and Orientation..............18 Placing Document ......................20 Changing Document Size and Orientation ............22 Copy ................................24... -
Page 4: Main Features On The Control Panel
Main Features on the Control Panel <ID Card Copy> button To use the ID Card Copy feature. <2 Sided> button To set 1 Sided or 2 Sided copying. <Pages per Side> button To use the Pages per Side feature. <Collated> button To set collate when copying multiple documents. - Page 5 Main Features on the Control Panel <Log In/Out> button <Original Size> button To enter or exit System To specify the scanning size and Administration mode. orientation for using the document glass. To switch the number of ID card copy. <Power Saver> button Numeric keypad To enter or exit Power Saver To enter numbers, such as...
-
Page 6: Informative Pointers
Using the correct printer driver? When you use new multifunctional machine, you cannot use the same driver used for the machine that you had been using. Install the new driver for this machine (DocuCentre S2011). Check the printer driver installed in your computer. - Page 7 Informative Pointers Clean the glass for clear copy! Check the glass before starting to copy. Even when you are using the document feeder, the glass is related to the feature. Point When using the document feeder... When using the document glass... Clean the narrow glass strip on the left Clean the document glass.
-
Page 8: Before Using This Machine
Before Using This Machine Safety Notes Before using this product, read "Safety Notes" carefully for safety use. This product and recommended supplies have been tested and found to comply with strict safety requirements including safety agency approvals and compliance with environmental standards. - Page 9 Plug the power cord directly into a grounded electrical outlet. To prevent overheat and a fire accident, do not use an extension cord, a multi-plug adaptor or a multiple connector. Consult your local Fuji Xerox representative to check if an outlet is grounded.
- Page 10 Once you notice any unusual condition, switch off and unplug this product first and contact your local Fuji Xerox representative. Machine Installation Do not locate this product where people might step on or trip over the power cord.
- Page 11 Before Using This Machine With Duplex Automatic Document Feeder 1100.9 325.9 (Unit: mm) Do not incline the product at more than 10 degree angle. Otherwise, it may fall over and cause injuries. 10 ° 10 ° 10 ° 10 ° Always lock the wheels of this product after installation.
- Page 12 Other cleaning materials may result in poor performance of the product. Never use aerosol cleaners to avoid catching fire and explosion. If you need to pull out a tray to remove paper jam, contact your local Fuji Xerox representative. Do not pull out a tray, otherwise it may cause injuries.
- Page 13 Never throw a toner cartridge into an open flame. Remaining toner in the cartridge may catch fire and cause burn injuries or explosion. If you have a used toner cartridge no longer needed, contact your local Fuji Xerox representative for its disposal.
- Page 14 Before Using This Machine Keep drum cartridges and toner cartridges out of the reach of children. If a child accidentally swallows toner, spit it out, rinse mouth with water, drink water and consult a physician immediately. When replacing drum cartridges and toner cartridges, be careful not to spill the toner.
- Page 15 Before Using This Machine Location of Warning and Caution Labels Always follow all warning instructions marked on or supplied with this product. To avoid the risk of burn injuries and electric shock, never touch the area with the "High Temperature" or "High Voltage" marks on.
-
Page 16: Preparations
60 to 216 gsm 100 sheets * Ream Weight: 51.6 - 186 kg (Up to 10 mm) When using 80 gsm paper When using Fuji Xerox standard paper Unusable Paper Damp or wet paper Paper pre-printed with other printer or copying machine ... -
Page 17: Loading Paper
Preparations Loading Paper Load paper in Tray 1 and 2 * Only Tray 1 Load paper in the Bypass tray Place the side to be copied on facing down After loading paper into tray, make sure to set the size and orientation of the paper. Refer to "Changing Paper Size and Orientation"... -
Page 18: Changing Paper Size And Orientation
Preparations Changing Paper Size and Orientation After loading paper into tray, make sure to set the size and orientation of the paper. * You cannot change the setting while the machine is processing a job. Press the <Paper Supply> button to select the <Paper Supply>... - Page 19 Preparations Press the <Start> button to confirm the settings. To exit the paper size setting mode without saving, press the <Clear All> or the <Stop> button. Be sure to press the <Start> button to confirm the settings. Otherwise the settings, the size and orientation of paper, are canceled and the previous settings are remained.
-
Page 20: Placing Document
Preparations Placing Document Place the document in the document feeder If you cannot place the document such as the document size is too large, place the short edge of the document to be fed first. Portrait orientation Only the standard sizes are supported. - Page 21 Preparations When using the document glass, make sure that the size and orientation of document displayed in the original size display area match the placed document. <Reference> "Changing Document Size and Orientation" (P.22) When there is no document size displayed in the original size display area, the machine automatically sets the Original Size Display Area...
-
Page 22: Changing Document Size And Orientation
Preparations Changing Document Size and Orientation After you place the document on the document glass, make sure that the document size and orientation displayed in the original size display area match the placed document. Follow the steps below for changing the size and orientation of document. Press the <Original Size>... - Page 23 Preparations The orientation of document and paper is important! Unexpected resolves may occur when the orientation of document does not match the orientation of loaded paper. In the following cases, you can copy without considering the orientation of paper since the machine automatically rotates the scanned data.
-
Page 24: Copy
Copy How to Copy Basic Copy Procedure (100% zoom ratio) Place the document. <Reference> "Placing Document" (P.20) When using the document glass, make sure that the size and orientation of document displayed in the original size display area match the placed document. <Reference>... - Page 25 Copy Press the <Start> button. <Start> button...
-
Page 26: Making Reduced Or Enlarged Copies
Copy Making Reduced or Enlarged Copies This feature allows you to select a zoom ratio to reduce or enlarge the size of copies. Place the document. <Reference> "Placing Document" (P.20) When using the document glass, make sure that the size and orientation of document displayed in the original size display area match the placed document. - Page 27 Copy To set a specific zoom ratio, press the <Variable Zoom Ratio> <Variable Zoom Ratio> button button to select a zoom ratio. ****************************************************************************************************** Press the <Start> button. <Start> button...
-
Page 28: Copying Two/Four Pages Onto One Sheet
Copy Copying Two/Four Pages onto One Sheet This feature allows you to copy two or four pages of document together onto one side of a single sheet of paper. The machine automatically sets the zoom ratio to fit on a page. Report Report Report... - Page 29 Copy Press the <Paper Supply> button to select the <Paper Supply> button desired tray. In the status machine diagram, the tray indicator lights up on the selected tray, and its paper size and orientation are displayed on the paper size display. ****************************************************************************************************** Press the <Start>...
-
Page 30: Making 2 Sided Copies
Copy Making 2 Sided Copies This feature allows you to copy 1 Sided or 2 Sided documents on one side or both sides of paper. Report Place the document. <Reference> "Placing Document" (P.20) When using the document glass, make sure that the size and orientation of document displayed in the original size display area match the placed document. - Page 31 Copy 2 → 1 Sided Copies 2 Sided document on one side of paper. The layout of each page is read as the page for long side binding. "1 → 2 Sided" and "2 → 1 Sided" for the short side binding are also available by changing the setting. For more information, refer to the User Guide.
-
Page 32: Copy Output
Copy Copy Output This feature allows you to output sheets sorted into sets that are arranged in page order for copying multiple documents. Place the document. <Reference> "Placing Document" (P.20) When using the document glass, make sure that the size and orientation of document displayed in the original size display area match the placed document. - Page 33 Copy Press the <Start> button. <Start> button When using the document glass and all documents have been <Last Original> button scanned, press the <Last Original> button to start copying.
-
Page 34: Copying An Id Card
Copy Copying an ID Card This feature allows you to copy both sides of an ID card (name card, employee card, etc.) on one side of paper. The default zoom ratio is set to 100 %. You can also change the zoom ratio. Place an ID card face down slightly away from the top left corner of the document glass, and then close the document cover. - Page 35 Copy Press the <Original Size> button until you select <Original Size> button the desired number of cards. When scanning 1 card: No image When scanning 2 cards: ****************************************************************************************************** Press the <Paper Supply> button to select the <Paper Supply> button desired tray. ******************************************************************************************************...
- Page 36 Copy Press the <Start> button. <Start> button When one side is finished scanning, the <Start> button lights up blinking. ****************************************************************************************************** Place the other side of the ID card face down slightly away from the top left corner of the document glass, and then close the document cover. ****************************************************************************************************** Press the <Start>...
-
Page 37: Print
For using this feature, the print driver included in the Media (Software/Product Manual) must be installed before use. Select [Print] from the application's [File] menu. ****************************************************************************************************** Select [FX DocuCentre S2011]. ****************************************************************************************************** Click [Properties] to change other options if needed. ****************************************************************************************************** Click [OK]. -
Page 38: Scan
Refer to "Placing Document" (P.20). ****************************************************************************************************** Start an application to load the scanned data. ****************************************************************************************************** From the [File] menu, select the item for selecting the scanner (source). ****************************************************************************************************** Select [DocuCentre S2011]. ****************************************************************************************************** Change other options if needed. ****************************************************************************************************** Click [Scan]. -
Page 39: Problem Solving
Problem Solving Paper Jams When a paper jam occurs in the machine, the machine stops and the alarm is activated. Also an error code is displayed in the status machine diagram. Error Code Remedy If the paper is jammed around the fusing unit: Important •... - Page 40 Problem Solving Error Code Remedy Operated after E-1. Important • "E-3" appears if you start copying or printing with the paper tray slightly open. Make sure that the paper tray is completely closed when loading paper or clearing a paper jam. Operated after E-2.
- Page 41 Problem Solving Error Code Remedy Operated after E1.
-
Page 42: Document Jams
Problem Solving Document Jams When a document jam occurs in the document feeder, the machine stops and the alarm is activated. Also, an error code is displayed in the status machine diagram. Error Code Remedy Handle... -
Page 43: Error Code
Problem Solving Error Code The error codes of the machine are listed in the following table. For more information, refer to "User Guide". <Note> If a two-digit error code (X-X) appears, you can view the grouped six-digit error code (XXX-XXX) while holding down the <ID Card Copy>... - Page 44 Problem Solving Error code (X-X) Error Code Cause Remedy Documents jammed in the document feeder. Remove the jammed document. The size of documents that are loaded in the Place the document on the document glass. document feeder is not supported. If the document is jammed, remove the jammed paper.
- Page 45 Problem Solving Error Code Cause Remedy The size and orientation of paper loaded in Confirm that the size and orientation of paper Bypass tray do not match the settings loaded in the Bypass tray) match the settings specified in the machine. displayed in the paper size display area, and reload paper adjusting with the paper guides.
- Page 46 Problem Solving Error Code Cause Remedy The drum cartridge is defective. Replace the drum cartridge. The warranty period of the image quality on It may affect the image quality. Replacing the the drum cartridge is expired. drum cartridge is recommended. The warranty period of performance on the It may damage the machine.
- Page 47 Problem Solving Error Code Cause and Remedy 005-122 [Cause] A document jam occurred in the document feeder. 005-123 [Remedy] Remove the jammed document. 005-125 005-131 005-132 005-134 005-135 005-136 005-139 005-145 005-147 005-196 005-197 005-198 005-199 005-210 [Cause] An error occurred in the document feeder. 005-275 [Remedy] Switch off the machine power, make sure that the display is blank, and then 005-280...
- Page 48 Problem Solving Error Code Cause and Remedy 010-311 [Cause] An error occurred. 010-312 [Remedy] Switch off the machine power, make sure that the display is blank, and then 010-320 switch on the machine power. If the same message is displayed again, contact 010-327 our Customer Support Center.
- Page 49 Problem Solving Error Code Cause and Remedy 024-365 [Cause] An error occurred. [Remedy] Switch off the machine power, make sure that the display is blank, and then switch on the machine power. If the same message is displayed again, contact our Customer Support Center.
- Page 50 Problem Solving Error Code Cause and Remedy 024-718 [Cause] Incompatible print parameters are used. The combination of the specified features such as Document Size, Paper Size, Paper Tray, 2 sided printing, and Output Tray is incompatible. [Remedy] Confirm the print data, and try printing again. 026-737 [Cause] A network error occurred.
- Page 51 Problem Solving Error Code Cause and Remedy 062-360 [Cause] An error occurred. 062-371 [Remedy] Switch off the machine power, make sure that the display is blank, and then 062-380 switch on the machine power. If the same message is displayed again, contact 062-386 our Customer Support Center.
- Page 52 [Remedy] Replace the drum cartridge soon. 091-402 [Cause] The drum cartridge needs to be replaced soon. [Remedy] Replace the drum cartridge. 091-406 [Cause] The drum cartridge life is over. [Remedy] Replace the drum cartridge. Contact your local Fuji Xerox representative or sales representative.
- Page 53 The drum cartridge need to be replaced soon. [Remedy] Prepare a new drum cartridge. 091-441 [Cause] The drum cartridge need to be replaced soon. [Remedy] Replace the drum cartridge. Contact your local Fuji Xerox representative or sales representative. 091-914 [Cause] An error occurred with the drum cartridge.
- Page 54 There is no more toner in the toner cartridge. [Remedy] Remove the seal on the drum cartridge. 093-959 [Cause] An error occurred with the drum cartridge. [Remedy] Replace the drum cartridge. Contact your local Fuji Xerox representative or sales representative. 116-317 [Cause] An error occurred.
- Page 55 DocuCentre S2011 Basic Operation Guide DE6551E2-1 (Edition 1) September 2014 Copyright © 2014 by Fuji Xerox Co., Ltd. Fuji Xerox Co., Ltd. Printed in China...
- Page 56 890E 50020 September 2014 DE6551E2-1 Edition 1...