Brady BMP 61 User Manual
Hide thumbs
Also See for BMP 61:
- User manual (178 pages) ,
- Quick start manual (56 pages) ,
- How-to manual (4 pages)
Table of Contents
Advertisement
Quick Links
Download this manual
See also:
User Manual
Advertisement
Table of Contents
Troubleshooting

Related Manuals for Brady BMP 61


Summary of Contents for Brady BMP 61
- Page 1 User’s Manual...
- Page 2 Copyright and Trademarks Disclaimer This manual is proprietary to Brady Worldwide, Inc. (hereafter "Brady"), and may be revised from time to time without notice. Brady disclaims any understanding to provide you with such revisions, if any. This manual is copyrighted with all rights reserved. No portion of this manual may be copied or reproduced by any means without the prior written consent of Brady.
- Page 3 Brady’s satisfaction to have been defective at the time Brady sold it. This warranty does not extend to any persons obtaining the product from the buyer. THIS WARRANTY IS IN LIEU OF ANY OTHER WARRANTY, EXPRESS OR IMPLIED, INCLUDING, BUT NOT LIMITED TO, ANY IMPLIED WARRANTY OF MERCHANTABILITY OR FITNESS FOR A PARTICULAR PURPOSE, AND OF ANY OTHER OBLIGATIONS OR LIABILITY ON BRADY’S PART.
- Page 4 To register your printer in the USA, scan the code below: Repair and Return If for any reason you need to return the product for repair, please contact Brady Technical Support for repair and replacement information. Document Conventions When using this document, it is important that you understand the conventions used.
-
Page 5: Table Of Contents
Physical and Environmental Characteristics ............3 External View ......................4 Power Source......................5 Loading the Battery Pack..................5 AC Power Adapter ..................... 6 Brady AC Adapters ....................6 Attaching the Adapter ...................6 Quick Charger ......................7 Installing the Driver ....................8 Configuring the Wi-Fi ....................8 Pause/Cut Preference ...................8... - Page 6 Config (Printer Configuration) ................26 Time/Date ......................26 Units ........................27 Language ......................27 Initial Language Setup .................27 Font Settings .......................28 Print History ......................28 Touch Screen Calibration ...................28 2 • Getting Started Creating a Text Label ....................29 Entering Text .......................29 Inserting Text ......................29 Deleting Text .......................29 Clear ......................29 Cancel Functions ....................30...
- Page 7 Barcode ........................46 Barcode Settings ....................47 Add a Barcode ....................47 Edit Barcode Data ....................48 Serialization......................49 How Serialization Works ..................49 Examples of Serialization ..................49 Add Serialization ....................50 Edit a Sequence ....................52 List ..........................52 Setting up the Data Source .................52 Working with Rows of Data ................54 Save the Data Source ..................55 Merging Files ......................55...
- Page 8 Vial ..........................78 DesiStrip ........................79 Breaker Box......................80 7 • Maintenance and Troubleshooting Cleaning the Printer....................83 Display Screen ....................83 Internal Components ...................83 Replacing the Cutter Blade Cover................84 Replacing the Printer Cover ................... 86 Recycling the Label and Ribbon Cartridge ............87 Materials ......................87 Dismantling the Ribbon ..................87 Dismantling the Cartridge ...................88...
-
Page 9: Introduction
Targeted applications to simplify the creation of specific label types • Battery operation - prints 1000 or more standard Brady labels with a fully charged Brady battery pack • Ability to use the printer while the NiMH battery pack is charging •... -
Page 10: Accessories
Introduction Unpack Your Printer Accessories The following items are accessories available for the BMP ® 61 Label Printer and can be purchased separately from your distributor: • Battery (Rechargeable) (BMP41-BATT) • Battery Cover (BMP61-BATCOV) • Cutter (BMP61-Cutter) • Cleaning Kit (PCK-5) for internal cleaning •... -
Page 11: Bmp ® 61 System Specifications
Introduction ® 61 System Specifications ® 61 System Specifications ® The BMP 61 printer has the following specifications: • Weight 3.55 lb (1.6 kg) (with battery pack and materials) • Thermal Transfer Print Mechanism 300 dpi • Optical Registration System for Precise Print Registration •... -
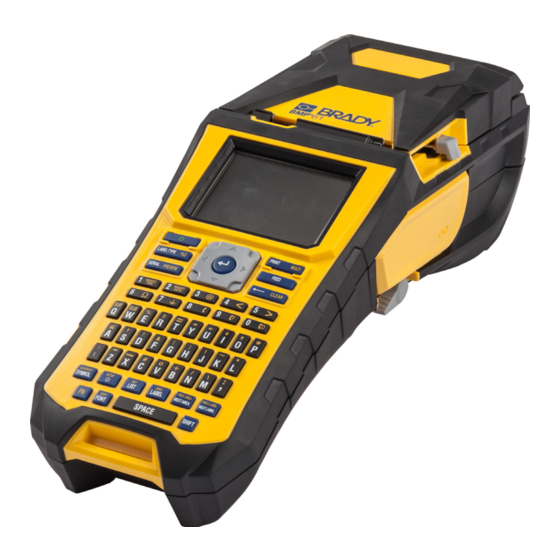
Page 12: External View
Introduction External View External View Cover Cover release latch AC adapter port USB port (computer connection) USB host port (flash drive) Strap lower attachment loop Cutter lever Ribbon Print head lock lever Strap upper attachment loop Tripod attachment screw hole Battery door latch Battery door (battery well) Magnet attachment screw holes... -
Page 13: Power Source
Introduction Power Source Power Source ® Power is supplied to the BMP 61 printer from a NiMH battery pack or from an AC power adapter. WARNING! • Do not expose batteries to temperatures above 60 C (140 • Do not disassemble or mistreat the battery pack. •... -
Page 14: Ac Power Adapter
AC Power Adapter The printer can be powered through an AC/DC power adapter. When the adapter is plugged in, it also charges the battery (if installed). Use only the 18 VDC, Brady AC/DC adapters, shown below, for WARNING! ® supplying power to the BMP... -
Page 15: Quick Charger
Introduction Quick Charger Quick Charger ® The battery quick charger is an accessory that can be purchased through your BMP 61 distributor. While the battery is charged from inside the printer when the AC adapter is attached, there may be times when you want to have another battery fully charged and ready to use when the AC adapter is not available. -
Page 16: Installing The Driver
Windows driver. Then follow the instructions on the computer screen. If you are unable to find the USB drive that came with the printer the driver can be downloaded from the Brady website: www.bradyid.com/owner/bmp61. 1. Insert the USB Drive into your computer. - Page 17 Introduction Installing the Driver 3. Click the Advanced button. 4. On the Advanced Options screen, click the Properties button for Custom Settings. 5. On the Custom Settings screen, click the down arrow in Cutter Option field and select: • pause the printer for cutting at the end of each label •...
-
Page 18: Connecting To A Computer Or Device
Connecting to a Computer or Device Labels can be created directly on the printer, in Brady Workstation or a 3rd party software on a computer, or by using the Brady Express Labels app on a mobile device. Additionally, data and graphics can be transferred between printers. -
Page 19: Connect To A Smartphone
61 is available, select the information button to see the full serial number. View serial number 4. Connect to the device by using the default password 1234567890. The printer is now connected and you can create labels from the Brady mobile apps. ® 61 User’s Manual... -
Page 20: Loading Supplies
Introduction Loading Supplies Loading Supplies Ribbon ® The BMP 61 printer comes with the ribbon installed. Removing 1. Flip the print head lock lever backward (to 2. Grasp the ribbon and gently slide out of the right) to disengage the print head. printer. -
Page 21: Label Supply
Introduction Loading Supplies Label Supply Brady labels come equipped with smart-cell technology that enables the printer to recognize the type of label and automatically set label formatting details. ® For optimum performance, it is recommended that you use genuine Brady BMP 61 labels. -
Page 22: Unloading
Introduction Loading Supplies Unloading 1. To open the printer cover, put your thumb 2. Flip the print head lock lever backward (to under the finger tab and push up. the right) to disengage the print head. 3. If label spool is not empty, gently rewind the 4. -
Page 23: Loading Bulk Label Supply
Introduction Loading Supplies Loading Bulk Label Supply ® 2. On the bulk label supply box, push tabs B and C in, 1. Remove the BMP 61 label spool and the label feed then pull the perforated flap down and tear off. ramp from the box. -
Page 24: B-593 Raised Panel Labels
Introduction Loading Supplies B-593 Raised Panel Labels ® 2. Keeping the label supply in the box, place the box 1. Open the printer and insert an empty BMP 61 label behind the printer, then feed the leading edge of the spool into the printer. -
Page 25: Attaching The Strap
Introduction Attaching the Strap Attaching the Strap The strap can be attached to the back of the printer to provide a secure grip when holding the printer in your hand or hanging it on a hook. 1. First, remove the label supply. Then, with 2. - Page 26 Introduction Attaching the Strap Top D-Ring Lower D-Ring 7. Slip your hand through the strap to provide 8. Or, use the third D-ring at the bottom of the a secure grip when holding the printer. printer to hang the printer on a pole or hooked device.
-
Page 27: Power
Introduction Power Power The first time the printer is turned on choose a language in which to display screen items. (For more information, see “Language” on page 27.) Whenever the printer is powered on, the system performs an initialization process. Part of this process is recognizing the label supply installed. -
Page 28: Navigation And Editing
Introduction Navigation and Editing Navigation and Editing Touch Screen The BMP®61 printer uses touch screen technology to manipulate menus and data. Using your finger, or a stylus, tap the desired option on the display screen. Keypad The following descriptions are based on the QWERTY keypad. If you are using a different keypad (such as Azerty or Cyrillic), some of the keys may vary. - Page 29 Introduction Navigation and Editing Function Description Navigation Navigation keys: • In a line of text, move the cursor left or right a character at a time, or up and down a line at a time. • In menus, move the selection left or right in a primary menus;...
- Page 30 Introduction Navigation and Editing Function Description Move to Next In a multi-label file, moves to the next label from Label the current label. (Refer to “Go To Label or Area” on page Move to Previous In a multi-label file, moves to the previous label Label from the current label.
- Page 31 Introduction Navigation and Editing Function Description List Enables you to produce multiple labels with variable information from a single, formatted label (main document) and a structured data source. (Refer to “List” on page 52.) Barcode Places a text string in Barcode format, toggling the barcode on and off.
-
Page 32: Menus
Introduction Menus Function Description Preview Previews the label as it will look when printed. (Refer to “Print Preview” on page 65.) Label Type Accesses the different applications/label types installed (i.e., wiremarker, flags, terminal blocks, etc.). (Refer to “Label Types” on page 69.) File... -
Page 33: Cancel A Menu Or Dialog Box
Introduction Menus To access a sub-menu: 1. Press the up/down navigation keys. An accessed menu displays with a yellow bar around it. 2. To activate the highlighted sub-menu, press Enter. A menu option remains in effect until a different menu option is activated. To access menus using the touch screen: 1. -
Page 34: Setup
Introduction Setup Setup The Setup function is used to determine the default settings for the printer. Under this function are the following features: • Pause/Cut • Config (Printer Configuration) • Time/Date • Units • Language • Font Settings • Print History •... -
Page 35: Units
Introduction Setup Units The Units setting is used to configure label parameter measurements for the printer. The units are: • Inches • Millimeters Once configured, you do not have to indicate “inches” or “millimeters” (or their globally accepted abbreviations or marks) when entering numbers in data fields. Likewise, in any scale or range of measurement field, the range of measurements will automatically configure to the units selected in the Setup function. -
Page 36: Font Settings
Introduction Setup Font Settings Use Font Settings to change the type, size, units and style, which can then be used as the default if desired. Figure 1-2. Font settings in Setup function Print History Print History is a convenient feature that enables easy access to recently used files. When Print History is turned on it keeps track of the last 10 label files printed. -
Page 37: Getting Started
2 Getting Started Creating a Text Label This section describes the process of creating a text label with minimal formatting, using basic editing techniques, and printing the label. Entering Text The vertical bar on the display screen is the cursor and the point at which data is entered. The cursor moves across the screen as you enter data. -
Page 38: Cancel Functions
Getting Started Font Autosize Cancel Functions Backspace is also used to cancel functions, a menu, or dialog box. When pressing Backspace in the middle of a function, you are walked out of the function a screen at a time. You may have to press Backspace several times to completely exit the function. -
Page 39: Printing A Label
Getting Started Printing a Label Printing a Label CAUTION! Do not insert fingers near cutter. It could pinch or cut. To print a label: Label Exit Chute Press the Print key. After printing, to cut the label: Pull the cutter lever forward (towards you) as far as it will go. -
Page 40: Formatting
(bold), angle (italics), underline, and expanding or condensing the text. The two fonts Brady Fixed Width and Brady Alpine give you the option of displaying a zero with or without a slash (0 or Ø) through it. In addition, hanzi and kanji fonts are also available. -
Page 41: Font Attributes
Formatting Font Font Attributes Font attributes (bold, italics, underline, expanded or condensed) can be applied to an entire line of text or to individual characters within a line of text. The attribute(s) can be turned on before entering the text or after the text has already been entered. Standard Expanded Condensed... -
Page 42: Superscript/Subscript
Formatting Font 3. Press Font. 4. Select the attribute, then select ON (bold, italics, and underline) or the percentage of expanded or condensed text. All highlighted text displays the attribute. To remove the highlighting from the characters, press any navigation key or touch anywhere on the screen. -
Page 43: Symbols
Formatting Symbols Symbols ® The BMP 61 printer contains hundreds of symbols that can be used for a variety of applications. The symbol categories available are: Arrows Data Electrical Exit Fire First Aid CLP/GHS Communications (Datacomm) Greek Home Electrical HSID International Laboratory Mandatory... -
Page 44: Graphics
Formatting Graphics Graphics Graphics are symbols, logos, or other artwork supplied from an outside source, such as a computer. ® These graphics must be bitmap files (*.bmp) and can only be black and white. The BMP 61 printer will automatically resize the graphic, but it is important to keep the graphic size approximate to the printed output (about 2-inch x 2-inch). -
Page 45: International Character Sets
Formatting International Character Sets International Character Sets ® The BMP 61 printer contains hundreds of internationally recognized characters, complete with diacritical marks. To add an international character to your label: 1. Position the cursor at the point where you want the international character to display. 2. -
Page 46: Date And Time
Formatting Date and Time Date and Time ® The BMP 61 printer inserts the current Date or Time data using the current system clock value at the time of printing and the date/time format defined in the Setup function. (For more information, see “Time/Date”... -
Page 47: Labels And Areas
Formatting Labels and Areas Labels and Areas Multiple labels can be created in one label file, with each new label being inserted immediately after the current label. Areas are used to apply different formatting (such as justification, rotation, and frames) to different parts of a single label. -
Page 48: Go To Label Or Area
Formatting Labels and Areas Go To Label or Area To move to another label: 1. Press the Label key. 2. Select GoTo, then enter the number of the label desired. To move to another area on a label with multiple areas: Area can only be used on continuous label supply. -
Page 49: Delete Label Or Area
Formatting Labels and Areas Delete Label or Area Deleting a label removes all data and formatting on that particular label. If multiple areas exist on one label, when that label is deleted all the areas associated with that one label are also deleted. Deleting an area removes all data and formatting from that one area on one particular label. -
Page 50: Justification
Formatting Labels and Areas Justification Justification refers to the alignment of data between boundaries (margins) on a label or in an area. There are two types of justification: horizontal and vertical. Horizontal justification (H. Justify) aligns data between the left and right boundaries of a label or area, while Vertical justification (V. Justify) aligns data between the top and bottom boundaries of a label or area. -
Page 51: Frame
Formatting Labels and Areas To rotate data: 1. Navigate to the label or area where rotation will take affect. 2. To set rotation for the label, press Label. To set rotation for an area, press FN and Area. 3. Choose Rotate and select the degree of rotation. Rotated data is autosized to accommodate the height versus the width of the label. -
Page 52: Reverse
Formatting Labels and Areas Frames do not display on the editing screen. Use “Print Preview” on page 65 to view the label or area frames. Note: Frames do not display edge to edge, but may appear slightly offset from the very edge of the label. -
Page 53: Vertical Text
Formatting Labels and Areas Vertical Text In Vertical text, each character drops down a line below the preceding character. Example: The word “WIRE” as vertical text displays as such: Vertical text can only be applied to an area or a label. It cannot be applied line-by-line. To format text vertically: 1. -
Page 54: Barcode
Formatting Barcode If a barcode is in the line of text to be placed vertically, or if the height of the label cannot accommodate the vertical placement of text, an error message displays. Note: See “Error Messages” on page 30 for information on clearing an error message from the screen. -
Page 55: Barcode Settings
Formatting Barcode Barcode Settings Before entering a barcode, determine the barcode symbology and attributes to use. Note: Additional barcode types are supported in Brady Workstation software. To access the barcode settings: 1. Press Label. 2. Select Barcode. 3. Input the desired settings. -
Page 56: Edit Barcode Data
Formatting Barcode The barcode displays on the screen as the data is being entered. Figure 3-9. Barcode in line of text When finished with the barcode entry, if you want to enter more data on the same line of text as the barcode: 1. -
Page 57: Serialization
Formatting Serialization Serialization Serialization (or sequencing) automatically adds a series of sequential numbers or letters to the printed labels. The Serial function consecutively places the next number or letter in the defined sequence on individual labels. The number of labels created is defined by the sequence values you enter, and displays in the Header Bar. -
Page 58: Add Serialization
Formatting Serialization In a multi-sequence serialization, where the second set of values is NOT dependent on the first set (that is, Linked box NOT checked), the two sequences increment sequentially, independent of each other. Example: Multiple serializations (where the second set of values is NOT dependent on the first set of values) Sequence #1 Sequence #2... - Page 59 Formatting Serialization For simple serialization: 3. With the cursor immediately displayed in the Start Value field of Sequence #1, enter the start value of the sequence. If the start value is larger than the end value, the series will decrement automatically. 4.
-
Page 60: Edit A Sequence
Formatting List The total number of labels to be printed in the sequence displays in the Header Bar. Edit a Sequence You can change the serialization values after a sequence has been determined. To edit the sequence values: 1. Press Serial. The Serial dialog box displays with the current values listed. - Page 61 Formatting List ® To create the data source directly on the BMP 61 printer: 1. Press List. 2. Select Create. 3. Enter the number of fields (columns) the data source will contain. 4. Select Continue. The number of defined fields displays as blue and yellow squares at the top of the screen. The blue field is the current field.
-
Page 62: Working With Rows Of Data
Formatting List 6. Enter the data for that particular field category, then press Enter. 7. Repeat Steps 5 and 6 for each field in which you want to enter data. When you entered data in each defined field, another row automatically displays. 8. -
Page 63: Save The Data Source
Formatting List Save the Data Source To save the data source: 1. Select Save. 2. Enter a name for the data source, then press Enter. To exit out of the data source: 3. Press Backspace. A message displays asking if you want to save the file before exiting. 4. -
Page 64: Advanced Merge
Formatting List If your label does not have the same number of defined areas as there are fields in the data source, the List function asks if you want to add additional areas. 6. Tap Ignore if you do not want to add additional areas. The fields from the data source sequentially merge into the label, depending on how many areas are defined on the label. -
Page 65: Edit Data Source
Formatting List The screen indicates how many fields are on the particular label. You can change which field in the data source you want to display in the areas of your label. Additionally, you can choose to ignore blank labels. Available Defining areas on the... -
Page 66: File Management
4 File Management Label Files Figure 4-1. File menu options A single label or a number of labels can be saved as a file, to be opened and reused at a later date. The following are guidelines when creating a label file: •... - Page 67 File Management Label Files To save labels: 1. Press FN and File. 2. Tap Save. The memory location dialog box displays ONLY if an external source is attached to the printer. 3. Tap Internal to save directly to the printer or External to save to the attached external source. 4.
-
Page 68: Folders
File Management Folders Folders To better organize your data, place similar label files into folders. Similar files could consist of all labels for a specific project, or all files that use the same label supply, or specific label applications. To create a label file folder: 1. -
Page 69: Open A File
File Management Open a File Open a File Be sure to save any current work prior to opening a file. To open (recall) a saved file: 1. Press FN and File. 2. Choose Open. 3. Select the location of the file (Internal or External). A list of previously saved folders and files displays. -
Page 70: Delete A File
File Management Delete a File Delete a File The Editor does not have to be cleared before deleting a file. A file can be deleted with other data still on the screen. To delete a previously saved file: 1. Press FN and File. 2. -
Page 71: Using Files From An External Source
File Management Using Files from an External Source Using Files from an External Source ® You can use labels, .csv lists, or .bmp graphics created on a computer or a different BMP 61printer ® and stored on a USB drive. Labels can be imported (transferred) from a USB drive to the BMP printer or you can open the label file directly from the USB drive. -
Page 72: Export A File
File Management Using Files from an External Source 6. If importing a Label file, on the Select Destination screen, select the destination folder or ® storage area on the BMP 61 printer where you want to store the imported file. Label files can be stored in any folder on the printer. -
Page 73: Printing Labels
5 Printing Labels Print The Print function prints the current file. To print a label: Label Exit Chute Press the Print key. The data is printed and the status of the print job is reflected in the Status Bar (example: Printing 1 of 10). After printing, to cut the label: Pull the cutter lever forward (towards you) as far as it will go. -
Page 74: Multiple Print
Printing Labels Multiple Print Multiple Print Multiple print lets you print multiple copies of a label or series of labels. Print Copies of a Single Label 1. Press FN and Multi. 2. With the cursor in the No. of Copies field, enter the number of copies desired. 3. -
Page 75: Separator
Printing Labels Multiple Print The default is to print collated. If you do not want to collate the copies: 1. Select the Collate option box to remove the check mark. When printing (or re-printing) a single label in a series, or a range of labels in a series, use the Print Range feature. -
Page 76: Print History
Printing Labels Print History Print History Print History is a convenient feature that enables easy access to recently used files. When Print History is turned on it keeps track of the last 10 label files created and printed from the editor; labels imported from an external source will not appear in the history. -
Page 77: Label Types
6 Label Types Label types provide templates that guide and control the layout for label formats and may require specific label supply. The label types available are: • General • WireMarker • Flags • Terminal Block, Patch Panel, 66-Block, • 110-Block, Bix Block •... -
Page 78: Wiremarker
Label Types WireMarker WireMarker The WireMarker label type is designed to repeat entered data down the length of the label. The data repeats as many times as possible, considering the font size and the wire size selected. Die-cut, self-laminating, or continuous label supply can be used for WireMarker labels. To use the WireMarker application: 1. -
Page 79: Flags
Label Types Flags If you press [Enter] to start a new line of text, a space opens below each line of repeated data and begins to repeat the next line of text as you enter it. Figure 6-1. WireMarker label with multiple lines Flags A Flag label wraps around a wire or cable, with the ends joined together to form a flag. - Page 80 Label Types Flags To configure a flag layout: 1. Select the radio button of the desired layout. 2. If continuous label supply is installed, in the Flag Length field, enter the length of the flag (the part that contains the text). 3.
-
Page 81: Terminal Block, Patch Panel, 66-Block
Label Types Terminal Block, Patch Panel, 66-Block, Rotation is embedded in the template design, based on the flag design you pick. Justification is defaulted to center, middle. The font size remains whatever size is set when the flag label type is chosen. - Page 82 Label Types Terminal Block, Patch Panel, 66-Block, A dialog box displays requesting additional information. 3. In the Terminal Repeat field, indicate the size of the gap between each terminal (with a minimum of 0.2 inches). 4. In the Number of Terminals field, enter the number of terminals on the block for which the label is intended.
- Page 83 Label Types Terminal Block, Patch Panel, 66-Block, 7. In the Separator field, from the drop down list, select the separator to use. Line Separator, Vertical Orientation Tic Separator, Horizontal Orientation 8. In the Orientation field, from the drop down list, select the desired layout. 9.
-
Page 84: 110-Block, Bix Block
Label Types 110-Block, Bix Block 110-Block, Bix Block The 110-Block and Bix Block use only the following dedicated label supply types. • 110-Block: M61C-475-412 or M61C-475-422 • Bix Block: M61C-625-412 or M61C-625-422 The 110-Block label type is based on user-selected pair configurations, with the length of the label determined by the pair type selected. - Page 85 Label Types 110-Block, Bix Block The following example displays the areas based on the Block Type selected (2-pair, 3-pair, 4-pair, 5-pair, or blank). The “Blank” strip is formatted as two areas covering the full printable length of the strip. None 2 pair Blank Text entered in area 1 prints here...
-
Page 86: Vial
Label Types Vial 6. In the # of Strips field, enter the number of strips (labels) to be created in the block configuration chosen. Note: If serializing the data, additional strips will continue the serialization from the last number of the previous strip. -
Page 87: Desistrip
Label Types DesiStrip DesiStrip A DesiStrip (Designation Strip) is a paper faceplate label that can rest over the keys of a phone or switches in a breaker box, etc. Figure 6-2. Example of DesiStrip labels To create a DesiStrip: 1. Press Label Type. 2. -
Page 88: Breaker Box
Label Types Breaker Box Breaker Box Breakers are usually arranged in two columns or along one row, depending on geographic regions. The breaker positions are numbered left-to-right or top-to-bottom, depending on label orientation. This numbering system is universal across various competing manufacturers of breaker panels. To create Breaker Box labels: 1. - Page 89 Label Types Breaker Box 6. In the Separator field, from the drop down list, select the separator to use. Line Separator, Vertical Orientation Tic Separator, Horizontal Orientation 7. In the Orientation field, select the orientation to use from the drop down list 8.
- Page 90 Label Types Breaker Box OFFICE RECEPTION CONF RM 1 CONF RM 2 Number of labels created by Breaker Box label printout. number of breakers defined. Figure 6-3. Breaker Box label strip ® 61 User’s Manual...
-
Page 91: Maintenance And Troubleshooting
2. Gently wipe the display screen until clean. Internal Components Use a Brady Cleaning Kit PCK-5, disposable cleaning card (purchased separately) to safely and effectively remove all dirt, ribbon ink residue, adhesive, and other contaminants from the thermal print head, platen roller, and paper path. -
Page 92: Replacing The Cutter Blade Cover
Maintenance and Troubleshooting Replacing the Cutter Blade Cover Replacing the Cutter Blade Cover If the printer is accidentally dropped, the cutter blade cover may come loose or fall out. If the blade cover is not dented or damaged, re-insert the blade cover into the printer. Side of cutter housing Back flap Side of cutter housing... - Page 93 1. From inside the label supply well, slip your finger under the right side of the blade cover and gently pull up to unhook the blade cover. The blade cover releases easily. 2. Either replace the blade or clean it using a pre-moistened swab from the Brady Cleaning Kit PCK-6. ®...
-
Page 94: Replacing The Printer Cover
Maintenance and Troubleshooting Replacing the Printer Cover Replacing the Printer Cover If the printer is accidentally dropped, the printer cover may come off. If the cover is not damaged, it can be re-attached to the printer. To re-attach the printer cover: 1. -
Page 95: Recycling The Label And Ribbon Cartridge
Maintenance and Troubleshooting Recycling the Label and Ribbon Cartridge Recycling the Label and Ribbon Cartridge Cartridges need to be recycled in accordance with local regulations. Before recycling, the used cartridges must be pulled apart to release the individual components. These various components must then be recycled in the correct recycling bins. -
Page 96: Dismantling The Cartridge
Maintenance and Troubleshooting Recycling the Label and Ribbon Cartridge 2. With the yellow ribbon cover facing up, insert the blade of the screwdriver, one at a time, in through the five locking tab holes to depress the locking tabs. While depressing each tab with the screwdriver, use your thumb or finger to apply upward pressure on the ribbon cap finger tab. - Page 97 Maintenance and Troubleshooting Recycling the Label and Ribbon Cartridge 4. From the back side of the black end cap, press the blade of the screwdriver against the locking tabs, applying outward pressure. This will release the smart cell. 5. Slide the cardboard core off of the plastic cartridge core. ®...
-
Page 98: Recycling Components
Maintenance and Troubleshooting Recycling the Label and Ribbon Cartridge Recycling Components These components should be removed from the cartridge and recycled according to the following guidelines. Component Material Recycle Bin Ribbon Spools (White) #9 ABS Ribbon Smart Cell Electronic Electronic Waste Label Supply Smart Cell Ribbon Cartridge (Clear) Polycarbonate (PC) -
Page 99: Upgrading The Firmware
® new features, as well as fixes and adjustments. Upgrades to BMP 61 firmware can be downloaded from Brady’s website. Note: Check the current firmware version by pressing the FN and Setup buttons and tapping Config on the screen. To upgrade the firmware: 1. - Page 100 Maintenance and Troubleshooting Upgrading the Firmware 4. Scroll down to SOFTWARE/FIRMWARE UPDATES and click the link for BMP61 and M611 Database Update (Rev Y-#, B-#). 5. Scroll to the bottom of the page and click BEGIN DOWNLOAD. 6. Save the files to any directory on the computer, extract the files from the .zip and save them to the root of the USB drive.
-
Page 101: Troubleshooting
Maintenance and Troubleshooting Troubleshooting Troubleshooting Use the following table to troubleshoot and diagnose possible performance problems with your ® 61 Label Printer. If the corrective action suggested does not work, contact Brady’s Technical Support Group. Problem Cause Corrective Action Hardware Error - "Head over temp"... - Page 102 Maintenance and Troubleshooting Troubleshooting Problem Cause Corrective Action Power ON/OFF (Printer not working) (continued) Printer frequently powers OFF. Battery is low. Attach the AC Adapter to the printer and plug into an electrical outlet. This will supply immediate power while charging the battery at the same time.
- Page 103 Damaged circuit board (memory Replace ribbon cartridge. device) on ribbon cartridge. Error - "No ribbon installed" Damaged contacts on printer for Send to Brady for repair. reading ribbon cartridge. Error - "Out of ribbon" Ribbon supply has run out. Replace ribbon cartridge.
- Page 104 Maintenance and Troubleshooting Troubleshooting Problem Cause Corrective Action Error - "Out of ribbon" Label or ribbon jam during Clear any jams by opening the feeding/printing printer cover and removing an excess labels in the feed roller or exit chute areas. Press [CLEAR/ESC] key to clear error Error - "Out of ribbon"...
- Page 105 Maintenance and Troubleshooting Troubleshooting Problem Cause Corrective Action Labels Supply Printer will not feed labels. The leading edge of the label roll Make sure the leading edge of is not inserted up to the black the label roll is securely under line under the ribs.
- Page 106 Press [CLEAR/ESC] key to clear error Error - "No media installed" Damaged contacts in receiver Send to Brady for Repair slot of lower printer base. Error - "Top of form" Label supply or ribbon has Clear any jams by opening the...
- Page 107 Maintenance and Troubleshooting Troubleshooting Problem Cause Corrective Action Program File incompatible with installed A saved file (or power off file) Install correct label supply. label supply. was designed for label supply not currently installed. Incompatible label supply for The labels installed cannot Install correct label supply.
-
Page 108: A Keyboard Configurations
A Keyboard Configurations Languages on Keyboards Your keyboard configuration depends on the region where you do business. The following are the currently supported keyboard configurations. ® There are four keypad configurations available for the BMP 61 Label Printer. The keypad layouts and the language supported by each are as follows: Keyboard Type Language Applied... -
Page 109: Qwerty
Keyboard Configurations Languages on Keyboards QWERTY ® 61 User’s Manual... -
Page 110: Qwertz
Keyboard Configurations Languages on Keyboards QWERTZ ® 61 User’s Manual... -
Page 111: Azerty
Keyboard Configurations Languages on Keyboards AZERTY ® 61 User’s Manual... -
Page 112: Cyrillic
Keyboard Configurations Languages on Keyboards Cyrillic ® 61 User’s Manual... -
Page 113: B Symbols
B Symbols Symbols for all enabled applications are available for use on any label, regardless of the application/label type in use. See “Symbols” on page 35 for information on applying symbols to labels Arrows DataComm ® 61 User’s Manual... - Page 114 Symbols Electrical Exit Fire First Aid ® 61 User’s Manual...
- Page 115 Symbols CLP/GHS Greek Home Electrical HSID International ® 61 User’s Manual...
- Page 116 Symbols Laboratory Mandatory ® 61 User’s Manual...
- Page 117 Symbols Miscellaneous Prohibition Packaging ® 61 User’s Manual...
- Page 118 Symbols Public Info Warning Safety WHMIS ® 61 User’s Manual...
-
Page 119: C Regulatory Compliance
C Regulatory Compliance Agency Compliance and Approvals United States FCC Notice Note: This equipment has been tested and found to comply with the limits for a Class A digital device, pursuant to part 15 of the FCC Rules. These limits are designed to provide reasonable protection against harmful interference when the equipment is operated in a commercial environment. -
Page 120: Europe
Regulatory Compliance Agency Compliance and Approvals Europe This is a Class A product. In a domestic environment, this product WARNING! may cause radio interference in which case the user may be required to take adequate measures. Waste Electrical and Electronic Equipment Directive In accordance with the European WEEE Directive, this device needs to be recycled in accordance with local regulations. -
Page 121: Wireless Regulatory Information
Antenna Type \ Antenna Gain PCB trace antenna \ -3.06 dBi Environmental Operation -40 to 85° C (-40° to 185° F) Note: Be mindful of Brady host printer user guide for maximum operating temperatures Environmental Storage -55 to 125° C (-67° to 257° F) -
Page 122: Canada
Regulatory Compliance Wireless Regulatory Information RF exposure guidelines: The radiated output power of this device is far below the radio frequency exposure limits. Nevertheless, to avoid the possibility of exceeding radio frequency exposure limits for an uncontrolled environment, a minimum 20cm distance should be maintained from Wi-Fi radio module PCB antenna (internal) to the head, neck, or body during normal operation. -
Page 123: European Union
< +20dBm EIRP (100mW) International The Wi-Fi radio module used in Brady host printers comply with internationally recognized standards covering human exposure to electromagnetic fields, i.e. EN 62311 "Assessment of electronic and electrical equipment related to human exposure restrictions for electromagnetic fields (0 Hz - 300 GHz)".