Agilent Technologies InfinityLab LC Series User Manual
Fluorescence detectors
Hide thumbs
Also See for InfinityLab LC Series:
- User manual (369 pages) ,
- Quick manual (82 pages) ,
- Installation manual (12 pages)

Related Manuals for Agilent Technologies InfinityLab LC Series


Summary of Contents for Agilent Technologies InfinityLab LC Series
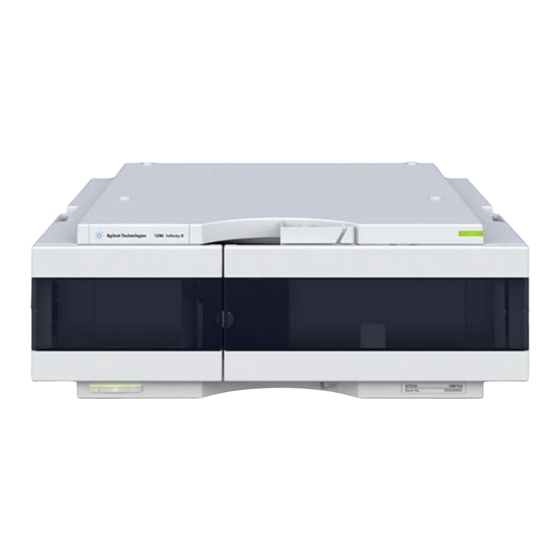
- Page 1 Agilent InfinityLab LC Series 1260 Infinity II Fluorescence Detectors User Manual Agilent Technologies...
- Page 2 Use, duplication or disclosure of Software is subject to Agi- lent Technologies’ standard commercial license terms, and non-DOD Departments and Agencies of the U.S. Government will Agilent InfinityLab LC Series 1260 Infinity II FLD User Manual...
- Page 3 In This Guide In This Guide This manual covers the Agilent InfinityLab LC Series Fluorescence Detectors: • the Agilent 1260 Infinity II Fluorescence Detector (G7121A), and • the Agilent 1260 Infinity II Fluorescence Detector Spectra (G7121B). 1 Introduction to the Fluorescence Detector This chapter gives an introduction to the detector and instrument overview.
- Page 4 This chapter provides information on cables used with the Agilent InfinityLab LC Series modules. 12 Hardware Information This chapter describes the detector in more detail on hardware and electronics. 13 Appendix This chapter provides safetey and other general information. Agilent InfinityLab LC Series 1260 Infinity II FLD User Manual...
-
Page 5: Table Of Contents
Set up the Detector with Agilent Open Lab ChemStation The Detector User Interface Detector Control Settings Method Parameter Settings Advanced Settings Acquire Spectra (G7121B Only) Special Settings Time Table Instrument Curves Agilent Local Control Modules Agilent InfinityLab LC Series 1260 Infinity II FLD User Manual... - Page 6 What Are Error Messages General Error Messages Detector Error Messages 8 Test Functions and Calibration Introduction Diagram of Light Path Lamp Intensity Test Raman ASTM Signal-to-Noise Test Wavelength Accuracy Test Agilent InfinityLab LC Series 1260 Infinity II FLD User Manual...
- Page 7 Tests and Calibrations 10 Parts for Maintenance and Repair Overview of Maintenance Parts Kits 11 Identifying Cables Cable Overview Analog Cables Remote Cables CAN/LAN Cables Agilent Module to PC USB Cables Agilent InfinityLab LC Series 1260 Infinity II FLD User Manual...
- Page 8 Setting the 6-bit Configuration Switch Instrument Layout Early Maintenance Feedback 13 Appendix General Safety Information Waste Electrical and Electronic Equipment (WEEE) Directive Radio Interference Sound Emission Solvent Information Agilent Technologies on Internet Agilent InfinityLab LC Series 1260 Infinity II FLD User Manual...
-
Page 9: Introduction To The Fluorescence Detector
Agilent InfinityLab LC Series 1260 Infinity II FLD User Manual Introduction to the Fluorescence Detector Introduction to the Detector Fluorescence Detector (FLD) Fluorescence Detector (FLD) Spectra How the Detector Operates Raman Effect Optical Unit Reference System Analytical Information From Primary Data... -
Page 10: Introduction To The Detector
74 Hz. G7121B SPECTRA Introduced as 1260 Infinity II FLD with spectra and multi-signal capabilities. Maximum data rate is 148 Hz. The G7121B can be converted to G7121A (emulation mode). Agilent InfinityLab LC Series 1260 Infinity II FLD User Manual... -
Page 11: Fluorescence Detector (Fld)
High-speed detection with up to 74 Hz data rates keeping you pace with the analysis speed of fast LC. Figure 1 Overview of the detector Agilent InfinityLab LC Series 1260 Infinity II FLD User Manual... - Page 12 • Automatic recognition of all flow cell cartridges provides documentation of instrument parameters and helps to comply with GLP. • Extensive diagnostics, error detection and display with Instant Pilot controller and Agilent Lab Advisor software. Agilent InfinityLab LC Series 1260 Infinity II FLD User Manual...
-
Page 13: Fluorescence Detector (Fld) Spectra
High-speed fluorescence detection with up to 148 Hz data rates keeping pace with the analysis speed of ultra-fast LC. Figure 2 Overview of the detector Agilent InfinityLab LC Series 1260 Infinity II FLD User Manual... - Page 14 • Automatic recognition of all flow cell cartridges provides documentation of instrument parameters and helps to comply with GLP. • Extensive diagnostics, error detection and display with Instant Pilot controller and Agilent Lab Advisor software. Agilent InfinityLab LC Series 1260 Infinity II FLD User Manual...
-
Page 15: How The Detector Operates
The absorption and emission spectra of organic molecules in solution produce bands instead of lines. ν ν Figure 3 Absorption of Light Versus Emission of Light Agilent InfinityLab LC Series 1260 Infinity II FLD User Manual... - Page 16 — the delay of emission after excitation. If a molecule emits light 10 to 10 seconds after it was illuminated then the process was fluorescence. If a molecule emits light longer than 10 seconds after illumination then the process was phosphorescence. Agilent InfinityLab LC Series 1260 Infinity II FLD User Manual...
- Page 17 The light which is emitted during phosphorescence therefore has less energy and is at a longer wavelength than fluorescence. Formula: where Energy Planck's constant λ Wavelength speed of light Agilent InfinityLab LC Series 1260 Infinity II FLD User Manual...
-
Page 18: Raman Effect
The particular molecule and its environment will determine what Raman signals will be observed (if any). A plot of Raman intensity versus Raman shift is a Raman spectrum. Agilent InfinityLab LC Series 1260 Infinity II FLD User Manual... -
Page 19: Optical Unit
The fluorescence detector has grating/grating optics, enabling the selection of both excitation and emission wavelengths. The flow cell can be accessed from the front of the fluorescence detector. Agilent InfinityLab LC Series 1260 Infinity II FLD User Manual... - Page 20 Introduction to the Fluorescence Detector Optical Unit Figure 7 Optical Unit Agilent InfinityLab LC Series 1260 Infinity II FLD User Manual...
- Page 21 The surface contains many minute grooves, 1200 of them per millimeter. The grating carries a blaze to show improved performance in the visible range. Agilent InfinityLab LC Series 1260 Infinity II FLD User Manual...
- Page 22 Most of the remaining 30 % of the light is reflected at zero order, with no dispersion. Figure 10 on page 23 illustrates the light path at the surface of the grating. Agilent InfinityLab LC Series 1260 Infinity II FLD User Manual...
- Page 23 The excitation grating reflects most 1 order light in the ultra-violet range around 250 nm, whereas the emission grating reflects better in the visible range around 400 nm. Agilent InfinityLab LC Series 1260 Infinity II FLD User Manual...
- Page 24 The selected wavelength of light is reflected onto the slit in the wall of the photo-multiplier compartment of the optical unit. The bandwidth of the emitted light is 20 nm. Agilent InfinityLab LC Series 1260 Infinity II FLD User Manual...
- Page 25 20. PMTs are designed for specific wavelength ranges. The standard PMT offers optimum sensitivity from 200 to 600 nm. In the higher wavelength range a red-sensitive PMT can improve performance. Agilent InfinityLab LC Series 1260 Infinity II FLD User Manual...
-
Page 26: Reference System
A diffuser is located in front of the reference diode (see Figure 7 on page 20). This diffuser is made of quartz, reduces light and allows integral measurement of the light. Agilent InfinityLab LC Series 1260 Infinity II FLD User Manual... -
Page 27: Analytical Information From Primary Data
27. The luminescence is short-lived, therefore the fluorescence detector need only measure over a short period of time after the lamp has flashed. Figure 13 Measurement of Fluorescence Agilent InfinityLab LC Series 1260 Infinity II FLD User Manual... -
Page 28: Phosphorescence Detection
Analytical Information From Primary Data Phosphorescence Detection An appropriate parameter set will be specified as soon as you chose the phosphorescence detection mode (special setpoints under FLD parameter settings). Figure 14 Measurement of Phosphorescence Agilent InfinityLab LC Series 1260 Infinity II FLD User Manual... -
Page 29: Processing Of Raw Data
Check your proposed PMTGAIN. If it is significantly distant from your setting, change your method or check the purity of your solvent. See also “Finding the Best Signal Amplification” on page 124. Agilent InfinityLab LC Series 1260 Infinity II FLD User Manual... - Page 30 RESPONSETIME function: the longer the RESPONSETIME, the greater the number of data points averaged. A four-fold increase in RESPONSETIME (for example, 1 sec to 4 sec) doubles the signal-to-noise ratio. Agilent InfinityLab LC Series 1260 Infinity II FLD User Manual...
- Page 31 Introduction to the Fluorescence Detector Analytical Information From Primary Data Figure 17 RESPONSETIME: Signal-to-Noise Ratio Agilent InfinityLab LC Series 1260 Infinity II FLD User Manual...
-
Page 32: System Overview
Introduction to the Fluorescence Detector System Overview System Overview Operating Principle Figure 18 Optical path of the FLD Agilent InfinityLab LC Series 1260 Infinity II FLD User Manual... -
Page 33: Leak And Waste Handling
Introduction to the Fluorescence Detector System Overview Leak and Waste Handling The Agilent InfinityLab LC Series has been designed for safe leak and waste handling. It is important that all security concepts are understood and instructions are carefully followed. The solvent cabinet is designed to store a maximum volume of 8 L solvent. The maximum volume for an individual bottle stored in the solvent cabinet should not exceed 2 L. - Page 34 Introduction to the Fluorescence Detector System Overview Figure 19 Infinity II Leak Waste Concept (Flex Bench installation) Agilent InfinityLab LC Series 1260 Infinity II FLD User Manual...
- Page 35 Introduction to the Fluorescence Detector System Overview Figure 20 Infinity II Single Stack Leak Waste Concept (bench installation) Agilent InfinityLab LC Series 1260 Infinity II FLD User Manual...
- Page 36 The solvent DMF (dimethyl formamide) leads to corrosion of the leak sensor. The material of the leak sensor, PVDF (polyvinylidene fluoride), is incompatible with DMF. ➔ Do not use DMF. Agilent InfinityLab LC Series 1260 Infinity II FLD User Manual...
- Page 37 1 Agilent recommends using the 6 L waste can with 1 Stay Safe cap GL45 with 4 ports (5043-1221) for optimal and safe waste disposal. If you decide to use your own waste solution, make sure that the tubes don't immerse in the liquid. Agilent InfinityLab LC Series 1260 Infinity II FLD User Manual...
-
Page 38: Bio-Inert Materials
The flow downstream of the sample introduction contains no metals whatsoever. Agilent InfinityLab LC Series 1260 Infinity II FLD User Manual... - Page 39 Do not use any parts that are not labeled as Agilent “Bio-inert”. For solvent compatibility of these materials, see “Material Information” on page 81. Agilent InfinityLab LC Series 1260 Infinity II FLD User Manual...
- Page 40 Introduction to the Fluorescence Detector Bio-inert Materials Agilent InfinityLab LC Series 1260 Infinity II FLD User Manual...
-
Page 41: Site Requirements And Specifications
Agilent InfinityLab LC Series 1260 Infinity II FLD User Manual Site Requirements and Specifications Site Requirements Physical Specifications Performance Specifications Specifications Specification Conditions This chapter provides information on environmental requirements, physical and performance specifications. Agilent Technologies... -
Page 42: Site Requirements
➔ Make sure the power connector of the instrument can be easily reached and unplugged. ➔ Provide sufficient space behind the power socket of the instrument to unplug the cable. Agilent InfinityLab LC Series 1260 Infinity II FLD User Manual... - Page 43 Never use the power cords that Agilent Technologies supplies with this instrument for any other equipment. ➔ Never use cables other than the ones supplied by Agilent Technologies to ensure proper functionality and compliance with safety or EMC regulations. Absence of ground connection WA R N I N G The absence of ground connection can lead to electric shock or short circuit.
- Page 44 ➔ If your module was shipped in cold weather, leave it in its box and allow it to warm slowly to room temperature to avoid condensation. Agilent InfinityLab LC Series 1260 Infinity II FLD User Manual...
-
Page 45: Physical Specifications
For storing the module Safety standards: Installation category II, Pollution degree 2 For indoor use only. IEC, EN, CSA, UL ISM Classification ISM Group 1 Class B According to CISPR 11 Agilent InfinityLab LC Series 1260 Infinity II FLD User Manual... -
Page 46: Performance Specifications
Xenon Flash Lamp, normal mode 20 W, economy mode 5 W, lifetime 4000 h Pulse frequency 296 Hz for single signal mode 74 Hz for economy/multi-wavelength/spectra mode Maximum data rate 74 Hz, 148 Hz Agilent InfinityLab LC Series 1260 Infinity II FLD User Manual... - Page 47 • Micro: 4 µL volume and 20 bar (2 MPa) pressure maximum Analog outputs Recorder/integrator: 100 mV or 1 V, 100 LU is the output range > 100 LU, two outputs recommended range Agilent InfinityLab LC Series 1260 Infinity II FLD User Manual...
- Page 48 Electronic records of maintenance and errors. Housing All materials are recyclable. Agilent InfinityLab LC Series 1260 Infinity II FLD User Manual...
- Page 49 Reference system in-line excitation measurement Timetable programming Single signal wavelength, response time, PMT Gain, baseline behavior (append, free, zero) Wavelength characteristic Repeatability +/- 0.2 nm Accuracy +/- 3 nm setting Agilent InfinityLab LC Series 1260 Infinity II FLD User Manual...
- Page 50 Electronic records of maintenance and errors. Housing All materials are recyclable. Agilent InfinityLab LC Series 1260 Infinity II FLD User Manual...
-
Page 51: Specification Conditions
Site Requirements and Specifications Performance Specifications Specification Conditions • Standard flow cell • Standard Photomultiplier • Using Agilent Lab Advisor, see “Raman ASTM Signal-to-Noise Test” page 173. Agilent InfinityLab LC Series 1260 Infinity II FLD User Manual... - Page 52 Site Requirements and Specifications Performance Specifications Agilent InfinityLab LC Series 1260 Infinity II FLD User Manual...
-
Page 53: Using The Fluorescence Detector
Agilent InfinityLab LC Series 1260 Infinity II FLD User Manual Using the Fluorescence Detector Magnets Turn on/off Status Indicators Instrument Configuration Set up the Detector with Agilent Open Lab ChemStation The Detector User Interface Detector Control Settings Method Parameter Settings... -
Page 54: Magnets
Using the Fluorescence Detector Magnets Magnets This stack exemplarily shows the magnets' positions in the modules. Agilent InfinityLab LC Series 1260 Infinity II FLD User Manual... -
Page 55: Turn On/Off
Using the Fluorescence Detector Turn on/off Turn on/off Power switch: On Turn instrument On/Off with the control software. Power switch: Off Agilent InfinityLab LC Series 1260 Infinity II FLD User Manual... - Page 56 Using the Fluorescence Detector Turn on/off Agilent InfinityLab LC Series 1260 Infinity II FLD User Manual...
-
Page 57: Status Indicators
5. Resident mode (blinking) - for example during update of main firmware. 6. Bootloader mode (fast blinking). Try to re-boot the module or try a cold-start. Then try a firmware update. Agilent InfinityLab LC Series 1260 Infinity II FLD User Manual... -
Page 58: Instrument Configuration
Switch 4 UP and others DOWN: module uses DHCP. c Switch 5 UP and others DOWN: modules uses STORED address 2 Enter the setup information (MAC / IP address and/or Instrument Name). a Agilent OpenLab ChemStation (Configure Instrument): Agilent InfinityLab LC Series 1260 Infinity II FLD User Manual... - Page 59 Lab Advisor (Instrument Overview - Add Instrument): Instrument Configuration 1 Enter the setup information (MAC / IP address and/or Instrument Name). a Agilent OpenLab ChemStation (Configure Instrument): b Lab Advisor (Instrument Overview - Add Instrument): Agilent InfinityLab LC Series 1260 Infinity II FLD User Manual...
-
Page 60: Set Up The Detector With Agilent Open Lab Chemstation
ChemStation Method and Run Control (just detector is shown) After successful load of the OpenLab ChemStation, you should see the module as an active item in the graphical user interface (GUI). Agilent InfinityLab LC Series 1260 Infinity II FLD User Manual... -
Page 61: The Detector User Interface
• EMF warning. Maintenance required (red) Important: The EMF settings can be accessed via Agilent Lab Advisor. The limit(s) can be changed. Based on the limit, the User Interface displays the above status. Agilent InfinityLab LC Series 1260 Infinity II FLD User Manual... - Page 62 • Switch the lamp on/off (same as click on button “Make Device Ready/Turn device off (standby)”) N O T E The Balance icon is used for UV detectors and has no function on the FLD. Agilent InfinityLab LC Series 1260 Infinity II FLD User Manual...
-
Page 63: Detector Control Settings
Analog Output (under “Method Parameter Settings” on page 64). • At Power On: automatic lamp-on at power on. • Automatic Turn On: automatic detector power on. Agilent InfinityLab LC Series 1260 Infinity II FLD User Manual... -
Page 64: Method Parameter Settings
These settings are available via Menu > Instrument > Set up Instrument Method or via right click into the module’s active area (does not show the Instrument Curves tab). Figure 23 Method parameter settings Agilent InfinityLab LC Series 1260 Infinity II FLD User Manual... -
Page 65: Advanced Settings
Acquire Signal Mark this check box to specify that the signal is stored in the CDS during data acquisition. When the check box is cleared, the signal is not stored. Agilent InfinityLab LC Series 1260 Infinity II FLD User Manual... - Page 66 10 and 15; use lower settings for very high concentrations. Higher PMT Gain may improve signal-to-noise. See also FLD Scaling Range and Operating Conditions. Limits: 0 to 18 in steps of 1. Default value is 10 Agilent InfinityLab LC Series 1260 Infinity II FLD User Manual...
- Page 67 You can choose to use three additional wavelengths, either excitation or emission wavelengths in your analysis. Choose Off to switch off multiple wavelengths, or Multi Ex or Multi Em to set up multiple wavelengths. See also Signal A. Agilent InfinityLab LC Series 1260 Infinity II FLD User Manual...
-
Page 68: Acquire Spectra (G7121B Only)
Example: Em: 350 nm, Ex: 300 – 400 nm step 10 — Resulting spectra will have 300 – 320 nm Data rate The data rate is calculated according to the specified scan conditions. Agilent InfinityLab LC Series 1260 Infinity II FLD User Manual... -
Page 69: Special Settings
Limits: 0 – 5000.0 µs in steps of 0.1 µs. Gate Sets a measurement time period after the lamp has flashed. Limits: 20.0 – 5000.0 µs in steps of0.1 µs. Agilent InfinityLab LC Series 1260 Infinity II FLD User Manual... - Page 70 Lamp Energy Reference Choose On to switch on a compensation for flash-to-flash variations in lamp intensity using the reference diode. This gives improved signal-to-noise. Agilent InfinityLab LC Series 1260 Infinity II FLD User Manual...
- Page 71 Note that this may not be 0 LU (Luminescence Units), depending on the analysis conditions. Signal Polarity Select the Signal Polarity you expect from your data from Negative or Positive. Agilent InfinityLab LC Series 1260 Infinity II FLD User Manual...
-
Page 72: Time Table
Via the buttons in the bottom area, time table lines can be added, removed, cut copied, pasted or completely cleared. Based on the chosen function, a certain parameter can be selected. Agilent InfinityLab LC Series 1260 Infinity II FLD User Manual... -
Page 73: Instrument Curves
This signals can be used in addition to the normal baseline signal to determine whether correlation to temperature of the lamp. These signals are available via the Agilent ChemStation Online Plot/Data Signal and/or Agilent Lab Advisor Software. Agilent InfinityLab LC Series 1260 Infinity II FLD User Manual... -
Page 74: Agilent Local Control Modules
• Preconfigured tablet with all required software already installed (included in the full package). • Centerpiece of the solution is a USB dongle that activates the complete intelligence of the InfinityLab LC Companion on the instrument stack. Agilent InfinityLab LC Series 1260 Infinity II FLD User Manual... - Page 75 • GLP – System logbook and module log-books record errors, unusual events and maintenance activities for GLP traceability. Agilent InfinityLab LC Series 1260 Infinity II FLD User Manual...
- Page 76 Using the Fluorescence Detector Agilent Local Control Modules Agilent InfinityLab LC Series 1260 Infinity II FLD User Manual...
-
Page 77: Preparing The Module
Agilent InfinityLab LC Series 1260 Infinity II FLD User Manual Preparing the Module Leak and Waste Handling Waste Concept Before You Start Solvent Information This chapter provides information on how to set up the module for an analysis and explains the basic settings. -
Page 78: Leak And Waste Handling
N O T E has been shipped with the solvent cabinet, electronic copies are available in the Agilent Information Center or via the Internet. For details on correct installation, see separate installation documentation. Agilent InfinityLab LC Series 1260 Infinity II FLD User Manual... - Page 79 1 Agilent recommends using the 6 L waste can with 1 Stay Safe cap GL45 with 4 ports (5043-1221) for optimal and safe waste disposal. If you decide to use your own waste solution, make sure that the tubes don't immerse in the liquid. Agilent InfinityLab LC Series 1260 Infinity II FLD User Manual...
-
Page 80: Before You Start
Flush your solvent delivery system for at least 15 minutes before checking sensitivity. If your pump has multiple channels, you should also flush the channels not in use. For optimal results refer to “Optimizing the Detector” on page 87. Agilent InfinityLab LC Series 1260 Infinity II FLD User Manual... -
Page 81: Solvent Information
(typically 20 – 25 °C, 68 – 77 °F). If corrosion is possible, it usually accelerates at higher temperatures. If in doubt, please consult technical literature on chemical compatibility of materials. Agilent InfinityLab LC Series 1260 Infinity II FLD User Manual... - Page 82 G7104C and for normal phase applications in 1260 Infinity pumps. Polyethylene has a good stability for most common inorganic solvents including acids and bases in a pH range of 1 to 12.5. It is compatible to many organic Agilent InfinityLab LC Series 1260 Infinity II FLD User Manual...
- Page 83 For example, a 1 % solution of acetic acid in methanol will attack steel. • Solutions containing strong complexing agents (for example, EDTA, ethylene diamine tetra-acetic acid). • Mixtures of carbon tetrachloride with 2-propanol or THF. Agilent InfinityLab LC Series 1260 Infinity II FLD User Manual...
- Page 84 It can be corroded by complexing cyanides and concentrated acids like aqua regia. Zirconium Oxide (ZrO Zirconium Oxide is inert to almost all common acids, bases and solvents. There are no documented incompatibilities for HPLC applications. Agilent InfinityLab LC Series 1260 Infinity II FLD User Manual...
- Page 85 Sapphire, Ruby and Al -based ceramics Sapphire, ruby and ceramics based on aluminum oxide Al are inert to almost all common acids, bases and solvents. There are no documented incompatibilities for HPLC applications. Agilent InfinityLab LC Series 1260 Infinity II FLD User Manual...
- Page 86 Preparing the Module Solvent Information Agilent InfinityLab LC Series 1260 Infinity II FLD User Manual...
-
Page 87: Optimizing The Detector
Agilent InfinityLab LC Series 1260 Infinity II FLD User Manual Optimizing the Detector Getting Started and Checkout Starting Your Detector Setting the Chromatographic Conditions Observe the Maxima via the Isoabsorbance Plot Method Development Step 1: Check the LC System for Impurities... -
Page 88: Getting Started And Checkout
When the lamp is turned on the first time the instrument performs some internal checks and a calibration check which takes about 5 minutes. 3 You are now ready to change the settings of your detector. Agilent InfinityLab LC Series 1260 Infinity II FLD User Manual... -
Page 89: Setting The Chromatographic Conditions
4 min Injection volume 5 µl Oven temperature (1200) 30 °C FLD Excitations/Emission Wavelength EX = 246 nm, EM = 317 nm FLD PMT Gain PMT = 10 FLD Response time Agilent InfinityLab LC Series 1260 Infinity II FLD User Manual... - Page 90 Figure 26 on page 90. In this example additional excitation wavelenghts (B, C, D) are used. This will increase the scan time and may lower the performance. Figure 26 FLD Parameters Agilent InfinityLab LC Series 1260 Infinity II FLD User Manual...
- Page 91 Getting Started and Checkout 3 Start the run. The resulting chromatograms are shown below : Figure 27 Biphenyl Peak With Different Excitation Wavelengths The excitation maxima are around 250 nm. Agilent InfinityLab LC Series 1260 Infinity II FLD User Manual...
-
Page 92: Observe The Maxima Via The Isoabsorbance Plot
= 246 nm, λ 1 Load the data file (λ = 317 nm) and open the isoabsorbance plot. 2 The maximum λ will be found around 250 nm. Figure 28 Isoabsorbance Plot Agilent InfinityLab LC Series 1260 Infinity II FLD User Manual... -
Page 93: Method Development
Determine Ex/Em spectra Collect online spectra, mode/multi-wavelength for all separated compounds perform library search, detection in a single run determine peak purity Activate up to four Deactivate wavelength wavelengths simultaneously switching Agilent InfinityLab LC Series 1260 Infinity II FLD User Manual... -
Page 94: Step 1: Check The Lc System For Impurities
In both cases, a higher noise level and therefore a higher limit of detection are obtained. This indicates that high sensitivity measurements should be done away from wavelength settings that have a high stray light background. Agilent InfinityLab LC Series 1260 Infinity II FLD User Manual... -
Page 95: Step 2: Optimize Limits Of Detection And Selectivity
(Figure 29 on page 94) for each compound. Since this is a tedious procedure, it is applicable only when there is a limited number of compounds of interest. Agilent InfinityLab LC Series 1260 Infinity II FLD User Manual... - Page 96 All excitation and emission spectra of Quinidine (1 μg/ml) are shown in graphic. Fluorescence intensity is plotted vs excitation and emission wavelengths. Detector settings: step size 5 nm, PMT 12, Response time 4 s Agilent InfinityLab LC Series 1260 Infinity II FLD User Manual...
- Page 97 Optimizing the Detector Method Development Figure 31 Characterization of a pure compound from a fluorescence scan Agilent InfinityLab LC Series 1260 Infinity II FLD User Manual...
- Page 98 100. The area of high intensity (red) is caused by stray light when emission spectra overlap with the excitation wavelength. This can be avoided by fitting the spectral range automatically. Excitation at 260 nm is most appropriate for all PNAs. Agilent InfinityLab LC Series 1260 Infinity II FLD User Manual...
- Page 99 This shows the isofluorescence plot of emission spectra for 15 PNAs (5 µg/ml) with a fixed excitation wavelength (260 nm). Figure 32 Optimization of the time-program for the emission wavelength Agilent InfinityLab LC Series 1260 Infinity II FLD User Manual...
- Page 100 Timetable for the analysis of 15 polynuclear aromatic hydrocarbons Time [min] Exitation Wavelength [nm] Emission Wavelength [nm] 19.0 This timetable gives the conditions for optimum detection based on the results of two chromatographic runs. Agilent InfinityLab LC Series 1260 Infinity II FLD User Manual...
- Page 101 DAP and AHP for reference. The column was overloaded with the non-fluorescent carbamate (2-benzimidazole carbamic acid methylester/MBC) to see the known impurities, AHP and DAP. Agilent InfinityLab LC Series 1260 Infinity II FLD User Manual...
- Page 102 265 nm was used for taking the emission spectrum and an emission wavelength at 540 nm was used for taking the excitation spectrum. Figure 34 UV-spectrum and fluorescence spectra for 2,3-diaminophenazine (DAP) Agilent InfinityLab LC Series 1260 Infinity II FLD User Manual...
- Page 103 0.4 ml/min Column temperature 35 °C Injection volume 5 µl FLD settings PMT 12, response time 4 s, step size 5 nm Ex 265 nm and 430 nm Em 540 nm Agilent InfinityLab LC Series 1260 Infinity II FLD User Manual...
-
Page 104: Step 3: Set Up Routine Methods
PNA analysis, for example, can be performed with simultaneous multi wavelength detection instead of wavelength-switching. With four different wavelengths for emission, all 15 PNAs can be monitored (Table on page 105). Agilent InfinityLab LC Series 1260 Infinity II FLD User Manual... - Page 105 22 °C Injection volume 2 µL FLD settings PMT 12, response time 4 s The upper trace was received with traditional wavelength switching. Figure 36 Simultaneous multi wavelength detection for PNA-analysis Agilent InfinityLab LC Series 1260 Infinity II FLD User Manual...
- Page 106 Table 13 on page 107 shows an automated library search based on the emission spectra from a PNA reference sample. Agilent InfinityLab LC Series 1260 Infinity II FLD User Manual...
- Page 107 15.274 15.200 16.052 6.90434e-1 Benzo(b)fluoranthene@em 16.187 16.200 17.052 5.61791e-1 Benzo(k)fluoranthene@em 16.865 16.900 17.804 5.58070e-1 Benz(a)pyrene@em 18.586 18.600 19.645 5.17430e-1 Dibenz(a,h)anthracene@em 19.200 19.100 20.329 6.03334e-1 Benzo(g,h,i)perylene@em 20.106 20.000 21.291 9.13648e-2 Indeno(1,2,3-c,d)pyrene@em Agilent InfinityLab LC Series 1260 Infinity II FLD User Manual...
-
Page 108: Example: Optimization For Multiple Compounds
22.5 min % B=95 Stop time 26 min Post time 8 min Injection volume 1 µl Oven temperature (1200) 30 °C FLD PMT Gain PMT = 15 FLD Response time Agilent InfinityLab LC Series 1260 Infinity II FLD User Manual... - Page 109 DO NOT select additional emission wavelengths (B, C, D). Doing so will increase the scan time and will lower the performance. Figure 37 Detector Settings for Emission Scan Agilent InfinityLab LC Series 1260 Infinity II FLD User Manual...
- Page 110 2 Load the signal. (In this example just the time range of 13 min is displayed). Figure 38 Chromatogram from Emissions Scan 3 Use the isoabsorbance plot and evaluate the optimal emission wavelengths, shown in the table below. Figure 39 Isoabsorbance Plot from Emission Scan Agilent InfinityLab LC Series 1260 Infinity II FLD User Manual...
- Page 111 Figure 40 page 111. DO NOT select additional excitation wavelengths (B, C, Doing so will increase the scan time and will lower the performance. Figure 40 Detector Settings for Excitation Scan Agilent InfinityLab LC Series 1260 Infinity II FLD User Manual...
- Page 112 (in this example just in the time range of 13 minutes). Figure 42 Isoabsorbance Plot - Excitation The table below shows the complete information about emission (from Figure 39 on page 110) and excitation maxima. Agilent InfinityLab LC Series 1260 Infinity II FLD User Manual...
- Page 113 225 / 285 nm 7.7 min 310 nm 265 nm 8.5 min 360 nm 245 nm 10.7 min 445 nm 280 nm 11.3 min 385 nm 270 / 330 nm Agilent InfinityLab LC Series 1260 Infinity II FLD User Manual...
-
Page 114: Evaluating The System Background
3 Set PMT gain to 16. The wavelength range and step number defines the duration. Using the maximum range, the scan would take approximately 10 minutes. Figure 43 FLD Special Settings Agilent InfinityLab LC Series 1260 Infinity II FLD User Manual... - Page 115 Figure 44 page 115. A low background will improve the signal-to-noise, see also “Reducing Stray Light” N O T E page 135. Figure 44 Fluorescence Scan of Water Agilent InfinityLab LC Series 1260 Infinity II FLD User Manual...
-
Page 116: How To Collect Spectra With Modes Spectra All In Peak And Apex Spectra Only
1 Set the parameters THRS, PDPW and PKWD accordingly to the current chromatogram. Best results for collecting peak triggered spectra are gathered when PDPW is 2 steps lower than PKWD, see Table 18 on page 134. Agilent InfinityLab LC Series 1260 Infinity II FLD User Manual... - Page 117 The selected values are fixed during the run. THRS and PDPW influence the peak-triggered spectra-acquisition. You can change THRS in the FLD’s setup-screen; PDPW can only be changed with the Peakwidth-field in the Timetable. Agilent InfinityLab LC Series 1260 Infinity II FLD User Manual...
- Page 118 "clean" APEX-spectra: the first/last points of the spectra are acquired before/after you have the highest concentration in the detector’s cell. • How long the acquisition of single spectra lasts is shown in the FLD’s setup screen. Agilent InfinityLab LC Series 1260 Infinity II FLD User Manual...
-
Page 119: Optimization Overview
Bear in mind that even if the response time is too high fast peaks will appear a little smaller and broader but retention time and peak areas are still correct and reproducible. Agilent InfinityLab LC Series 1260 Infinity II FLD User Manual... - Page 120 (FLD = 20 nm) which cause a systematic wavelength maximum shift depending on the absorbance spectrum of the compound under evaluation. Agilent InfinityLab LC Series 1260 Infinity II FLD User Manual...
-
Page 121: Design Features Help Optimization
Flush your solvent delivery system for at least 15 minutes before checking sensitivity. If your pump has multiple channels, you should also flush the channels not in use. Agilent InfinityLab LC Series 1260 Infinity II FLD User Manual... -
Page 122: Finding The Best Wavelengths
Flash-type lamps shift the optimum wavelength to lower wavelength ranges with the module to a maximum of 250 nm. The excitation grating is blazed for highest efficiency at 300 nm. Agilent InfinityLab LC Series 1260 Infinity II FLD User Manual... -
Page 123: A Real Example
(FLD = 20 nm) which cause a systematic wavelength maximum shift depending on the absorbance spectrum of the compound under evaluation. Agilent InfinityLab LC Series 1260 Infinity II FLD User Manual... -
Page 124: Finding The Best Signal Amplification
Figure 46 on page 124 the PMTGAIN was gradually raised from 4 up to 11 (the peak is from the Agilent Technologies isocratic sample which was diluted 1000 times). With increasing PMTGAIN there was an improvement in signal-to-noise up to 10. Above 10 the noise increased proportionately to the signal with no improvement in signal-to-noise. -
Page 125: Fld Scaling Range And Operating Conditions
For another FLD this PMT level may vary (based on the individual PMT-Gain-Test). The figure below demonstrates the impact of changing the PMT Gain. Agilent InfinityLab LC Series 1260 Infinity II FLD User Manual... - Page 126 FLD by gradually decreasing the PMT-Level by 1 to get roughly half the signal height by each step. Be aware that by that step you will lose sensitivity at low signal levels (LOD). Agilent InfinityLab LC Series 1260 Infinity II FLD User Manual...
- Page 127 For low background and highest sensitivity keep the flow cell clean and always use fresh water to prevent biological background from native fluorescence by algae and bacteria. Agilent InfinityLab LC Series 1260 Infinity II FLD User Manual...
- Page 128 "ADC overflow" the max possible LU is displayed in chromatogram. Note that "max LU" is slightly dependent on lamp drift and lamp noise but strongly dependent on the excitation wavelength. Agilent InfinityLab LC Series 1260 Infinity II FLD User Manual...
- Page 129 The transfer of methods 1:1 from one FLD to another may result into the above "ADC N O T E overflow" problem. For details see “FLD Scaling Range and Operating Conditions” page 125. Agilent InfinityLab LC Series 1260 Infinity II FLD User Manual...
-
Page 130: Changing The Xenon Flash Lamp Frequency
180 mJ (13.3 W) 74 Hz (Economy), 560 V 63 mJ (4.7 W) Best sensitivity can be expected with “no economy”, see Figure 48 on page 130. Figure 48 Xenon Flash Lamp Frequency Agilent InfinityLab LC Series 1260 Infinity II FLD User Manual... -
Page 131: Lamp Life Savings
There are three ways to save lamp life: • switch to “lamp on during run” without loss of sensitivity. • switch to “economy” mode with a certain loss of sensitivity. • a combination of the above. Agilent InfinityLab LC Series 1260 Infinity II FLD User Manual... -
Page 132: Selecting The Best Response Time
4 seconds. It is important to know that comparing sensitivity requires using the same response time. A response time of 4 s (default) is equivalent to a time constant of 1.8 s and appropriate for standard chromatographic conditions. Agilent InfinityLab LC Series 1260 Infinity II FLD User Manual... - Page 133 Limits: When you set the peak width (in minutes), the corresponding response time is set automatically and the appropriate data rate for signal and spectra acquisition is selected as shown in the table below. Agilent InfinityLab LC Series 1260 Infinity II FLD User Manual...
- Page 134 > 0.005 0.12 37.04 27.0 > 0.01 0.25 37.04 27.0 > 0.025 18.52 54.0 > 0.05 9.26 108.0 > 0.1 4.63 216.0 > 0.2 2.31 432.0 > 0.4 1.16 864.0 Agilent InfinityLab LC Series 1260 Infinity II FLD User Manual...
-
Page 135: Reducing Stray Light
280 nm. Because of a known set of applications a 295 nm cut-off filter is built-in for undisturbed application up to 560 nm without compromises (see Figure 51 page 136). Agilent InfinityLab LC Series 1260 Infinity II FLD User Manual... - Page 136 Optimizing the Detector Reducing Stray Light Figure 51 Reducing Stray Light Agilent InfinityLab LC Series 1260 Infinity II FLD User Manual...
-
Page 137: Troubleshooting And Diagnostics
Agilent InfinityLab LC Series 1260 Infinity II FLD User Manual Troubleshooting and Diagnostics Available Tests vs User Interfaces Agilent Lab Advisor Software Diagnostic Signals Overview of Diagnostic Signals Baseline Problems Deriving from Xenon Flash Lamp/Trigger Pack Assembly Wander/Drift Problems Due to Temperature Changes... -
Page 138: Available Tests Vs User Interfaces
Agilent Lab Advisor B.02.08 or later is required. The Instant Pilot (G4208A) supports the G7121A/B with B.02.19 or later. Screenshots used within these procedures are based on the Agilent Lab Advisor software. Agilent InfinityLab LC Series 1260 Infinity II FLD User Manual... - Page 139 Troubleshooting and Diagnostics Available Tests vs User Interfaces Figure 52 The Lab Advisor shows the available tests Agilent InfinityLab LC Series 1260 Infinity II FLD User Manual...
-
Page 140: Agilent Lab Advisor Software
The tests and diagnostic features that are provided by the Agilent Lab Advisor software may differ from the descriptions in this manual. For details, refer to the Agilent Lab Advisor software help files. Agilent InfinityLab LC Series 1260 Infinity II FLD User Manual... -
Page 141: Diagnostic Signals
• wander / drift problems due to temperature changes These signals can be used in addition to the normal baseline signal to determine if there is any correlation to the temperature or voltage/current of the lamp. Agilent InfinityLab LC Series 1260 Infinity II FLD User Manual... -
Page 142: Baseline Problems Deriving From Xenon Flash Lamp/Trigger Pack Assembly
If there are no instabilities, it’s detector related and a replacement of the trigger pack assembly (first) and lamp (second) is required. b If there are still instabilities, check the system in front of the FLD (for example for air leaks). Agilent InfinityLab LC Series 1260 Infinity II FLD User Manual... -
Page 143: Wander/Drift Problems Due To Temperature Changes
Problem Verification Use the diagnostic signals to find a correlation to ambient changes. • Normal signal [LU] • Reference signal [LU] • Board Temperature (instrument curves) Agilent InfinityLab LC Series 1260 Infinity II FLD User Manual... -
Page 144: Monitoring Of Additional Signals
Measurements should be taken over 60 – 120 min minimum to include long-term effects N O T E (e.g. cycle of air condition systems). Agilent Lab Advisor • Open Instrument Control. • Select Main signal and board temperature. • Scale the signals. Agilent InfinityLab LC Series 1260 Infinity II FLD User Manual... - Page 145 Figure 53 Signal plus board temperature (Agilent Lab Advisor) The board temperature (short-/long term) is also stored in the module’s memory and can be retrieved via the Module Info - Signals. Agilent InfinityLab LC Series 1260 Infinity II FLD User Manual...
- Page 146 Troubleshooting and Diagnostics Monitoring of Additional Signals Figure 54 Internal board temperature (Agilent Lab Advisor - Module Info - Signals) Agilent InfinityLab LC Series 1260 Infinity II FLD User Manual...
-
Page 147: Error Information
Agilent InfinityLab LC Series 1260 Infinity II FLD User Manual Error Information What Are Error Messages General Error Messages Timeout Shutdown Remote Timeout Lost CAN Partner Leak Leak Sensor Open Leak Sensor Short Compensation Sensor Open Compensation Sensor Short Fan Failed... -
Page 148: What Are Error Messages
In all cases, error propagation is done via the CAN bus or via an APG/ERI remote cable (see documentation for the APG/ERI interface). Agilent InfinityLab LC Series 1260 Infinity II FLD User Manual... -
Page 149: General Error Messages
Check the logbook for the occurrence and A not-ready condition was present during a source of a not-ready condition. Restart the sequence or multiple-injection run for a analysis where required. period longer than the timeout threshold. Agilent InfinityLab LC Series 1260 Infinity II FLD User Manual... -
Page 150: Shutdown
Exchange the remote cable. Defective remote cable. Check the instrument for defects (refer to the Defective components in the instrument instrument’s documentation). showing the not-ready condition. Agilent InfinityLab LC Series 1260 Infinity II FLD User Manual... -
Page 151: Lost Can Partner
This changes the resistance of the leak sensor which is sensed by the leak-sensor circuit on the main board. Probable cause Suggested actions Ensure all fittings are tight. Loose fittings. Exchange defective capillaries. Broken capillary. Agilent InfinityLab LC Series 1260 Infinity II FLD User Manual... -
Page 152: Leak Sensor Open
Leak sensor incorrectly routed, being pinched by a metal component. Please contact your Agilent service representative. Power switch assembly defective Please contact your Agilent service representative. Cable or contact problem. Agilent InfinityLab LC Series 1260 Infinity II FLD User Manual... -
Page 153: Compensation Sensor Open
Probable cause Suggested actions Please contact your Agilent service Defective power switch assembly representative. Please contact your Agilent service Loose connection between the power representative. switch board and the main board Agilent InfinityLab LC Series 1260 Infinity II FLD User Manual... -
Page 154: Fan Failed
The top foam has been removed. Probable cause Suggested actions Please contact your Agilent service Foam not activating the sensor. representative. Please contact your Agilent service Defective sensor or main board. representative. Agilent InfinityLab LC Series 1260 Infinity II FLD User Manual... -
Page 155: Cover Violation
The ERI (Enhanced Remote Interface) provides two error events related to over current situations on the +5 V and +24 V lines. Probable cause Suggested actions Reduce the load. The load on the ERI is too high. Agilent InfinityLab LC Series 1260 Infinity II FLD User Manual... -
Page 156: Detector Error Messages
Please contact your Agilent service FLF board not connected to the FLM board. representative. Please contact your Agilent service Defective FLF board. representative. Please contact your Agilent service Defective FLM board. representative. Agilent InfinityLab LC Series 1260 Infinity II FLD User Manual... -
Page 157: Adc Not Calibrated
For details see “Visualization of ADC Limits” page 128. Probable cause Suggested actions Reduce PMT gain. PMT setting to high. Change wavelength setting. Wavelength setting wrong. Agilent InfinityLab LC Series 1260 Infinity II FLD User Manual... -
Page 158: Flash Lamp Current Overflow
100 times in series, an error is generated and the lamp is turned OFF. Probable cause Suggested actions Please contact your Agilent service Defective Hardware. representative. Agilent InfinityLab LC Series 1260 Infinity II FLD User Manual... -
Page 159: Flash Trigger Lost
Cell position not correct. Flush the flow cell. Solvent in the cell not clean or air bubble in the cell. Please contact your Agilent service Monochromator assembly position not representative. correct (after replacement). Agilent InfinityLab LC Series 1260 Infinity II FLD User Manual... -
Page 160: Wavelength Calibration Lost
SHUT DOWN is generated. Probable cause Suggested actions Insert flow cell and turn on the lamp. Flow cell has been removed during analysis. Agilent InfinityLab LC Series 1260 Infinity II FLD User Manual... -
Page 161: Motor Errors
Check motor connections to FLF (Ex) and FLM Monochromator assembly not connected. (Em) and encoders to FLM. Replace monochromator assembly. Monochromator or encoder defective. Defective FLF board (Ex) or FLM board (Em). Monochromator motor power driver defective. Agilent InfinityLab LC Series 1260 Infinity II FLD User Manual... - Page 162 The history may show an increasing friction of the drive(s) over a length of time. Probable cause Suggested actions Replace monochromator assembly. Friction too high. Replace monochromator assembly. Defective monochromator assembly. Agilent InfinityLab LC Series 1260 Infinity II FLD User Manual...
- Page 163 Motor Speed Too Low Error ID: EX 6715, EM 6716 For proper operation the monochromator gratings must run at a certain constant revolution. Probable cause Suggested actions Replace monochromator assembly. Revolution too low. Agilent InfinityLab LC Series 1260 Infinity II FLD User Manual...
- Page 164 Suggested actions Reset pattern via user interface and recalibrate. Encoder was replaced and has a different pattern or no reset of pattern was made. Replace monochromator assembly. Encoder lost position completely. Agilent InfinityLab LC Series 1260 Infinity II FLD User Manual...
-
Page 165: Test Functions And Calibration
Agilent InfinityLab LC Series 1260 Infinity II FLD User Manual Test Functions and Calibration Introduction Diagram of Light Path Lamp Intensity Test Lamp Intensity History Raman ASTM Signal-to-Noise Test Using the Agilent Lab Advisor Interpretation of the Results Wavelength Accuracy Test... -
Page 166: Introduction
Adding of temperature/lamp signals to chromatographic signals possible Agilent Instant Pilot Some tests are available • Intensity • WL Calibration • Spectra Scan (Tools) • Module Info (Tools) • Diagnostic Agilent InfinityLab LC Series 1260 Infinity II FLD User Manual... - Page 167 - Remote Pulse Duration [s] * Basic Advanced - Analog Output 1 Range Advanced - Control - Lamp Basic Advanced - Response Multiply Factor Advanced - Conversions - 7121A * (G7121B only) Basic Advanced Agilent InfinityLab LC Series 1260 Infinity II FLD User Manual...
- Page 168 - Signal D [LU] Advanced - Photomultiplier raw [counts] Advanced - Reference diode raw [counts] Advanced - Ambient Temperature [°C] Advanced EMF Counters - Flash Lamp Life Time Basic Advanced Agilent InfinityLab LC Series 1260 Infinity II FLD User Manual...
- Page 169 Test Functions and Calibration Introduction Figure 55 The Lab Advisor shows the available tests Agilent InfinityLab LC Series 1260 Infinity II FLD User Manual...
-
Page 170: Diagram Of Light Path
Test Functions and Calibration Diagram of Light Path Diagram of Light Path The light path is shown in Figure 56 on page 170. Figure 56 Schematic of the light path Agilent InfinityLab LC Series 1260 Infinity II FLD User Manual... -
Page 171: Lamp Intensity Test
UV degradation, especially below 250 nm is significantly higher compared to visible wavelength range. Generally the "LAMP ON during run" setting or using "economy mode" will increase lamp life by a magnitude. Agilent InfinityLab LC Series 1260 Infinity II FLD User Manual... -
Page 172: Lamp Intensity History
250 nm, 350 nm, 450 and 600 nm) in a buffer. The data/plot can be retrieved via the diagnostics and provides intensity data over a length of time. Figure 58 Lamp Intensity History (Agilent Lab Advisor under Module Info) Agilent InfinityLab LC Series 1260 Infinity II FLD User Manual... -
Page 173: Raman Astm Signal-To-Noise Test
N O T E Advisor. All others (not used for standard checkout) have to be set up manually with the information from Table 24 on page 174 and Table 25 on page 174. Agilent InfinityLab LC Series 1260 Infinity II FLD User Manual... - Page 174 Settings for Single Wavelength Specifications (at background) Time Baseline Free 20.30 Free Table 25 Settings for Dual Wavelength Specifications (Multi-EM Scan) Time EM_A EM_B Spectra From Step Baseline Spectra 00.00 None Free 20.30 None Free Agilent InfinityLab LC Series 1260 Infinity II FLD User Manual...
- Page 175 350, 397) mean_backg round 350, 450) SNR_Raman noise_rama 350, 397) − mean_raman 350, 397) mean_backg round 350, 450) SNR_Dark noise_back ground 350, 450) Figure 60 Raman ASTM signal/noise calculation Agilent InfinityLab LC Series 1260 Infinity II FLD User Manual...
-
Page 176: Using The Agilent Lab Advisor
3 Start the test in the Lab Advisor. Figure 61 Raman ASTM Signal-to-Noise Test (Agilent Lab Advisor) In case of failing this test (as shown above) see “Interpretation of the Results” on page 177. Agilent InfinityLab LC Series 1260 Infinity II FLD User Manual... -
Page 177: Interpretation Of The Results
(flush with clean bi-distilled water), ✔ no air bubble(s) (check via fluorescence scan or visual check of cell/cuvette), ✔ solvent inlet filter (may create air bubbles in flow cell). Agilent InfinityLab LC Series 1260 Infinity II FLD User Manual... -
Page 178: Wavelength Accuracy Test
350 nm and scan in the range of the expected maximum of 397 nm±20 nm. As result, the maxima should be found at 397 nm ±3 nm, see Figure 62 page 178. Figure 62 Excitation and Emission Spectrum (expected results) Agilent InfinityLab LC Series 1260 Infinity II FLD User Manual... - Page 179 “Interpretation of the Results” on page 181. Figure 63 Wavelength Accuracy Test with Lab Advisor If the test fails observe the maxima of the EX or EM side under the Signals tab. Agilent InfinityLab LC Series 1260 Infinity II FLD User Manual...
- Page 180 If the plots do not have a maximum around EX=397 nm and EX=350 nm (±3 nm) the test fails, see figure below. Refer to “Interpretation of the Results” on page 181. Agilent InfinityLab LC Series 1260 Infinity II FLD User Manual...
-
Page 181: Interpretation Of The Results
(may create air bubbles in flow cell). ✔ check optical path for contamination (service) ✔ check alignment of lamp / trigger pack assembly (service) ✔ perform a Wavelength Calibration Agilent InfinityLab LC Series 1260 Infinity II FLD User Manual... -
Page 182: Wavelength Verification And Calibration
A complete wavelength calibration is not always required. In most cases a quick N O T E wavelength accuracy verification is sufficient enough, see Table 26 on page 183. Agilent InfinityLab LC Series 1260 Infinity II FLD User Manual... - Page 183 Wavelength Verification and Calibration Table 26 Reasons for doing a Verification or Calibration Verification WL calibration interest GLP compliance cell change lamp change monochromator change main board change optical unit change Agilent InfinityLab LC Series 1260 Infinity II FLD User Manual...
-
Page 184: Wavelength Calibration Process
186 shows the steps performed during the wavelength calibration. The excitation grating and the emission grating are calibrated using Rayleigh stray light from the flow cell or cuvette measured with the photomultiplier tube. Agilent InfinityLab LC Series 1260 Infinity II FLD User Manual... - Page 185 Test Functions and Calibration Wavelength Calibration Process Figure 66 Wavelength Calibration (Agilent Lab Advisor) Agilent InfinityLab LC Series 1260 Infinity II FLD User Manual...
- Page 186 “Wavelength Calibration Failed” on page 159. If you encounter calibration problems: 1 Check for air bubbles in the flow cell. 2 Flush the flow cell with isopropanol. 3 Change the water. Agilent InfinityLab LC Series 1260 Infinity II FLD User Manual...
-
Page 187: Wavelength Calibration Procedure
Fill the prepared amount into a suitable bottle/vial. c Fill 10 ml of distilled water into the vial and shake. d Wait 5 minutes and shake again. After 10 minutes the solution is ready. Agilent InfinityLab LC Series 1260 Infinity II FLD User Manual... - Page 188 Agilent Lab Advisor: Calibrations • Instant Pilot (G4208A): Maintenance > FLD > Calibration If the wavelength calibration process fails, refer to “Wavelength Calibration Failed” N O T E page 159. Agilent InfinityLab LC Series 1260 Infinity II FLD User Manual...
- Page 189 If a deviation is displayed, press Yes to adjust to new values. The history table will be updated. Figure 68 Wavelength Calibration (Agilent Lab Advisor) Figure 69 Calibration History (Agilent Lab Advisor, under Module Info) Agilent InfinityLab LC Series 1260 Infinity II FLD User Manual...
- Page 190 When organic solvent is sequentially applied (without rinsing), a blockage of capillaries may occur. 4 Verification using the "Wavelength Accuracy Test". a Refit the capillary to the flow cell. b Follow the procedure "Wavelength Accuracy Test". Agilent InfinityLab LC Series 1260 Infinity II FLD User Manual...
-
Page 191: Excitation And Emission Grating Resistance History
The history data contains the data/time information and the number of turns. The data/plot can be retrieved via the diagnostics and provides turn data over a length of time. Figure 70 Resistance History (Agilent Lab Advisor under Module Info) Agilent InfinityLab LC Series 1260 Infinity II FLD User Manual... -
Page 192: D/A Converter (Dac) Test
Running the test with Agilent Lab Advisor 1 Run the D/A Converter (DAC) Test (for further information see Online-Help of user interface). Figure 71 D/A Converter (DAC) Test Agilent InfinityLab LC Series 1260 Infinity II FLD User Manual... -
Page 193: Test Evaluation
The noise on the step should be less than 3 μV. Probable cause Suggested actions Check or replace the cable. Bad cable or grounding problem between detector and external device. Please contact your Agilent service Defective detector main board. representative. Agilent InfinityLab LC Series 1260 Infinity II FLD User Manual... -
Page 194: Dark-Current Test
(two via reference diode and two from PMT) are shown in a table and checked against reasonable limits (see below). Figure 73 Dark-Current Test (Agilent Lab Advisor) Figure 74 Dark Current History (Agilent Lab Advisor) Agilent InfinityLab LC Series 1260 Infinity II FLD User Manual... -
Page 195: Test Failed
Test Functions and Calibration Dark-Current Test Test Failed Probable cause Suggested actions Exchange the PMT. Defective PMT. Exchange the FLF board. Defective reference diode or A/D converter. Agilent InfinityLab LC Series 1260 Infinity II FLD User Manual... -
Page 196: Using The Built-In Test Chromatogram
3 Open the test chromatogram screen 4 Turn the Test Chromatogram on. 5 Change to the detector's Module Service Center and add the detector signal to the Signal Plot window. Agilent InfinityLab LC Series 1260 Infinity II FLD User Manual... - Page 197 Test Chromatogram with Agilent Lab Advisor 7 To stop the test chromatogram enter in the command line: STOP The test chromatogram is switched off automatically at the end of a run. N O T E Agilent InfinityLab LC Series 1260 Infinity II FLD User Manual...
-
Page 198: Other Lab Advisor Functions
The Tables tab allows you to display the contents of all available diagnostic tables for the module. You click the [+] sign to open a table, or the [-] sign to close an open table. Figure 76 Module Info – General Agilent InfinityLab LC Series 1260 Infinity II FLD User Manual... - Page 199 Module Info – Signals Includes signal for Board Temperature (long/short term), Number of Revolutions of EX/EM Gratings, Dark current of Reference Diode and PMT. Figure 78 Module Info – Tables Agilent InfinityLab LC Series 1260 Infinity II FLD User Manual...
-
Page 200: Board Check And Change
After boot of the FLD, normally the Module Type is automatically entered (based on installed optical unit). In this case just the module Serial Number has to be entered (same on the module label). Figure 79 Module Info – Tables Agilent InfinityLab LC Series 1260 Infinity II FLD User Manual... -
Page 201: Instrument Control
The Instrument Control screen provides controls for each of the modules in the selected system. Module information and status are displayed; click to display the module's controls or to hide them. Figure 80 Instrument Control – Overview Agilent InfinityLab LC Series 1260 Infinity II FLD User Manual... -
Page 202: Emf - Early Maintenance Feature
Test Functions and Calibration Other Lab Advisor Functions EMF - Early Maintenance Feature The EMFs screen allows you to view and manage the EMF counters for all modules in all systems. Agilent InfinityLab LC Series 1260 Infinity II FLD User Manual... -
Page 203: Spectral Scan (G7121B Only)
(comma-separated values) file that can be used in other applications (for example, Microsoft Excel). Figure 81 Spectral Scan Agilent InfinityLab LC Series 1260 Infinity II FLD User Manual... - Page 204 You select the mode in the FLD Mode section. • Export Data Exports the selected data in csv format for use in other applications. Agilent InfinityLab LC Series 1260 Infinity II FLD User Manual...
-
Page 205: Maintenance
Agilent InfinityLab LC Series 1260 Infinity II FLD User Manual Maintenance Introduction to Maintenance Warnings and Cautions Overview of Maintenance Cleaning the Module Remove and Install Doors Exchanging a Flow Cell How to use the Cuvette Flow Cell Flushing Correcting Leaks... -
Page 206: Introduction To Maintenance
The module is designed for easy maintenance. Maintenance can be done from the front with module in place in the system. There are no serviceable parts inside. N O T E Do not open the module. Agilent InfinityLab LC Series 1260 Infinity II FLD User Manual... -
Page 207: Warnings And Cautions
Repair work at the module can lead to personal injuries, e.g. shock hazard, when the cover is opened. ➔ Do not remove the cover of the module. ➔ Only certified persons are authorized to carry out repairs inside the module. Agilent InfinityLab LC Series 1260 Infinity II FLD User Manual... - Page 208 If you connect external equipment to the instrument, make sure that you only use accessory units tested and approved according to the safety standards appropriate for the type of external equipment. Agilent InfinityLab LC Series 1260 Infinity II FLD User Manual...
-
Page 209: Overview Of Maintenance
182. Flow cell flushing If flow cell is contaminated. Leak sensor drying If leak has occurred. Check for leaks. Leak handling System If broken or corroded. Check for leaks. replacement Agilent InfinityLab LC Series 1260 Infinity II FLD User Manual... -
Page 210: Cleaning The Module
WA R N I N G hazard and damage the module ➔ Do not use an excessively damp cloth during cleaning. ➔ Drain all solvent lines before opening any connections in the flow path. Agilent InfinityLab LC Series 1260 Infinity II FLD User Manual... -
Page 211: Remove And Install Doors
The figures shown in this procedure exemplarily show the Infinity II Multisampler module. N O T E The principle of how to remove and/or install doors works in the same way for all Infinity II modules. Agilent InfinityLab LC Series 1260 Infinity II FLD User Manual... - Page 212 Press the release buttons and pull the front door out. For the Installation of the front door. Insert the hinges into their guides and move the door in until the release buttons click into their final position. Agilent InfinityLab LC Series 1260 Infinity II FLD User Manual...
-
Page 213: Exchanging A Flow Cell
For bio-inert applications, always use dedicated bio-inert parts, which can be identified by the bio-inert symbol or other markers described in this manual. ➔ Do not mix bio-inert and non-inert modules or parts in a bio-inert system. Agilent InfinityLab LC Series 1260 Infinity II FLD User Manual... - Page 214 Before storing the flow cell, flush it with iso-propanol and close it with Plastic fittings N O T E (0100-1259). Open the doors of the module. Disconnect the capillaries from the flow cell. Agilent InfinityLab LC Series 1260 Infinity II FLD User Manual...
- Page 215 N O T E The label attached to the flow cell provides information on part number, cell volume and maximum pressure. The cell type will be automatically detected. Agilent InfinityLab LC Series 1260 Infinity II FLD User Manual...
- Page 216 (maximum pressure is 20 bar (2 MPa)). Always use the outlet capillary set supplied with the accessory kit. Perform a Wavelength Calibration. Close the doors of the module. Agilent InfinityLab LC Series 1260 Infinity II FLD User Manual...
-
Page 217: How To Use The Cuvette
229) to inject the compound. 4 Setup the parameters for the Fluorescence Scan (under Special Setpoints). 5 Select “Take Fluorescence Scan” on the user-interface to start the off-line measurement. Agilent InfinityLab LC Series 1260 Infinity II FLD User Manual... -
Page 218: Flow Cell Flushing
Do not exceed the pressure limit of 20 bar (0.2 MPa). N O T E Do not use the HPLC pump to pump nitric acid through the system. N O T E Agilent InfinityLab LC Series 1260 Infinity II FLD User Manual... -
Page 219: Correcting Leaks
Figure 82 Correcting leaks When If a leakage has occurred in the flow cell area or at the capillary connections Tools required Description Tissue Wrench, 1/4 inch for capillary connections Agilent InfinityLab LC Series 1260 Infinity II FLD User Manual... - Page 220 Open the doors. Use tissue to dry the leak sensor area [1]. Observe the capillary connections and the flow cell area [2] for leaks and correct, if required. Close the doors. Agilent InfinityLab LC Series 1260 Infinity II FLD User Manual...
-
Page 221: Replace Leak Handling System Parts
Lift the cover levers at the rear of the module until you page 211 can lift the cover. Remove the cover and place it on the bench. Locate the Leak Interface Top. Agilent InfinityLab LC Series 1260 Infinity II FLD User Manual... - Page 222 Press the main cover down at the rear until the levers click. Insert the Tubing [2] (ca. 85 mm required for replacement) between Leak Adapter outlet and Leak Pan. Install the Doors, see “Remove and Install Doors” page 211. Agilent InfinityLab LC Series 1260 Infinity II FLD User Manual...
-
Page 223: Replacing Module Firmware
Agilent web. http://www.agilent.com/en-us/firmwareDownload?whid=69761 2 For loading the firmware into the module follow the instructions in the documentation. Module Specific Information There is no specific information for this module. Agilent InfinityLab LC Series 1260 Infinity II FLD User Manual... -
Page 224: Tests And Calibrations
Tests and Calibrations The following tests are required after maintenance of lamps and flow cells: • “Lamp Intensity Test” on page 171 • “Wavelength Verification and Calibration” on page 182 Agilent InfinityLab LC Series 1260 Infinity II FLD User Manual... -
Page 225: Parts For Maintenance And Repair
Agilent InfinityLab LC Series 1260 Infinity II FLD User Manual Parts for Maintenance and Repair Overview of Maintenance Parts Kits This chapter provides information on parts for maintenance and repair. Agilent Technologies... -
Page 226: Overview Of Maintenance Parts
Parts for Maintenance and Repair Overview of Maintenance Parts Overview of Maintenance Parts Figure 83 Overview of Maintenance Parts Agilent InfinityLab LC Series 1260 Infinity II FLD User Manual... - Page 227 Door right 5043-1013 Tubing Clip 5043-0856 Leak Adapter 5063-6527 Tubing assembly, i.d. 6 mm, o.d. 9 mm, 1.2 m (to waste) for Waste and Leak Adapter (ca. 85 mm required) Agilent InfinityLab LC Series 1260 Infinity II FLD User Manual...
-
Page 228: Kits
Tube Connector, 90 degree, ID 6.4 Calibration Kit FLD Calibration Kit (G7121-68001) Description 5063-6597 Calibration Sample, Glycogen 9301-1446 Syringe 9301-0407 Needle 5190-5111 Syringe filter, 0.45 µm, 100/pk 0100-1516 Fitting male PEEK, 2/pk Agilent InfinityLab LC Series 1260 Infinity II FLD User Manual... - Page 229 Tube PTFE 0.7 mm x 5 m, 1.6 mm od 79814-22406 ST Fitting 0100-0043 ST front ferrule 0100-0044 ST back ferrule 0100-1516 Fitting male PEEK, 2/pk 9301-0407 Needle 9301-1446 Syringe Agilent InfinityLab LC Series 1260 Infinity II FLD User Manual...
- Page 230 Parts for Maintenance and Repair Kits Agilent InfinityLab LC Series 1260 Infinity II FLD User Manual...
-
Page 231: Identifying Cables
Agilent InfinityLab LC Series 1260 Infinity II FLD User Manual Identifying Cables Cable Overview Analog Cables Remote Cables CAN/LAN Cables Agilent Module to PC USB Cables This chapter provides information on cables used with the Agilent InfinityLab LC Series modules. -
Page 232: Cable Overview
Identifying Cables Cable Overview Cable Overview Never use cables other than the ones supplied by Agilent Technologies to ensure proper N O T E functionality and compliance with safety or EMC regulations. Analog cables Description 35900-60750 Agilent 35900A A/D converter... - Page 233 1-1, 2-3, 3-2, 4-6, 5-5, 6-4, 7-8, 8-7, 9-9. 5181-1561 RS-232 cable, 8 m USB cables Description 5188-8050 USB A M-USB Mini B 3 m (PC-Module) 5188-8049 USB A F-USB Mini B M OTG (Module to Flash Drive) Agilent InfinityLab LC Series 1260 Infinity II FLD User Manual...
-
Page 234: Analog Cables
The other end depends on the instrument to which connection is being made. Agilent Module to 35900 A/D converters p/n 35900-60750 35900 Pin Agilent Signal Name module Not connected Shield Analog - Center Analog + Agilent InfinityLab LC Series 1260 Infinity II FLD User Manual... - Page 235 Signal Name module Shield Shield Analog - Center Center Analog + Agilent Module to General Purpose p/n 01046-60105 Pin Agilent Signal Name module Not connected Black Analog - Analog + Agilent InfinityLab LC Series 1260 Infinity II FLD User Manual...
-
Page 236: Remote Cables
NOT USED pink SHUT DOWN blue START PREPARE black 1wire DATA violet DGND grey-pink +5V ERI out red-blue PGND white-green PGND brown-green +24V ERI out white-yellow +24V ERI out yellow-brown Agilent InfinityLab LC Series 1260 Infinity II FLD User Manual... - Page 237 • 5188-8045 ERI to APG (Connector D_Subminiature 15 pin (ERI), Connector D_Subminiature 9 pin (APG)) p/n 5188-8045 Pin (ERI) Signal Pin (APG) Active (TTL) Start Request Stop Ready High Power on High Future Shut Down Start Prepare Ground Cable Shielding Agilent InfinityLab LC Series 1260 Infinity II FLD User Manual...
- Page 238 Ground Cable Shielding One end of these cables provides a Agilent Technologies APG (Analytical Products Group) remote connector to be connected to Agilent modules. The other end depends on the instrument to be connected to. Agilent InfinityLab LC Series 1260 Infinity II FLD User Manual...
- Page 239 Pin Agilent Signal Name Active module (TTL) White Digital ground Brown Prepare run Gray Start Blue Shut down Pink connected Yellow Power on High Ready High Green Stop Black Start request Agilent InfinityLab LC Series 1260 Infinity II FLD User Manual...
-
Page 240: Can/Lan Cables
CAN cable, Agilent module to module, 1 m LAN Cables Description 5023-0203 Cross-over network cable, shielded, 3 m (for point to point connection) 5023-0202 Twisted pair network cable, shielded, 7 m (for point to point connection) Agilent InfinityLab LC Series 1260 Infinity II FLD User Manual... -
Page 241: Agilent Module To Pc
It's also called "Null Modem Cable" with full handshaking where the wiring is made between pins 1-1, 2-3, 3-2, 4-6, 5-5, 6-4, 7-8, 8-7, 9-9. 5181-1561 RS-232 cable, 8 m Agilent InfinityLab LC Series 1260 Infinity II FLD User Manual... -
Page 242: Usb Cables
To connect a USB Flash Drive use a USB OTG cable with Mini-B plug and A socket. Description 5188-8050 USB A M-USB Mini B 3 m (PC-Module) 5188-8049 USB A F-USB Mini B M OTG (Module to Flash Drive) Agilent InfinityLab LC Series 1260 Infinity II FLD User Manual... -
Page 243: Hardware Information
Agilent InfinityLab LC Series 1260 Infinity II FLD User Manual Hardware Information Firmware Description Electrical Connections Rear view of the module Information on Instrument Serial Number Interfaces Overview Interfaces ERI (Enhanced Remote Interface) USB (Universal Serial Bus) Setting the 6-bit Configuration Switch... -
Page 244: Firmware Description
• run synchronization through APG/ERI remote, • error handling, • diagnostic functions, • or module specific functions like • internal events such as lamp control, filter movements, • raw data collection and conversion to absorbance. Agilent InfinityLab LC Series 1260 Infinity II FLD User Manual... - Page 245 Update of main system can be done in the resident system only. Update of the resident N O T E system can be done in the main system only. Main and resident firmware must be from the same set. Figure 84 Firmware Update Mechanism Agilent InfinityLab LC Series 1260 Infinity II FLD User Manual...
- Page 246 All this specific information is described in the documentation provided with the firmware update tools. The firmware update tools, firmware and documentation are available from the Agilent web. • http://www.agilent.com/en-us/firmwareDownload?whid=69761 Agilent InfinityLab LC Series 1260 Infinity II FLD User Manual...
-
Page 247: Electrical Connections
There are no externally accessible fuses because automatic electronic fuses are implemented in the power supply. Never use cables other than the ones supplied by Agilent Technologies to ensure proper N O T E functionality and compliance with safety or EMC regulations. -
Page 248: Rear View Of The Module
Hardware Information Electrical Connections Rear view of the module Figure 85 Rear view of detector (example shows a G7114A/B VWD) – electrical connections and label Agilent InfinityLab LC Series 1260 Infinity II FLD User Manual... -
Page 249: Information On Instrument Serial Number
Alphabetic character A-Z (used by manufacturing) Alpha-numeric code 0-9, A-Z, where each combination unambiguously denotes a module (there can be more than one code for the same module) 00000 Serial number Agilent InfinityLab LC Series 1260 Infinity II FLD User Manual... -
Page 250: Interfaces
Hardware Information Interfaces Interfaces The Agilent InfinityLab LC Series modules provide the following interfaces: Table 30 Agilent InfinityLab LC Series Interfaces Module RS-232 Analog APG (A) Special (on-board) / ERI (E) Pumps G7104A/C G7110B G7111A/B, G5654A G7112B G7120A G7161A/B Samplers... - Page 251 • RS-232C as interface to a computer • USB (Universal Series Bus) as interface to a computer • REMOTE connector as interface to other Agilent products • Analog output connector(s) for signal output Agilent InfinityLab LC Series 1260 Infinity II FLD User Manual...
-
Page 252: Overview Interfaces
“USB (Universal Serial Bus)” on page 257. Analog Signal Output The analog signal output can be distributed to a recording device. For details refer to the description of the module’s main board. Agilent InfinityLab LC Series 1260 Infinity II FLD User Manual... - Page 253 Remote (ERI) The ERI (Enhanced Remote Interface) connector may be used in combination with other analytical instruments from Agilent Technologies if you want to use features as common shut down, prepare, and so on. It allows easy connection between single instruments or systems to ensure coordinated analysis with simple coupling requirements.
- Page 254 PREPARE (L) Request to prepare for analysis (for example, calibration, detector lamp on). Receiver is any module performing pre-analysis activities. Special Interfaces There is no special interface for this module. Agilent InfinityLab LC Series 1260 Infinity II FLD User Manual...
-
Page 255: Eri (Enhanced Remote Interface)
ERI replaces the AGP Remote Interface that is used in the HP 1090/1040/1050/1100 HPLC systems and Agilent 1100/1200/1200 Infinity HPLC modules. All new InfinityLab LC Series products using the FUSION core electronics use ERI. This interface is already used in the Agilent Universal... - Page 256 This serial line can be used to read out an EPROM or write into an EPROM of a connected ERI-device. The firmware can detect the connected type of device automatically and update information in the device (if required). Agilent InfinityLab LC Series 1260 Infinity II FLD User Manual...
-
Page 257: Usb (Universal Serial Bus)
• Short circuit will be detected through hardware. USB (Universal Serial Bus) USB (Universal Serial Bus) - replaces RS232, supports: • a PC with control software (for example Agilent Lab Advisor) • USB Flash Disk Agilent InfinityLab LC Series 1260 Infinity II FLD User Manual... -
Page 258: Setting The 6-Bit Configuration Switch
• For specific LAN modes switches 4-5 must be set as required. • For boot resident/cold start modes switches 1+2 or 6 must be UP. Figure 87 Location of Configuration switch (example shows a G7114A/B VWD) Agilent InfinityLab LC Series 1260 Infinity II FLD User Manual... - Page 259 When selecting mode COM, settings are stored to non-volatile memory. When selecting mode TEST, COM settings are tak- en from non-volatile memory. not assigned - Always keep these switches on position ‘0’ (off) Default IP Address is 192.168.254.11 Host Name will be the MAC address. Agilent InfinityLab LC Series 1260 Infinity II FLD User Manual...
-
Page 260: Special Settings
Save your methods and data before executing a forced cold start. If you use the following switch settings and power the instrument up again, it will start as described above. Agilent InfinityLab LC Series 1260 Infinity II FLD User Manual... - Page 261 Boot Main System / Keep Data Boot Resident System / Keep Data Boot Main System / Revert to Default Data Boot Resident System / Revert to Default Data Note: The setting '0' (down) is essential. Agilent InfinityLab LC Series 1260 Infinity II FLD User Manual...
-
Page 262: Instrument Layout
• the plastic layers help cushion the electronic and mechanical parts from physical shock, and • the metal inner cabinet shields the internal electronics from electromagnetic interference and also helps to reduce or eliminate radio frequency emissions from the instrument itself. Agilent InfinityLab LC Series 1260 Infinity II FLD User Manual... -
Page 263: Early Maintenance Feedback
This function is only available via Agilent Lab Advisor or Instant Pilot. N O T E The detector provides the following EMF counters: • Flash Lamp Life Time Agilent InfinityLab LC Series 1260 Infinity II FLD User Manual... - Page 264 Hardware Information Early Maintenance Feedback Agilent InfinityLab LC Series 1260 Infinity II FLD User Manual...
-
Page 265: Appendix
Agilent InfinityLab LC Series 1260 Infinity II FLD User Manual Appendix General Safety Information General Safety Information Safety Standards General Before Applying Power Ground the Instrument Do Not Operate in an Explosive Atmosphere Do Not Remove the Instrument Cover Do Not Modify the Instrument... -
Page 266: General Safety Information
Do not use this product in any manner not specified by the manufacturer. The protective features of this product may be impaired if it is used in a manner not specified in the operation instructions. Agilent InfinityLab LC Series 1260 Infinity II FLD User Manual... -
Page 267: Before Applying Power
Verify that the voltage range and frequency of your power distribution matches to the power specification of the individual instrument. ➔ Never use cables other than the ones supplied by Agilent Technologies to ensure proper functionality and compliance with safety or EMC regulations. ➔... -
Page 268: Do Not Operate In An Explosive Atmosphere
Personal injury (for example electrical shock, intoxication) ➔ Instruments that appear damaged or defective should be made inoperative and secured against unintended operation until they can be repaired by qualified service personnel. Agilent InfinityLab LC Series 1260 Infinity II FLD User Manual... -
Page 269: Solvents
For details, see the usage guideline for the solvent cabinet. A printed copy of the guideline N O T E has been shipped with the solvent cabinet, electronic copies are available in the Agilent Information Center or via the Internet. Agilent InfinityLab LC Series 1260 Infinity II FLD User Manual... -
Page 270: Safety Symbols
European Community directives. The European Declaration of Conformity is available at: http://regulations.corporate.agilent.com/DoC/search.htm Manufacturing date. Power symbol indicates On/Off. The apparatus is not completely disconnected from the mains supply when the power switch is in the Off position Agilent InfinityLab LC Series 1260 Infinity II FLD User Manual... - Page 271 ➔ Do not proceed beyond a caution until you have fully understood and met the indicated conditions. Agilent InfinityLab LC Series 1260 Infinity II FLD User Manual...
-
Page 272: Waste Electrical And Electronic Equipment (Weee) Directive
Do not dispose of in domestic household waste N O T E To return unwanted products, contact your local Agilent office, or see http://www.agilent.com for more information. Agilent InfinityLab LC Series 1260 Infinity II FLD User Manual... -
Page 273: Radio Interference
If test and measurement equipment is operated with unscreened cables, or used for measurements on open set-ups, the user has to assure that under operating conditions the radio interference limits are still met within the premises. Agilent InfinityLab LC Series 1260 Infinity II FLD User Manual... -
Page 274: Sound Emission
This product has a sound pressure emission (at the operator position) < 70 dB. • Sound Pressure Lp < 70 dB (A) • At Operator Position • Normal Operation • According to ISO 7779:1988/EN 27779/1991 (Type Test) Agilent InfinityLab LC Series 1260 Infinity II FLD User Manual... -
Page 275: Solvent Information
2-propanol or THF. • Avoid the use of dimethyl formamide (DMF). Polyvinylidene fluoride (PVDF), which is used in leak sensors, is not resistant to DMF. Agilent InfinityLab LC Series 1260 Infinity II FLD User Manual... -
Page 276: Agilent Technologies On Internet
Appendix Agilent Technologies on Internet Agilent Technologies on Internet For the latest information on products and services visit our worldwide web site on the Internet at: http://www.agilent.com Agilent InfinityLab LC Series 1260 Infinity II FLD User Manual... - Page 277 A/D Overflow compensation sensor short fan failed ADC Not Calibrated condensation features compensation sensor open Agilent InfinityLab LC Series 1260 Infinity II FLD User Manual...
- Page 278 Motor Encoder Index Wrong internet overview motor friction too high cable motor messages motor or encoder not found lamp intensity history Motor Position Lost lamp intensity test parts identification motor position not found Agilent InfinityLab LC Series 1260 Infinity II FLD User Manual...
- Page 279 (ERI) boot main remote boot-resident cables UV degradation specification remove physical doors specifications repairs analog outputs cautions and warnings voltage range communications correction leaks flow cell replacing firmware Agilent InfinityLab LC Series 1260 Infinity II FLD User Manual...
- Page 280 Index warnings and cautions waste electrical and electronic equipment wavelength calibration procedure 184, wavelength calibration wavelength shift of spectra wavelength recalibration WEEE directive weight xenon flash lamp Agilent InfinityLab LC Series 1260 Infinity II FLD User Manual...
- Page 281 Index Agilent InfinityLab LC Series 1260 Infinity II FLD User Manual...
- Page 282 • introduction and specifications, • using and optimizing, • troubleshooting and diagnose, • maintenance, • parts identification, • hardware information, • safety and related information. © Agilent Technologies 2016-2018 Printed in Germany 08/2018 *G7121-90000* *G7121-90000* G7121-90000 Rev. B Agilent Technologies...