
Related Manuals for ResMed Elisee 350


Summary of Contents for ResMed Elisee 350
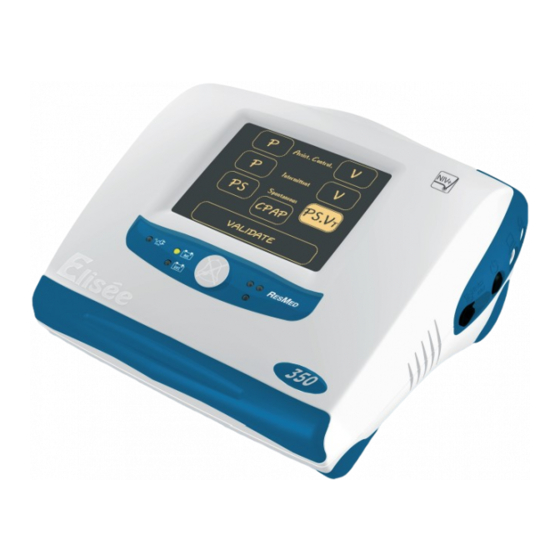
- Page 1 Elisée™ 350 Clinical Manual English Respiratory Care solutions Making quality of care easy...
- Page 2 Respiratory Care solutions Making quality of care easy...
- Page 3 Foreword Definitions This manual contains special terms and icons that appear in the margins. Their purpose is to draw your attention to specific or important information. CAUTION Explains special measures for the safe and effective use of the ventilator. WARNING Alerts you to possible injury.
-
Page 5: Table Of Contents
Table of contents 1 Safety instructions....................... 1 2 Introduction ......................... 5 2.1 Field of application 2.2 Features at a glance 2.3 Overview 2.4 Power supplies 2.5 Air inlet 2.6 High-pressure oxygen port 2.7 Low-pressure oxygen port 2.8 Standard pneumatic nebuliser 2.9 Accessories 3 Ventilation........................ -
Page 7: Safety Instructions
This manual is intended for use by physicians, HME providers and nursing staff. There is also a service manual for the ventilator, which is issued at ResMed training sessions. The Service Manual contains instructions for servicing the ventilator. It must be read and understood by the technicians responsible for servicing the ventilator. - Page 8 Use the specific power cord and the mains power pack supplied with the ventilator. The use of other mains power supplies may result in a risk to the patient. • ResMed does not guarantee the operation of the ventilator when powered by a wheelchair battery. •...
- Page 9 The replacement fuses must have the same specifications and standards as the original fuses. • Upon request, ResMed can provide information on the methods used during production and delivery to ensure the cleanliness of the components of the respiratory system. Transport and storage •...
- Page 10 4/102 NOT013281-8...
-
Page 11: Introduction
2 Introduction 2.1 Field of application This ventilator is intended for use exclusively by health care professionals. The Elisée 350 is a dual-mode ventilator, capable of delivering pressure-based or volume-based, invasive or non-invasive ventilation to adult or paediatric patients (above 5 kg [11 lbs]). It is not designed for neonatal ventilation. -
Page 12: Features At A Glance
2.2 Features at a glance Features for emergency situations and in-hospital transport The Elisée 350 comes with an ergonomic transport bag, which makes it possible to attach the ventilator securely to the vehicle. The ventilator may be used at an altitude of up to 4000 metres (13,123 feet). High-pressure and low-pressure oxygen supplies and FiO measurement The Elisée 350 enables the enrichment of insufflated gases with high-pressure oxygen (240 to... -
Page 13: Overview
2.3 Overview Top view Touch screen (for setting and viewing the various parameters) Data exchange LED (flashes green during data transfer via the serial port) Bluetooth LED (shows a continuous blue light Handle when a connection is established) Power supplies: (for details, see table on page 47) Mains or external power supply Internal battery LED (charge status) - Page 14 Patient circuit connection modules One of two modules can be connected to the left-hand side of the ventilator: • The single circuit support, which has connectors for the expiratory valve control tube and the proximal pressure line • The double circuit support, commonly known as the expiratory valve. This removable support has an external clapper where the expiratory limb of the circuit is connected.
-
Page 15: Power Supplies
CAUTION Only power supplies or power cords designed and distributed by ResMed should be connected to the ventilator. Note: In the event of a loss of mains power, an audible and visual alarm is activated. It can be stopped by pressing the Alarm Silence button. - Page 16 • The mains power pack, using the external power cord • A DC power supply connected to the Elisée via the ResMed cigarette lighter connector. CAUTION Only power supplies able to deliver 12 28 V / 15 A can be connected through the DC power –...
-
Page 17: Air Inlet
3 External battery pack Like the mains power pack, the external battery pack is housed in the compartment located on the underside of the ventilator. When available, this power supply is used in preference to the internal battery. Underside view Top view During ventilation, the battery will be recharged if the voltage is higher than 20 V. -
Page 18: High-Pressure Oxygen Port
2.6 High-pressure oxygen port The high-pressure oxygen port accepts oxygen at a pressure of between 240 kPa and 700 kPa. When high-pressure oxygen is in use, it replaces ambient air as the ventilator’s air supply. High-pressure O port with high- pressure O hose inserted 2.7 Low-pressure oxygen port... -
Page 19: Accessories
2.9 Accessories Below is a non-exhaustive list of accessories available for use with the Elisée 350. Refer to the ResMed website (www.resmed.com) for more details (see “Technical specifications for accessories” on page 94 for the connection path). Mains power pack... - Page 20 14/102 NOT013281-8...
-
Page 21: Ventilation
3 Ventilation 3.1 Ventilation parameters Pressure Support and Inspiratory Pressure Pi (cm H Pressure support is the pressure delivered by the ventilator in addition to the target PEEP during inspiratory phases in Pressure Support mode (PS on the graph below). In P(A)CV mode, the pressure added during the inspiratory phase is known as inspiratory pressure, or Pi. - Page 22 Plateau time (s) The period of time at the end of the inspiratory phase, during which there is no flow and the inspiratory and expiratory valves are closed. Inspiratory time Tinsp (s) The length of the inspiratory phase, corresponding to the total of the insufflation time plus the plateau time.
- Page 23 Influence of the choice of flow shape in ACV mode with the I:E ratio or the Ti set In this case, the flow decreases at the rate of one of four downward gradients: 2, 3, 4 or 5. 5: Max. flow = constant flow + 100% 4: Max.
- Page 24 Tidal volume V (mL) The volume of air insufflated to the patient by the ventilator (V ), and the volume of air exhaled by the patient (V Rise time The time it takes the ventilator to reach the set pressure. Four rise times are available, ranging from 1 (shortest rise time, 100 ms depending on ventilation) to 4 (longest rise time, up to 600 ms, depending on ventilation).
- Page 25 TgI(P) t (s) t (s) Non-invasive inspiratory trigger TgI: Operates with a single or double circuit It is activated according to the amplitude of the pressure variation when the patient makes an inspiratory effort. Activation of the trigger is based on several algorithms, making it possible to detect the patient’s inspiratory effort, regardless of whether the patient’s respiratory rate is rapid or slow.
-
Page 26: Ventilation Modes
• In manual mode (%): The expiratory trigger is expressed as a percentage of the maximum flow. The expiratory phase is triggered when the decreasing flow reaches the set flow percentage value. Vmax TgE = 40% TgE = 25% TgE = 10% 3.2 Ventilation modes The Elisée 350 offers seven ventilation modes: •... - Page 27 Cycling occurs at the end of the inspiratory time (Ti) set by the user. For volume modes only, Ti ° is set either directly by means of the Ti setting, or indirectly by means of the I:E or max settings, see “Selecting target parameters in ACV mode (during ventilation and while ventilation is stopped)”...
- Page 28 WARNING In P(A)CV, the flow is adjusted so that a constant pressure is maintained. Consequently, the volume delivered may vary depending on compliance and resistance. It is therefore important to monitor the inspiratory and, in particular, the expiratory volumes through the min.
- Page 29 Synchronized Intermittent Mandatory Ventilation (SIMV and PSIMV) These ventilation modes allow you to alternate between: • Assisted ventilation cycles that are either flow-controlled (SIMV) or pressure-controlled (PSIMV) • Cycles that allow the patient to produce spontaneous breaths with pressure support (PS). They are generally used to wean patients off ventilation and help them regain respiratory independence.
- Page 30 Triggering of (assisted) controlled cycles or spontaneous cycles with pressure support: • If there is no patient effort (patient-initiated breath) during the Wsync window, at the end of the Wsync period the Elisée 350 delivers a controlled cycle (CC) based on the respiratory rate F set on the ventilator.
- Page 31 Adjustable parameters (SIMV) Adjustable parameters (PSIMV) Ti Max Ti Max Rise time Rise time Inspiratory pressure and flow triggers Inspiratory pressure and flow triggers Expiratory trigger Expiratory trigger Tplateau Spontaneous ventilation The Elisée 350 has two spontaneous ventilation modes: • Standard pressure support (PS mode) •...
- Page 32 Expiratory phase The device cycles into the expiratory phase: 1. When the expiratory trigger setting is reached. The setting may be: • Based on the percentage of the maximum flow (Scenario 1, see figure) • Based on the intersection of the flow curve with the 2.3 s line (Scenario 2). 2.
- Page 33 Inspiratory phase The beginning of each cycle is triggered by the patient (through the flow or pressure trigger) or by the user (by pressing the Manual breath button). In PS.V mode, you can set an apnea time, at the end of which the ventilator switches to apnea ventilation if the patient does not trigger a cycle.
- Page 34 CAUTION Under certain conditions, the minimum V cannot be delivered: • When the delivered pressure reaches the Pmax value • When certain parameter settings are reached (Low Ti, Low PS and High V Expiratory phase When the cycle is entirely spontaneous (the device does not switch to volume-controlled mode), cycling to expiration occurs in the same way as in pressure support mode (see page 25).
-
Page 35: Ventilation Settings And Measurements
Set CPAP t (s) t (s) 3.3 Ventilation settings and measurements Ventilation parameters must be determined and set under the supervision of a physician or other competent and trained personnel. Ventilation settings Adult ventilation settings Ventilation type Default Setting Precision of INVASIVE NON-INVASIVE value... - Page 36 Ventilation type Default Setting Precision of INVASIVE NON-INVASIVE value Increment* set values Parameter Min. Max. Min. Max. Recruitment pressure ± (cm H Nebulisation duration (min) Ti/60 Nebuliser flow (L/min) * The setting increment may vary depending on the parameter value. For example, for tidal volume (V ), the values increase/ decrease by 10 between 300 mL and 1000 mL and by 100 between 1000 mL and 2000 mL.
- Page 37 Triggers used with a double circuit : Non-invasive ventilation; : Invasive ventilation Default values Minimum Maximum Increment Paediatric Adult Paediatric Adult Paediatric Adult Inspiratory 5.9/NO 5.9/NO pressure PACV trigger (cm H PS.Vt SIMV PSIMV Inspiratory 9.9/NO 9.9/NO flow trigger PACV (L/min) 10.0 10.0...
- Page 38 Measurements Actual Precision of Measurements (unit) Range measurement displayed values accuracy PEEP (cm H 0–100 ± 5% or 0.5 cm H ± Pplat 0–100 5% or 0.5 cm H Pmean (cm H 0–100 ± 5% or 0.5 cm H Ppeak (cm H 0–100 ±...
- Page 39 Implicit parameter limits Minimum value Maximum value ° Adult 10 L/min 120 L/min Maximum flow ( max) Paediatric 5 L/min 40 L/min 0.3 s 3.0 s 1:0.4 1:9.9 0.45 s Limitation of the total inspiratory pressure The upper limit of the total inspiratory pressure is: PS (or Pi) + PEEP = 60 cm H O or Precruit.
- Page 40 For ventilation in pressure-based modes Inspiratory Expiratory Pi/PS PEEP trigger trigger ° ° PEEP Ppeak Pplat Pmean 34/102 NOT013281-8...
-
Page 41: Setting Up
4 Setting up 4.1 Power supplies Mains power pack (housed in the compartment under the ventilator) CAUTION • Before installing the mains power pack, disconnect the power cord. • Use only the power pack and the specific cord supplied with the ventilator. Connecting the device to mains power enables you to recharge the internal battery. - Page 42 External power supply from a vehicle 1. Connect the 12–28 V DC power cord to the connector on the ventilator. 2. Plug the power cord with the ResMed cigarette lighter adapter attached into the cigarette lighter. External battery pack This is fitted and removed in the same way as the mains power pack. We recommend you remove the external battery pack when the ventilator is switched off.
-
Page 43: Patient Circuits
4.2 Patient circuits The Elisée 350 can be operated with a single or double circuit, and has the option of an interchangeable expiratory valve system. The Elisée 350 can be used with circuits of the following diameters: • 15 mm for ventilation with a tidal volume between 50 and 300 mL (“paediatric” circuits) •... -
Page 44: Oxygen
WARNING Set a V alarm threshold based on the measured expiratory volumes. Single circuit 1. Connect the expiratory valve control tube. 2. Connect the proximal pressure line by pushing the tube onto the notched connector. Depending on the circuit used, it may be necessary to cut off the nozzle of the proximal pressure line. - Page 45 5. Plug the connector into the sensor. 6. Cover the sensor with the protective cap. 7. Switch the ventilator on, and perform a manual test to calibrate the sensor (see “3 Manual test” on page 48). If the message “REPLACE O CELL”...
-
Page 46: Other Accessories
1. Insert the metal coupling. 2. Connect the oxygen tube to the ventilator. 4.4 Other accessories In addition to the patient circuit, the user can use a humidification system, an antibacterial filter or a nebulisation system. Any circuit can be used with the Elisée 350, whether single or double, with or without water traps, reusable or single-use, as long as it has the same technical specifications as the recommended circuit (see “Technical specifications for accessories”... - Page 47 Active humidification system A humidification system makes it possible to increase the amount of moisture in the air delivered to the patient. Set up the heater base and connect it to a power supply in accordance with the manufacturer’s instructions. Note: If a heated circuit is being used with a humidification system, connect it to a power supply, then wait 15 minutes before performing a manual test so that the temperature and humidity can stabilise.
- Page 48 Trolley Mounting adapter 1. Use an Allen key to attach the mounting adapter to the Elisée 350. 2. Then connect the ventilator to the attachment groove on Support plate the trolley. 3. Swing the ventilator downwards so that it rests on the support plate.
- Page 49 Transport bracket system You can use this accessory to attach the ventilator, in its ergonomic transport bag, to a vertical pole in an emergency vehicle. For further details, refer to the user guide for this accessory. Setting up 43/102 NOT013281-8...
- Page 50 44/102 NOT013281-8...
-
Page 51: How To Use Elisée 350
5 How to use Elisée 350 5.1 General outline of operations The outline below shows the four steps involved in checking the ventilator before use, and all of its functions. Starting up, page 46 Checks before use, page 46 Checking the power supplies, page 47 Checking the patient circuit, page 48 Manual test, page 48 Testing the alarms, page 49... -
Page 52: Starting Up
5.2 Starting up When the ventilator is running on battery power 1. Press the button on the right-hand side of the device. The device performs its self-test, which includes: • Checking available power supplies • Setting the flow sensor offsets •... - Page 53 1 Checking the power supplies Three LEDs on the front of the device indicate the charging status of the power supplies, whether the ventilator is on standby or delivering ventilation. Power supply Symbol and LED status Meaning Mains power pack or Mains power pack or external DC supply (green LED, not flashing) external power...
- Page 54 2 Checking the patient circuit Before connecting the patient to the ventilator, check the whole of the patient circuit to eliminate any risk of leaks or defective parts. Check that: • The expiratory circuit support matches the circuit type: single or double •...
- Page 55 4. Cover the insufflation outlet on the ventilator, then Cancel press “Continue”. The ventilator measures the rate of leak, if any. Obstruct the inspiratory outlet ! When done, press: CONTINUER CONTINUER CONTINUE CONTINUE 5. Connect the patient circuit accessories, excluding the mask (the other end of the patient circuit should Cancel be left free), then press “Continue”.
-
Page 56: Recommendations For Use During Transport
5.4 Recommendations for use during transport During transport, we recommend using the ventilator in its ergonomic transport bag, which must be firmly attached to the vehicle. Before using the ventilator during transport, connect it to mains power for long enough to ensure that its internal and/or external batteries are charged. - Page 57 There are five steps involved in configuring the Elisée 350: • Selecting the ventilation type (Invasive or Non-invasive) • Selecting the patient type (Adult or Paediatric) • Selecting the ventilation mode • Setting the ventilation parameters • Setting the ventilation alarm thresholds. When all five steps are complete, patient ventilation can begin.
- Page 58 2 Setting ventilation parameters 1. Press the button for the parameter you wish to change (here, Ventil. Ventil. stop stop Parameters setting Cancel Cancel PEEP). info PEEP PEEP 2. Press to set the value, then press to confirm. Note: It is possible to change several parameter values in ┘HP 1:2.0 succession and confirm them all at once.
- Page 59 3 Setting alarm thresholds Ventil. Ventil. stop stop Parameters settings 1. Press info PEEP PEEP ┘HP 2. Press the value to be modified (here, Pmax = 50). 1:2.0 3. Press to set the value (a flashing message appears at <PE the top of the screen when the upper or lower limit is reached), then press to confirm.
-
Page 60: Pre-Programming Settings
There are two possible scenarios: • The pressure during inspiration exceeds the threshold. In this case, the Elisée 350 considers the respiratory circuit to be closed (circuit not disconnected), and consequently the Low Pressure alarm is not triggered. 100% e s s info Pmax = 22 cm H Pmax = 22 cm H 2 O... -
Page 61: Starting Ventilation
Ventil. Ventil. PROG. PROG. 4. Then press stop stop Select a menu Back info PRESET PRESET Custom Custom Setting Setting Config. Config. Option Option <PE Select one of the five available programs. Replace configuration: Back DEFAULT DEFAULT DEFAULT DEFAULT DEFAULT DEFAULT DEFAULT DEFAULT... -
Page 62: The Ventilator During Ventilation
5.8 The ventilator during ventilation Monitoring ventilation The curves screen appears as soon as ventilation is started: Patient type Current mode Power supply status Ventilation type Peak pressure Press to change the mode 100% O supply 100% Freeze-> Touch curves info Pressure curve Press to adjust... - Page 63 Freezing the curves The Frozen Curves function allows you to view the instantaneous values of the flow, pressure and volume measurements at a given point on a curve. 1. Press one of the curves. 100% Freeze->Touch curves info peak peak Ti Ti <PE <PE...
- Page 64 Respiratory mechanics parameters On the curves screen, two screens display the ventilatory mechanics parameters, which can be accessed using the (screen 2/4) button and the (screen 3/4) button. Plateau time Pressing the End-inspiratory pause button inserts a plateau time at the end of the inspiratory cycle, once the minimum tidal volume has been reached.
- Page 65 Manual breath (not available in CPAP mode) Pressing the Manual breath button immediately triggers an additional respiratory cycle. 1. Press screen 3/4 100% Freeze-> Touch curves info Manual Manual 2. Press to trigger an additional respiratory cycle. breath breath <PE <PE Manual Manual...
- Page 66 P0.1 (invasive ventilation only) Press the P0.1 button to calculate the occlusion pressure. The measurements are taken when the patient initiates a cycle. The negative pressure generated by the patient’s inspiratory effort is measured 0.1 seconds after inspiration is triggered. 1.
-
Page 67: Optional Settings
Sample log entries: MAXI MAXI The Maximum Pressure alarm was triggered at 11:47:14. 11 : 47: 14 The Minimum Tidal Volume alarm was stopped at 11:55:12. MINI MINI 11 : 55: 12 The High Pressure alarm threshold was changed (new value: 60 cm H »... - Page 68 Ventil. Ventil. stop stop Back info serial connection with computers or monitoring systems EasyView with ResMed’s EasyView software installed ViewLink • “ViewLink” to exchange information via the serial connection with monitoring systems compatible with Philips VueLink technology. <PE 62/102 NOT013281-8...
- Page 69 Calibrating the touch screen (while ventilation is stopped) This operation allows the user to readjust the reactive areas of the touch screen. 1. On the main screen, press and hold Last test the 18/06/10 TEST TEST Double circuit : PASS simultaneously until the calibration screen appears.
- Page 70 Note: Modifying any one of these parameters can change the ventilation settings. To adjust the four aforementioned parameters (BTPS correction, RC auto calcul., Low pressure oxygen input and target parameter): 1. After selecting one of the configuration types (New, Most MENU MENU Configuration...
-
Page 71: Using Oxygen
5.10 Using oxygen 1 High-pressure oxygen Before using high-pressure oxygen, check that: • The oxygen sensor is installed in the ventilator (see “Installing the oxygen sensor” on page 38) • The manual test was successful (which means that the oxygen sensor is working). See “3 Manual test”... -
Page 72: Using The Nebuliser
1. Press 100% to supply 100% FiO for two minutes. The 100% Freeze->Touch curves corresponding icon will flash. info 2. Press 100% again to interrupt the supply before the end of the two minutes. Note: You cannot interrupt the oxygen supply during the first peak peak four ventilation cycles, because this is the time required to... -
Page 73: Stopping Ventilation/Shutting Down The Ventilator
Setting the parameters (during ventilation and while ventilation is stopped) 1. After selecting one of the configuration types (New, Most MENU MENU Configuration Options ... Back Recent or Preset) on the main screen, press the button on the right-hand side of the device. Locked touch screen 2. - Page 74 Shutting down the ventilator 20 0 1. Press the button on the right-hand side of the ventilator. MENU MENU Configuration Options ... back 2. Press “Stop machine” for three seconds. Locked touch screen Pause (stop ventilation) <AI Stop machine The message “STOP IN PROGRESS” flashes, then the device <PE turns off.
-
Page 75: Alarms And Troubleshooting
6 Alarms and troubleshooting WARNINGS • You should check that the default thresholds set for activation of the alarms are appropriate before using the ventilator on a patient. • If you set the alarm thresholds at extreme levels you risk making the alarms system ineffective. -
Page 76: Alarm Types
6.2 Alarm types Type 1: Ventilation monitoring alarms If two alarms with different priority levels are triggered at the same time, the higher priority alarm takes precedence over the lower priority alarm. If two alarms with the same priority level are triggered at the same time, refer to the table under the heading “Relative alarm priorities”... - Page 77 Trigger Symbol Message Alarm Priority threshold [can Time to trigger be stopped?] MINI FIO Minimum FiO High – 10% Maximum of 20 consecutive cycles below alarm threshold [NO] MAXI FIO Maximum FiO High + 10% Maximum of 20 consecutive cycles above alarm threshold [NO] FAULT HP O...
-
Page 78: Alarm Priorities
Type 2: Technical alarms CAUTION If a technical alarm (TECH[n]) is triggered, stop ventilation and contact your technical department. Symbol Message Alarm Priority Solution TECH [n] Numbered technical alarm [n] Varies according to the Refer to the Service Manual for alarm number [n] detailed information on these alarms ADJUST... -
Page 79: Alarm Settings
Relative alarm priorities High-priority alarms Medium-priority alarms Low-priority alarms Highest priority LP – Low Flow? EXT BATT EMPTY NiMH battery LP – CIRCUIT OPEN INT BATT LOW EXT BATT MISSING MAXI P inspi LOW PEEP EXT BATT LOW FAULT PATIENT APNEA EXT MISSING MAXI LEAKS MAINS MISSING... -
Page 80: Alarm Testing Procedures
Default value Settings range Value: Minimum Maximum Increment Patient type: Child Adult Child Adult Child Adult 10 / NO NO / 10 1000 Mini Vte (mL) 1000 2300 Maxi Vti (mL) (Pressure- 1000 750 / NO 1000 controlled modes) 1000 2400 / NO Maxi Vti (mL) (Volume-controlled... - Page 81 Tests which apply to both single and double circuit alarms 1. Connect a patient circuit (single or double) fitted with a Maquet test lung to the ventilator and perform the manual test. 2. Set the mode to ACV, Adult. 3. Set the ventilation parameters as follows: °...
- Page 82 10. Start ventilation and perform the following actions: Audible Time the alarm Alarm Action Visual alert signal takes to trigger Trigger 4 inspiratory cycles Steady PATIENT APNEA Wait without triggering further inspiratory phases Flashing Sounding Tapnea Press the Alarm Silence button Set the FiO to 90% Flashing...
- Page 83 Tests for single circuit-only alarms 1. Connect a single patient circuit fitted with a Maquet test lung to the ventilator and perform the manual test. 2. Configure the device for ACV mode, adult ventilation, then set the ventilation parameters as follows: = 500 mL I:E = 1:2.0...
-
Page 84: Troubleshooting
6.6 Troubleshooting WARNING If, after trying these solutions, the activated alarm persists, turn the device off and contact your technician. Alarms that cannot be stopped Symbol Message Priority Cause Solution INT BATT EMPTY High Internal battery charge less than Change the power supply MINI FIO High Supplied FiO... - Page 85 Symbol Message Priority Cause Solution MAXI P INSPI High The pressure in the circuit is Check the alarm threshold is correctly set and higher than the High Pressure the patient’s airway is clear, and check the alarm threshold integrity of the patient circuit MAXI V/min The patient’s minute volume is Check the alarm threshold is correctly set and...
- Page 86 80/102 NOT013281-8...
-
Page 87: Maintenance And Disinfection
7 Maintenance and disinfection WARNING The device should be cleaned and disinfected before it is used for the first time, and also between patients. The disinfection of the ventilator must be carried out as stated in the manufacturer’s instructions and in accordance with the current protocol of the health care institution. Service personnel must be familiar with cleaning and disinfection protocols as well as the precautions required for certain materials. -
Page 88: List Of Cleaning/Replacement Tasks
If the antibacterial filter is used to protect against bacteria and viruses, it should be inserted in the inspiratory limb of the patient circuit. It should be changed as directed by the manufacturer. Note: ResMed recommends the use of a proximal antibacterial filter in accordance with the practices in effect in the hospital. - Page 89 Cold disinfection See the following paragraph Cold disinfection protocol ResMed recommends the disinfection of the double circuit expiratory valve according to the following protocol. This protocol allows cleaning, pre-disinfection, and complete cold disinfection through two cycles. Proceed as follows: 1. Disassemble the expiratory valve and throw away the valve clapper.
- Page 90 3 Reassembly 1. After autoclaving or disinfecting the expiratory valve, place a clapper in the holder so that the side with a number on it is visible, as in the figure opposite. 2. Line up the three notches with the locking nibs and push firmly.
- Page 91 Disassembly 1. Switch off the ventilator. 2. Prepare the new oxygen sensor: • Check the expiry date (month and year) on the sensor packaging; it can be installed at any time before the date on the label. • Let the sensor sit in ambient air for 15 minutes. Protective cap 3.
-
Page 92: Preventative Maintenance
Ventilator casing Clean the outside of the device with a dry cloth or, if necessary, with a damp sponge. WARNING • The ventilator may be disinfected using current procedures approved by your service centre. However, users are strongly advised not to use abrasive powders or solvents. •... -
Page 93: Technical Specifications
8 Technical specifications 8.1 Technical description and operation CAUTION This section is intended for qualified technicians trained by ResMed. Technical description The Elisée 350 is a volumetric and barometric ventilator. The air flow is generated by a turbine from ambient air flowing through the air inlet. The Elisée 350 can therefore operate without a pressurised air supply. - Page 94 The pressurised air assembly also contains integrated sensors to monitor ventilation: Sensors Measurement range Proximal pressure sensor (Paw) 0–100 cm H Proximal pressure sensor for pressure triggering (Ptg). This sensor is more precise than the Paw -10 cm H O – +40 cm H sensor.
- Page 95 Block diagram of Elisée 350 with single circuit Expiratory Patient valve Proximal pressure line Cleaning solenoid valve sensor Expiratory Spontaneous Inspiratory flow Ptg trigger flow sensor inspiration Vi sensor sensor valve Pout sensor Printed circuit board Stepper motor Rotary valve Optical sensor Internal I/E solenoid...
-
Page 96: Elisée 350 Technical Specifications
8.2 Elisée 350 technical specifications Dimensions and weight • Dimensions: 290 x 250 x 130 mm (11” x 10” x 5”) • Weight of the ventilator: 4.15 kg (9.1 lbs) • Weight of the mains power pack: 0.45 kg (1 lb) •... - Page 97 External power supply ( ) • Female power socket FRB DB315 • 12 to 28 V DC / 15 A max. RS232 serial link socket ( ResMed-specific equipment. 1: TXD 2: RXD 3: GND 4: +5V 5: Digital input/output (0/5 V)
- Page 98 Pressurised air specifications High-pressure oxygen port: 240–700 kPa, 150 L/min maximum Low-pressure oxygen port: 400 kPa, 15 L/min maximum Pressurised air interface: • High-pressure oxygen: Female connector (built-in) Male connector (cord) • Low-pressure oxygen: Female connector (built-in): 1.8 NPT thread with clapper. CPC product code: MCD10-02. Male connector (cord): CPC product code: MC22-03.
- Page 99 Conditions for transport when not delivering ventilation When returning to the service centre, the ventilator and its accessories must be transported inside the ResMed packaging. They must be transported in the following conditions: • Storage temperature: -10°C to +50°C (14 to 122°F) •...
-
Page 100: Technical Specifications For Accessories
The Elisée 350 may be used during transport up to an altitude of 4000 metres (13,123 feet). • If the ventilator is to be used during transport, it should remain inside its ResMed bag. • For indoor transport on a gurney or for attachment to a bed rail, the mounting bracket can be used. - Page 101 Any brand of nebuliser may be used, provided it is able to function at a maximum pressure of 200 kPa and a maximum flow rate of 20 L/min. Dust filter ResMed-specific equipment. Note: The manufacturer accepts no liability for damage to the device caused by the use of a filter which does not comply with the recommendations.
-
Page 102: Operating Symbols And Abbreviations
8.4 Operating symbols and abbreviations Symbols displayed on the screen Power supply symbols External DC power supply Mains power Internal battery External battery None None Flat Approx. internal battery charge Approx. external battery charge Battery full Battery full Battery full Battery full Ventilation symbols Ventilation type... -
Page 103: Symbols On The Device Casing
Abbreviation Definition Abbreviation Definition ° Nebul. Nebulisation Maximum flow Custom. Setting Customised Setting PACV Pressure Assisted Volume-Controlled Ventilation Pressure PSIMV Pressure-Synchronised Intermittent Mandatory Ventilation P1 to P5 Ventilation programs P1 to P5 Volume Param Parameter Spontaneous ventilation PEEP Positive End Expiratory Pressure Tidal volume Inspiratory pressure Expired tidal volume... -
Page 104: Applicable Standards
8.6 Applicable standards This ventilator complies with the following standards: • IEC 60601-1: Medical electrical equipment – Part 1: General requirements for basic safety and essential performance • IEC 60601-1-2: Medical electrical equipment – Part 1-2: General requirements for basic safety and essential performance: Collateral standard: Electromagnetic compatibility –... - Page 105 Guidance and manufacturer’s declaration – electromagnetic immunity The Elisée 350 is intended for use in the electromagnetic environment specified below. The client or user of the Elisée 350 should ensure that it is used only in such an environment. IEC 60601-1-2 Electromagnetic environment Immunity test Compliance level...
- Page 106 Note 1: U is the voltage of the AC network, prior to application of the test level, included between 100 and 240 VAC. Note 2: At 80 MHz and 800 MHz, the higher frequency range applies. Note 3: It is possible that these guidelines do not apply in all situations. Electromagnetic propagation is affected by absorption and reflection from structures, objects, and people.
-
Page 107: Index
Index Numerics 100% O2 supply I:E ratio Implicit (calculated) parameters Inspiratory flow Inspiratory trigger Adjustable touch screen Insufflation time Alarms Internal battery 9, 11, 35 Relative priorities 73 Settings 73 Specifications 90 Invasive inspiratory trigger Testing procedures 74 Antibacterial filter Flow 18 13, 82 Pressure 18... - Page 108 Self-test Serial port Single circuit support Storage conditions Tapnea Target parameters in ACV mode Tidal volume Touch screen sound Transport bag Transport conditions Trolley Support plate 42 Ventilation parameters Setting 52 Volume level Weight 102/102 NOT013281-8...
- Page 109 Respiratory Care solutions Making quality of care easy...
- Page 110 AU 2004224573, CA 2242882, CN 200480007797.2, FR 2766568, FR 2812203, FR 2852853, FR 2889812, EP 0893673, EP 1177810, JP 4060449, JP 4591443, JP 4689893, NZ 543179, NZ 566148, US 6164141, US 6722356, US 7905231. Others patents pending. Elisée is a trademark of ResMed Paris and is registered in the U.S.