Table of Contents

Related Manuals for Daikin AVV


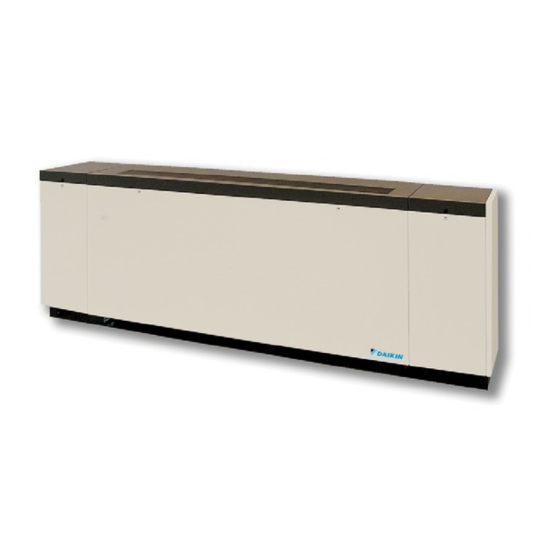
Summary of Contents for Daikin AVV
- Page 1 Installation and Maintenance Manual IM 817-7 Group: WSHP Document PN: 9102047358 Date: October 2018 Daikin Classroom Unit Ventilators Floor Models AVS, AVV, AVB and AVR Digital Ready, MicroTech Control (“J” Vintage) ® Field Controls by Others...
-
Page 2: Table Of Contents
MicroTech Unit Mounted DDC Control Components – Models AVS, AVV, and AVR....40 Pre-Installation Information . . . . . . . . . . . . . . . . . . . . . 5 Typical MicroTech Wiring –... -
Page 3: General Data
eneral Model Nomenclature Category Code Item Code Option Code Designation & Description Product Category Unit Ventilators Floor, Face & Bypass Floor, Valve Control Model Type Floor, Face & Bypass, Reheat Floor, Valve Control, Reheat Design Series Design J PSC Motor, 3-Speed EC Motor, Variable Airflow Motor Type EC Motor, 3-Speed... -
Page 4: Receiving & Handling
eneral Model Nomenclature (continued) Category Code Item Code Option Code Designation & Description Return Air Bottom Front/ Outdoor Air Rear Return Air/Outside 18-19 Recirculation Only/ No OA or RA Dampers Return Air Bottom with Draft Stop/ OA Rear Power Connection Box With Switch Antique Ivory Soft Gray... -
Page 5: Pre-Installation Information
Pre-Installation Information practices that can result in personal injury or product and property damage. • Before beginning installation, please read this Improper installation, adjustment, service, maintenance, publication in its entirety. or use can cause explosion, fire, electrical shock, or • Directions given in this bulletin for right and left sides other conditions which may result in personal injury or assume a position facing the indoor side of the unit property damage. -
Page 6: Properly Identify Unit Ventilator(S)
Figure 1 on page 4) located on the lower right end Vertical Floor Models AVS, AVV, AVB, AVR are typically of the unit ventilator, contains specific information of installed in front of a wall opening containing a properly... -
Page 7: Installing Louvers
Installing Louvers Louver Details Figure 6: Horizontal and Vertical Blade Louvers, Without Flange, (see Caution below for louver blade orientation and drainage) Bird Screen On Side Toward Unit Outside Air Bottom Outside Air Horizontal Blade Louver Vertical Blade Louver Figure 7: Horizontal and Vertical Blade Louvers, Without Flanges With Grille or With Flange Without Grille Vertical Louver with Flange, without Grille Flange Outside Air... -
Page 8: Louver Installation With Typical Unit Configurations
Louver Installation With Typical Figure 11: Above Floor Level Outdoor Air Intake Using Arrangement AV or AL With Accessory Closed Pipe Tunnel Unit Configurations Lintel (By Others) Unit Configuration Type AL Insulated Closure Plate Accessory Piping Intake Louver Not Less Than 3" Figure 9: The 16-5/8"... - Page 9 Unit with Closed Pipe Tunnel, Ducted with Top Intake Window Sash Figure 13: 21-7/8" (556mm) Deep Full Adapter Back Unit With Standard Louver Application “Goose Neck” Insulated Duct (By Others) Intake Louver Duct Collar (By Daikin) Piping Piping Lintel (By Others) Piping Piping...
-
Page 10: Typical Installation Methods
Typical Installation Methods Figure 17: Typical Louver Installation with Sloping Sealed Cement Mortar Base If the fresh air opening has not yet been made, see Figure 9 on page 8 through Figure 16 for the recommended locations and the job-specific plans for the exact location. Wall Follow local codes. -
Page 11: Installing The Ventimatic Shutter Assembly
fastening it to the exterior of the building using fasteners Figure 21: Vertical or Horizontal Blade Wall Intake Louver (Recessed Without Flange) (Horizontal Blade Shown) (by others) appropriate to the installation. Seal the top and sides with a waterproof caulk to make it weather-tight. Do Lintels (By Others) not caulk the bottom of the louver;... -
Page 12: Before Setting The Unit In Place
Removing Unit from the Skid Figure 23: Single VentiMatic Shutter & Wall Louver Remove fasteners at each end which hold the unit to the Aluminum Wall Louver 2.14" 51mm Assembly With Bird Screen skid and carefully slide the front of the unit off the skid (See Note 1) (1). -
Page 13: Mounting Holes, Piping And Electrical Knockout Locations & Dimensions
Mounting Holes, Piping and DANGER Electrical Knockout Locations & Disconnect all electrical power before servicing unit to prevent Dimensions injury or death due to electrical shock. Figure 26: Front View with End Panels - Mounting Holes Locations CAUTION Personal injury hazard. Wear protective gloves to avoid possible cuts and abrasions from exposed edges. - Page 14 Figure 30: Low End of Drain Pan (Drain End) Figure 31: High End of Drain Pan 1/4" hex head screws 1/4" hex head screws Shallow Upper Plate Drain Pan Deep Upper Plate Deep Lower Bracket Shallow Lower Bracket Standard Drain Connection Standard Drain Connection To Clean the Drain Pan...
-
Page 15: Typical Floor Unit Installation
Typical Floor Unit Installation Figure 32: Typical Classroom Unit Ventilator Installation And Louver Details (see installation section for typical warnings and cautions) Internal Column For Screws or Bolts (by others) Wall Bracing (By Others) Pipe Tunnel Unit Gasket 1" End Panel w/Cut Out Lintel (by others) Weep Holes Unit Gasket... -
Page 16: Unit Ventilator Installation
Unit Ventilator Installation Figure 36: Shipping Envelope Contents. Before setting the unit ventilator in position, be sure that field-supplied electrical connections are in place, de- energized and in accordance with the plans. Move the unit ventilator into position against the wall surface. -
Page 17: Water Coil Connections
Ensure proper insulation of supply and return piping. Figure 39: Protect Components From Overheating Before Brazing Proper insulation prevents loss of unit ventilator capacity, overheating of end compartment, and / or moisture dripping. The piping to and from the unit must be protected from outside air and freeze conditions. -
Page 18: Coil Headers, Locations
Note: This arrangement available on AVV units only. Heating Only Units Right Hand Figure 41: Hot Water Only Unit (Coils 65, 66, 67) Air Flow Note: This arrangement available on AVV and AVS units only. Left Hand Right Hand Air Flow Air Flow... -
Page 19: Cooling Only Units
Figure 47: Condensate Drain Cooling Only Units Left Hand Right Hand Figure 45: Chilled Water Only Unit (Coils V, S, W) Note: This arrangement available on AVV and AVS units only. Left Hand Right Hand 7/8"(22 mm) 7/8"(22 mm) Condensate O.D. -
Page 20: Heat/Cool Units
Heating (Left Hand) Heating (Right Hand) Heating (Left Hand) Heating (Right Hand) Air Flow Air Flow Air Flow Air Flow S = Supply R = Return Vent Vent Coil Headers, Locations (continued) Direct Expansion and Steam Unit Note: For opposite end drain steam coils (code 78, 79) 10-1/8"... - Page 21 Chilled Water and Electric Heating Coils Direct Expansion and Electric Heating Unit Figure 57: Chilled Water (1st Position) and Electric Heating Figure 58: Direct Expansion (1st Position) and Electric (Cooling Coils V[5], S[6], W[7]), (Heating Coils 12, 13) Heating (Cooling Coils G[9]), (Heating Coils 12, 13) Cooling (Left Hand) Cooling (Left Hand) Air Flow...
-
Page 22: Reheat Units
Reheat Units Direct Expansion and Steam Unit Note: For opposite end drain steam coils (code 78, 79) Chilled Water and Hot Water Unit Return (R) is 7¼” (184mm) from bottom of unit and Note: Numerical codes [#] denote optional stainless steel drain (H) 2”... -
Page 23: Typical Valve Packages
Typical Valve Packages Face & Bypass End of Cycle Valves 2-Way End of Cylce Valve The optional factory-supplied Daikin Control Valve(s) for water applications are either 2-way or 3-way type, and are shipped separate from the unit ventilator itself to help... - Page 24 Figure 69: 2-Way EOC Valve Dimensions Figure 71: 2-Way EOC Steam Valve Dimensions Connection Connection 3/4" (19mm) " " (24mm) 3⅝" (92mm) 1" (25mm) FNPT 1⅞" (47mm) 1" (25mm) " (94mm) FNPT (43mm) 3-Way End of Cylce Valve Table 10: EOC Actuator Specifications Control 2 Position Electrical...
- Page 25 2-Way Modulating Valve (Chilled Water, Table 12: 2-Way Actuator Specifications (CW, HW, CW/HW) Hot Water or Combination) Power Supply 24 VAC, ±20%, 50/60 Hz, 24 VDC, ±10% 3ft [1m], 18 GA plenum cable with 1/2” Electrical Connection conduit connector Overload Protection electronic throughout 0°...
- Page 26 2-Way Modulating Valve (Steam) - 1/2" Table 16: 2-Way Actuator Specifications (Steam) Power Supply 24 VAC ± 20%, 50/60 Hz, 24 VDC ± 10% 3ft [1m], 18 GA plenum cable with 1/2" Electrical Connection conduit connector" Overload Protection electronic throughout 0° to 95° rotation 2 to 10 VDC, 4 to 20 mA w/ ZG-R01 (500 Operating Range Y Ω, 1/4 W resistor)
- Page 27 2-Way Modulating Valve (Steam) - 3/4" Table 20: Actuator Specifications Power Supply 24 VAC ± 20%, 50/60 Hz, 24 VDC ± 10% 3ft [1m], 18 GA plenum cable with 1/2” Electrical Connection conduit connector Overload Protection electronic throughout 0° to 95° rotation 100 k Ω...
- Page 28 3-Way Modulating Valve (Chilled Water, Hot Table 24: 3-Way Actuator Specifications (CW, HW, CW/HW) Water or Combination) Power Supply 24 VAC, ±20%, 50/60 Hz, 24 VDC, ±10% 3ft [1m], 18 GA plenum cable with 1/2" Electrical Connection conduit connector Overload Protection electronic throughout 0°...
-
Page 29: 2-Way And 3-Way Hot Water And Chilled Water Modulating Valve Selection
Steam Modulating Valve Selection Obtain the supply steam inlet pressure. Determine the actual heat requirement of the space The steam modulating control valve is expected to vary to be heated. the quantity of steam through the coil. Any movement of the valve stem should produce some change in the steam flow rate. -
Page 30: Typical Piping Arrangements
Balancing Bypass Valve piping connections. Refer to Daikin factory instruction Supply sheet shipped with the unit for port orientation and a piping schematic. Control valves must be installed on the units 3-way EOC Valve Union in which they are shipped. -
Page 31: Cooling - Chilled Water Eoc Valve Piping
Two-way, End of Cycle two-position valve (Daikin) Union: Half attached to coil, half attached to valve Modulating control valve (Daikin) All piping, fittings and unions by others (not Daikin except as noted) Steam check valve and pressure equalizing line (Daikin) -
Page 32: Steam - Typical Modulating Valve Piping
Steam – Typical Modulating Valve Figure 83: Same End Connections – Model AV 68/69 Coils Piping The optional factory supplied Daikin controls with a 2-way Modulating steam valve is furnished normally open to the coil. When the valve is de-energized (off) there is full flow through the coil. -
Page 33: Typical Steam Coil Piping
Unions (by others), must disconnect below floor line Two-way, End of Cycle two-position valve (Daikin) Union: Half attached to coil, half attached to valve Modulating control valve (Daikin) All piping, fittings and unions by others (not Daikin Left End View Right End View except as noted) -
Page 34: Heating - Modulating Valve Piping
Hot water connections may be same end as cooling coil connections, but are recommended to be opposite end Return to facilitate piping. When using Daikin Applied MicroTech controls, they must be opposite end. The modulating Balancing and Shutoff Valve valve accessory must be field installed on the unit for which it was selected. -
Page 35: Cooling - Chilled Water Modulating
Cooling – Chilled Water Modulating Figure 91: 2-Way Modulating, Normally Closed Chilled Water Valve Piping Valve Piping 2-way Modulating, Normally Closed, Chilled Water Valve Piping (typical) The 2-way Modulating chilled water valve is furnished normally closed to the coil. When the valve is de-energized (off) there is no flow through the coil. -
Page 36: Condensate Piping
Condensate Piping: NOTICE Daikin cooling unit ventilators are designed for Ensure refrigerant pressure taps are installed in piping end condensate removal into a condensate disposal compartment for proper charging and setting of the TXV valve. -
Page 37: Unit Ventilator Split Systems Guidelines
Unit Ventilator Split Systems Figure 95: Typical Piping and Wiring for Split System Weatherproof Fused Disconnect Per NEC Guidelines 2 Wires (+) Ground The following provides basic guidelines that will provide proper system cooling and operation of an R-410 commercial DX/hot water system for school applications. DX system components must be matched and sized correctly (not oversized) for the load. -
Page 38: Checking System Charge
Table 31: Dimensions, DX Tubing inches (mm) In windy areas, add wind baffles to condensing unit or • build a parapet (eliminate wind effect on condensing unit Models AVS, AVV, Suction Line O .D . Liquid Line O .D . AVB, AVR coil for proper TXV refrigerant flow at lower ambient) 3/4"... -
Page 39: Determining System Superheat
Figure 98: Typical Unit Ventilator/Condensing Unit Wiring Diagram Typical Condensing Unit Capacitor Head Motor Pressure Controller (Optional) Compressor Contactor Compressor High Pressure Switch Typical Unit Ventilator Interface Line Voltage Pressure Switch Low Ambient Temp. Switch Rec3 TDR or TB TDR = Time Delay Relay Factory Wired Field Wired (By Others) TB = Terminal Block... -
Page 40: Superheat Adjustment
Provided for field wiring of: Control Components – Models Remote Wall Mounted Temperature Sensor • AVS, AVV, and AVR (optional accessory) External Input Signals (by others) – • Note: Refer to Figure 101 on page 42. - Page 41 2 position “End of Cycle” expansion (DX) cooling coil. It is located on the right (AVS and AVB models) or modulating (AVV and AVR hand side of the coil “u-bend”. models), to control the quantity of water through the coil.
- Page 42 Figure 100: AV Top View Figure 101: MicroTech Sensor and Component Locations Front View Figure 102: MicroTech Control Board Note: If Installing Communication Module, refer to the installation instructions specific to that Communication Module. IM 817-7 www.DaikinApplied.com...
- Page 43 Economizer Control Capabilities Operating mode states • Fan functions Basic – Compares the inside and outside air temperatures using item 13 (Room Temperature • Room set point temperature Sensor) and item 15 (Outdoor Air Temperature Sensor) • Current room temperature to determine if outdoor air can be used for “free”, •...
-
Page 44: Typical Microtech Wiring - 115Volt / 60Hz / 1 Phase
Typical MicroTech Wiring – 115Volt / 60Hz / 1 Phase Note: See on page 45 for typical MicroTech service and disconnect wiring and wiring schematic legend. IM 817-7 www.DaikinApplied.com... - Page 45 External wiring options - see IM for the different configured options, wiring to be minimum 18 gauge, 90°C. 3. EC motors are factory programmed for specified air flow. Contact Daikin Applied for replacement. 4. Cap extra wire. Switch wire 42A to red wire for 208V operation.
-
Page 46: Microtech Unit Electrical Connections
Wire leads provided from unit ventilator electric High-Med.-Low-Off Motor Speed Switch connection box to load side of unit power switch (switch provided by Daikin). The junction box has 1"(25mm) and 2"(51mm) knockouts, located 10- 1/2"(267mm) from right end of unit. -
Page 47: Microtech Wall Mounted Sensor
MicroTech Wall Mounted Sensor Figure 107: Correct Wall Sensor Locations = Correct Sensor Location WARNING Window Exposure Window Exposure Rigorously adhere to field wiring procedures regarding proper lockout and tagout of components. Unit WARNING Interior Wall To avoid electrical shock, personal injury or death: Interior Wall 1. -
Page 48: Typical Connections For Temperature Sensor Applications
Sensor Functions CAUTION • Display sensor to show room Temperature, fan speed (AUTO/HIGH/MEDIUM/LOW), system mode (HEAT/COOL Static sensitive components. A static discharge while handling AUTO/OFF), ALARM, Override and occupancy. electronic circuit boards can cause damage to the components. Discharge any static electrical charge by touching the bare metal Mounting inside the main control panel before performing any service work. - Page 49 The mixing of room air and air from within the wall cavity can lead to condensation, erroneous readings and sensor failure. To prevent these conditions, Daikin recommends sealing the conduit leading to the junction box with fiberglass.
- Page 50 Table 37: Unit Ventilator MicroTech board to room temperature sensor wiring MicroTech Base Board Terminal Block Label H6-1 H6-2 H6-3 H6-4 H6-5 H6-6 H6-7 H6-8 Sensor 910247458 ● ● ○ ● ● ● ● ● ● Sensor 910247448 ● ● ●...
-
Page 51: Making Control Connections
Making Control Connections Low Air Temperature Limit (T6 - Freezestat): factory installed, cuts out below 38°F±2 °F and automatically resets above 45°F±2 °F. Responds Digital Ready™ – Face & Bypass when any 15% of the capillary length senses these Control Components Model AVS temperatures. - Page 52 Figure 112: Component Locations (Vertical Floor Unit Shown) Motor Outdoor Air Opening (Sensor) IM 817-7 www.DaikinApplied.com...
-
Page 53: Typical Wiring Diagram
ypiCal irinG iaGram Digital Ready Face and Bypass Control www.DaikinApplied.com IM 817-7... -
Page 54: Digital Ready Unit Mounted Temperature Sensor Specifications
Digital Ready Unit Mounted Figure 113: Sensor Locations Discharge Air Sensor Temperature Sensor Specifications A 10 K ohm Negative Temperature Coefficient (NTC) sensor and a 1 K ohm Positive Temperature Coefficient sensor is provided for the discharge air, outdoor air and room air temperature measurement. -
Page 55: Digital Ready - Damper Actuator Specifications
Digital Ready – Damper Actuator provides proportional damper control based on a 2 to 10 VDC input from the DDC Unit Ventilator Controller Specifications (UVC). A 4 to 20 mA input signal can be used with the field addition of a Belimo ZG-R01 (or equivalent) 500 Outdoor Air/Return Air Damper Actuator ohm resistor (by others). -
Page 56: Digital Ready Unit Electrical Connections
1. Wire leads provided from unit ventilator electric connection box to load side of unit power switch (switch provided by Daikin). The junction box has 1"(25mm) and 2"(51mm) knockouts, located 10- 1/2"(267mm) from right end of unit. -
Page 57: Controls By Others Components
Controls by Others Components CAUTION Daikin unit ventilators come with factory installed It is the responsibility of the Automatic Temperature Control components and wiring. It facilitates the field hookup of supplier to ensure the T6 freezestat is incorporated properly to controls by others, capable of providing the standard protect the unit. - Page 58 Controls by Others - Variable Making Control Connections For field provided control wiring connections refer to the Airflow appropriate control wiring schematic, page 59 page An optional EC motor with “variable fan speed control” allows a field provided DDC controller to modulate the Connect the field supplied controller to the harness unit airflow between 50% and 100% of nominal unit provided.
-
Page 59: Typical Controls By Others Wiring Diagram - Units With Optional Ec Motor With Variable Airflow
Typical operation is to wire from the TB-DX to a normally open relay with the relay closing on control call for cooling. For additional information, contact Daikin Applied Applications. 8. Motors are factory programmed for specified air flow. Contact Daikin Applied for replacement. -
Page 60: Control
Typical Controls by Others Wiring Diagram – Units with Optional EC Motor with Variable Airflow, Valve Control Figure 120: Variable Airflow 120V, 208/230, 265V 1 Phase, 60 Hz – Terminal Board for Field Controller, Valve Control Notes: 1. Make electrical installation in accordance with job wiring schematic complying with national and local electric codes. -
Page 61: Controls By Others - Field Installed
Controls by Others – Field Installed www.DaikinApplied.com IM 817-7... -
Page 62: Controls By Others - Electrical Connections
See Electric Heating on page 65, Table 40 on page connection box to load side of unit power switch Table 41. (switch provided by Daikin). The junction box has 1"(25mm) and 2"(51mm) knockouts, located 10- 1/2"(267mm) from right end of unit. - Page 63 Figure 122: Controls by Others Unit Power and Junction Box Connection Location Auto Transformer Fuses High-Med.-Low-Off Motor Speed Switch Switch Junction Box Terminal Strip Electric Power Wire Opening in Back of Box www.DaikinApplied.com IM 817-7...
-
Page 64: Electric Heat Wiring Diagram - Typical
Electric Heat Wiring Diagram – Typical Figure 123: 460 Volt, 60 Hz, 3 Phase IM 817-7 www.DaikinApplied.com... -
Page 65: Electric Heating
Rigorously adhere to field wiring procedures regarding proper lockout and tagout of components. Electric Heating Table 42: Standard Motor Electric Heat Capacities, Amps, Wire Sizing, and Over Current Protection AVS AVV AVS AVV AVS AVV AVS AVV Unit Type... - Page 66 Table 43: High Static Applications Electric Heat Capacities, Amps, Wire Sizing, and Over Current Protection AVS AVV AVS AVV AVS AVV AVS AVV Unit Type AVV AVR AVV AVR AVV AVR AVV AVR Number of Electric Elements 20.48 40.96 27.30 54.61...
-
Page 67: Draftstop™ System/Window Down-Draft Installation
Figure 124: Cabinet(s) Meeting Unit Ventilator (refer to the instructions specific to the installation, included with the cabinets) NOTICE Remove debris, dust, dirt, and any obstruction from the area in front of the return air intake grille at the floor (approximately 3' - see shaded area) as this will affect unit performance. - Page 68 Upper Channel or Backplate Assembly The “DraftStop” system can be employed even in those marginal applications to provide the occupants comfort Establish a level chalk line on the wall at a height without the material installation and operating cost specified for the top of the enclosure. Select penalty associated with “auxiliary radiation.”...
- Page 69 Table 45: 1″ (25mm) End Panel Dimensions – Floor Unit Table 46: 1″ (25mm) End Panel Dimensions – Non- Ventilators Standard 28″ Deep Floor Unit Ventilators " (422mm) All Dimensions All Dimensions " (556mm) Deep 28" (711mm) Deep End Panels Deep in Inches in Inches...
-
Page 70: Finned Radiation System
Finned Radiation System Table 47: 1″ (25mm) End Panel Dimensions – Non- Standard 28″ Deep Floor Unit Ventilators 6″ (152mm) End Finned radiation down-draft control is available for Panel Dimensions – Floor Unit Ventilators those who prefer it. Made of furniture-quality steel and "... -
Page 71: Installing Unit Ventilator End Panels
Installing Unit Ventilator End Panels: Figure 132: Install End Panels With Provided Hardware (6″ End Panel Shown) See Figure 130. Accessory end panels are shipped 1/4-20 x 1/2 Screw & 1/4 Flat Washer separately with hardware and kickplate, or simulated kickplate adhesive tape used on 16⅝"... -
Page 72: Prepare Unit Ventilator(S) For Start-Up
Prepare Unit Ventilator(s) for Figure 134: Oiling Point for 1500 cfm units Bearing Oiler Cap Start-up Remove Battery Shipping Tab Check that board backup battery shipping tab is removed. To remove, grasp tab and gently pull. Battery should be replaced every 3 years of unit service. Unit Ventilator Start-up Remove Battery ShippingTab NOTICE... -
Page 73: Filter(S)
Filters are included Renewable Media (Single-use and Permanent Wire Mesh Filters Also Available) in all units. Daikin single-use filters are standard on all but electric heat units, which come with permanent wire mesh filters. Permanent wire mesh and renewable... -
Page 74: Check, Test & Start Procedure For: Daikin Applied Unit Ventilators
Note: This form must be completely filled out and returned to, Daikin Warranty Department within ten days in order to comply with the terms of the Daikin Applied warranty. Forms should be returned to Daikin Applied Warranty Department, P.O. Box 920, Auburn, NY 13021-0920. - Page 75 Deadband 6° or _______°F III . Refrigeration system A. Has all field piping been leak tested to 100 psig (AVS, AVV, AVR, AHF, AHV & AHR) ........Yes No B. Is expansion valve bulb properly installed and insulated ................Yes ...
- Page 76 Daikin Applied Training and Development Now that you have made an investment in modern, efficient Daikin equipment, its care should be a high priority. For training information on all Daikin HVAC products, please visit us at www.DaikinApplied.com and click on Training, or call 540-248-9646 and ask for the Training Department.