Table of Contents
Advertisement
Available languages
Available languages
Owner's Manual
Bedienungsanleitung
Mode d'emploi
Manuale d'uso
Manual del usuario
Thank you for purchasing the PCR-30/50/80 USB MIDI controller.
Before using this unit, carefully read the sections entitled: "USING THE
UNIT SAFELY" and "IMPORTANT NOTES" (pp. 2–4). These sections
provide important information concerning the proper operation of the
unit. Additionally, in order to feel assured that you have gained a good
grasp of every feature provided by your new unit, Owner's manual
should be read in its entirety. The manual should be saved and kept on
hand as a convenient reference.
Copyright © 2003 ROLAND CORPORATION
All rights reserved. No part of this publication may be reproduced in
any form without the written permission of ROLAND CORPORATION.
Advertisement
Table of Contents

Related Manuals for Roland Edirol PCR-30


Summary of Contents for Roland Edirol PCR-30
- Page 1 Mode d’emploi Manuale d’uso Manual del usuario Thank you for purchasing the PCR-30/50/80 USB MIDI controller. Before using this unit, carefully read the sections entitled: “USING THE UNIT SAFELY” and “IMPORTANT NOTES” (pp. 2–4). These sections provide important information concerning the proper operation of the unit.
- Page 2 AC adaptor from the outlet, and request servicing by your retailer, the nearest EDIROL/Roland Service Center, or an authorized EDIROL/Roland distributor, as listed on the “Infor- mation” page when: • The AC adaptor or the power-supply cord has been damaged; or •...
- Page 3 • Before using the unit in a foreign country, consult with your retailer, the nearest Roland Service Center, or an authorized Roland distributor, as listed on the "Information" page.
-
Page 4: Important Notes
• Unfortunately, it may be impossible to restore the contents of data that was stored in another MIDI device (e.g., a sequencer) once it has been lost. Roland Corporation assumes no liability concerning such loss of data. • Use a reasonable amount of care when using the unit’s buttons, sliders, or other controls;... -
Page 5: Table Of Contents
Contents Contents of the package...9 Names of things and what they do ...10 Setup ... 13 English Installing & Setting Up the Driver (Windows) ...14 Driver Installation ... 14 Windows XP users... 14 Windows 2000 users ... 18 Windows Me/98 users... 21 Settings ... - Page 6 Contents Français Installation et configuration du pilote (Windows) ...55 Installation du pilote... 55 Windows XP ... 55 Windows 2000 ... 59 Windows Me/98 ... 62 Paramètres... 64 Installation et configuration du pilote (Macintosh) ...66 Utilisateurs Mac OS 9/8... 66 Utilisateurs Mac OS X... 71 Italiano Installazione e configurazione del driver (Windows) ...74 Installazione del driver ...
- Page 7 Operation ... 113 Connection and MIDI data flow ...114 When using MIDI connections... 114 When using a USB connection ... 115 Basic operation...116 How to switch modes... 116 PLAY mode... 117 Controllers you can operate ... 117 MIDI Channel mode (MIDI CH)... 118 Program Change mode (PROGRAM CHANGE)...
- Page 8 Contents Appendices ... 157 Convenient functions...158 Setting the input mode ... 158 Specifying the button mode ... 158 Specifying the port... 159 Sys Ex. ASSIGN items ... 160 Specifying the checksum... 160 Specifying the location of the data ... 161 Inputting channel/block data ...
-
Page 9: Contents Of The Package
MIDI Keyboard Controller PCR-30/50/80 AC adaptor This is the only AC adaptor you should use with the PCR-30/50/80. Do not use any AC adaptor other than the supplied one, since doing so may cause malfunction. USB cable Use this to connect the USB connector of your computer with the USB connector of the PCR-30/50/80. -
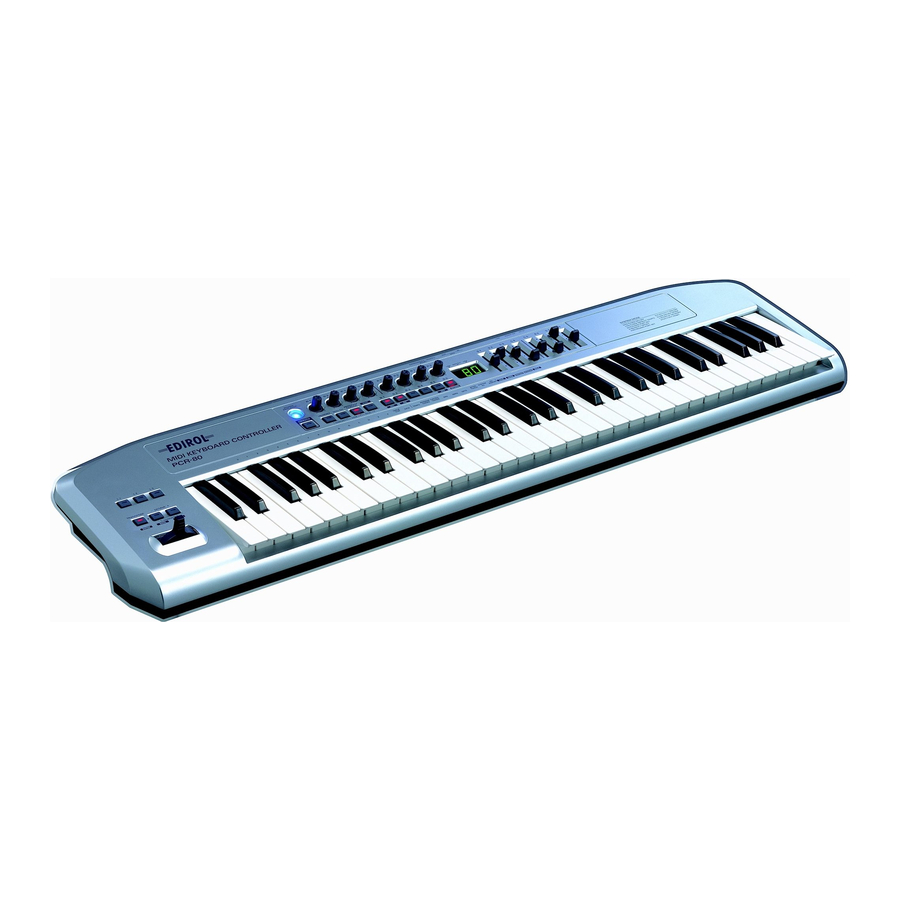
Page 10: Names Of Things And What They Do
V-LINK compatible video device, you can enjoy various video effects that are linked to your performance. 4. MEMORY Button Accesses memories that are stored within the PCR-30/50/80. 5. MIDI CH Button Specifies the transmission channel (“current channel”) for the keyboard and bender. - Page 11 13. Display Indicates the current status and various other information. Lights if the PCR-30/50/80 is connected to your computer via USB. DATA OUT This will blink when MIDI messages are transmitted via USB or MIDI OUT. Lights when the value shown in the display is hexadecimal.
-
Page 12: Rear Panel
In this case, the power will be supplied from your computer via the USB cable. To use the PCR-30/50/80 with bus power, set the power switch to USB. * For some computers, the PCR-30/50/80 may not operate if bus power is used. In this case, use the included AC adaptor. -
Page 13: Setup
A “driver” is software that transfers data between the PCR-30/50/80 and application software running on your computer, when your computer and the PCR-30/50/80 are connected by a USB cable. The driver sends data from your application to the PCR-30/50/80, and from the PCR-30/50/80 to your application. -
Page 14: Installing & Setting Up The Driver (Windows)
• Windows 2000 users ... (p. 18) • Windows Me/98 users ... (p. 21) Windows XP users With the PCR-30/50/80 disconnected, start up Windows. Disconnect all USB cables except for a USB keyboard and USB mouse (if used). Open the System Properties dialog box. - Page 15 PCR-30/50/80. 2. Connect the AC adaptor to an electrical outlet. 3. Use the USB cable to connect the PCR-30/50/80 to your computer. Set the PCR-30/50/80’s power switch to the ON position. Near the task bar, your computer will indicate “Found New Hardware”.
- Page 16 Installing & Setting Up the Driver (Windows) The Found New Hardware Wizard will appear. Make sure that the screen indicates “EDIROL PCR”, select“Install from a list or specific location (Advanced)”, and click [Next]. fig.2-7 The screen will indicate “Please choose your search and installation options”.
- Page 17 The Found New Hardware Wizard will appear. Make sure that the display indicates “EDIROL PCR”, and click [Finish]. Wait until “Found New Hardware” appears near the taskbar. When driver installation has been completed, the System Setting Change dialog box will appear. Click [Yes].
-
Page 18: Windows 2000 Users
Installing & Setting Up the Driver (Windows) Windows 2000 users With the PCR-30/50/80 disconnected, start up Windows. Disconnect all USB cables except for a USB keyboard and USB mouse (if used). Log on to Windows as a user with administrative privileges (such as Administrator). - Page 19 PCR-30/50/80. 2. Connect the AC adaptor to an electrical outlet. 3. Use the USB cable to connect the PCR-30/50/80 to your computer. Set the PCR-30/50/80’s power switch to the ON position. If the “File signature verification” setting was not set to “Ignore”, a “Digital Signature Not Found”...
- Page 20 Installing & Setting Up the Driver (Windows) The Insert Disk dialog box will appear. Click [OK]. The Files Needed dialog box will appear. Input the following into the “Copy files from” field, and click [OK]. D:\Drivers\USB_XP2K * The drive name “D:” may be different for your system. Specify the drive name of your CD-ROM drive.
-
Page 21: Windows Me/98 Users
1. With the power switch turned OFF, connect the AC adaptor to the PCR-30/50/80. 2. Connect the AC adaptor to an electrical outlet. 3. Use the USB cable to connect the PCR-30/50/80 to your computer. Set the PCR-30/50/80’s power switch to the ON position. Installing & Setting Up the Driver (Windows) - Page 22 Installing & Setting Up the Driver (Windows) The driver will be installed automatically. In the dialog box, click [OK]. * If a message recommends that you restart Windows, restart Windows as directed. Next, you need to make the driver settings. MIDI input and output destinations (p.
-
Page 23: Settings
Settings MIDI input and output destinations Windows XP/2000/Me users Open Control Panel. Click the Windows Start button, and from the menu that appears, select Settings | Control Panel. Windows XP Click the Windows start button, and from the menu that appears, select Control Panel. - Page 24 Installing & Setting Up the Driver (Windows) Make MIDI device settings on your sequencer software. For details on the MIDI OUT/IN device to select, refer to About the ports when using a USB connection (p. 159). This completes driver settings. Windows 98 users Open Control Panel.
-
Page 25: Installing & Setting Up The Driver (Macintosh)
* Disconnect the PCR-30/50/80 from the Macintosh before you perform the installation. If a PCR-30/50/80 is already connected to your Macintosh when you install the driver, a message like the following will appear when the Macintosh is started up. Perform the steps described below as appropriate for the message that is displayed. -
Page 26: Setting The Driver
1. With the power switch turned OFF, connect the AC adaptor to the PCR-30/50/80. 2. Connect the AC adaptor to an electrical outlet. 3. Use the USB cable to connect the PCR-30/50/80 to your computer. Set the PCR-30/50/80’s power switch to the ON position. fig.3-3... - Page 27 fig.3-5_35 If a dialog box like the one shown here appears, click [Turn It Off]. A confirmation dialog box will then appear, so click [OK]. fig.3-6_35 The Create a New Studio Setup dialog box will appear. Click [Cancel]. If you accidentally clicked [OK], click [Cancel] in the next screen.
- Page 28 MIDI OUT/IN device to select, refer to “About the ports when using a USB connection” (p. 159). This completes the series of steps needed to connect the PCR-30/50/80 to the Macintosh, install the MIDI driver, and make the driver settings.
-
Page 29: Freemidi Settings
PCR-30/50/80. 2. Connect the AC adaptor to an electrical outlet. 3. Use the USB cable to connect the PCR-30/50/80 to your computer. Set the PCR-30/50/80’s power switch to the ON position. From the CD-ROM, copy the Driver E (Mac OS 9, 8) – FreeMIDI Setting folder onto the hard disk of your Macintosh. - Page 30 MIDI OUT/IN device to select, refer to “About the ports when using a USB connection” (p. 159). This completes the series of steps needed to connect the PCR-30/50/80 to the Macintosh, install the MIDI driver, and make the driver settings.
-
Page 31: Mac Os X Users
Mac OS X Users Installing the driver Disconnect all USB cables other than those for your keyboard and mouse, and restart your Macintosh. Prepare the CD-ROM. Insert the CD-ROM into the CD-ROM drive of your computer. In the Driver (Mac OS X) folder of the CD-ROM, double-click PCRUSBDriver.pkg. -
Page 32: Setting The Driver
* Disconnect the USB cable from the PCR-30/50/80 only after you have quit your sequencer or other software. * Leave the Sleep function of your Macintosh turned off. * The PCR-30/50/80 will not work in the Classic environment of Mac OS X. Use the PCR when the Classic environment is not running. Setting the driver Use the USB cable to connect the PCR-30/50/80 to your computer. -
Page 33: Installieren Und Einrichten Des Treibers (Windows)
• Windows XP-Anwender ... (S. 33) • Windows 2000-Anwender... (S. 38) • Windows Me/98-Anwender ... (S. 42) Windows XP-Anwender Starten Sie Windows, wobei das PCR-30/50/80 ausgesteckt ist. Stecken Sie alle USB-Kabel außer der USB-Tastatur und der USB-Maus aus (falls vorhanden). Öffnen Sie das Dialogfeld Systemeigenschaften. - Page 34 Installieren und Einrichten des Treibers (Windows) fig.2-1 Klicken Sie auf die Registerkarte Hardware und klicken Sie anschließend auf [Treibersignierung]. Öffnen Sie das Dialogfeld Treibersignaturoptionen. Prüfen Sie, ob “Wie soll Windows vorgehen?” auf “Ignorieren” eingestellt ist. Wenn “Ignorieren” eingestellt ist, klicken Sie einfach auf [OK]. Wenn “Ignorieren”...
- Page 35 Das Dialogfeld SetupInf wird angezeigt. Jetzt kann der Treiber installiert werden. Verwenden Sie das USB-Kabel, um das PCR-30/50/80 mit Ihrem Computer zu verbinden. 1. Verbinden Sie bei ausgeschaltetem Netzschalter den Wechselstromadapter mit dem PCR-30/50/80. 2. Verbinden Sie den Wechselstromadapter mit einer elektrischen Steckdose.
- Page 36 Installieren und Einrichten des Treibers (Windows) Prüfen Sie, ob das Feld “Modell” “EDIROL PCR” anzeigt und klicken Sie auf [Weiter]. Die Installation des Treibers beginnt. Wenn die Einstellung für “Wie soll Windows vorgehen?” nicht “Ignorieren” lautet, wird das Dialogfeld “Hardware-Installation” angezeigt. Wenn für Wie soll Windows vorgehen? “Warnen”...
- Page 37 Wenn Sie die Einstellung für “Wie soll Windows vorgehen?” geändert haben Wenn Sie die Einstellung “Wie soll Windows vorgehen?” geändert haben, müssen Sie die ursprüngliche Einstellung nach dem Neustart von Windows wiederherstellen. Wenn Sie Windows XP Professional verwenden, melden Sie sich in Windows mit dem Benutzernamen eines Administrationskontos an (z.B.
-
Page 38: Windows 2000-Anwender
Installieren und Einrichten des Treibers (Windows) Windows 2000-Anwender Starten Sie Windows, wobei das PCR-30/50/80 ausgesteckt ist. Stecken Sie alle USB-Kabel außer der USB-Tastatur und der USB-Maus aus (falls vorhanden). Melden Sie sich in Windows als Benutzer mit Administratorrechten an (z.B. als Administrator). - Page 39 Laufwerknamen Ihres CD-ROM-Laufwerks an. Das Dialogfeld SetupInf wird angezeigt. Jetzt kann der Treiber installiert werden. Verwenden Sie das USB-Kabel, um das PCR-30/50/80 mit Ihrem Computer zu verbinden. 1. Verbinden Sie bei ausgeschaltetem Netzschalter den Wechselstromadapter mit dem PCR-30/50/80.
- Page 40 Installieren und Einrichten des Treibers (Windows) Wenn in für “Dateisignaturverifizierung” nicht “Ignorieren” aktiviert wurde, erscheint die Meldung “Digitalsignatur nicht gefunden”. Wenn für “Dateisignaturverifizierung” “Warnen” aktiviert ist, Klicken Sie auf [Ja]. Setzen Sie die Installation fort. Wenn für “Dateisignaturverifizierung” “Sperren” aktiviert ist, Klicken Sie auf [OK].
- Page 41 Wenn Sie “Dateisignaturverifizierung” geändert haben Wenn Sie die Einstellung für “Dateisignaturverifizierung” geändert haben, müssen Sie die ursprüngliche Einstellung nach dem Neustart von Windows wiederherstellen. 1. Nachdem Windows neu gestartet ist, melden Sie sich als Benutzer mit Administratorrechten an (z.B. als Administrator). 2.
-
Page 42: Windows Me/98-Anwender
Installieren und Einrichten des Treibers (Windows) Windows Me/98-Anwender Starten Sie Windows, wobei das PCR-30/50/80 ausgesteckt ist. Stecken Sie alle USB-Kabel außer der USB-Tastatur und der USB-Maus aus (falls vorhanden). Beenden Sie alle aktuell ausgeführten Programme (Anwendungen). Schließen Sie außerdem alle noch geöffneten Programmfenster. Wenn Sie ein Virenschutzprogramm oder ähnliche Software verwenden, müssen Sie diese... - Page 43 Verwenden Sie das USB-Kabel, um das PCR-30/50/80 mit Ihrem Computer zu verbinden. 1. Verbinden Sie bei ausgeschaltetem Netzschalter den Wechselstromadapter mit dem PCR-30/50/80. 2. Verbinden Sie den Wechselstromadapter mit einer elektrischen Steckdose. 3. Verwenden Sie das USB-Kabel, um das PCR-30/50/80 mit Ihrem Computer zu verbinden.
-
Page 44: Einstellungen
Installieren und Einrichten des Treibers (Windows) Einstellungen Eingabe- und Ausgabeziele für MIDI Windows XP/2000/Me-Anwender Öffnen Sie die Systemsteuerung. Klicken Sie in Windows auf Start und wählen Sie im daraufhin angezeigten Menü Einstellungen - Systemsteuerung. Windows XP Klicken Sie in Windows auf Start und wählen Sie im daraufhin angezeigten Menü... - Page 45 Nehmen Sie die MIDI-Geräteeinstellungen auf Ihrer Sequenzer-Software vor. Wenn Sie weitere Informationen zu dem MIDI OUT/IN-Gerät erhalten möchten, lesen Sie bitte About the ports when using a USB connection (S. 159). Damit sind die Treibereinstellungen abgeschlossen. Windows 98-Anwender Öffnen Sie die Systemsteuerung. Klicken Sie in Windows auf Start und wählen Sie im daraufhin angezeigten Menü...
-
Page 46: Installieren Und Einrichten Des Treibers (Macintosh)
Macintosh entweder OMS oder FreeMIDI installiert sein. Installieren Sie den PCR-30/50/80-Treiber wie anschließend beschrieben. * Trennen Sie das PCR-30/50/80 vom Macintosh, bevor Sie die Installation ausführen. Wenn das PCR-30/50/80 eingeschaltet wird, wird eine Meldung ähnlich der folgenden Meldung angezeigt, wenn der Macintosh hochgefahren wird. Gehen Sie abhängig von der angezeigten Meldung vor wie nachfolgend beschrieben. - Page 47 Beenden Sie alle aktuell ausgeführten Programme (Anwendungen). Wenn Sie ein Virenschutzprogramm oder ähnliche Software verwenden, müssen Sie diese ebenfalls beenden. Halten Sie die CD-ROM bereit. Legen Sie die CD-ROM in das CD-ROM-Laufwerk ein. Doppelklicken Sie auf das Symbol PCR Driver-E Installer (das sich im Ordner Driver E (Mac OS 9, 8) -OMS auf der CD-ROM befindet), um das Installationsprogramm zu starten.
- Page 48 Bevor Sie die OMS-Einstellungen prüfen können, müssen Sie ein MIDI-Soundmodul mit dem MIDI OUT-Anschluss des PCR-30/50/80 verbinden. Verwenden Sie das USB-Kabel, um das PCR-30/50/80 mit Ihrem Computer zu verbinden. 1. Verbinden Sie bei ausgeschaltetem Netzschalter das Wechselstromadapter mit dem PCR-30/50/80.
- Page 49 fig.3-6_35 Das Dialogfeld Create a New Studio Setup wird angezeigt. Klicken Sie auf [Cancel]. Wenn Sie versehentlich auf [OK] geklickt haben, klicken Sie im nächsten Bildschirm auf [Cancel]. fig.3-8_35 Wählen Sie “Open” im Menü File. Wählen Sie im Ordner Setting , den Sie in Schritt 3 kopiert haben, die Datei PCR, und klicken Sie auf [Open].
- Page 50 Wählen Sie im Menü File die Option [Exit]. Klicken Sie im Dialogfeld AppleTalk Confirmation auf [OK], um das Dialogfeld zu schließen. Damit wurden die Schritte ausgeführt, die erforderlich sind, um das PCR-30/50/80 mit Ihrem Macintosh zu verbinden, die MIDI-Treiber zu installieren und die Treiber zu konfigurieren. Weitere Informationen...
- Page 51 Einstellungen für FreeMIDI Verwenden Sie das USB-Kabel, um das PCR-30/50/80 mit Ihrem Computer zu verbinden. 1. Verbinden Sie bei ausgeschaltetem Netzschalter das Wechselstromadapter mit dem PCR-30/50/80. 2. Verbinden Sie das Wechselstromadapter mit einer elektrischen Steckdose. 3. Verwenden Sie das USB-Kabel, um das PCR-30/50/80 mit Ihrem Computer zu verbinden.
-
Page 52: Mac Os X-Benutzer
Wählen Sie im Menü File die Option Quit, um FreeMIDI Setup zu beenden. Damit wurden die Schritte ausgeführt, die erforderlich sind, um das PCR-30/50/80 mit Ihrem Macintosh zu verbinden, die MIDI-Treiber zu installieren und die Treiber zu konfigurieren. Mac OS X-Benutzer Installation des Treibers Stecken Sie alle USB-Kabel außer der Tastatur und der Maus aus, und... - Page 53 * Trennen Sie das USB-Kabel nicht vom PCR-30/50/80, während Ihr Sequenzer oder andere Software ausgeführt wird. * Stecken Sie das USB-Kabel erst aus dem PCR-30/50/80 aus, nachdem Sie Ihren Sequenzer oder andere Software beendet haben. * Lassen Sie die Ruhezustandsfunktion Ihres Macintosh deaktiviert.
- Page 54 AUSGESCHALTETEM Netzschalter. 2. Verbinden Sie den Wechselstromadapter mit einer elektrischen Steckdose. 3. Verwenden Sie das USB-Kabel, um das PCR-30/50/80 mit Ihrem Computer zu verbinden. Bringen Sie den Netzschalter des PCR-30/50/80 in die Position ON. Nehmen Sie in Ihrem Sequenzerprogramm die Einstellungen für MIDI-Geräte vor.
-
Page 55: Installation Et Configuration Du Pilote (Windows)
• Windows 2000... (p. 59) • Windows Me/98 ... (p. 62) Windows XP Le PCR-30/50/80 étant débranché, démarrez Windows. Débranchez tous les câbles USB, à l’exception de ceux du clavier et de la souris (le cas échéant). Ouvrez la boîte de dialogue Propriétés Système. - Page 56 PCR-30/50/80. 2. Branchez le cordon secteur sur une prise électrique (secteur). 3. Utilisez le câble USB pour brancher le PCR-30/50/80 à votre ordinateur. Placez l’interrupteur d’alimentation du PCR-30/50/80 sur ON. Près de la barre des tâches, votre ordinateur indique “Nouveau matériel détecté”.
- Page 57 La boîte de dialogue Assistant ajout de nouveau matériel s'affiche. Vérifiez que l’écran indique EDIROL PCR, sélectionnez Installer à partir d’une liste ou d’un emplacement spécifique (Avancé), puis cliquez sur [Suivant]. fig.2-7 L’écran indiquera “Veuillez choisir vos options de recherche et d’installation”. Sélectionnez “Ne pas rechercher.
- Page 58 Installation et configuration du pilote (Windows) La boîte de dialogue Assistant ajout de nouveau matériel s'affiche. Vérifiez que l’écran indique EDIROL PCR, puis cliquez sur [Terminer]. Attendez que “Nouveau matériel détecté” s’affiche près de la barre des tâches. Une fois l’installation du pilote terminée, la boîte de dialogue Modification des paramètres système s’affiche.
-
Page 59: Windows 2000
Windows 2000 Le PCR-30/50/80 étant débranché, démarrez Windows. Débranchez tous les câbles USB, à l’exception de ceux du clavier et de la souris (le cas échéant). Ouvrez une session Windows en tant qu’utilisateur doté de droits d’administration (Administrateur, par exemple). - Page 60 PCR-30/50/80. 2. Branchez le cordon secteur sur une prise électrique (secteur). 3. Utilisez le câble USB pour brancher le PCR-30/50/80 à votre ordinateur. Placez l’interrupteur d’alimentation du PCR-30/50/80 sur ON. Si l’option “Vérification de la signature des pilotes” n’a pas été définie sur “Ignorer”, une boîte de dialogue “Signature numérique introuvable”...
- Page 61 La boîte de dialogue Insérez le disque s'affiche. Cliquez sur [OK]. La boîte de dialogue Fichiers nécessaires s'affiche. Tapez ce qui suit dans le champ “Copier les fichiers depuis”, puis cliquez sur [OK]. D:\Drivers\USB_XP2K * La lettre du lecteur “D:” n’est pas forcément celle de votre ordinateur. Tapez la lettre affectée au lecteur de CD de votre ordinateur (par exemple, E: ou F:).
-
Page 62: Windows Me/98
Installation et configuration du pilote (Windows) Windows Me/98 Le PCR-30/50/80 étant débranché, démarrez Windows. Débranchez tous les câbles USB, à l’exception de ceux du clavier et de la souris (le cas échéant). Quittez tous les logiciels (applications) actifs. Fermez également toutes les fenêtres éventuellement ouvertes. Si vous utilisez un anti-virus, quittez-le également. - Page 63 1. L’interrupteur d’alimentation sur OFF, branchez le cordon secteur sur le PCR-30/50/80. 2. Branchez le cordon secteur sur une prise électrique (secteur). 3. Utilisez le câble USB pour brancher le PCR-30/50/80 à votre ordinateur. Placez l’interrupteur d’alimentation du PCR-30/50/80 sur ON. Le pilote s'installe automatiquement.
-
Page 64: Paramètres
Installation et configuration du pilote (Windows) Paramètres Paramètres d'entrée et de sortie MIDI Windows XP/2000/Me : Ouvrez le Panneau de configuration. Cliquez sur le bouton Démarrer de Windows, puis dans le menu qui s’affiche, choisissez Paramètres | Panneau de configuration. Windows XP Cliquez sur le bouton Démarrer de Windows, puis dans le menu qui s’affiche, choisissez Panneau de configuration. - Page 65 Procédez aux réglages MIDI du périphérique dans votre application (séquenceur). Pour plus de détails sur le périphérique MIDI OUT/IN à sélectionner, reportez-vous à la section About the ports when using a USB connection (p. 159). Le paramétrage du pilote est terminé. Windows 98 Ouvrez le Panneau de configuration.
-
Page 66: Installation Et Configuration Du Pilote (Macintosh)
Procédez comme suit pour installer le pilote PCR-30/50/80. * Débranchez l'PCR-30/50/80 du Macintosh avant d'effectuer l'installation. Si le PCR-30/50/80 est allumé, un message similaire à celui présenté ici s'affiche à la mise sous tension du Macintosh. Suivez une des procédures décrites ci-après, selon le message qui s'affiche. - Page 67 1. L’interrupteur d’alimentation sur OFF, branchez le cordon secteur sur le PCR-30/50/80. 2. Branchez le cordon secteur sur une prise électrique (secteur). 3. Utilisez le câble USB pour relier le PCR-30/50/80 à votre ordinateur. Placez l’interrupteur d’alimentation du PCR-30/50/80 sur ON. fig.3-3 fig.3-3...
- Page 68 Installation et configuration du pilote (Macintosh) fig.3-4 Dans le dossier Opcode-OMS Application où vous avez installé OMS, cliquez deux fois sur OMS Setup pour le lancer. fig.3-5_35 Si une boîte de dialogue similaire à celle présentée ici s'affiche, cliquez sur [Turn It Off]. Une boîte de confirmation s'affiche, cliquez sur [OK].
- Page 69 MIDI, le curseur se transforme en note de musique. Si un module de sons est branché en sortie MIDI OUT du PCR-30/50/80, cliquer sur l'icône de prise MIDI du schéma de droite produira un son: les réglages sont alors corrects. Quittez OMS Setup.
- Page 70 PCR-30/50/80. 2. Branchez le cordon secteur sur une prise électrique (secteur). 3. Utilisez le câble USB pour relier le PCR-30/50/80 à votre ordinateur. Placez l’interrupteur d’alimentation du PCR-30/50/80 sur ON. Depuis le CD-ROM, copiez le dossier Driver E (Mac OS 9, 8) – FreeMIDI Setting sur le disque dur du Macintosh.
-
Page 71: Utilisateurs Mac Os X
Choisissez à nouveau la commande MIDI Check Connections pour terminer le test. Dans le menu File, choisissez Quit pour quitter FreeMIDI Setup. La connexion du PCR-30/50/80 au Macintosh, l’installation du pilote MIDI ainsi que sa configuration sont terminées. Utilisateurs Mac OS X Installation du pilote Déconnectez tous les câbles USB à... - Page 72 Avant d’utiliser votre logiciel séquenceur, tenez compte des points suivants. * Branchez le PCR-30/50/80 à votre ordinateur avec un câble USB avant de lancer tout logiciel audio. * Ne débranchez pas le câble USB du PCR-30/50/80 pendant que le logiciel est actif.
- Page 73 Réglage du pilote Utilisez le câble USB pour brancher le PCR-30/50/80 à votre ordinateur. 1. L’interrupteur d’alimentation sur OFF, branchez le cordon secteur sur le PCR-30/50/80. 2. Branchez le cordon secteur sur une prise électrique (secteur). 3. Utilisez le câble USB pour brancher le PCR-30/50/80 à votre ordinateur.
-
Page 74: Installazione E Configurazione Del Driver (Windows)
• Utenti Windows 2000... (pag. 78) • Utenti Windows Me/98 ... (pag. 81) Utenti Windows XP Dopo aver scollegato il PCR-30/50/80 , avviare Windows. Scollegare tutti i cavi USB, ad eccezione della tastiera e del mouse USB, se utilizzati. Aprire la finestra di dialogo Proprietà del sistema. - Page 75 AC al PCR-30/50/80. 2. Collegare l’adattatore AC a una presa elettrica. 3. Utilizzare il cavo USB per collegare il PCR-30/50/80 al computer. Spostare l’interruttore di alimentazione del PCR-30/50/80 in posizione ON. Nella barra delle applicazioni verrà visualizzato il messaggio “Trovato nuovo hardware”.
- Page 76 Installazione e configurazione del driver (Windows) Verrà visualizzata la finestra di dialogo Installazione guidata nuovo hardware. Accertarsi che sullo schermo compaia “EDIROL PCR”, selezionare “Installa da un elenco o percorso specifico (per utenti esperti)” e fare clic su [Avanti]. fig.2-7 La finestra visualizzerà...
- Page 77 Verrà visualizzata la finestra di dialogo Installazione guidata nuovo hardware. Accertarsi che sullo schermo sia visualizzato “EDIROL PCR”, e fare clic su [Fine]. Attendere fino a quando nella barra delle applicazioni non appare il messaggio “Trovato nuovo hardware”. Alla fine dell’installazione del driver, comparirà la finestra di dialogo Modifica impostazioni di sistema.
-
Page 78: Utenti Windows 2000
Installazione e configurazione del driver (Windows) Utenti Windows 2000 Dopo aver scollegato il PCR-30/50/80 , avviare Windows. Scollegare tutti i cavi USB, ad eccezione della tastiera e del mouse USB, se utilizzati. Collegarsi a Windows con i privilegi di un amministratore, ad esempio come Administrator. - Page 79 AC al PCR-30/50/80. 2. Collegare l’adattatore AC a una presa elettrica. 3. Utilizzare il cavo USB per collegare il PCR-30/50/80 al computer. Spostare l’interruttore di alimentazione del PCR-30/50/80 in posizione ON. Se l’impostazione “Verifica firma file” non è stata impostata su “Ignora”, verrà visualizzato il messaggio “Firma digitale non trovata”.
- Page 80 Installazione e configurazione del driver (Windows) Viene visualizzata la finestra di dialogo Inserisci disco Fare clic su [OK]. Viene visualizzata la finestra di dialogo Richiesta file Immettere quanto segue nel campo “Copia file da” e fare clic su [OK]. D:\Drivers\USB_XP2K * L’identificativo dell’unità...
-
Page 81: Utenti Windows Me/98
Utenti Windows Me/98 Dopo aver scollegato il PCR-30/50/80 , avviare Windows. Scollegare tutti i cavi USB, ad eccezione della tastiera e del mouse USB, se utilizzati. Chiudere tutti i programmi in corso di esecuzione. Chiudere anche le altre finestre aperte. Se si utilizza un programma antivirus o simile, accertarsi che sia anch’esso chiuso. - Page 82 1. Dopo aver spostato l’interruttore di alimentazione su OFF, collegare l’adattatore AC al PCR-30/50/80. 2. Collegare l’adattatore AC a una presa elettrica. 3. Utilizzare il cavo USB per collegare il PCR-30/50/80 al computer. Spostare l’interruttore di alimentazione del PCR-30/50/80 in posizione ON. Il driver verrà installato automaticamente.
-
Page 83: Impostazioni
Impostazioni Destinazioni input e output MIDI Utenti Windows XP/2000/Me Aprire il Pannello di controllo. In Windows, fare clic sul pulsante Start e nel menu selezionare Impostazioni | Pannello di controllo. Windows XP In Windows, fare clic sul pulsante Start e nel menu selezionare Pannello di controllo. - Page 84 Installazione e configurazione del driver (Windows) Configurare la periferica MIDI sul sofware sequencer. Per maggiori informazioni sulla periferica MIDI OUT/IN da selezionare, fare riferimento alla sezione About the ports when using a USB connection (pag. 159). La procedura di configurazione del driver è giunta al termine. Utenti Windows 98 Aprire il Pannello di controllo.
-
Page 85: Installazione E Configurazione Del Driver (Macintosh)
Seguire la procedura sotto indicata per installare il driver PCR-30/50/80. * Scollegare l’PCR-30/50/80 dal Macintosh prima di eseguire l’installazione Se l’PCR-30/50/80 è acceso, comparirà un messaggio, come quello sotto illustrato, quando viene avviato il Macintosh. Seguire una delle procedure sotto indicate a seconda del messaggio visualizzato. - Page 86 1. Dopo aver spostato l’interruttore di alimentazione su OFF, collegare il adattatore AC all’PCR-30/50/80. 2. Collegare il adattatore AC a una presa elettrica. 3. Utilizzare il cavo USB per collegare l’PCR-30/50/80 al computer. Una volta terminati i collegamenti, accendere i vari dispositivi nell’ordine indicato.
- Page 87 Spostare l’interruttore di alimentazione dell’PCR-30/50/80 in posizione ON. fig.3-3 fig.3-3 Dal CD-ROM, selezionare e trascinare la cartella Driver E (Mac OS 9, 8) - OMS Setting sul disco fisso del Macintosh per copiarvela. fig.3-4 Nella cartella Opcode-OMS Application dove è stato installato OMS, fare doppio clic su OMS Setup per avviarlo.
- Page 88 Se un modulo sonoro MIDI è collegato alla presa MIDI OUT della tastiera PCR-30/50/80, fai click sull’icona del connettore MIDI che appare nel diagramma a destra. Se viene generato un suono, le impostazioni sono state eseguite correttamente.
- Page 89 AC all’PCR-30/50/80. 2. Collegare il adattatore AC a una presa elettrica. 3. Utilizzare il cavo USB per collegare l’PCR-30/50/80 al computer. Spostare l’interruttore di alimentazione dell’PCR-30/50/80 in posizione ON. Dal CD-ROM, copiare la cartella Driver E (Mac OS 9, 8) – FreeMIDI Setting sul disco fisso del Macintosh.
- Page 90 Scegliere di nuovo il comando Check Connections nel menu MIDI per concludere il test. Nel menu File, scegliere Quit per uscire da FreeMIDI Setup. La procedura di collegamento dell’PCR-30/50/80 al Macintosh, di installazione del driver MIDI e di configurazione del driver è giunta al termine.
-
Page 91: Utenti Mac Os X
Utenti Mac OS X Installazione del driver Scollegare tutti i cavi USB a parte quelli della tastiera e del mouse e riavviare il Macintosh. Preparare il CD-ROM. Inserire il CD nell’unità CD-ROM del computer. Nella cartella Driver (Mac OS X) del CD-ROM, fare doppio clic su PCRUSBDriver.pkg. - Page 92 * Collegare la tastiera PCR-30/50/80 al computer mediante il cavo USB prima di avviare il software sequencer o altri programmi. * Non scollegare il cavo USB dalla tastiera PCR-30/50/80 mentre è in esecuzione il software sequencer o un altro programma.
- Page 93 Configurazione del driver Utilizzare il cavo USB per collegare la tastiera PCR-30/50/80 al computer. 1. Dopo aver spostato l’interruttore di alimentazione su OFF, collegare l’adattatore AC alla tastiera PCR-30/50/80. 2. Collegare l’adattatore AC a una presa elettrica. 3. Utilizzare il cavo USB per collegare la tastiera PCR-30/50/80 al computer.
-
Page 94: Instalación Y Configuración Del Controlador (Windows)
• Usuarios de Windows 2000 ... (pág. 98) • Usuarios de Windows Me/98 ... (pág. 101) Usuarios de Windows XP Con la unidad PCR-30/50/80 desconectada, inicie Windows. Desconecte todos los cables USB excepto el del teclado USB y el ratón USB (si se utilizan). - Page 95 CA a la unidad PCR-30/50/80. 2. Conecte el adaptador de CA a una toma de corriente eléctrica. 3. Utilice el cable USB para conectar la unidad PCR-30/50/80 al PC. Coloque el interruptor de alimentación de la unidad PCR-30/50/80 en la posición ON (encendido).
- Page 96 Instalación y configuración del controlador (Windows) Aparecerá el Asistente para hardware nuevo encontrado. Asegúrese de que la pantalla indique “EDIROL PCR”, seleccione “Instalar desde una lista o ubicación específica (avanzado)” y haga clic en [Siguiente]. fig.2-7 La pantalla indicará “Elija sus opciones de búsqueda e instalación”.
- Page 97 Aparecerá el Asistente para hardware nuevo encontrado. Asegúrese de que la pantalla indica “EDIROL PCR” y haga clic en [Finalizar]. Espere hasta que aparezca “Nuevo hardware encontrado” cerca de la barra de tareas. Una vez finalizada la instalación del controlador, aparecerá el cuadro de diálogo Cambio de configuración del sistema.
-
Page 98: Usuarios De Windows 2000
Instalación y configuración del controlador (Windows) Usuarios de Windows 2000 Con la unidad PCR-30/50/80 desconectada, inicie Windows. Desconecte todos los cables USB excepto el del teclado USB y el ratón USB (si se utilizan). Inicie Windows con un usuario con privilegios administrativos (como Administrador). - Page 99 CA a la unidad PCR-30/50/80. 2. Conecte el adaptador de CA a una toma de corriente eléctrica. 3. Utilice el cable USB para conectar la unidad PCR-30/50/80 al PC. Coloque el interruptor de alimentación de la unidad PCR-30/50/80 en la posición ON (encendido).
- Page 100 Instalación y configuración del controlador (Windows) Aparecerá el cuadro de diálogo Insertar disco. Haga clic en [Aceptar]. Aparecerá el cuadro de diálogo Archivos necesarios. Especifique lo siguiente en el campo “Copiar archivos de” y haga clic en [Aceptar]. D:\Drivers\USB_XP2K * El nombre de la unidad “D:” puede ser diferente para su sistema. Especifique el nombre de la unidad de CD-ROM.
-
Page 101: Usuarios De Windows Me/98
Usuarios de Windows Me/98 Con la unidad PCR-30/50/80 desconectada, inicie Windows. Desconecte todos los cables USB excepto el del teclado USB y el ratón USB (si se utilizan). Salga de todo el software que se esté ejecutando (aplicaciones). Cierre cualquier ventana que esté abierta. Si utiliza un programa antivirus o software similar, también deberá... - Page 102 CA a la unidad PCR-30/50/80. 2. Conecte el adaptador de CA a una toma de corriente eléctrica. 3. Utilice el cable USB para conectar la unidad PCR-30/50/80 al PC. Coloque el interruptor de alimentación de la unidad PCR-30/50/80 en la posición ON (encendido).
-
Page 103: Configuración
Configuración Destinos de entrada y salida MIDI Usuarios de Windows XP/2000/Me Abra el Panel de control. Haga clic en el botón Inicio y, en el menú que aparecerá, seleccione Configuración | Panel de control. Windows XP Haga clic en el botón Inicio de Windows y, en el menú que aparecerá, seleccione Panel de control. - Page 104 Instalación y configuración del controlador (Windows) Configure el dispositivo MIDI en el software secuenciador. Para obtener información sobre el dispositivo MIDI OUT/IN que debe seleccionar, consulte el apartado About the ports when using a USB connection (pág. 159). Con esto finaliza la configuración del controlador. Usuarios de Windows 98 Abra el Panel de control.
-
Page 105: Instalación Y Configuración Del Controlador (Macintosh)
* Desconecte el PCR-30/50/80 del Macintosh antes de realizar la instalación. Si el PCR-30/50/80 está encendido, al iniciarse el Macintosh aparecerá un mensaje como el siguiente. Realice los pasos que se describen a continuación según el mensaje que se muestre. - Page 106 1. Con el interruptor de alimentación en OFF, conecte el adaptador de CA al PCR-30/50/80. 2. Conecte el adaptador de CA a una toma de corriente eléctrica. 3. Utilice el cable USB para conectar el PCR-30/50/80 al PC. Disponga el interruptor de alimentación del PCR-30/50/80 en la posición ON.
- Page 107 fig.3-4 En la carpeta Opcode-OMS Application donde ha instalado OMS, haga doble clic en OMS Setup para iniciarlo. fig.3-5_35 Si aparece un cuadro de diálogo como éste, haga clic en [Turn It Off]. Aparecerá un cuadro de diálogo de confirmación; haga clic en [OK].
- Page 108 Si un módulo de sonido MIDI se conecta al conector MIDI OUT del PCR-30/50/80, pulse el icono del conector MIDI mostrado en el diagrama de la derecha. Si escucha sonido, los ajustes se han realizado correctamente.
- Page 109 1. Con el interruptor de alimentación en OFF, conecte el adaptador de CA al PCR-30/50/80. 2. Conecte el adaptador de CA a una toma de corriente eléctrica. 3. Utilice el cable USB para conectar el PCR-30/50/80 al PC. Disponga el interruptor de alimentación del PCR-30/50/80 en la posición ON.
-
Page 110: Usuarios De Mac Os X
En el menú File, seleccione Quit para salir de FreeMIDI Setup. Con esto, habrá completado todos los pasos necesarios para conectar el PCR-30/50/80 al Macintosh, instalar el controlador MIDI y efectuar la configuración del controlador.) Usuarios de Mac OS X Instalación del controlador... - Page 111 * Desconecte el cable USB del PCR-30/50/80 sólo después de haber salido del software secuenciador u otro software. * Deje la función Sleep del Macintosh desactivada. * El PCR-30/50/80 no funcionará en el entorno Classic de Mac OS X. Utilice el PCR cuando no se esté ejecutando el entorno Classic. Instalación y configuración del controlador (Macintosh)
- Page 112 1. Con el interruptor POWER apagado (OFF), conecte el adaptador de CA al PCR-30/50/80. 2. Conecte el adaptador de CA a una toma de corriente eléctrica. 3. Utilice el cable USB para conectar el PCR-30/50/80 al sistema. Coloque el Interruptor POWER del PCR-30/50/80 en la posición ON (encendido).
-
Page 113: Operation
The PCR-30/50/80 is a controller that transmits MIDI messages. You cannot perform using only the PCR-30/50/80 by itself. You will need to connect it to a sound module or computer. The various controllers ([R1--R8], [S1--S8], [B1--B6], [L1--L3], [P1, P2]) can be assigned almost any message you want to get the control you need for your particular setup. -
Page 114: Connection And Midi Data Flow
Connection and MIDI data flow This section explains how to make basic connections for the PCR-30/50/80. * To prevent malfunction and/or damage to speakers or other devices, always turn down the volume, and turn off the power on all devices before making any connections. -
Page 115: When Using A Usb Connection
It is not necessary to connect the AC adaptor if you are using a USB connection. However, with some computers, the PCR-30/50 may not operate when powered from the USB bus. In this case, set the power switch to the DC position and connect the AC adaptor. -
Page 116: Basic Operation
(i.e., the button that is lit). Alternatively, press the [CANCEL] button. The setting you were in the process of making will be discarded. Switcing modes When you turn on the power, the PCR-30/50/80 will start up in PLAY mode. Press the [MIDI CH] button. -
Page 117: Play Mode
PLAY mode When you power up the PCR-30/50/80, it will start up in PLAY mode. The display will show the current channel (p. 118). * The PCR-30/50/80 will start up according to the Startup Memory settings (p. 164). With the factory settings, it will start up with the GM2 MEMORY. -
Page 118: Midi Channel Mode (Midi Ch)
Basic operation MIDI Channel mode (MIDI CH) This mode lets you set the transmission channel (current channel) of the keyboard and bender lever. Each controller has its own independent transmission channel setting. However, if OMNI mode (p. 149) is on, the controllers will also transmit on the current channel you specify here. fig.MIDIch-1_80 Press the [MIDI CH] button. -
Page 119: Program Change Mode (Program Change)
Program Change mode (PROGRAM CHANGE) This mode lets you transmit a program change message on the current channel. fig.PC-1_80 Press the [PROGRAM CHANGE] button. The [PROGRAM CHANGE] button will light. The display will indicate the program change that was transmitted most recently. * The [HEX] or [DECIMAL] button will also light according to the input mode (p. -
Page 120: Bank Mode (Bank)
Basic operation Bank mode (BANK) This mode lets you transmit a bank select (MSB, LSB) message on the current channel. The program change message you most recently transmitted (specified) in Program Change mode (p. 119) will also be transmitted following the bank select message. fig.BANK-1_80 Simultaneously press the [PROGRAM CHANGE] button and [MIDI CH] button. -
Page 121: Memory Mode (Memory)
For details on the contents of each memory number, refer to “Memory sets” (p. 164). If you edit the controller settings of a memory you recall, and want to keep your changes, you must save the memory before powering down the PCR-30/50/80. For the procedure, refer to “EDIT-Save” p. 148. -
Page 122: Snapshot Mode (Snapshot)
Basic operation Snapshot mode (SNAPSHOT) Once you have set the various controllers to the desired settings, you can transmit a detailed description of this state in the form of a “snapshot”. When you execute this function, the current values of the controllers ([R1–R8], [S1–S8]) will be transmitted. This is convenient when you want to record the state of these controllers together at the beginning of a song in your sequencer, as the initial values. -
Page 123: Panic Mode (Panic)
Panic mode (PANIC) If notes on a connected MIDI sound module become “stuck”, or if there is something wrong with the sound, you can execute the Panic function to solve the problem. When you execute the Panic function, All Sound Off, All Notes Off, and Reset All Controllers messages will be transmitted on all channels. - Page 124 MEMO...
-
Page 125: Edit Mode (Edit)
Edit mode (EDIT) Press the [EDIT] button to enter Edit mode. In Edit mode you can make the following settings. fig.edit-1 fig.edt Selected item [R1--R8] [S1--S8] [B1--B6] [L1--L3] Indicates the number of [P1, P2] the selected controller Keyboard [BULK] Keyboard [SYSTEM] Keyboard [SAVE]... -
Page 126: Controller Settings
Edit mode (EDIT) Controller settings You can assign the following functions to a controller. * After you have modified the controller settings, perform the “SAVE” (p. 148) operation as needed. If you turn off the power without executing “SAVE”, your changes will be lost. NOTE AFTERTOUCH CONTROL CHANGE... -
Page 127: Note Assign
NOTE ASSIGN Here’s how to assign a Note message to a controller. In addition to being used to play sounds, note messages can also be used to control a sequencer. Mode Keyboard Basic mode Advanced mode Basic mode fig.edt Press the [EDIT] button. The display will indicate “EDT.”... -
Page 128: Advanced Mode
Edit mode (EDIT) Advanced mode Advanced mode 1 of NOTE ASSIGN lets you specify the velocity value in addition to the items of Basic mode. 1. Press the [EDIT] button. 2. Slightly move the controller to which you want to assign a Note message. In the case of a button, press that button. -
Page 129: Aftertouch Assign
AFTERTOUCH ASSIGN Here’s how to assign an Aftertouch message to a controller. Mode Keyboard Basic mode Advanced mode 1 Advanced mode 2 Advanced mode 3 Basic mode fig.edt Press the [EDIT] button. The display will indicate “EDT.” fig.r-1 Slightly move the controller to which you want to assign an Aftertouch message. - Page 130 Edit mode (EDIT) Advanced mode 1–3 Advanced mode 1 of AFTERTOUCH ASSIGN lets you specify the upper and lower limits of the aftertouch value in addition to the items of Basic mode. Advanced modes 2 and 3 let you specify an aftertouch message for an individual note (Polyphonic Key Pressure) instead of specifying the channel.
- Page 131 Aftertouch Assign upper/lower limit and port settings In the case of Aftertouch Assign 1 or 3, you can set the upper limit and lower limit of the value, and specify the port. fig.max 1. The following display will appear. 2. Use the [DEC][INC] buttons or the [0]–[F] keys to specify the upper limit. 3.
-
Page 132: Control Change Assign
Edit mode (EDIT) CONTROL CHANGE ASSIGN Here’s how to assign a control change message to a controller. Mode keyboard Basic mode Advanced mode 1 Advanced mode 2 Basic mode fig.edt Press the [EDIT] button. The display will indicate “EDT”. Slightly move the controller to which you want to assign a Control Change message. In the case of a button, press that button. - Page 133 Advanced mode 1 Advanced mode 1 of CONTROL CHANGE ASSIGN lets you specify the upper and lower limits of the control change value in addition to the items of Basic mode. 1. Press the [EDIT] button. 2. Slightly move the controller to which you want to assign a Control Change message.
- Page 134 Edit mode (EDIT) Advanced mode 2 Advanced mode 2 simulates the operation of a conventional rotary encoder. If this is assigned to a controller, moving that controller toward the right (upward) of center will have the same effect as turning the encoder clockwise, and moving the controller toward the left (downward) of center will have the same effect as turning the encoder counterclockwise.
-
Page 135: Program Change Assign
PROGRAM CHANGE ASSIGN Here’s how to assign a program change message to a controller. Mode Number Basic mode Advanced mode 1 Advanced mode 2 Advanced mode 3 Advanced mode 4 Basic mode fig.edt Press the [EDIT] button. The display will indicate “EDT.” Slightly move the controller to which you want to assign a Program Change message. - Page 136 Edit mode (EDIT) Advance mode 1, 2 Advanced mode 1 of PROGRAM CHANGE ASSIGN lets you specify the upper and lower limits of the program change value. Advanced mode 2 lets you transmit BANK LSB/MSB settings in addition to the program change. 1.
- Page 137 Advanced modes 3 and 4 Advanced mode 3 lets you assign the Program Change Decrement function (PC DEC) to a controller. Advanced mode 4 lets you assign the Program Change Increment function (PC INC) to a controller. 1. Press the [EDIT] button. 2.
-
Page 138: Rpn/Nrpn Assign
Edit mode (EDIT) RPN/NRPN ASSIGN Here’s how you can assign an RPN or NRPN message to a controller. Mode Keyboard Basic mode Advanced mode 1 fig.edt Press the [EDIT] button. The display will indicate “EDT”. Slightly move the controller to which you want to assign an RPN or NRPN message. In the case of a button, press that button. - Page 139 fig.BANK-3 Use the [DEC][INC] buttons or the [0]–[F] keys to specify the RPN LSB (CC#100) or NRPN LSB (CC#98). Press the [ENTER] button. If you are making an assignment for a button, specify the button mode. ( “Specifying the button mode” (p. 158)) Advanced mode In Advanced mode for RPN/NRPN, you can specify the upper and lower limit of the data entry MSB (CC#6) value when the RPN/NRPN message is transmitted, as well as the various settings available...
-
Page 140: Sys Ex. Assign
Edit mode (EDIT) SYS EX. ASSIGN Here’s how you can assign a system exclusive message to a controller. Advanced mode 2 lets you assign a single-byte system message (System realtime message, tune request). Advanced modes 3 and 4 let you assign any desired message.(Input up to 24 bytes) Mode Key- Mode... - Page 141 Input the second and subsequent bytes in the same way. After you have input the number of bytes you specified in step 7, the PCR-30/50/80 will check whether the messages you've input are indeed valid MIDI messages. If there is a problem, the display will indicate “ERR”.
- Page 142 Edit mode (EDIT) In the case of Advanced mode 4, specify the upper and lower limits. Specify the output port. ( “Specifying the port” (p. 159)) If you are making an assignment for a button, specify the button mode. ( “Specifying the button mode”...
- Page 143 Master Volume F0 7F 7F 04 01 vL vM F7 Since a Master Volume message has a data range of 00 00–7F 7F and we do not need to specify the range, we will use Basic mode. Since the two bytes of data are in the order of LSB and then MSB, we will select “DT3”...
- Page 144 Edit mode (EDIT) Bend Pitch Control fig.checksum Since the GS Bend Pitch Control message has a data range of 40H–58H (0–24 semitones), we will select Advanced mode 1, which lets us specify the range. Since the data format is one byte, we will select “DT0”...
- Page 145 13. To specify “2” for the upper bits, press the [2] key. The display will indicate “2BL”. 14. Confirm what’s indicated and press [ENTER]. 15. In the same way, enter bytes 8. 16. Since the ninth byte is the data area, press the [DATA] key. The display will indicate “DT0.”...
-
Page 146: Tempo Assign
Edit mode (EDIT) TEMPO ASSIGN You can assign a controller to adjust the speed (20–250) of the F8 Clock message. * In order to transmit F8 Clock messages, the F8 CLOCK setting must be “ON”. ( “F8 CLOCK ON/OFF” (p. 154)) fig.edt Press the [EDIT] button. -
Page 147: Assign Copy
fig.noa Press the [NO ASSIGN] key. The display will indicate “NOA”. Press the [ENTER] button. fig.yes The display will blink “YES,” so press the [ENTER] button once again. ASSIGN COPY Here’s how a message assigned to a controller can be copied to another controller. fig.edt Press the [EDIT] button. -
Page 148: Save
Edit mode (EDIT) SAVE Here’s how to save the settings of the current memory into internal memory. You can save settings into internal memory numbers 1–F. You cannot save to memory number 0 (GM2). * After you edit the settings, perform the “SAVE” (p. 148) operation as needed. If you turn off the power without performing “SAVE”, your changes will be lost. -
Page 149: Omni
OMNI If you turn the Omni setting ON, all messages will be transmitted on the current channel (p. 118) regardless of the channel that is specified for each controller. Also, all messages will be transmitted to the “KEYBOARD PORT SET” (p. 154) regardless of the port that is specified for each controller. -
Page 150: Protect
Edit mode (EDIT) PROTECT If you turn the Protect setting ON, All Bulk (p. 151) reception and Save (p. 148) operations will be disabled. fig.edt Press the [EDIT] button. The display will indicate “EDT”. Press the [PROTECT] key. fig.ptc The display will blink “PTC”. Confirm what’s indicated and press the [ENTER] button. -
Page 151: Bulk
Use the [DEC] [INC] buttons or the [0] [1] keys to select the mode. Confirm what’s indicated and press the [ENTER] button. fig.rs1 The third digit of the display will blink, and the PCR-30/50/80 will wait to receive bulk data. A memory will be received as bulk data. - Page 152 Edit mode (EDIT) About the display in Bulk mode fig.bulk-dis 1st digit: indicates Receive mode or Transmit mode 2nd digit: Single Bulk or All Bulk Transmit bulk data from your sequencer or other device. Specify “PCR” (Mac OS 9/8: PCR 1) as the MIDI output device for your sequencer software. For details on this setting, refer to the manual of your sequencer software.
-
Page 153: Transmit Mode
Use the [DEC] [INC] buttons or the [0] [1] keys to select the mode. Confirm what’s indicated and press the [ENTER] button. fig.bs-1 The third digit of the display will blink, and the PCR-30/50/80 will wait to transmit bulk data. Press the [ENTER] button. -
Page 154: System
Edit mode (EDIT) SYSTEM Here’s how you can make various system settings for the PCR-30/50/80. fig.edt Press the [EDIT] button. The display will indicate “EDT”. Press the [SYSTEM] key. The display will indicate “SY0”. fig.sy0 Use the [0]–[8] keys to specify the System setting that you want to set, and then press the [ENTER] button. -
Page 155: Setting Method A
Setting method A Perform steps 1–3. Use the [DEC][INC] buttons or the [0] or [1] keys to switch F8 CLOCK or H-ACTIVITY on/off. The display will indicate either “ON” or “OFF”. Press the [ENTER] button. Setting method B Perform steps 1–3. Use the [DEC][INC] buttons or the [0]–[F] keys to specify the F8 CLOCK DEFAULT TEMPO or the VELOCITY OFFSET value. -
Page 156: Setting Method D
When the PCR starts up, memory number 0 (GM2) will GM2 MEMORY be loaded into current memory (p. 148) regardless of the state in which the power was turned off. Upon power-up, the PCR-30/50/80 will recall the LAST ACCESS memory that was last recalled or saved into current MEMORY... -
Page 157: Appendices
Appendices This section contains troubleshooting information and explanations of convenient functions. You may read this material as necessary. Convenient functions ... p. 158 Memory sets ... p. 164 Troubleshooting... p. 170 MIDI implementation ... p. 174 Main specifications ... p. 179... -
Page 158: Convenient Functions
If you are not in Play mode, you can use one of two ways to input a numerical value into the PCR-30/50/80; Decimal input mode or Hexadecimal input mode. If you want to input decimal numbers, press the [DECIMAL] button. If you want to input hexadecimal numbers, press the [HEX] button. -
Page 159: Specifying The Port
1. Press a key [1]–[3] to select the port. 2. Press the [ENTER] button. If you are using the PCR-30/50/80 with a MIDI connection, the messages will be transmitted from the MIDI OUT connector regardless of this port setting. About the ports when using a USB connection The ports correspond to the PCR-30/50/80 as follows. -
Page 160: Sys Ex. Assign Items
Sys Ex. ASSIGN items Specifying the checksum The PCR-30/50/80 can automatically calculate the checksum of a system exclusive message and embed it in the message. In order to use this function, you must use the following procedure to specify the starting location from which the checksum is calculated, and the location at which the checksum is inserted. -
Page 161: Specifying The Location Of The Data
Specifying the location of the data Here’s how to specify the location and data type of the variable portion (data) within a system exclusive message. The range of data values will be the default range in the case of Basic mode or Advanced mode 3. In the case of Advanced modes 1 and 4, you can specify the range of data values. -
Page 162: Inputting Channel/Block Data
(p. 118) will be inserted as the lower bits. (The block number is not actually a channel, but corresponds to the “part” within a GS sound module. On the PCR-30/50/80, this corresponds to the channel for the sake of convenience.) -
Page 163: V-Link Mode
V-LINK mode When you press the [V-LINK] button, the PCR will transmit a V-LINK ON message and will enter V-LINK mode. When you press the [V-LINK] button once again, the PCR will transmit a V-LINK OFF message and will exit V-LINK mode. When the PCR enters V-LINK mode, it will transmit the following parameters to the V-LINK host. -
Page 164: Memory Sets
Memory sets With the factory settings, the GM2 set shown in the illustration is assigned to the controllers. Use the included template. The following memory sets are also provided. GM2 set (MEMORY: 0) ...(p. 164) MCR-8 MODE 3(SONAR 2) SET...(p. 165) MCR-8 MODE 3(SONAR 2) - A (MEMORY: 1)... -
Page 165: Mode 3(Sonar 2) Set
MCR-8 MODE 3(SONAR 2) SET When using this memory set, turn the PCR-30/50/80's OMNI (p. 149) setting OFF. * To display the external controller toolbar, open Display | Toolbars, and select External Controllers. MCR-8 MODE 3(SONAR 2) - A (MEMORY: 1) -
Page 166: Mode 4(Cubase 5/Sx) Set
Memory sets MCR-8 MODE 4(Cubase 5/SX) SET When using this memory set, turn the PCR-30/50/80's OMNI (p. 149) setting OFF. MCR-8 MODE 4(Cubase 5/SX) - A (MEMORY: 5) Message Parameter (Hex.) TRACK 1 PAN CC 72(48) TRACK 2 PAN CC 73(49) -
Page 167: H-Compatible (Protools Le, Digital Performer) Set (Memory: 9)
TRACK > REWIND STOP PLAY HOLD EXPRESSION GS SET When using this memory set, you will find it convenient to turn the PCR-30/50/80's OMNI (p. 149) setting ON. GS-A (MEMORY: A) Parameter REVERB MACRO REVERB CHARACTER REVERB PRE-LPF REVERB TIME... - Page 168 Memory sets GS-B (MEMORY: B) Parameter CHORUS MACRO CHORUS PRE-LPF CHORUS DELAY CHORUS RATE CHORUS DEPTH CHORUS FEEDBACK CHORUS LEVEL PART PANPOT CHORUS SEND LEVEL TO REVERB CHORUS SEND LEVEL TO DELAY TVF CUTOFF FREQ TVF RESONANCE MODULATION DEPTH BEND RANGE CHORUS SEND LEVEL PART LEVEL PROGRAM CHANGE DEC...
-
Page 169: Xg Set
XG SET When using this memory set, you will find it convenient to turn the PCR-30/50/80's OMNI (p. 149) setting ON. XG-A (MEMORY: D) Parameter BEND PITCH CONTROL BEND FILTER CONTROL BEND AMPLITUDE CONTROL PITCH EG INITIAL LEVEL PITCH EG ATTACK TIME... -
Page 170: Troubleshooting
The power switch of the PCR-30/50/80 may have been set to the USB position. Make sure that the power switch of the PCR-30/50/80 is set to the DC position. Do not use bus power while installing the driver. Check this, and if you are using Windows, close the Sound and... - Page 171 PCR-30/50/80’s USB cable connected, and restart your Macintosh. If it is still not detected, shut down your Macintosh, and then restart it. The PCR-30/50/80 will not be detected if it is connected to the USB connector on the Macintosh keyboard.
- Page 172 “Found unknown device” appears even though you installed the driver If your computer or USB hub has two or more USB connectors, and you connect the PCR-30/50/80 to a USB connector to which the PCR-30/50/80 has never been connected before, the “Unknown device”...
-
Page 173: Deleting The Driver
Deleting the driver If you were unable to install the driver according to the procedure given, the PCR-30/50/80 may not be recognized correctly by the computer. In this case, use the following procedure to delete the driver, and then follow the procedure in “Setup” (p. 13) to install the driver once again. -
Page 174: Midi Implementation
Sub ID #1 (PCR-30/50/80) EOX (End of Exclusive) Data transmission The PCR-30/50/80 can use Bulk Dump (p. 177) to transfer its internal memory set data (p. 164). Data Set 1 (DT1) These messages transmit the actual data, and are used to transfer data settings to a device. -
Page 175: Program Change
* Transmitted by rightward/leftward operation of the BENDER lever in Play mode. Channel mode messages In addition to the channel mode messages that can be transmitted in Panic mode, the PCR-30/50/80 lets you assign any channel voice message to any controller and transmit it. Channel mode messages Status... -
Page 176: System Exclusive Message
MIDI implementation System exclusive message The PCR-30/50/80 is able to transmit the following exclusive messages: exclusive messages assigned to the controllers, Identity Reply, V-LINK messages, and Bulk Dump. Universal non-realtime system exclusive Identity reply This message will be transmitted when an Identity Request message is received. -
Page 177: Bulk Dump
500 ms. * Please be aware that if you modify the data dumped from the PCR-30/50/80 by changing the order in which the exclusive messages are transmitted, by... - Page 178 MIDI implementation MIDI KEYBOARD CONTROLLER Model PCR-30/50/80 Function... Basic Default Channel Changed Default Mode Messages Altered Note Number : True Voice Note On Velocity Note Off After Key's Touch Channel's Pitch Bend 0-119 Control Change Program Change : True Number...
-
Page 179: Main Specifications
39-3/8(W) x 9-3/16 (D) x 3-7/16 (H) inches Weight PCR-30: 2.4 kg / 5 lbs 5 oz (excluding AC adaptor) PCR-50: 3.3 kg / 7 lbs 5 oz (excluding AC adaptor) PCR-80: 3.7 kg / 8 lbs 3 oz (excluding AC adaptor) -
Page 180: Index
INDEX AC adaptor ... 9 AC adaptor jack ... 12 AFTERTOUCH ASSIGN ... 129 ALL BULK ... 151, 153 AppleTalk ... 27 ASSIGN COPY ... 147 BANK ... 120 Bank mode ... 120 Bank select ... 120 Bend Pitch Control ... 144 BENDER Lever ... - Page 181 LSB ... 120 Master Volume ... 143 MCR-8 ... 165–166 MEMORY ... 121 MEMORY Button ... 10 Memory mode ... 121 MIDI ... 114 MIDI CH ... 118, 158 MIDI CH Button ... 10 MIDI Channel mode ... 118 MIDI IN ... 159 MIDI IN/OUT connectors ...
- Page 182 INDEX USB connector ... 12 USB DRIVER MODE ... 154 Uscita MIDI ... 84 VELOCITY OFFSET ... 154 V-LINK ... 10 V-LINK Button ... 10 V-LINK mode ... 10 XG ... 169...
-
Page 183: Declaration Of Conformity
Compliance Information Statement Model Name : Type of Equipment : Responsible Party : Telephone : NOTICE AVIS PCR-30/50/80 USB MIDI KEYBOARD CONTROLLER Edirol Corporation North America Address : 425 Sequoia Drive, Suite 114, Bellingham, WA 98226 (360) 594-4276 For EU Countries... - Page 184 Information When you need repair service, call your nearest EDIROL/Roland Service Center or authorized EDIROL/Roland distributor in your country as shown below. HONG KONG Parsons Music Ltd. 8th Floor, Railway Plaza, 39 EUROPE Chatham Road South, T.S.T, EDIROL (Europe) Ltd.