Table of Contents
Advertisement
EXCELL PRECISION CO., LTD
© Excell Precision Limited 2004. All rights reserved Worldwide.
The information contained herein is the property of Excell Precision Limited and is supplied
without liability for errors or omissions. No part may be reproduced or used except as
authorised by contract or other written permission.
The copyright and the foregoing
restriction on reproduction and use extend to all media in which the information may be
embodied.
PW Service Manual
SME300000016
Advertisement
Table of Contents

Related Manuals for Excell PW


Summary of Contents for Excell PW
- Page 1 EXCELL PRECISION CO., LTD © Excell Precision Limited 2004. All rights reserved Worldwide. The information contained herein is the property of Excell Precision Limited and is supplied without liability for errors or omissions. No part may be reproduced or used except as authorised by contract or other written permission.
-
Page 3: Table Of Contents
EXCELL PRECISION CO., LTD Table of Content INDICATOR HOUSING ..................3 BEFORE USING THE SCALE................4 PREPARING TO USE THE SCALE ..............4 CHAPTER 1 INTRODUCTION................5 1-1 Features and Specifications.................... 5 1-2 Scale Appearance ......................6 1-3 Power Supply ........................6 1-4 Display .......................... - Page 4 EXCELL PRECISION CO., LTD 3-3-4 Restore to the Default Settings ............38 3-3-5 Noise Filter Settings ................ 39 3-3-6 Hold Function Settings ..............40 3-3-7 Auto Unit Weight Averaging Setting ..........41 3-4 Weight Calibration ................. 42 3-5 RS232 Serial Interface Settings ............
-
Page 5: Indicator Housing
EXCELL PRECISION CO., LTD INDICATOR HOUSING Before opening the stainless steel indicator housing, make sure it is dry. If necessary wipe the housing dry paying particular attention to the joint between the front panel and rear housing. The re-assembly instructions should be accurately followed to ensure the IP rating is maintained in service. -
Page 6: Before Using The Scale
EXCELL PRECISION CO., LTD BEFORE USING THE SCALE To enable you to use this scale correctly, we suggest that you read this manual carefully. INSTRUCTIONS FOR USE 1. The load placed on the weigh pan must NOT exceed the maximum weighing capacity of the scale. -
Page 7: Chapter 1 Introduction
EXCELL PRECISION CO., LTD CHAPTER 1 INTRODUCTION 1-1 Features and Specifications Features: Sealed to IP67, Waterproof and dust proof (Only use cables of 3mm~5.5mm diameter to ensure correct sealing of the cable glands) Up to 1/15,000 display resolution (Internal 1/300,000) -
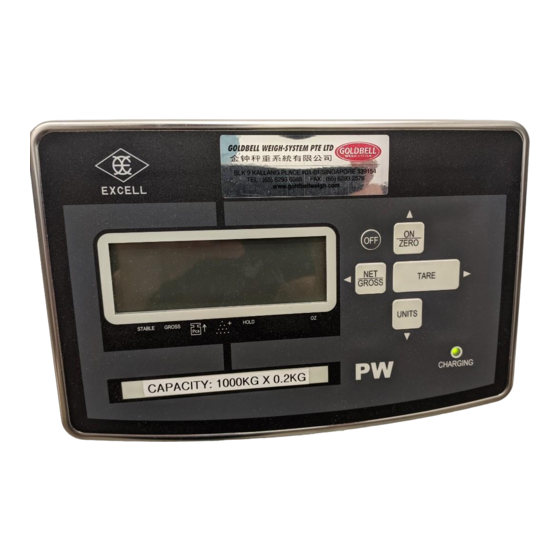
Page 8: Scale Appearance
EXCELL PRECISION CO., LTD 1-2 Scale Appearance 256 mm The package includes: 1. Indicator 1 off 2. Power supply 1 off 3. User Manual 1 off 170 mm When you first unseal the product package if you find any of the items above are missing, contact your supplier. -
Page 9: Display
EXCELL PRECISION CO., LTD 1-4 Display The weight on weigh pan is greater than the high limit The weight on weigh pan is equal to the OK limit The weight on weigh pan is less than the lower limit kg units. When “kg” is displayed, it means the weight shown is in kg Pound units. -
Page 10: Keyboard Function
EXCELL PRECISION CO., LTD 1-5 Keyboard Function ON/ZERO KEY Press the ON/ZERO key to switch the indicator on. When switched on the ON/ZERO key acts as the zero balance function. OFF KEY When the indicator on, press the OFF key to switch it off. -
Page 11: Error Messages
EXCELL PRECISION CO., LTD 1-6 Error Messages ⇒ The EEPROM is not working correctly. ⇒ Zero is higher than the zero range when switching the indicator on. ⇒ Zero is lower than the zero range when switching the indicator on. -
Page 12: Chapter 2 Service Mode Access
Set the jumper SWA1 on the main board to the ADJ position (EEPROM UNLOCKED). Switch the PW on. The display shows When finished, set the jumper SWA1 back to the LOCK position. If the jumper SWA1 is returned to the LOCK position during calibration, the PW exits the service mode automatically. Press... -
Page 13: Capacity Configuration
EXCELL PRECISION CO., LTD 2-1 Capacity Configuration Capacity configuration includes Weight Units Setting Customised Weight Units Setting Press TARE Input a parameter “00” or “01” After inputting “00”, press ON/ZERO key ⇒ Increment number by 1 key to return to the TARE UNITS key ⇒... -
Page 14: Weight Units Setting
EXCELL PRECISION CO., LTD 2-1-1 Weight Units Setting There is no resolution limitation, when the weight units “kg, g, lb, lb/oz” are selected. The weight units ”oz, GN, dwt, and ct” are only available on indicators with less 1/10,000 external resolution. - Page 15 EXCELL PRECISION CO., LTD NOTE 1 The users can set up the different weight units in various orders according to their preference, and the amount of the chosen weight units can be up to 5 (a) (b) (c) (d) (e) (f) (a) ⇒...
-
Page 16: Customised Weight Unit Setting (No Resolution Limit)
EXCELL PRECISION CO., LTD 2-1-2 Customised Weight Unit Setting (no resolution limit) The display shows the maximum Press TARE capacity of the scale + minimum division set previously for 2 seconds. The display shows the number of weighing units and the units for the weight calibration set previously Refer to “Note 4”... - Page 17 EXCELL PRECISION CO., LTD Cont Press TARE The display shows the maximum capacity of the scale + minimum division set previously for 2 seconds. Refer to “Note 5” For example: 006000 ⇒ 6000 g Press TARE Enter the mass value Refer to “Note 5”...
- Page 18 EXCELL PRECISION CO., LTD NOTE 4 (a) (b) (a) ⇒ The number of the weight units (Max: 5, key in 1 ~ 5) (b) ⇒ The weight unit for weight calibration (choose from “kg”, “g”, “lb”, key in 0, 1, or 2) Parameter description: 0 ⇒...
- Page 19 EXCELL PRECISION CO., LTD B. Choose “kg” as the weight unit for the weight calibration • The first weight unit setting: 6.000 kg / 0.002 kg ⇒ Enter the maximum capacity 006000 at (c) ~ (h) ⇒ Enter the mass value 006000 at (i) ~ (n) ‚...
- Page 20 EXCELL PRECISION CO., LTD NOTE 6 (o) ( p ) ( q) ( r ) ( s ) (o) ⇒ Minimum division Parameter description: Decimal system: Hexadecimal notation system: Input 1, 2, or 5 as the Input 1, 2, 4, or 8 as the...
-
Page 21: Modify "Customized Weight Units" Setting
EXCELL PRECISION CO., LTD 2-1-3 Modify “Customized Weight Units” Setting The display shows the maximum capacity of the scale + minimum Press TARE division set previously for 2 seconds. The display shows the number of weight units and the weight unit for calibration set... -
Page 22: Weight Calibration
EXCELL PRECISION CO., LTD 2-2 Weight Calibration Press TARE Input a parameter “00” or “01” After inputting “00”, press ON/ZERO key ⇒ Increment number by 1 key to return to previous TARE UNITS key ⇒ Decrement number by 1 step. (Exit from weight TARE key ⇒... -
Page 23: Weight Calibration Setting
EXCELL PRECISION CO., LTD 2-2-1 Weight Calibration Setting For the most accurate weight calibration it is recommended that the indicator is calibrated at full load where possible, although calibration at less than full load is also possible. Press the TARE... -
Page 24: Manufacturing Location Gravity Setting
EXCELL PRECISION CO., LTD 2-2-2 Manufacturing Location Gravity Setting The gravity value is set between that at the equator and the polar regions. Gravity value at the equator G = 9.7803184558 m/sec Gravity value at the polar regions G = 9.8321772792 m/sec Taipei ≒... -
Page 25: Linearity Adjustment
EXCELL PRECISION CO., LTD 2-3 Linearity Adjustment 4 After linearity adjustment it is necessary to re-calibrate the weight. 4 Therefore the linearity points should include full load. Remove all weight from the pan, press to enter linearity TARE calibration mode. - Page 26 EXCELL PRECISION CO., LTD The weight factor is arranged as follows:- 1 = The weights are equal. 2 = The next weight is twice as big as the first weight 3 = 3 times as big as the first weight 4 = 4 times…...
- Page 27 EXCELL PRECISION CO., LTD Ex4: 30kg (1kg, 2kg ,5kg, 10kg, 2kg, 10kg) Display Key Press Note 03 CLn TARE Into linearity calibration TARE First point (zero), remove weigh pan and press the Tare key L1 1 TARE Put 1kg on and press the Tare key...
-
Page 28: Function Setting
EXCELL PRECISION CO., LTD 2-4. Function Setting Environment parameters Approval configuration Buzzer type Press TARE Input a parameter 00, 01, 02, or 03 ON/ZERO key ⇒ Increment number by 1 To exit enter “00” and UNITS key ⇒ Decrement number by 1... -
Page 29: Environment Parameters
EXCELL PRECISION CO., LTD 2-4-1 Environment parameters 4 If parameters are changed in , then will be revised automatically Return to zero The display shows the current setting Press Return to zero point TARE Using to enter ON/ZERO UNITS Default = 0 0 ⇒... -
Page 30: Approval Configuration
EXCELL PRECISION CO., LTD 2-4-2 Approval configuration Press TARE Approval configuration Display shows current setting Using ON/ZERO UNITS Approval configuration to input a parameter Using to input the setting ON/ZERO UNITS 0 ⇒ Non-approved model 1 ⇒ OIML or NTEP approved model, 2 ⇒... -
Page 31: Keyboard Buzzer Type
EXCELL PRECISION CO., LTD 2-4-3 Keyboard buzzer type Press TARE Keyboard buzzer type fitted Display shows current type Using ON/ZERO UNITS To enter the setting Keyboard buzzer type fitted to alter value ON/ZERO UNITS 0 ⇒ Pulse signal (DC type, PT-134OP) Press 1 ⇒... -
Page 32: Gravity Zone Compensation
EXCELL PRECISION CO., LTD 2-5 Gravity zone compensation Press TARE Enter the gravity value of the customer’s site. ON/ZERO key ⇒ Increment number by 1 UNITS key ⇒ Decrement number by 1 TARE key ⇒ Move cursor one place to the right NET/GROSS key ⇒... -
Page 33: Chapter 3 Advanced Functions
EXCELL PRECISION CO., LTD CHAPTER 3 ADVANCED FUNCTIONS 3-1 Advanced Function Setting Table The advanced functions are listed below. For detailed settings refer to the following sections. DISPLAY LEVEL 1 FUNCTION DISPLAY LEVEL 2 FUNCTIONS Exit the ADVANCED FUNCTION setting mode... - Page 34 EXCELL PRECISION CO., LTD DISPLAY LEVEL 1 FUNCTION DISPLAY LEVEL 2 FUNCTIONS Continuous data transmission rate Auto transmission at Zero Reset of auto transmission Output condition settings PW Service Manual SME300000016...
-
Page 35: Advanced Function Setting Workflow
EXCELL PRECISION CO., LTD 3-2 Advanced Function Setting Workflow In the weighing mode, press the keys at the same time to enter the NET/GROSS ON/ZERO Advanced Function setting mode. The LCD shows Overall workflow of the Advanced Function setting mode:... -
Page 36: General Function Setting
EXCELL PRECISION CO., LTD 3-3 General Function Setting There are 7 functions in the general function setting mode from Workflow of the General Function setting: DISPLAY NOTE ACTIONS Press TARE Use the keys to select the function Key in “00” and press ON/ZERO key ⇒... -
Page 37: Automatic Backlight Function Setting
EXCELL PRECISION CO., LTD 3-3-1 Automatic Backlight Function Setting Select in the general function setting mode to change the backlight function setting. DISPLAY NOTE ACTIONS Press TARE LCD displays the last status ON/ZERO UNITS to select function “on” or “off On à... -
Page 38: Automatic Power-Off Timer Setting
EXCELL PRECISION CO., LTD 3-3-2 Automatic Power-off Timer Setting Select in the general function setting mode to change the automatic power-off timer setting. DISPLAY NOTE ACTIONS Press TARE LCD displays the last status ON/ZERO UNITS Automatic power-off timer setting key to key in parameter... -
Page 39: Hi/Lo/Ok Settings
EXCELL PRECISION CO., LTD 3-3-3 HI/LO/OK Settings Select in the general function setting mode to set the HI/LO/OK function. DISPLAY NOTE ACTIONS 4 When the high limit and low limit are both set as “0”, the Hi/Lo/OK function is disabled. -
Page 40: Restore To The Default Settings
EXCELL PRECISION CO., LTD 3-3-4 Restore to the Default Settings Select in the general function setting mode to restore to the default settings. DISPLAY NOTE ACTIONS Press TARE ⇒ Return (Cancel the restoration) ON/ZERO UNITS keys to select “return” or “format”... -
Page 41: Noise Filter Settings
EXCELL PRECISION CO., LTD 3-3-5 Noise Filter Settings Select in the general function setting mode to set the noise filter settings. NOTE ACTIONS DISPLAY 4 When modifying , the parameters of remain un-altered. Returning to zero point setting LCD displays the last status... -
Page 42: Hold Function Settings
EXCELL PRECISION CO., LTD 3-3-6 Hold Function Settings Select in the general function setting mode to set the hold function. ACTIONS NOTE DISPLAY Press TARE Hold function setting LCD displays the last parameter setting Hold function setting ON/ZERO UNITS keys to key in the... -
Page 43: Auto Unit Weight Averaging Setting
EXCELL PRECISION CO., LTD 3-3-7 Auto Unit Weight Averaging Setting Press TARE Auto unit weight averaging setting LCD displays the last parameter setting Auto unit weight averaging setting ON/ZERO UNITS keys to key in ON/ZERO UNITS to key in the parameters... -
Page 44: Weight Calibration
EXCELL PRECISION CO., LTD 3-4 Weight Calibration In the weighing mode, press the keys at the same time to enter the NET/GROSS ON/ZERO Advanced Function setting mode. The LCD shows and use the NET/GROSS key to select to enter the weight calibration mode. -
Page 45: Rs232 Serial Interface Settings
EXCELL PRECISION CO., LTD 3-5 RS232 Serial Interface Settings In the weighing mode, press the keys at the same time to enter the NET/GROSS ON/ZERO Advanced Function setting mode. The LCD shows and use the NET/GROSS key to select to enter the RS232 serial interface setting mode. -
Page 46: Baud Rate Settings
EXCELL PRECISION CO., LTD 3-5-1 Baud Rate Settings Select in the RS232 serial interface setting mode to set the Baud Rate. ACTIONS NOTE DISPLAY Press TARE Baud rate setting LCD displays the last value Default value: 9600 (bits/sec) ON/ZERO UNITS... -
Page 47: Communication Protocol Settings
EXCELL PRECISION CO., LTD 3-5-2 Communication Protocol Settings Select in the RS232 serial interface setting mode to set the Communication Protocol. ACTIONS NOTE DISPLAY Press TARE Communication protocol setting LCD shows the last setting value. Default setting: n 8 1... -
Page 48: Output Format Settings
EXCELL PRECISION CO., LTD 3-5-3 Output Format Settings Select in the RS232 serial interface setting mode to set the Output Format. ACTIONS DISPLAY NOTE RS232 output format setting LCD shows the last setting. Default setting: Press TARE RS232 output format setting... -
Page 49: Continuous Transmission Settings
EXCELL PRECISION CO., LTD 3-5-4 Continuous Transmission Settings Select in the RS232 serial interface setting mode to set the Continuous Transmission status. ACTIONS NOTE DISPLAY Press TARE Transmission setting LCD shows the last setting Default setting: ON/ZERO UNITS keys to select the... -
Page 50: Selection Of The Continuous Transmission Rate
EXCELL PRECISION CO., LTD 3-5-5 Selection of the Continuous Transmission Rate Select in the RS232 serial interface setting mode to set the Continuous Transmission Rate. ACTIONS NOTE DISPLAY Press TARE Continuous transmission rate setting The LCD shows the last setting. -
Page 51: Auto Transmission At Zero
EXCELL PRECISION CO., LTD 3-5-6 Auto Transmission at Zero Select in the RS232 serial interface setting mode set the Auto Transmission at Zero. ACTIONS NOTE DISPLAY Press TARE Auto transmission at zero LCD shows the last setting Default setting: ON/ZERO... -
Page 52: Reset Auto Transmission
EXCELL PRECISION CO., LTD 3-5-7 Reset Auto Transmission Select in the RS232 serial interface setting mode Reset Auto Transmission. ACTIONS NOTE DISPLAY Press TARE Resetting auto transmission The LCD shows the last setting Default setting: keys ON/ZERO UNITS to key in the desired... -
Page 53: Output Condition Settings
EXCELL PRECISION CO., LTD 3-5-8 Output Condition Settings Select in the RS232 serial interface setting mode Reset of Auto Transmission. ACTIONS NOTE DISPLAY Press TARE Output condition settings The LCD shows the last setting. Default setting: ON/ZERO UNITS keys to select the desired... - Page 54 EXCELL PRECISION CO., LTD 2 Command mode Command Format A Host Command Slave Command Zero Command mode Tare Switch to the first unit Gross weight Switch to the second unit Net weight Switch to the third unit Clear TARE value...
- Page 55 EXCELL PRECISION CO., LTD Command Format C Host Command+ Data Slave Command+ Data Write weight comparison setting value WS™™££XXXXXX ™™: Groups(00 ~ 09) ££: Setting Items XXXXXX: Setting Value Write “HI” setting value Write “LO” setting value Note : ™™ (Group) is various depended on different models 00 ⇒...
- Page 56 EXCELL PRECISION CO., LTD 2 Output data format Weight format Gross 7 SP SP o Tare 6 SP SP k CR LF Plus OL + SP SP SP SP SP SP SP SP SP SP SP SP Minus OL O L...
-
Page 57: Appendix I: Ascii Code Table
EXCELL PRECISION CO., LTD APPENDIX I: ASCII CODE TABLE ASC II ASC II ASC II Symbol Symbol Symbol Code Code Code ↵ PW Service Manual SME300000016... -
Page 58: Appendix Ii: 7 Segment Display Characters
EXCELL PRECISION CO., LTD APPENDIX II: 7 SEGMENT DISPLAY CHARACTERS Digit 7 segment letter Alphabet 7 segment letter Alphabet 7 segment letter PW Service Manual SME300000016...