Paxar 9855 Operator's Handbook Manual
Paxar americas inc operator's manual printer 9855
Hide thumbs
Also See for 9855:
- Operator's handbook manual (124 pages) ,
- Application notes (54 pages) ,
- Reference manual (294 pages)

Related Manuals for Paxar 9855


Summary of Contents for Paxar 9855
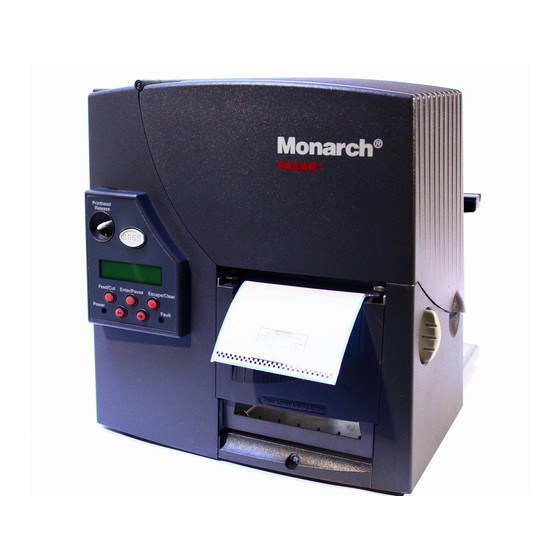
- Page 1 Paxar 9855 Printer TC9855OH Rev. AB 4/03 ©2003 Paxar Americas, Inc. All rights reserved.
- Page 2 édicte par le ministère des Communications du Canada. Trademarks 926, 932, 938, 939, 9800, 9855, and 9860 are trademarks of Paxar Americas, Inc. Paxar ® and Paxar Americas are registered trademarks of Paxar Corporation. Microsoft and MS-DOS are registered trademarks of Microsoft Corporation.
-
Page 3: Table Of Contents
Printer Status Lights........ - Page 4 LOADING RIBBON ........... . . 3-1 Loading Ribbon .
- Page 5 Parallel Communications ......... . 5-6 Port.
- Page 6 PRINTING............. 8-1 Printing.
- Page 7 Printer ........
-
Page 9: Getting Started
9855 printer lets you print text, graphics, and bar codes on thermal transfer (ribbon) and thermal direct labels or tags. The 9855 printer prints labels continuously (in one strip) or on-demand (one label at a time). You can print on aperture, die cut, black mark, or continuous (non-indexed) supplies. -
Page 10: Shipping The Printer
U n p a c k i n g t h e P r i n t e r After you unpack the printer, you should have the printer, a power cord, and a ribbon take-up core (may already be on take-up reel). -
Page 11: 9445 Printer Online Emulation
1. Plug the power cable into the socket. Plug the other end of the cable into a grounded electrical outlet. 2. Turn on the printer. Press ( I ) to turn on and ( O ) to turn off the printer. -
Page 12: Establishing Communications
The factory default values are 9600 Baud, 8 bit data frame, 1 stop bit, no parity, and DTR flow control. The printer also has a USB (Universal Serial Bus) Version 1.1 communication port. -
Page 13: Using The Control Panel
The printer supports a baud rate up to 115200. Make sure your host is capable of communicating at the speed you select for the printer. U s i n g t h e C o n t r o l P a n e l The control panel has a two-line LCD display, 2 status lights, and five buttons. -
Page 14: Button Functions
When the printer is in the offline menu mode, returns the display to the next higher menu. When the printer is in the offline menu mode, displays the previous menu item. When the printer is in the offline menu mode,... -
Page 15: Display
D i s p l a y The display shows a three-digit error code and brief message to identify any problem the printer may have. For a description of the problem, look up the error code in Chapter 11, "Diagnostics and Troubleshooting."... -
Page 16: Exiting An Option
When you see the menu option you want, press Enter/Pause to select it. The Main Menu controls the printer’s setup and operation. Through the Setup Menu, you can select a sub-menu for the supply, contrast, default, or port settings. Each of those sub-menus have several options, such as ribbon, speed, monetary symbols, and baud rate. -
Page 17: Loading Supplies
If you are using thermal direct supplies, do not load a ribbon. If you switch from black mark to die cut supplies, make sure the printer’s supply type is set correctly. See "Supply Type" in Chapter 4 for more information. Your System Administrator can also send the supply setup packet to change the supply type. -
Page 18: Loading Labels Or Tags
L o a d i n g L a b e l s o r Ta g s Make sure the printer is configured for the correct supply type. 1. Open the cover. 2. Unlock the printhead by turning the retaining latch. - Page 19 For fan-fold supplies, lay the label strip over the supply holder and across the supply guide so that a few inches extend past the front of the printer. Tuck the supply under the nibs and in between the die cut sensor.
- Page 20 For tag supplies using the optional knife, feed the supply through the knife. Make sure at least 0.5 inches of supply is past the knife. 8. Adjust the supply guides so they touch the supply. Push up on the supply lever to lock the supply guides into place. Die Cut Sensor Nibs...
- Page 21 9. Hold the printhead assembly by the printhead tab while pressing down on the printhead release. 10. Close the printhead by pressing down on the thumb well until you hear it click into place. Thumb Well 11. Close the cover. 12.
- Page 22 The next label is not printed until the completed one is removed from the printer. Make sure the printer is configured for on-demand mode and the correct supply type.
- Page 23 3. Feed the backing paper over the peel bar. Peel Bar Lower Opening 4. Feed the backing paper through the lower opening of the exit cover. Close the exit cover. Pull down on the backing paper to remove any slack. Tear Edge Backing Paper When removing the backing paper, pull up across the...
-
Page 24: Using The Optional Tear Bar
5. Close the printer’s cover. 6. Press Feed/Cut to position the supply under the printhead. U s i n g t h e O p t i o n a l Te a r B a r Note the following change to loading labels if you have purchased the optional tear bar. -
Page 25: Using Linerless Supply
U s i n g L i n e r l e s s S u p p l y Linerless printing is an option that must be purchased separately on the original printer order. The linerless option is not customer or field-installable. - Page 26 5. Press down on the exit cover tabs to open the exit cover. 6. Pull back slightly on the spring latch with your thumb or fingernail and lift the shelf out. CAUTION Be careful when inserting or removing the shelf. The shelf has sharp points.
- Page 27 7. If inserting the peel bar: Insert the left edge of the peel bar into the side slot at an angle. Then, slide the peel bar to the right and press down until you hear it click into place. The peel bar must be lined up with the platen roller.
- Page 28 The shelf must be parallel to the platen roller, not at an angle. See the following diagrams. Platen Roller Spring Latch Shelf Shelf inserted correctly. Platen Roller Shelf Shelf not inserted correctly. CAUTION Make sure the shelf is not misaligned with the platen roller, or damage to the platen roller could occur.
-
Page 29: Using String Tag Supply
Linerless supplies do not stick to the textured platen roller. 11. Close the printhead assembly and the cover. 12. Turn on the printer. 13. Verify the alignment of the platen roller with the peel bar or shelf. Press Feed/Cut to position the supply under the printhead. - Page 30 Make sure the printer is configured for the correct supply type. 1. Open the cover. 2. Unlock the printhead by turning the retaining latch. 3. Lift printhead assembly using the printhead tab until the assembly locks into place. 4. Shake the roll of string tags down to untangle the roll.
- Page 31 8. Lay the supply across the supply guide so that a few inches extend past the front of the printer. Tuck the supply under the nibs and in between the die cut sensor. 9. Adjust the supply guides so they touch the supply. Push up on the supply lever to lock the supply guides into place.
-
Page 32: Adjusting The Wide/Narrow Knobs
12. Close the cover. 13. Press Feed/Cut to position the supply under the printhead. If the printer will be unused for extended periods of time, we recommend leaving the printhead unlatched. A d j u s t i n g t h e W i d e / N a r r o w K n o b s You may need to adjust the two wide/narrow knobs according to the width of your supply. -
Page 33: Loading Ribbon
See "Using a High Energy Ribbon" for more information. If you want to use a high energy ribbon, select high energy for the ribbon every time the printer is turned on. See "Ribbon" in Chapter 4 for more information. - Page 34 L o a d i n g R i b b o n Make sure the printer is configured to use a ribbon. To load ribbon: 1. Open the cover. 2. Unlock the printhead by turning the retaining latch. 3. Lift printhead assembly using the printhead tab until the assembly locks into place.
- Page 35 6. Remove the new ribbon from the package as shown. Do not wrinkle or crush the new ribbon. 7. Slide the ribbon onto the back reel as far as it will go. The ribbon roll only fits on the reel one way. Carefully unwind a few inches of ribbon from the bottom of the roll.
-
Page 36: Using A High Energy Ribbon
U s i n g a H i g h E n e r g y R i b b o n High energy ribbon is an option for this printer. It enables you to print on high energy (TUFF-MARK®) supplies. -
Page 37: High Energy Ribbon Limitations
A non-printing area of at least .1 inch (2.54 mm) must exist on the left and right edge of the ribbon. Do not print horizontal lines or bars. Graphics are limited. off the printer. CAUTION contains print. Loading Ribbon 3-5... - Page 38 3-6 Loading Ribbon...
-
Page 39: Setting Supply Options
S E T T I N G S U P P L Y O P T I O N S This chapter explains how to select the supply type, ribbon, speed, feed mode, backfeed, print position, supply position, margin position, cut position, dispense position, backfeed distance, separators, and skip index mode. -
Page 40: Supply Type
S u p p l y Ty p e You can print on aperture, black mark, die cut, or continuous supplies. You have to tell the printer which supplies you are using. If you are using edge aperture supplies, use To change the setting, from the Main Menu, select Setup, then Supply. -
Page 41: Ribbon
R i b b o n You have to tell the printer if your supplies require a ribbon. To change the setting, from the Main Menu, select Setup, then Supply. Then, follow these steps. 1. Press l or r until you see 2. -
Page 42: Speed
S p e e d You can change the print speed for bar codes or graphics. If you select "default" for speed, formats with serial bar codes automatically print at 2.5 ips and formats with parallel bar codes print at 6.0 ips. 12.0 ips printing is an option that must be purchased separately. -
Page 43: Feed Mode
F e e d M o d e You can use continuous or on-demand printing. On-demand printing allows you to remove a label before printing the next one. To change the setting, from the Main Menu, select Setup, then Supply. Then, follow these steps. 1. -
Page 44: Backfeed
In continuous mode, only the last label in the batch is advanced to the dispense position. Extended backfeed is available on this printer with a knife installed. Extended backfeed feeds a tag far enough out to be cut and backfeeds the next tag to the printhead line. -
Page 45: Positioning
One dot is 0.0049 inch. If the data is too close to the bottom, increase the number. If the data is too close to the top, decrease the number. Changing this setting only affects new formats sent to the printer. Setting Supply Options 4-7... - Page 46 To change the setting, from the Main Menu, select Setup, Supply, then Positioning. Then, follow these steps. 1. Press l or r until you see 2. Press Enter/Pause. The current setting is displayed, for example: 3. Press l or r to change the print position. Pressing l decreases the value (moves the image down);...
-
Page 47: Supply Position
This function adjusts the machine to print at the vertical 0,0 point on the supply. The supply position adjustment should only be made on inital printer setup. For format adjustments, change the print position. You may need to adjust the supply in or out to allow tags and labels to be removed. -
Page 48: Margin Position
This function adjusts where the format prints horizontally on the supply. The adjustments are in dots (0.0049 inch), which is the smallest measurement the printer recognizes. The width of the print area depends on your supply size. Maximum width is four inches. When you move the image to the right or left on the supply, avoid moving the image too close to either edge, because it may not print. -
Page 49: Cut Position
Press Escape/Clear until you see the Main Menu. C u t P o s i t i o n This function adjusts where the tag is cut. The printer adjusts the cut position according to the black marks on the supply. You may need to adjust for aperature supplies. -
Page 50: Dispense Position
2. Press Enter/Pause. The current setting is displayed, for example: 3. Press l or r to change the cut position. Pressing l decreases the value (moves the cut down); r increases it (moves the cut up). 4. Press Enter/Pause when the number you need appears. Press Escape/Clear until you see the Main Menu. -
Page 51: Backfeed Distance
B a c k f e e d D i s t a n c e This is the amount to move the label backwards. The backfeed distance can not be greater than the dispense position. If you make the backfeed distance greater than the dispense position, the dispense position automatically changes to match the backfeed distance. -
Page 52: Batch Separators
(two tags) separator prints. For non-indexed supply, the batch separator is always six inches long. If you have ® the Paxar 928 stacker installed, the batch separator is 3.66 inches long. The name of the batch is shown on the batch separator. -
Page 53: Skip Index
3. Press l or r to see the other options. After you display the option you want, press Enter/Pause. Press Escape/Clear until you see the Main Menu. S k i p I n d e x You can use the skip index mode to skip (or ignore) a sense mark and print an image over multiple labels, if necessary. -
Page 54: Setting Contrast
S e t t i n g C o n t r a s t The print contrast controls the darkness of the printing on your supply. The range is -699 to +699 and the default is 0. You may need to increase the print contrast for linerless supplies. - Page 55 4. Press l or r to change the contrast. Pressing r darkens the print; l lightens the print. Feed/Cut acts as a toggle switch to change the value by 10 or 1. For example, to make the contrast 50 (from the default of 0), press Feed/Cut, then press r five times (50).
-
Page 56: Verifier
V e r i f i e r The verifier scans and checks the quality of bar codes as they are printed. The optional verifier must be purchased separately. The verifier scans parallel bar codes; it can not scan serial bar codes. The verifier must be enabled and set up before you can scan bar codes. -
Page 57: Communication Values
C O M M U N I C A T I O N V A L U E S This chapter tells you how to set the serial or parallel communication values. These values provide the link for normal online printing. CANCEL PRINT BATCH... -
Page 58: Baud Rate
B a u d R a t e To change the setting, from the Main Menu select Setup, Port Settings, then Serial Comm. If password protection in enabled, press Feed/Cut three times, then press Enter/Pause before you see the Setup Menu options. Then, follow these steps. 1. -
Page 59: Stopbits
3. Press l or r to display the word length you need, then press Enter/Pause. Press Escape/Clear until you see the Main Menu. S t o p B i t s To change the setting, from the Main Menu select Setup, Port Settings, then Serial Comm. -
Page 60: Flow Control
2. Press Enter/Pause. The current setting is displayed, for example: 3. Press l or r to display the parity you need, then press Enter/Pause. Press Escape/Clear until you see the Main Menu. F l o w C o n t r o l To change the setting, from the Main Menu select Setup, Port Settings, then Serial Comm. -
Page 61: Reset To Default Values
R e s e t t o D e f a u l t V a l u e s To change the setting, from the Main Menu select Setup, Port Settings, then Serial Comm. Then, follow these steps. 1. Press r until you see 2. -
Page 62: Mode
Ethernet communication port. The external port is used to connect a printer cable or external device directly to the parallel port. 4. Press Escape/Clear until you see the Main Menu. M o d e To change the setting, from the Main Menu select Setup, Port Settings, then Parallel Comm. -
Page 63: Setting Defaults
You can set your printer configurations to fit your daily operation, using either the offline menus or the online configuration option. After an option is selected in the online configuration or offline Setup Menu, the option is saved when the printer is turned off. MAIN MENU REPEAT... - Page 64 Changing the settings does not affect 6-2 Setting Defaults Choices None/USA/UK/Japan/ Germany/France/Spain/ Italy/Sweden/Finland/ Austria/India/Russia/ Korea/Thailand/China/Euro-Dollar No/Yes 0/1/2/3 No/Yes Online/Offline English/French/German/ Spanish-ES/Japanese/Portuguese/ Italian/Swedish/Spanish 2-MX/ Danish/Dutch/Finnish/Norwegian Disabled/Enabled batches already in the printer. Default Online English Disabled...
- Page 65 M o n e t a r y S i g n You can also select None if you do not want a monetary sign to print in price fields. The monetary signs available for 15 countries are shown in the table below. Country Japan Germany...
-
Page 66: Secondary Sign
3. Press l or r until you see the country’s monetary sign you want. 4. Press Enter/Pause. Press Escape/Clear until you see the Main menu. S e c o n d a r y S i g n If you select USA as the monetary sign, you can print amounts less than $1.00 either by using a dollar sign and decimal ($0.30) or by using a cent sign (30¢). -
Page 67: Decimal Places
D e c i m a l P l a c e s You can set the printer for 0, 1, 2, or 3 places after the decimal in a price field. In U.S. currency, you might print prices like this: $24.00 (2 decimal places) or like this: $24 (0 decimal places). -
Page 68: Slashed Zero
P o w e r - U p M o d e Power-up mode lets you decide how your printer starts each time you turn it on. If you want the printer to be ready to start printing when it is turned on, use the Online power-up mode. If you want the operator to perform some other task first, use the Offline power-up mode. -
Page 69: Power-Up Mode
Enter/Pause. Press Escape/Clear until you see the Main menu. P r o m p t S e t Prompt set determines which language displays on the printer’s menu. You can select English, French, German, Spanish-ES, Japanese, Portuguese, Italian, Swedish, Spanish 2-MX, Danish, Dutch, Finnish, and Norwegian. -
Page 70: Flash Storage
Flash storage allows packets (with "R" or "N" selectors) to be stored in flash memory, instead of volatile RAM. Packets stored in flash memory are saved when the printer is turned off. However, flash memory storage is limited. You must format flash memory before enabling this option. -
Page 71: Using Flash Memory
F o r m a t t i n g F l a s h M e m o r y Before storing packets in flash memory, downloading a script, or if the printer’s firmware is updated, you must format the flash memory. Formatting flash memory is only required once during initial printer setup. -
Page 72: Checking Available Flash Memory
4. Press r to display "Yes" and press Enter/Pause. The printer’s flash memory is cleared and reformatted. This process may take several minutes. The printer reboots automatically after formatting flash memory. You need to resend any fonts you want to use to flash memory again. You return to the "Print Mode Ready"... -
Page 73: Packing Flash Memory
Packing flash memory permanently removes any deleted files from memory. Periodically select this option to "clean up" the printer’s memory. Any deleted files are removed from memory when you pack flash. To pack flash memory, from the Main Menu, select Setup. Then, follow these steps. -
Page 74: Memory Guidelines
TrueType font may exceed that limit. If you print TrueType or double-byte Asian fonts, use a 9855 or 9860 printer with the extended memory option. There is not a 1-to-1 ratio between the memory in your printer and the memory in your PC. -
Page 75: Setting Batch Options
Use temporary storage for graphics that are only used once or twice. However, if you have a logo that is used on multiple formats, save the graphic in flash. Once again, try to create the smallest file size possible for your graphic. Each line in a packet requires the same amount of memory. - Page 76 6-14 Setting Defaults...
-
Page 77: Using Scripts
This chapter explains how to load, enable, and delete scripts. You can also enable status polling and immediate commands. Using the Scripts menu requires custom software from Paxar. It allows you to print data streams written for other printers. Ignore these menus if you do not use Scripts. - Page 78 V i e w i n g S c r i p t I n f o r m a t i o n 1. To see if your printer has a script loaded from the Main menu, press l or r until you see 2.
-
Page 79: Downloading A Script
Set the communication parameters using the MODE command. Then, prepare the printer to accept a script. 1. From the printer’s Script Menu, press l or r until you see 2. Press Enter/Pause. Only one script can be loaded in the printer at When downloading a script, if you receive an error: Check the available flash memory. -
Page 80: Enabling A Script
Enter/Pause. Selecting "Yes" starts the script. Selecting "No" stops the script. If you select "Yes," when you turn off the printer and turn it back on, the script automatically starts. Once the script is enabled, you will see The "S" in the lower left-hand corner of the screen indicates the printer has a script loaded and enabled (the script is running). -
Page 81: Deleting A Script
D e l e t i n g a S c r i p t You can delete a script from the printer’s memory. To delete a script: 1. From the Script Menu, press l or r until you see 2. -
Page 82: Enabling Status Polling
E n a b l i n g S t a t u s P o l l i n g Status polling allows you to obtain information about the readiness of the printer and the current (or last received) print job. Your System Administrator can enable status polling while the printer is running in Script mode. -
Page 83: Printing
You can send format, batch, and graphic data to the printer from a host. When the printer receives the data, batches begin printing automatically. The optional Packet Reference Manual tells how to create, store, and download the data necessary to print batches. -
Page 84: On-Demand Mode Printing
O n - D e m a n d M o d e P r i n t i n g When this printer is operating in the on-demand mode, the next label prints when the previous label is removed from the printer or when Feed/Cut is pressed. The display shows "Printing X of Y"... -
Page 85: Pausing A Batch
P a u s i n g a B a t c h You can pause printing by pressing Enter/Pause. You may want to interrupt a batch to make adjustments for: Loading a different roll of supply or a ribbon. See Chapter 2, "Loading Supplies"... -
Page 86: Canceling A Paused Batch
2. Press l or r until you see 3. Press Enter/Pause. The batch starts printing from the beginning. C a n c e l i n g a P a u s e d B a t c h You can cancel a paused batch, delete a format, graphic, or font in memory, or all the batches waiting to print. - Page 87 Press Escape/Clear or press r to display No and then press Enter/Pause. The printer returns to the Pause menu. Press l or r to select another function from the Pause Menu, or to return to Print Mode and print all the batches.
-
Page 88: Repeating A Batch
Press r, then press Enter/Pause. You return to the Pause menu. If you select "Yes," these prompts delete ALL formats, graphics, and/or fonts in the printer. 5. Press l or r to select another function from the Pause menu, or to return to Print mode. -
Page 89: Offline Printing
1. From the Main Menu, press l or r until you see 2. Press Enter/Pause. Printing xxxx of xxxx The number increments until the entire batch has printed. When it is finished, you will see O f f l i n e P r i n t i n g Offline printing requires the optional keyboard, which must be purchased separately. -
Page 90: Special Printing Considerations
S p e c i a l P r i n t i n g C o n s i d e r a t i o n s Keep in mind the following special printing considerations. Maximum Print Speed 2.5/4.0/6.0 ips (inches per second) -
Page 91: Printing Truetype® Fonts
After reconfiguring memory, resend the font, format, and batch packets. This printer can accept a TrueType font file that has been converted to Hex or Run-Length encoding using the version of Font Utility. Font Utility is available on our Web site (www.servisource1.com). -
Page 92: Licensing Your Fonts
However, it is your responsibility to license the fonts you purchase and download to your printer. Contact your font supplier for licensing information. Additional fonts that are compatible with this printer can be purchased from: The Electronic Font Foundry... -
Page 93: Care And Maintenance
When you are printing and a jam occurs, the Fault light on the printer’s front panel blinks. To clear the jam: Turn off the printer and open the cover and printhead assembly. If necessary, remove the label roll and ribbon. - Page 94 If you still notice build-up on the printhead or black streaks on your supply, use the enclosed printhead CLEAN-STRIP. 1. Turn off the printer and open the cover and printhead assembly. 2. Remove the label roll and ribbon (when cleaning the printhead).
- Page 95 4. Clean the platen roller when you see significant adhesive build-up or a label is wrapped around the platen roller. Use a dry, soft-bristle brush, such as a toothbrush, to clean either the standard (black) or linerless (red/orange textured) platen roller.
- Page 96 7. Rub the cotton swab across the supply sensor and die cut sensor and remove any build-up. 8. Clean the build-up in the supply path. 9. Let the printer dry before you reload supplies. 10. Close the exit cover by pushing firmly on it. Both latches will click into place.
-
Page 97: Replacing The Printhead
The printhead is sensitive to static electricity, which can damage the printhead or reduce its life. Ground yourself by touching some metal, such as the printer’s metal base, before touching the printhead. Clean the printhead to remove any salt or oil left from handling prior to operation. - Page 98 Ground yourself by touching some metal, such as the printer’s metal base, before touching the printhead. 7. Carefully plug the cable into the new printhead.
- Page 99 11. Let the printhead dry and reload your supplies. 12. Close the printhead assembly and the cover. Turn on the printer. Press Feed/Cut to position the supply under the printhead. the ribbon roll.
- Page 100 9-8 Care and Maintenance...
-
Page 101: Diagnostics & Troubleshooting
D I A G N O S T I C S & T R O U B L E S H O O T I N G This chapter explains how to perform simple diagnostic functions such as checking the software version, the supply quality, printing test labels, and using password protection. -
Page 102: Printing A Test Label
Line one lists the printer model number (M9855) and line two gives the version of software in the printer. P r i n t i n g a Te s t L a b e l 1. From the Diagnostics Menu, press l or r until you see 2. -
Page 103: Checking Supply Quality
"No data! Press Enter" message if you are using continuous (non-indexed) supplies. If you have printed labels since turning on the printer, you will l 1568 034 124 Y r The Len listing is the length of the loaded supply in dots. -
Page 104: Using Password Protection
U s i n g P a s s w o r d P r o t e c t i o n The password protection feature prevents formats, graphics or fonts from accidentally being deleted from the printer’s memory. It also limits access to the Setup and Scripts menus. -
Page 105: Service Diagnostics
S e r v i c e D i a g n o s t i c s The Service Diagnostics menu can only be accessed by a Paxar Representative, because it requires a separate password. If you need to call Technical Support, print a test label first. -
Page 106: Troubleshooting
Voids in printing. Serial bar codes do not scan. 10-6 Diagnostics & Troubleshooting Action Turn off the printer, wait fifteen seconds and then turn on the printer. Call Technical Support if the error message reappears. Check supply. Check ribbon. Send a corrected format and batch packet. -
Page 107: Error Messages
Some errors numbered 400-438 and 500-574 are internal software errors. Errors numbered 900-999 are hard printer failures. If you cannot clear an error, turn off the printer, wait several seconds and then turn on the printer. For a complete list of errors, refer to the optional Packet Reference Manual available on our Web site. -
Page 108: Common Errors
C o m m o n E r r o r s Errors 001 to 405 and 429 to 435 are data errors. This type of error indicates that incorrect data was sent to the printer, and the printer is ignoring it. Your System Administrator should correct the packet and send it back to the printer. - Page 109 Escape/Clear and try to continue printing. Change supply. Printhead is overheated. Turn off the printer. Printer did not sense a black mark when expected. For errors 751-753, check the supply tracking, supply marks, black mark sensor position, and supply roll for binding.
- Page 110 The printer does not recalibrate after this error. The printhead has less than 8 bad dots. The printer can shift bar code fields to avoid bad dots. You may need to press Escape/Clear to continue printing. Print a test label to confirm the number of bad dots.
-
Page 111: Specifications
S P E C I F I C AT I O N S P r i n t e r Height: 12.5 inches (318 mm) Width: 12 inches (305 mm) Depth: 13 inches (330 mm) with the optional 13.0" (330 mm) x 12.5" (318 mm) x 17.3" (439 mm) metal cover (H x W x D) Weight:... -
Page 112: Tag Cut Dimensions
Print Speed: Maximum Print Area: Ta g C u t D i m e n s i o n s Use these specifications for the 926 Knife. Widths: Lengths: Thickness: Cut Angle: Batch Separator: A-2 Specifications 2.5 ips (64 mm) default for all serial bar codes, 4.0 ips (102 mm), 6.0 ips (152 mm) default for parallel bar codes, 8.0 ips (203 mm), and 10.0 ips (254 mm). -
Page 113: Supplies
S u p p l i e s For high temperature or high humidity environments, contact Paxar for supply recommendations. Continuous (non-indexed) supply does not have perforations or black marks and must be used in continuous mode. We recommend using continuous supply with a tear bar or the optional knife. -
Page 114: Linerless Supplies
L i n e r l e s s S u p p l i e s For Supply Width greater than or equal to 1.5 inches (38 mm) 2.0 inches (51 mm) 3.0 inches (76 mm) 4.0 inches (102 mm) A 0.50 inch non-print zone exists on the leading edge (beginning) of all labels. -
Page 115: Ribbon Specification
R i b b o n S p e c i f i c a t i o n Do not leave ribbon in sunlight, high temperatures or humidity. Ribbon Type: Standard or High Energy Ribbon Widths 1.5 inches (38 mm) 1.8 inches (46 mm) 2.3 inches (58 mm) standard or high energy... -
Page 116: Cable Pinouts
C a b l e P i n o u t s The following tables show the connector pins for a 9-pin to 25-pin (118364) cable or a 25-pin to 25-pin cable (118366). 9-Pin (F) CD 1 RD 2 TD 3 DTR 4 SGND 5 DSR 6... -
Page 117: Accessories & Options
3", or 4" widths) Monarch® MPCL Toolbox (utilities to configure the printer, download fonts, and design formats) Available on our Web site (www.paxar.com) External LAN Print Server Supports Ethernet and TCP/IP: External Ethernet Print Server supports TCP/IP (11753105) Printhead CLEAN-STRIP (120350) -
Page 118: Packaging Materials
P a c k a g i n g M a t e r i a l s If you need to ship the printer to a different location and do not have the original packaging, use the following part numbers to order the appropriate packaging materials. -
Page 119: Ethernet Information
Windows® 95/98/2000 or Windows NT®, TCP/IP, and NetWare®. Software is available on our Web site (www.paxar.com) to configure the print server. It can also be configured using HP Jet Admin or HP Web JetAdmin software. - Page 120 B-4 Accessories & Options...
-
Page 121: Glossary
G L O S S A R Y The following terms will help you use this manual. continuous mode Mode in which the printer prints all the labels in the batch without stopping. download (send) Transmission of data from the host to your printer. - Page 122 2 Glossary...
- Page 123 10-2 softw are version 10-1 cleaning peel bar 9-3 printhead 9-3 supply sensor 9-4 cleaning printer 9-1 clearing jam s 9-1 com m on errors 10-8 com m unication errors 10-7 com m unication param eters baud rate 5-1...
- Page 124 10-2 linerless labels 2-9 linerless supply specifications A -4 loading, ribbon 3-2 locating supply sensor 9-4 m aintenance cleaning printer 9-1 m argin adjusting 4-10 m em ory flash 6-8 m ode offline 8-7 online 8-1 m onetary sign, defining 6-3...
- Page 125 4-4, 4-6, 4-15, 6-1, 6-3, 6-8 establishing com m unication 1-4 features 1-1 lights 1-5 operating specifications A -1 physical specifications A -1 unpacking 1-2 printer accessories B -1 printer options B -3 printhead cleaning 9-3 printhead replacem ent 9-6 printing considerations 8-8...
- Page 126 string tags 2-13 supply options ribbon 4-3 separators 4-14 setting 4-1 supply sensor 9-4 locating 9-4 tag specifications A -3 tear bar 2-8 tear edge 2-7 test labels printing 10-2 troubleshooting 10-6 trueType fonts printing 8-9 values com m unication 5-1, 5-6 default 5-1, 5-6 version of softw are 10-1 w ord length 5-1...
- Page 128 Fournitures et assistance en Suisse: GOMARO s.a. - La Rosaire 5 - CH 1123 Aclens - Suisse Tel: 021 869 97 70 - Fax: 021 869 96 02 http://www.gomaro.ch...