
Related Manuals for Paxar Monarch 9855 RFID


Summary of Contents for Paxar Monarch 9855 RFID
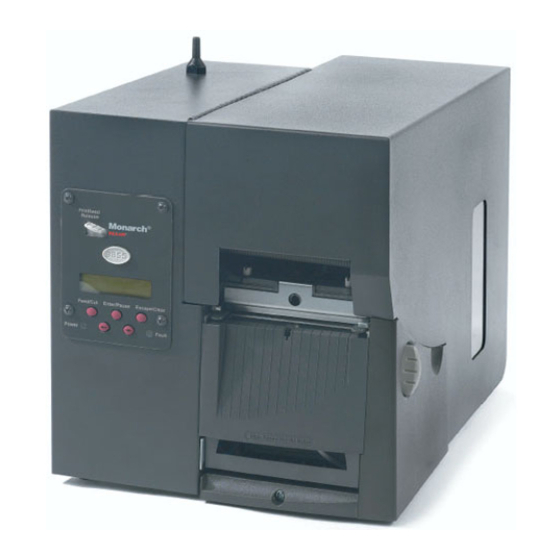
- Page 1 Quick Quick Monarch ® 9855 RFID ® Reference Reference Printer TC9855RFIDQR Rev. AN 4/08 ©2007 Paxar Americas, Inc. a subsidiary of Avery Dennison Corp. All rights reserved.
- Page 2 Each product and program carries a respective written warranty, the only warranty on which the customer can rely. Paxar reserves the right to make changes in the product, the programs, and their availability at any time and without notice. Although Paxar has made every effort to provide complete and accurate information in this manual, Paxar shall not be liable for any omissions or inaccuracies.
- Page 3 Identification) label (commonly called “RFID tags”) before the label’s format is printed. RFID tags contain an embedded RFID inlay (chip and antenna). RFID is only available on the Monarch® 9855™ printer using die cut or black mark supplies. Linerless supplies are not currently supported. The RFID printer is also capable of printing standard (non-RFID) supplies.
- Page 4 2.0 communications port, which is compatible with version 1.1. Drivers are available on our Web site for a variety of operating systems. Turn on the printer. Press ( I ) to turn on and ( O ) to turn off the printer. www.aimglobal.org www.epcglobalinc.org www.rfidjournal.com...
- Page 5 System Administrator if an error is displayed. When the printer is offline, changes the displayed value by one or ten. Enter/Pause: Pauses the current print job or resumes a paused print job.
- Page 6 Lift the printhead assembly using the printhead tab until the assembly locks into place. Place the roll of supply on the supply holder. For labels, the supply unrolls from the top or the bottom. Do not pick up the printer by the supply holder. Supply Holder Retaining Latch...
- Page 7 Lay the label strip across the supply guide so that a few inches extend past the front of the printer. Tuck the supply under the nibs and in between the die cut sensor. Do not feed supply between the supply roller and deflector.
- Page 8 Adjust the supply guides so they touch the supply. Push up on the supply lever to lock the supply guides into place. 10. Hold the printhead assembly by the printhead tab while pressing down on the printhead release. 11. Close the printhead by pressing down on the thumb well until you hear it click into place.
-
Page 9: Loading Labels For The Optional Peel Mode
The next label is not printed until the completed one is removed from the printer. Make sure the printer is configured for on-demand mode and the correct supply type is installed. The minimum feed length is 1.5 inches for peel mode. - Page 10 When removing the backing paper, pull up across the saw-toothed tear edge. Make sure the backing paper tears at the edge. Close the printer's cover. Press Feed/Cut several times to feed at least three labels/tags to properly position the supply and the ribbon.
- Page 11 L o a d i n g R i b b o n Open the cover. Unlock the printhead by turning the retaining latch. Lift printhead assembly using the printhead tab until the assembly locks into place. Push the deflector tab down. Slide the extra ribbon core on the take-up reel as far as it will go with the "This End Out"...
- Page 12 When you turn on the RFID printer, “Monarch Initializing” flashes briefly and then you see “Print Mode Ready.” If an error occurs while the printer is initializing, the error message flashes briefly on the display and then you see “Print Mode Ready.”...
- Page 13 Note: The RFID printer pauses while programming the RFID tag. Remove the printed labels. If the printer will be unused for extended periods of time, we recommend leaving the printhead unlatched. M e n u C h a n g e s Some changes were made to the menu structure for RFID.
- Page 14 C l e a r i n g J a m s When you are printing and a jam occurs, the Fault light on the printer's front panel blinks. Turn off the printer and open the cover and printhead assembly.
- Page 15 CLEAN-STRIP if the printhead is extremely dirty or you see streaks on the supply. Rub the cotton swab across the supply sensor and die cut sensor and remove any build-up. Clean the build-up in the supply path. Let the printer dry before you reload supplies. Printhead Platen Roller Supply...
- Page 16 10. Push on the exit cover firmly to close it. Both latches will click into place. 11. Close the cover and printhead assembly. 12. Turn on the printer and press Feed/Cut several times to feed at least three labels/tags to properly position the supply and the ribbon. Resend your format, batch, and check digit packets.
- Page 17 Lock code is invalid. Lock code must be 0 (Unlock) or 1 (Lock) for Option 64. For more information, refer to the HF Application Notes. Invalid character following {. Field separator was not found. Printer memory is full. Delete unnecessary formats or graphics from memory. Parity mismatch. Framing error (baud rate mismatch).
- Page 18 The printer sensed a calibration of different-sized black marks. Make sure the correct supply type is loaded. Printer has not sensed a supply mark when expected or is out of supplies. Press Escape/Clear and try to continue printing. Change supply.
- Page 19 Printhead has more than 8 bad dots within the format area or is not connected. Replace or connect printhead as necessary. The printer does not recalibrate (feed a blank label) after any RFID error. Refer to the RFIDMP Application Notes or the HF Application Notes (on our Web site) for...
- Page 20 40°F to 104°F (4°C to 40°C) Transfer: 40°F to 95°F (4°C to 35°C) Storage: 15°F to 120°F (-9°C to 49°C) 5% to 90% non-condensing Humidity: with autoselect 50/60Hz with autoselect 50/60Hz The RFID printer pauses while programming the RFID tag.
- Page 21 Additional RFID supplies may be available by request. Contact your RFID Representative for more information. T a g C u t D i m e n s i o n s Use these specifications for the 926™ Knife with the RFMP printer. Use only Monarch®/Paxar® approved RFID tag supplies. Widths:...
- Page 22 R F S p e c i f i c a t i o n s The UHF radio operates in the 902 – 928 MHz frequency range in accordance with FCC Rules and Regulations. The HF radio operates at 13.56 MHz in accordance with FCC Rules and Regulations.