Table of Contents
Advertisement
Owner's Manua
Read this first. It explains the basic things you need
to know in order to use the V-1HD.
PDF Manual
(download from the Web)
5 Remote Control Guide
This manual covers remote control of the V-1HD
via MIDI.
5 V-1HD RCS Owner's Manual
This is the manual for V-1HD RCS dedicated
remote-control software for the V-1HD.
Before using the V-1HD, ensure that its system program is at the most recent version. For information on
available upgrades for the system program, see the Roland website (http://proav.roland.com). You can check the
system program version by pressing and holding the [(TAP) BPM] button g "VERSION" at the SETUP menu.
l (this document)
To obtain the PDF manual
1.
Enter the following URL in your computer.
http://proav.roland.com
I
2.
Go to the V-1HD product page and click
the "Support" tab.
Copyright © 2015 ROLAND CORPORATION
Advertisement
Table of Contents

Related Manuals for Roland v-1hd


Summary of Contents for Roland v-1hd
- Page 1 V-1HD. Copyright © 2015 ROLAND CORPORATION Before using the V-1HD, ensure that its system program is at the most recent version. For information on available upgrades for the system program, see the Roland website (http://proav.roland.com). You can check the...
-
Page 2: Table Of Contents
Checking the Included Items The V-1HD includes the following items. Please take a moment to confirm that all of these items have been included with the V-1HD. If you find that any item is missing, contact the nearest authorized Roland distributor in your country. -
Page 3: Using The Unit Safely
Use only the attached power cord. Also, the Refer all servicin-g to your retailer, the nearest supplied power cord must not be used with Roland Service Center, or an authorized Roland any other device. distributor, as listed on the “Information. ”... - Page 4 Immediately turn the unit off, remove the AC adaptor from the outlet, and request servicing Avoid climbing on top of the unit, or placing heavy objects by your retailer, the nearest Roland Service on it Center, or an authorized Roland distributor, as listed on the “Information”...
-
Page 5: Important Notes
(such as a or by using V-1HD RCS dedicated software (p. 29). refrigerator, washing machine, microwave oven, or Although we will do our utmost to preserve the data air conditioner). -
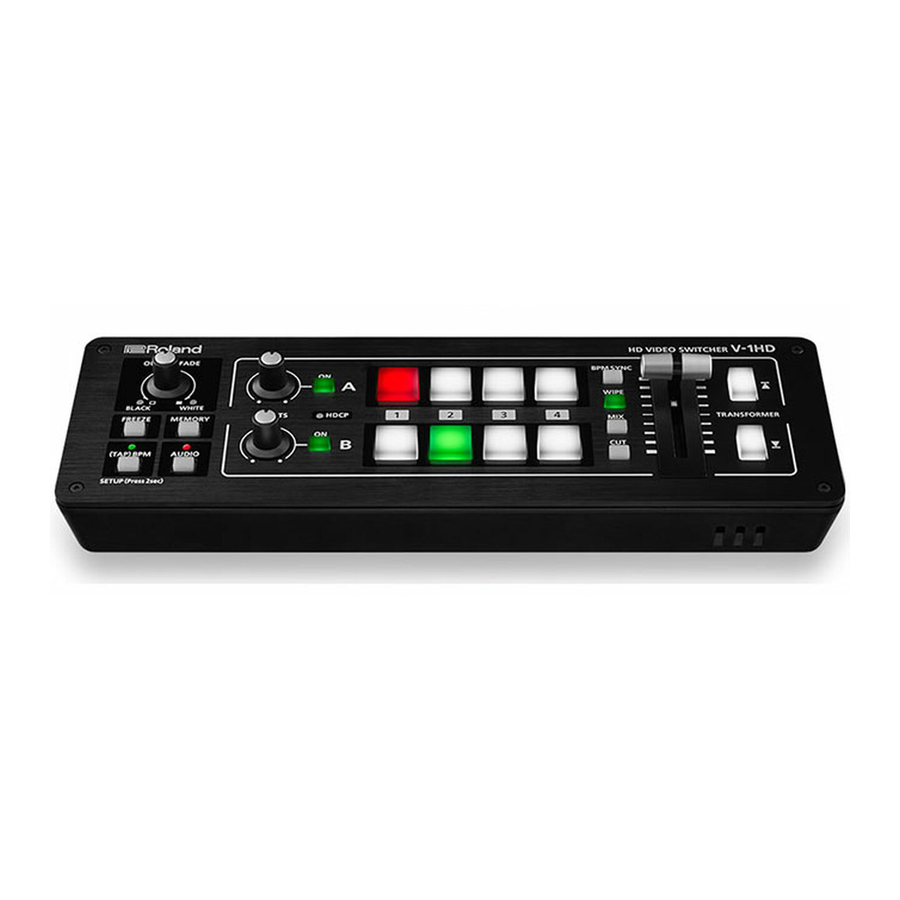
Page 6: Panel Descriptions
Panel Descriptions Top Panel/Front Panel [OUTPUT FADE] Knob p. 20 EFFECTS A/EFFECTS B [ON] Buttons p. 21 This performs a fade-in or fade-out for the output These turn effects on and off for the respective video. output video on bus A and bus B. When turned on, the [ON] button lights up. - Page 7 Never obstruct the cooling-fane xhaust port. NOTE Obstructing the xhaust port might result in a temperature rise inside the V-1HD and lead to malfunction due to heat. [WIPE], [MIX], and [CUT] Buttons p. 16 These select video transition effects. The selected [A-1]–[A-4] Buttons...
-
Page 8: Rear Panel (For Equipment Connections)
* Be sure to use cables and adaptor plugs with the proper connectors matching those of the other devices you are using. USB Port p. 29 OUTPUT Connector You use V-1HD RCS dedicated software to operate This outputs the video mixing result (main output the V-1HD remotely from a connected computer video). Here you can connect a device such as an or tablet. - Page 9 Panel Descriptions * The V-1HD is designed to radiate heat from the entire rear panel. Accordingly, the rear panel might become hot during use, but this is not a malfunction. PREVIEW Connector p. 15 HDMI INPUT Connectors This outputs the incoming video on channels 1 Here you input video signals from video cameras, through 4 as a four-way split screen.
-
Page 10: Side Panel (For Equipment Connections)
Roland Service Center, place using the screw you removed in step 1. or an authorized Roland distributor, as listed on the “Information. ” Unsuitable places for connection... -
Page 11: Basic Operation
The Auto Off function is turned off. Power is not turned off automatically. MEMO 5 The power to the V-1HD turns off automatically if Press the [(TAP) BPM] button to quit the menu. a set interval elapses with no operation performed NOTE (Auto Off function). -
Page 12: Using The Menus
Basic Operation Using the Menus This explains how to display menus and make settings for video and audio, and for the V-1HD itself. * The menu is shown on the monitor connected to the PREVIEW connector (p. 9). NOTE 5 Video-switching operations cannot be performed while a menu is displayed. -
Page 13: Saving/Recalling Settings (Memory)
You can take the current settings, including video and audio settings and the state of the operation panel, and save them as a single set in the V-1HD’s internal memory, for later recall and use when needed. The V-1HD is provided with eight memories. -
Page 14: Video Input/Output Settings
720p 720p 720p output video. Menu item Explanation MEMO 5 The V-1HD’s internal processing is progressive. Interlaced OUTPUT CONTRAST This adjusts the contrast. input video is automatically converted to a progressive OUTPUT SATURATION This adjusts the saturation. signal. OUTPUT BRIGHTNESS This adjusts the brightness. -
Page 15: Switching The View Mode Of Preview Output
Blu-ray Disc player or the like, you make the setting for enabling HDCP input. * The V-1HD must be connected to an HDCP compatible Press and hold the [(TAP) BPM] button (for 2 display for HDCP protected video to be connected. -
Page 16: Video Operations
Video Operations Switching the Video You can switch the video input to bus A and to bus B of the video mixer. Switching Using the A/B Fader You operate the A/B fader to switch between two video feeds. The video on the bus toward which the A/B fader is flipped is output (A/B mode). -
Page 17: Switching Using The Transformer Buttons
Video Operations Switching Using the TRANSFORMER Buttons You can switch video using the TRANSFORMER buttons, without using the A/B fader. This section describes the operations, using the factory-default memory number 1 settings as an example. Use the [A-1] through [A-4] and [B-1] through Changing the Operation of the [B-4] buttons to select the video to input on bus A and bus B. -
Page 18: Switching In Time With Music (Bpm Sync)
Video Operations Switching in Time with Music (BPM Sync) You can switch video in time with a musical beat. The video is switched automatically, with no operation of the A/B fader or the TRANSFORMER buttons. Setting BPM Using a Numerical Value Setting BPM by the Timing of Pressing the [(TAP) BPM] Button Setting BPM using a numerical value makes the... -
Page 19: Switching Automatically (Auto Scan)
Video Operations Switching Automatically (Auto Scan) Using a Different Transition Pattern The video on channels 1 through 4 is switched A variety of transition patterns are available for mix automatically in sequence. and wipe transition effects. To use a different pattern, change the transition MEMO pattern assigned to the [MIX] or [WIPE] button. -
Page 20: Applying A Fade To The Main Output Video
This temporarily pauses the incoming video. You can apply transition effects and other effects You can apply a fade to the V-1HD’s main output video. during a video freeze. This lets you make the main output video fade to a... -
Page 21: Video Effect Operations
Video Effect Operations You can apply effects to the main output video. The V-1HD has nine types of built-in filter effects and ten types of built-in compositing effects. Using Filter Effects These apply effects such as changes in video color tone and appearance to the entire video. -
Page 22: Using Compositing Effects
Video Effect Operations Using Compositing Effects These composite the bus A video and the bus B video. NOTE 5 When compositing effects are turned on for either bus A or bus B, no effects can be applied to the other bus. Selecting a Compositing Effect Compositing Using Luminance Key This composites video with white or black areas... -
Page 23: Compositing Using Chroma Key
Video Effect Operations Compositing Using Chroma Key Compositing Using Picture-in-Picture This composites video shot against a blue or green This composites video in an inset screen onto a background against a different background video. different background video. Inset screen Background video Blue or Green NOTE Follow the procedure in “Selecting a... -
Page 24: Compositing Using Split
Video Effect Operations Compositing Using Split This composites two video streams in a split screen. The bus A video is displayed above or on the left, and the bus B video is displayed below or on the right. MEMO 5 While compositing of the video is in progress, the video switches with cuts regardless of the selected transition effect. -
Page 25: Audio Operations
AUDIO IN LEVEL Input audio from AUDIO IN Lighted in exceeds the maximum input/output level. Audio output from the V-1HD might be MIC LEVEL Input audio from MIC distorted in such cases. Use the A/B fader to adjust the volume level for * By factory default, the display of the AUDIO indicator is the respective input audio. -
Page 26: Applying Effects To Audio
Audio Operations Applying Effects to Audio You can apply effects to audio that is input and output to adjust its sound quality. Applying Effects to Input Audio Delay (DELAY) This applies effects and adjusts sound quality for This outputs audio with a delay. audio input via AUDIO IN, MIC, and HDMI IN. -
Page 27: Applying Effects To Output Audio
Audio Operations Reverb (REVERB) Applying Effects to Output Audio This adds lingering reverberations to the audio. This applies effects and adjusts the sound quality for output audio. You can apply reverb to audio input via AUDIO IN, MIC, and HDMI IN. Menu item Explanation Press the [AUDIO] button to display the AUDIO... -
Page 28: Interlinking Audio Output To Video Switching
Audio Operations Interlinking Audio Output to Video Switching (Audio Follow) You can associate audio with a video switch so that when the video is switched, only the HDMI audio of the output video is output, and other HDMI audio is automatically muted. You can also use Audio Follow with audio input via AUDIO IN or MIC. -
Page 29: Other Features
Operating the V-1HD by Remote default State (Factory Reset) Control You can return the values of settings on the V-1HD to You can use V-1HD RCS dedicated software to their factory defaults. remotely control the following functions on the V-1HD from a computer or tablet connected via USB. -
Page 30: Appendices
SETUP menu and set “HDCP” to “ON. ” Is the format of the video output The supported input formats on the V-1HD are 1080p, Video from the computer is from the computer compatible with 1080i, and 720p. -
Page 31: Menu List
Appendices Menu List * The menu is shown on the monitor connected to the PREVIEW connector (p. 9). MEMORY Menu ([MEMORY] button g [A-1]–[A-4] and [B-1]–[B-4] buttons) Setting item Value Explanation MEMORY1–MEMORY8 NEGATIVE, EMBOSS, COLORIZE, COLORPASS, POSTERIZE, SILHOUETTE, MONOCOLOR, FINDEDGE, FLIP, WHT-L.KEY(*1), This specifies the effect assigned to the EFFECTS A BLK-L.KEY(*1), GRN-C.KEY(*1), BLU-C.KEY(*1), PinP 1/4(*1), PinP... -
Page 32: Audio Menu
Appendices AUDIO Menu ([AUDIO] Button) * The default value is printed in bold characters. Setting item Value Explanation MEMORY1–MEMORY8 HDMI IN 1 This adjusts the volume level of the respective input audio streams. HDMI IN 4 LEVEL 0–100–127 * 100 = 0.0 dB, 127 = +6.0 dB AUDIO IN This adjusts the volume level of output audio. -
Page 33: Setup Menu
Appendices Setting item Value Explanation AUDIO IN REV SEND 0–100–127 This adjusts the send level of audio to Reverb. This adjusts the return level from reverb of the audio. A setting of REVERB LEVEL 0–127 “0” results in no reverb applied. REVERB TIME 0.0 sec–1.0 sec–5.0 sec This adjusts the length of the reverb. - Page 34 Setting this to “ON” outputs a test tone. MIDI Rx SOURCE MIDI OUT For information on remote control via MIDI, download and refer to the “V-1HD Remote Control Guide” MITI Tx CHANNEL (PDF) from the following Roland website. MIDI DEVICE ID http://proav.roland.com...
-
Page 35: Transition Effects List
Appendices Transition Effects List Effect Explanation As the original picture gradually disappears, the next video is overlaid and progressively grows more visible. Video transitions are made with the luminance levels of the two video streams maintained unchanged. * This is an abbreviation of “full additive mix. ” The two video streams are compared, and transitions are made with display during transition starting with levels of high luminance. -
Page 36: Block Diagram
Appendices Block Diagram Video Block HDMI INPUT 1 EDID FREEZE CONV HDMI INPUT 2 EDID FREEZE CONV HDMI INPUT 3 EDID FREEZE CONV HDMI INPUT 4 EDID FREEZE CONV 1080p 1080i FORMAT 720p MULTI- VIEWER Audio Block LEVEL GATE COMP DELAY GAIN FOLLOW... - Page 37 Appendices 1080p 1080i FORMAT 720p HDMI OUTPUT A-BUS TRANSITION EFFECTS A INPUT OUTPUT FADE CONV SELECT EFFECTS B B-BUS WIPE MENU HDMI PREVIEW CONV MULTI-VIEW REVERB HDMI OUTPUT HDMI PREVIEW MASTER LEVEL AUDIO OUT MASTERING PHONES PHONES REVERB LEVEL LEVEL REVERB...
-
Page 38: Main Specifications
Appendices Main Specifications Video Video Processing 4:2:2 (Y/Pb/Pr), 8-bit Input Connectors HDMI INPUT 1–4 Type A (19 pins) x 4 * HDCP Supported HDMI OUTPUT Type A (19 pins) * HDCP Supported Output Connectors HDMI PREVIEW Type A (19 pins) * HDCP Supported 720/59.94p, 720/50p (FORMAT switch = 720p) 1080/59.94i, 1080/50i... - Page 39 Appendices Others Power Supply AC Adaptor Current Draw 1.5 A Power Consumption 18 W +0 to +40 degrees Celsius Operation Temperature +32 to +104 degrees Fahrenheit 313 (W) x 102 (D) x 59 (H) mm Dimensions 12-1/3 (W) x 4 (D) x 2-1/3 (H) inches 1.2 kg (excluding AC adaptor) Weight 2 lbs 10-2/5 oz...
-
Page 40: Dimensions
Appendices Dimensions Unit: mm... -
Page 41: Declaration Of Conformity
Compliance Information Statement Model Name : V-1HD Type of Equipment : HD VIDEO SWITCHER Responsible Party : Roland Corporation U.S. Address : 5100 S. Eastern Avenue Los Angeles, CA 90040-2938 Telephone : (323) 890-3700 For the USA FEDERAL COMMUNICATIONS COMMISSION... - Page 42 For EU Countries For China...
- Page 43 We Co., Ltd. in Japan. assume no responsibility whatsoever with regard to any • Roland is an either registered trademark or trademark infringements of third-party copyrights arising through of Roland Corporation in the United States and/or other your use of this product.