Sign In
Upload
Manuals
Brands
Yamaha Manuals
Receiver
TSR-7850
Yamaha TSR-7850 Manuals
Manuals and User Guides for Yamaha TSR-7850. We have
1
Yamaha TSR-7850 manual available for free PDF download: Owner's Manual
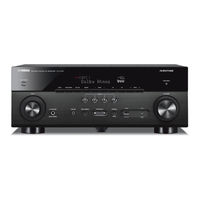
Yamaha TSR-7850 Owner's Manual (197 pages)
Brand:
Yamaha
| Category:
Receiver
| Size: 18.24 MB
Table of Contents
Table of Contents
2
Before Using the Unit
8
How to Use this Manual
8
Checking the Accessories
8
Using the Remote Control
9
Insert the Batteries in the Remote Control
9
Operating Range of the Remote Control
9
Features
10
What You Can Do with the Unit
10
Part Names and Functions
12
Part Names and Functions of the Front Panel
12
Part Names and Functions of the Front Display
14
Part Names and Functions of the Rear Panel
15
Part Names and Functions of the Remote Control
16
Preparations
17
Speaker Requirements
18
Speaker Systems and Speakers to be Connected
18
Cable Requirements
19
How to Connect Speakers
19
Setting the Speaker Impedance
19
How to Place Speakers (Speaker Systems)
21
Advanced Speaker Systems
27
1 Connecting Speakers
17
Names and Functions of Speakers
17
2 Connecting a TV
30
HDMI Connection with a TV
30
HDMI Connection with Another TV or a Projector
30
3 Connecting Playback Devices
31
HDMI Connection with a Video Device such as a BD/DVD Player
31
Connection Other than HDMI with a Playback Device
31
Connecting to the Jack on the Front Panel
33
4 Connecting the Radio Antennas
34
Connecting the FM/AM Antennas (Except for U.K., Europe, Russia and Australia Models)
34
Connecting the DAB/FM Antenna (U.K., Europe, Russia and Australia Models)
35
5 Preparing for Connecting to a Network
36
Connecting a Network Cable (Wired Connection)
36
Preparing Wireless Antennas (Wireless Connection)
37
6 Connecting Other Devices
37
Connecting an External Power Amplifier
37
Connecting a Device Compatible with the Trigger Function
38
7 Plugging in the Power Cable
39
8 Selecting the On-Screen Menu Language
40
9 Configuring the Necessary Speaker Settings
41
Assigning Speaker Configuration
41
Optimizing the Speaker Settings Automatically (YPAO)
42
Checking the YPAO Measurement Results
44
Reloading the Previous YPAO Adjustments
45
Error Messages from YPAO
46
Warning Messages from YPAO
47
10 Setting Musiccast
48
What Is Musiccast
48
Using Musiccast CONTROLLER
48
Adding the Unit to the Musiccast Network
48
Enjoying Sound
49
Enjoying Sound Field Effects
49
Select Your Favorite Sound Mode
49
Enjoying 3D Sound Fields (CINEMA DSP 3D)
49
Enjoying Sound Field Effects Optimized for the Type of Content
50
Enjoying Sound Field Effects Without Surround Speakers (Virtual CINEMA DSP)
50
Enjoying Surround Sound with 5 Speakers Placed in Front (Virtual CINEMA FRONT)
50
Enjoying Surround Sound with Headphones (SILENT CINEMA)
50
Enjoying Unprocessed Playback
51
Enjoying Original Sound (Straight Decode)
51
Enjoying Multichannel Playback Without Sound Field Effects (Surround Decoder)
51
Enjoying Pure High Fidelity Sound (Pure Direct)
52
Enjoying Enhanced Bass Sound
53
Enhancing the Bass (Extra Bass)
53
Enjoying Enhanced Compressed Music
53
Playing Back Digitally Compressed Formats with Enriched Sound (Compressed Music Enhancer)
53
Enjoying Dolby Atmos® and DTS:X
54
Enjoying Music in Multiple Rooms
55
Playing Back Music in Multiple Rooms
55
Connecting Zone2 Speakers
55
Operating the Unit from Zone2 (Remote Connection)
57
Controlling Zone2
58
Enjoying the same Source in Multiple Rooms (Party Mode)
59
Playback
60
Basic Playback Procedure
60
Basic Procedure for Playing Back Video and Music
60
Selecting an HDMI Output Jack
61
Switching Information on the Front Display
61
Item Names and Functions of the Playback Screen
62
Item Names and Functions of the Browse Screen
63
Listening to FM/AM Radio (Except for U.K., Europe, Russia and Australia Models)
64
Setting the Frequency Steps
64
Selecting a Frequency for Reception
65
Selecting a Preset Station
66
Registering FM Radio Stations Automatically (FM Auto Preset)
66
Registering a Radio Station Manually
67
Clearing Preset Stations
68
Clearing All Preset Stations
68
Listening to DAB Radio (U.K., Europe, Russia and Australia Models)
69
Preparing the DAB Tuning
69
Selecting a DAB Radio Station for Reception
70
Selecting a Preset DAB Radio Station
70
Registering a DAB Radio Station as Presets
71
Clearing Preset DAB Radio Stations
72
Clearing All Preset DAB Radio Stations
72
Displaying the DAB Information
73
Checking Reception Strength of each DAB Channel Label
74
Listening to FM Radio (U.K., Europe, Russia and Australia Models)
75
Selecting a Frequency for FM Radio Reception
75
Selecting a Preset FM Radio Station
76
Registering FM Radio Stations Automatically (FM Auto Preset)
76
Registering an FM Radio Station Manually
77
Clearing Preset FM Radio Stations
78
Clearing All Preset FM Radio Stations
78
Displaying the Radio Data System Information
79
Playing Back Music Stored on a Bluetooth® Device
80
Playback Bluetooth® Device Music on the Unit
80
Playing Back Music with Airplay
81
Playback of Itunes/Iphone Music Contents with Airplay
81
Playing Back Music Stored on a USB Storage Device
82
Playback of USB Storage Device Contents
82
Playing Back Music Stored on Media Servers (Pcs/Nas)
83
Media Sharing Setup on Media Servers (Pcs/Nas)
83
Listening to Internet Radio
85
Selecting an Internet Radio Station
85
Registering Favorite Internet Radio Stations
85
Listening to Music Streaming Services
86
Listening to a Streaming Service
86
Useful Playback Functions
87
SCENE Function
87
Shortcut Function
90
Configuring Playback Settings for Different Playback Sources (Option Menu)
92
Basic Operation of the Option Menu
92
Option Menu Items
93
Adjusting the Tone of the Audio Output
94
Configuring the Volume Automatically Based on the YPAO Measurement Results
94
Adjusting the Volume or Perceive Height of Dialogue Sounds
95
Adjusting the Delay of the Lipsync Function
96
Setting Compressed Music Enhancer
96
Correcting Volume Differences During Playback
97
Setting the Use of Extra Bass
97
Enabling the Video Signal Processing
98
Selecting a Video Source to be Output with the Selected Audio Source
98
Configuring the Shuffle/Repeat Setting
98
Switching between Stereo and Monaural for FM Radio Reception
99
Setting Presets for Radio Stations
99
Adding an Internet Radio Station to the "Favorites" Folder
101
Removing an Internet Radio Station from the "Favorites" Folder
101
Performing an Initial Scan for DAB Radio Reception
101
Checking Reception Strength of each DAB Channel Label
102
Checking the Current Status Information
102
Configurations
103
Configuring Various Functions (Setup Menu)
103
Basic Operation of the Setup Menu
103
Setup Menu Items
104
Configuring the Speaker Settings
108
Setting Your Speaker System
108
Setting the Size of the Front Speakers
108
Setting the Use of a Center Speaker and Its Size
109
Setting the Use of Surround Speakers and Their Size
109
Setting the Layout of the Surround Speakers
110
Setting the Use of Surround Back Speakers and Their Size
110
Setting the Use of Presence Speakers and Their Size
111
Setting the Layout of the Presence Speakers
111
Setting the Crossover Frequency of the Low-Frequency Components
111
Setting the Use of a Subwoofer
112
Setting the Phase of the Subwoofer
112
Setting the Distance between each Speaker and the Listening Position
112
Adjusting the Volume of each Speaker
112
Setting the Equalizer
113
Outputting Test Tones
114
Reloading the Previous YPAO Adjustments
114
Configuring the Sound Settings
115
Checking the Current Audio Signal Information
115
Enabling Lipsync Adjustment
115
Setting the Adjustment Method of the Lipsync Function
116
Adjusting the Delay of the Lipsync Function
116
Selecting Sound Programs
117
Adjusting the Sound Field Effect Level
118
Adjusting the Delay between the Direct Sound and Presence Sound Field Generation
118
Adjusting the Broadening Effect of the Presence Sound Field
118
Adjusting the Loss of the Presence Sound Field
119
Adjusting the Decay Time of the Rear Reverberant Sound
119
Adjusting the Delay between the Direct Sound and Reverberant Sound Generation
119
Adjusting the Volume of the Reverberant Sound
119
Adjusting the Delay between the Direct Sound and Surround Sound Field Generation
120
Adjusting the Broadening Effect of the Surround Sound Field
120
Adjusting the Loss of the Surround Sound Field
120
Adjusting the Delay between the Direct Sound and Surround Back Sound Field Generation
120
Adjusting the Broadening Effect of the Surround Back Sound Field
121
Adjusting the Loss of the Surround Back Sound Field
121
Selecting the Surround Decoder Used in the Program
121
Setting the Use of Center Spread
122
Adjusting the Center Localization (Broadening Effect) of the Front Sound Field
122
Adjusting the Entire Volume for "7Ch Stereo
122
Adjusting the Front and Rear Volume Balance for "7Ch Stereo
122
Adjusting the Left and Right Volume Balance for "7Ch Stereo
122
Adjusting the Height Volume Balance Using the Presence Speakers for "7Ch Stereo
123
Setting the Use of Monaural MIX for "7Ch Stereo
123
Setting the Dynamic Range Adjustment Method
123
Setting the Limit Value of the Volume
123
Setting the Initial Volume for When the Unit Is Turned on
124
Adjusting the CINEMA DSP 3D Effect Level Automatically
124
Setting Virtual Surround Back Speaker (VSBS)
124
Configuring the Scene Settings
125
Selecting Items to be Included as the Scene Assignments
125
Renaming the SCENE Name
126
Configuring the Video/Hdmi Settings
127
Checking the Current Video and HDMI Signal Information
127
Setting the Use of the Video Signal Processing
127
Setting a Resolution to Output HDMI Video Signals
127
Setting an Aspect Ratio to Output HDMI Video Signals
128
Setting the Use of HDMI Control
128
Setting the Audio Jack Used for TV Audio Input
128
Setting the Use of ARC
128
Linking the Standby Modes of the Unit and the TV
129
Setting the Output of HDMI Audio from the TV Speaker
129
Setting the Version of HDCP Used on the HDMI Input Jacks
129
Setting the Use of HDMI Standby through
129
Configuring the Network Settings
130
Checking the Network Information on the Unit
130
Setting the Network Connection Method (Wired/Wireless)
130
Setting the Network Parameters Automatically (DHCP)
130
Setting the Network Parameters Manually
131
Setting the Use of the Network Standby Function
131
Setting the MAC Address Filter
132
Setting the MAC Address
132
Setting the Use of a Digital Media Controller
132
Setting the Use of Volume Control Via Airplay
132
Setting the Network Name of the Unit
133
Setting the Power Interlock from the Unit to Musiccast Compatible Devices
133
Configuring the Bluetooth® Settings
134
Setting the Use of Bluetooth
134
Terminating the Connection between a Bluetooth® Device and the Unit
134
Setting the Use of the Bluetooth® Standby Function
134
Configuring the Multi Zone Settings
135
Checking the Zone2 Information
135
Setting the Use of Volume Adjustments for Zone2 Output
135
Setting the Zone2 Limit Value of the Volume
135
Setting the Zone2 Initial Volume for When the Unit Is Turned on
136
Adjusting the Time Deviation in Relation to the Main Zone
136
Switching between Stereo and Monaural for Zone2 Output
136
Setting the Use of Compressed Music Enhancer for Zone2 Output
137
Adjusting the Tone for Zone2 Output
137
Setting the Use of Extra Bass for Zone2 Output
137
Adjusting the Volume Balance for Zone2 Output
137
Renaming the Zone Name
138
Setting the Use of Switching to the Party Mode on Zone2
138
Configuring the System Settings
139
Checking the System Information on the Unit
139
Setting the On-Screen Menu Language
139
Combining Audio of Another Input Source with Video of the Current Input Source
140
Setting Input Sources to be Skipped When Operating the INPUT Key
141
Automatically Changing the Input Source Names Displayed on the Front Display
142
Manually Changing the Input Source Names Displayed on the Front Display
142
Setting the Use of Auto Play Function
143
Setting Sound Programs to Skip When Operating the PROGRAM Key
143
Setting the Function for the PROGRAM Key on the Remote Control
143
Setting the Unit's Functions for the RED/GREEN/YELLOW/BLUE Keys of the Remote Control
144
Adjusting the Brightness of the Front Display
144
Setting the Scale of the Volume Display
144
Setting the Use of Short Messages on the TV
144
Setting the Image to be Used as Wallpaper on the TV
144
Specifying the Condition for the TRIGGER out Jack to Function
145
Specifying the Output Level of the Electronic Signal Transmitted with each Input
145
Switching the Output Level for Electronic Signal Transmission Manually
145
Specifying the Zone with Which the TRIGGER out Jack Functions Are Synchronized
145
Setting the Amount of Time for the Auto-Standby Function
146
Setting the Use of the Eco Mode
146
Preventing Accidental Changes to the Settings
146
Updating the Firmware Via the Network
147
Configuring the Advanced Settings (ADVANCED SETUP Menu)
148
Basic Operation of the ADVANCED SETUP Menu
148
ADVANCED SETUP Menu Items
148
Changing the Speaker Impedance Setting (SP IMP.)
149
Selecting the Remote Control ID (REMOTE ID)
149
Changing the FM/AM Tuning Frequency Setting (TU)
149
Switching the Video Signal Type (TV FORMAT)
149
Removing the Limitation on HDMI Video Output (MON.CHK)
150
Selecting the HDMI 4K Signal Format (4K MODE)
150
Setting DTS Format Notification (DTS MODE)
151
Backuping and Restoring All the Settings (BKUP/RSTR)
151
Restoring the Default Settings (INIT)
152
Updating the Firmware (UPDATE)
152
Checking the Firmware Version (VERSION)
152
Troubleshooting
153
When any Problem Appears
153
If Trouble Occurs, First Check the Following
153
Power, System, or Remote Control Trouble
153
Audio Trouble
155
Video Trouble
158
FM/AM Radio Trouble
159
Models)
159
DAB Radio Trouble (U.K., Europe, Russia and Australia Models)
160
USB Trouble
161
Network Trouble
161
Bluetooth® Trouble
163
Error Indications on the Front Display
165
Appendix
167
Updating the Unit's Firmware Via the Network
167
Firmware Updates
167
Updating the Unit's Firmware Via the Network
168
Connecting to a Network Wirelessly
169
Selecting a Wireless Network Connection Method
169
Setting up a Wireless Connection Using the WPS Button
170
Setting up a Wireless Connection Using an Ios Device
170
Setting up a Wireless Connection by Selecting from the List of Available Access Points
172
Setting up a Wireless Connection Manually
173
Setting up a Wireless Connection by Using the WPS PIN Code
175
Input/Output Jacks and Cables
176
Video/Audio Jacks
176
Video Jacks
176
Audio Jacks
177
Using Presence Speakers
178
Presence Speaker Layout
178
Installing the Presence Speakers in Front Height Position
178
Installing the Presence Speakers in Overhead Position
178
Using Dolby Enabled Speakers as the Presence Speakers
179
Glossary
180
Glossary of Audio Information
180
Glossary of HDMI and Video Information
181
Glossary of Network Information
182
Glossary of Yamaha Technologies
182
Supported Devices and File Formats
183
Supported Bluetooth® Devices
183
Supported USB Devices
183
Supported Airplay Devices
183
Supported File Formats
184
Video Signal Flow
184
Video Conversion Table
185
Additional Information on HDMI
186
HDMI Control and Synchronized Operations
186
Audio Return Channel (ARC)
187
HDMI Signal Compatibility
188
Trademarks
189
Specifications
190
Default Settings
194
Default Settings of the Option Menu
194
Default Settings of the Setup Menu
194
Default Settings of the ADVANCED SETUP Menu
196
Advertisement
Advertisement
Related Products
Yamaha TSR-6750
Yamaha TSR-5790
Yamaha TSR-5790BL
Yamaha TSR-6B60
Yamaha TSR-700
Yamaha TSR-5850
Yamaha T-300
Yamaha TX-350
Yamaha MusicCast TSR-7810
Yamaha TSR-5770
Yamaha Categories
Motorcycle
Musical Instrument
Electronic Keyboard
Receiver
Amplifier
More Yamaha Manuals
Login
Sign In
OR
Sign in with Facebook
Sign in with Google
Upload manual
Upload from disk
Upload from URL