Sign In
Upload
Manuals
Brands
Sony Manuals
CD Player
Walkman MZ-R909
Sony Walkman MZ-R909 Manuals
Manuals and User Guides for Sony Walkman MZ-R909. We have
4
Sony Walkman MZ-R909 manuals available for free PDF download: Operating Instructions Manual, Service Manual
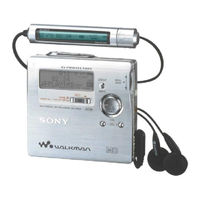
Sony Walkman MZ-R909 Operating Instructions Manual (91 pages)
portable
Brand:
Sony
| Category:
Minidisc Recorder
| Size: 6.31 MB
Table of Contents
Table of Contents
4
Controls
8
Product View and Parts Identification
8
The Display Window of the Recorder
9
The Headphones/Earphones with a Remote Control
10
The Display Window of the Remote Control
10
How to Use the Jog Dial
11
List of Menus
11
Menu Functions
11
Display Window Ehile Selecting the Menu Items
11
Tables of Menus on the Recorder
13
Menus and Menu Items Selected While the Recorder Is Stopped
13
Menus and Menu Items Selected While the Recorder Is Playing
15
Menus and Menu Items Selected While the Recorder Is Recording
16
Tables of Menus on the Remote Control
17
How to Use
19
Insert the Rechargeable Battery
19
Charging the Rechargeable Battery
19
Make Connections and Unlock the Control
20
Using the Dry Battery
20
Insert an MD
21
Recording an MD
22
Connections
22
Specifying the Recording Position
23
If the Recording Does Not Start
24
Playing an MD
25
If the Play Does Not Start
26
When Using the Headphones/Earphones
26
Various Ways of Recording
27
Two Ways of Connecting to a Sound Source
27
Difference between Digital (Optical) and Analog (Line) Inputs
27
Recording with Analog Input (Line Cable Required)
28
Recording for Long Times
29
When You Don't Want "LP:" Added Automatically at Beginning of Track
29
Recording Tracks Using the Group Function (Group Mode Recording)
30
To Activate the Group Mode
31
Recording a Track into a New Group
31
How Is Group Information Recorded?
31
To Start/Stop Recording in Sync with the Source Player
32
Recording a Track into an Existing Group
32
Recording Without Overwriting Existing Material
33
To Cancel Synchro-Recording
33
Recording from a Microphone
34
To Select Microphone Sensitivity
34
Adding Track Marks Automatically at Specified Intervals
35
Auto Time Stamp
35
Using Auto Time Stamp to Add Track Marks While Recording
35
Adjusting the Recording Level Manually (Manual Recording)
36
To Switch Back to Automatic Level Control
36
Checking the Remaining Time or the Recording Position
37
To Know the Recording Condition
38
On the Remote Control
38
Setting the Clock to Stamp the Recorded Time
39
If You Make a Mistake While Setting the Clock
39
Copying CD Text Information While Recording (Joint Text)
40
Various Ways of Playback
42
Searching for a Specific Track or a Position Quickly (Quick Search)
42
Selecting the Search Mode
42
Using the Group Function (Group Mode)
43
Searching for a Specific Point While Monitoring the Elapsed Time
43
Time Search
43
Listening to Tracks in a Specific Group (Group Mode Playback)
43
Selecting and Playing Desired Groups (Group Skip Mode)
44
To Turn off the Group Function
44
Changing a Play Mode
45
Selecting a Play Mode
45
Creating a Program (Program Play)
46
Repeat Play
47
To Adjust the Sound Quality (Digital Sound Preset)
48
Selecting the Sound Quality
48
To Select a Preset Sound
48
To Cancel the Digital Sound Preset
49
To Change Playback Speed (Speed Control)
50
Storing the Settings for Individual Discs (Personal Disc Memory)
51
Erasing the Disc Information
51
Checking the Remaining Time or the Playing Position
52
Connecting to a Stereo System (Line Out)
53
Editing Recorded Tracks
55
Labeling Recordings
55
Available Characters
55
About the Character Palette
55
Labeling a Track or a Group During Playback
57
Labeling a Track, a Group or a Disc During Recording
57
To Cancel Labeling
57
Labeling a Disc During Stop
57
Storing Phrases Frequently Used in Labeling
59
Relabeling Recordings
59
Storing Phrases into the Name Bank (Name Back Function)
59
Storing Phrases While Labeling a Track, Group or Disc
60
Retrieving Phrases
60
Searching for a Phrase by Displaying the Stored Phrase One by One
60
Searching for a Phrase by Its First Letter
60
Erasing Phrases
61
Storing Phrases into the Name Bank (Name Bank Function)
61
Storing Phrases While Labeling
61
Registering Tracks or Groups as a New Group (Group Setting)
63
To Release a Group Setting
64
Moving Recorded Tracks
64
Moving a Track to a Different Group
65
Changing the Order of a Group on a Disc (Group Move)
66
Adding a Track Mark
67
To Add Track Marks While Recording
67
Erasing a Track Mark
68
Erasing Tracks or Groups
68
To Erase the Whole Disc
69
To Erase a Group
69
Suppression the Skips of the Sound (G-Protection)
70
Using the Alarm (Melody Timer)
70
To Check the Time Remaining on the Alarm While Playing
70
To Cancel Melody Timer
71
To Stop the Alarm
71
Protecting Your Hearing (AVLS)
72
To Cancel the AVLS
72
Turning off the Beep Sound
73
Adjusting the Contrast of the Display Window (Contrast Adjustment)
73
Locking the Controls (Hold)
74
Power Sources
75
Battery Life
75
When to Replace the Batteries
75
Precautions
76
Notes on Batteries
77
To Protect a Recorded MD
77
Note on Digital Recording
77
Note on Maintenance
78
Troubleshooting
79
System Limitations
83
Messages
84
Specifications
87
Optional Accessories
88
How Minidisc Works
88
Quick Random Access
89
Advertisement
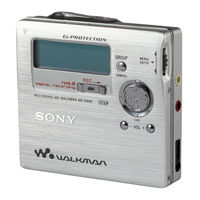
Sony Walkman MZ-R909 Operating Instructions Manual (92 pages)
Sony Operating Instructions Portable MiniDisc Recorder MZ-R909
Brand:
Sony
| Category:
Minidisc Recorder
| Size: 1.66 MB
Table of Contents
Table of Contents
4
Looking at Controls
8
How to Use the Jog Dial
11
List of Menus
11
Menu Functions
11
Tables of Menus on the Recorder
13
Tables of Menus on the Remote Control
17
Getting Started
19
Recording an MD Right Away
22
Playing an MD Right Away
25
Various Ways of Recording
27
Two Ways of Connecting to a Sound Source
27
Recording with Analog Input (Line Cable Required)
28
Long-Time Recording
29
When You Do Not Want "LP:" Added Automatically at the Beginning of a Track
29
Recording Tracks Using the Group Function (Group Mode Recording)
30
To Activate the Group Mode
31
Recording a Track into a New Group
31
Recording a Track into an Existing Group
32
To Start/Stop Recording in Sync with the Source Player (Synchro-Recording)
32
Recording Without Overwriting Existing Material
33
Recording from a Microphone
34
To Select Microphone Sensitivity
34
Adding Track Marks Automatically at Specified Intervals (Auto Time Stamp)
35
Adjusting the Recording Level Manually (Manual Recording)
36
Checking the Remaining Time or the Recording Position
37
On the Recorder
37
On the Remote Control
38
Setting the Clock to Stamp the Recorded Time
39
Copying CD Text Information While Recording (Joint Text)
40
Various Ways of Playback
42
Searching for a Specific Track or a Position Quickly (Quick Search)
42
Searching for a Specific Track While Monitoring Track Numbers or Track Names (Index Search)
42
Searching for a Specific Point While Monitoring the Elapsed Time
43
(Time Search)
43
Using the Group Function (Group Mode)
43
Listening to Tracks in a Specific Group (Group Mode Playback)
43
Selecting and Playing Desired Groups (Group Skip Mode)
44
Changing a Play Mode
45
On the Recorder
45
On the Remote Control
46
To Adjust the Sound Quality (Digital Sound Preset)
48
Selecting the Sound Quality
48
Adjusting the Sound Quality
48
To Change Playback Speed (Speed Control)
50
Storing the Settings for Individual Discs (Personal Disc Memory)
51
On the Recorder
51
On the Remote Control
51
Checking the Remaining Time or the Playing Position
52
On the Recorder
52
On the Remote Control
53
Connecting to a Stereo System (LINE OUT)
53
Editing Recorded Tracks
55
Labeling Recordings
55
On the Recorder
55
On the Remote Control
57
Storing Phrases Frequently Used in Labeling
59
On the Recorder
59
On the Remote Control
61
Registering Tracks or Groups as a New Group (Group Setting)
63
To Release a Group Setting
64
Moving Recorded Tracks
64
On the Recorder
64
On the Remote Control
65
Moving a Track to a Different Group
65
On the Recorder
65
On the Remote Control
66
Changing the Order of a Group on a Disc (Group Move)
66
On the Recorder
66
On the Remote Control
67
Adding a Track Mark
67
Erasing a Track Mark
68
Erasing Tracks or Groups
68
To Erase a Track
68
To Erase the Whole Disc
69
To Erase a Group
69
Other Operation
70
Suppressing the Skips of the Sound (G-PROTECTION)
70
Using the Alarm (Melody Timer)
70
On the Recorder
70
On the Remote Control
71
Protecting Your Hearing (AVLS)
72
On the Recorder
72
On the Remote Control
72
Turning off the Beep Sound
73
On the Recorder
73
On the Remote Control
73
Adjusting the Contrast of the Display Window (Contrast Adjustment)
73
Locking the Controls (HOLD)
74
Power Sources
75
Battery Life
75
Additional Information
76
Precautions
76
To Protect a Recorded MD
77
Troubleshooting
79
System Limitations
83
Messages
84
Specifications
87
What Is an MD
88
Sony Walkman MZ-R909 Operating Instructions Manual (116 pages)
Brand:
Sony
| Category:
Cassette Player
| Size: 1.61 MB
Table of Contents
Table of Contents
2
付属品を確かめる
4
各部のなまえ
5
ジョグダイヤルの使いかた
8
メニュー一覧 (本体/リモコン
8
ここだけ読ん でも使えます
16
電源を準備する
16
録音する
19
再生する
22
いろいろな録音のしかた
24
種類のつなぎかた
24
光デジタル入力とアナログ入力
24
アナログ入力で録音する (接続コードが必要
25
長時間録音する
26
グループ機能」を使って録音する
27
再生側に合わせて録音を始める/止める
29
シンクロ録音
29
上書きをせずに録音する
30
マイクで録音する
31
一定時間ごとに頭出しマークをつけながら録音する (オートタイムトラックマーク
32
手動で録音レベルを調節する (マニュアル録音
33
残り時間や録音位置を調べる
34
録音日時を記録する (時計合わせ
36
CD の曲名などを記録しながら録音する
37
ジョイントテキスト機能
37
いろいろな再生のしかた
39
聞きたい曲や場所を高速で探す (高速サーチ
39
「グループ機能」 を使う
40
再生モードを選ぶ
42
音質を設定する (デジタルサウンドプリセット
45
再生速度を変える (スピードコントロール
47
パーソナルディスクメモリー
48
残り時間や再生位置を調べる
49
お手持ちのシステムで聞く ( Line out
51
編集する前に
52
名前をつける・変える
52
よく使う言葉を登録して使う (ネームバンク機能
56
グループ設定
60
グループを解除する
61
曲順を変える (ムーブ
62
別のグループに曲を移動する
63
グループの順番を並べかえる (グループムーブ
64
頭出しマーク (曲番) をつける
65
頭出しマーク (曲番) を消す
65
曲やグループを消す
66
G-Protection 機能
68
タイマーを使う (メロディタイマー
68
音量リミット - Avls
70
リモコンの確認音を消す
70
表示窓の濃淡を調節する (コントラスト調整
71
誤操作を防ぐ (ホールド
71
電池の持続時間
72
使用上のご注意
73
故障かな ? と思ったら
75
システム上の制約による症状と原因
78
メッセージ一覧
79
保証書とアフターサービス
81
主な仕様
82
Advertisement
Sony Walkman MZ-R909 Service Manual (62 pages)
Brand:
Sony
| Category:
CD Player
| Size: 2 MB
Table of Contents
Table of Contents
2
1 Servicing Notes
3
2 General
4
3 Disassembly
5
Disassembly Flow
5
Panel Assy, Bottom
5
Panel Assy, Upper Section
6
LCD Module", "Panel Assy, Upper
6
MAIN Board Assy
7
Case Assy, Battery", "MAIN Board
7
Strip, Ornamental
8
MD Mechanism Deck (MT-MZR909-171)", "Chassis Assy, Set
8
Service Assy, OP (LCX-4R)
9
Holder Assy
10
Motor, DC (Sled) (M602)
10
Motor, DC (Spindle) (M601)", "Motor, DC (over Write Head UP/DOWN) (M603)
11
4 Test Mode
12
5 Electrical Adjustments
18
6 Diagrams
34
Block Diagram - SERVO Section
34
Block Diagram - AUDIO Section
35
BLOCK DIAGRAM - KEY CONTROL/DISPLAY/POWER SUPPLY Section
36
Note for Printed Wiring Boards and Schematic Diagrams
37
Printed Wiring Board - Main Board (Component Side)
38
Printed Wiring Board - Main Board (Conductor Side)
39
Schematic Diagram – Main Board (1/4)
40
Schematic Diagram – Main Board (2/4)
41
Schematic Diagram - Main Board (1/4)
42
Schematic Diagram - Main Board (2/4)
42
Schematic Diagram - Main Board (3/4)
42
Schematic Diagram - Main Board (4/4)
43
IC Pin Function Description
48
7 Exploded Views
54
Panel Section
54
Chassis Section
55
MD Mechanism Deck Section (MT-MZR909-171)
56
8 Electrical Parts List
57
Revision History
62
Advertisement
Related Products
Sony MD Walkman MZ-R91
Sony MZ-R90/R91
Sony MZ-R910
Sony MZ-R37SP - MD Walkman MiniDisc Recorder
Sony Walkman MZ-R500DPC
Sony Walkman MZ-R500PC
Sony MZ-R701PC
Sony MZ R37 - Portable Minidisc Player/Recorder
Sony MZ-R70 Analog PCLink
Sony MZ-R701DPC
Sony Categories
Laptop
TV
Camcorder
CD Player
Digital Camera
More Sony Manuals
Login
Sign In
OR
Sign in with Facebook
Sign in with Google
Upload manual
Upload from disk
Upload from URL