Sign In
Upload
Manuals
Brands
Roland Manuals
Printer
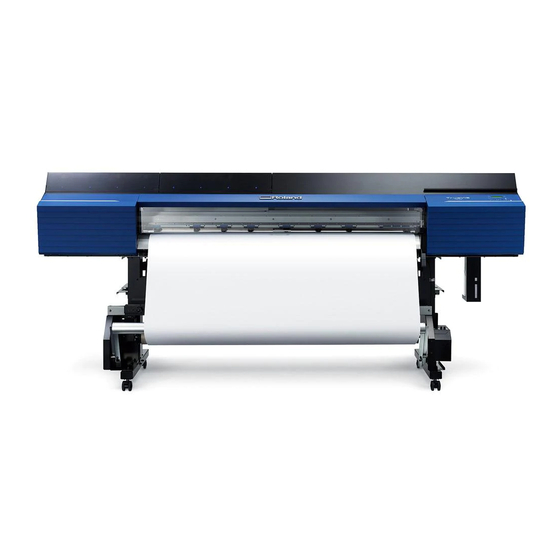
TrueVIS VG2-640
Roland TrueVIS VG2-640 Manuals
Manuals and User Guides for Roland TrueVIS VG2-640. We have
3
Roland TrueVIS VG2-640 manuals available for free PDF download: User Manual, Setup Manual, Regular Maintenance Manual
Roland TrueVIS VG2-640 User Manual (319 pages)
Brand:
Roland
| Category:
Printer
| Size: 11 MB
Table of Contents
Table of Contents
2
Chapter 1 Basic Handling Methods
9
Basic Information
10
Part Names and Functions
11
Printer Unit
11
Operation Panel
16
Display Screen
17
About the Media Used
18
Types of Media
18
Conditions for Usable Media
19
Menu List
20
Main Menu
20
Function Menu
24
Language and Unit Menu
25
Basic Operations
26
Power Supply Operations
27
Turning the Power on
27
Turning the Power off
28
Precautions When Operating the Power Supply
29
Sleep Mode (Power-Saving Feature)
30
Setup of Media
31
Setup of Roll Media
31
Setup of Sheet Media
41
Separating the Media
48
What to Do First after Installation
49
Accurately Adjusting the Misalignment of the Ink Landing Position
49
Checking before Output
51
LAN Network Settings
51
Preventing Sedimentation in Inks
52
Pausing and Canceling Output
53
Pausing and Resuming Output
53
Canceling Output
54
Ink Pouch/Tr2 Cleaning Liquid Pouch Replacement
55
Out-Of-Ink Warnings
55
Out-Of-TR2-Cleaning-Liquid Warnings
56
Ink Pouch Replacement
57
TR2 Cleaning Liquid Pouch Replacement
59
Chapter 2 Output Method
61
Printing Method
62
Preparations before Printing Output
63
Printing Tests and Normal Cleaning
63
Printing Output
66
Step 1: Batch Settings for Printing
66
Step 2: Starting Output
75
Cutting Method
77
Preparations before Cutting Output
78
Step 1: Switching off the Print Heater and Dryer
78
Step 2: Preventing Pulling of the Media with Undue Force
79
Step 3: Adjusting Cutting
80
Cutting Output
82
Step 1: Batch Settings for Cutting
82
Step 2: Starting Output
89
Printing and Cutting Method
90
Preparations before Printing and Cutting Output
91
Step 1: Printing Tests and Normal Cleaning
91
Step 2: Adjusting Cutting
94
Printing and Cutting Output
96
Step 1: Batch Settings for Printing and Cutting
96
Step 2: Starting Output
109
How to Cut with Crop Marks
111
Preparations before Cutting with Crop Marks
112
What Is Cutting with Crop Marks
112
Step 1: Printing Tests and Normal Cleaning
113
Step 2: Adjusting Cutting
116
Cutting with Crop Marks
118
Step 1: Batch Settings for Cutting with Crop Marks
118
Step 2: Starting Output with Crop Marks
131
Step 3: Preparations for Cutting Output
133
Step 4: Starting Cutting Output
137
Chapter 3 Optimizing Quality and Efficiency
138
Optimizing the Output Quality
139
Using the Correction Functions
140
Adjust the Misalignment of the Ink Landing Position
140
Accurately Adjusting the Misalignment of the Ink Landing Position
141
Reducing Horizontal Bands (Feed Correction Function)
143
Configuring Settings to Match the Properties of the Media
145
Adjusting Print Head Height to Match Media Thickness
145
Using Transparent Media
147
Using Hard-To-Dry Media
148
Using Media that Wrinkles Easily/Does Not Move Smoothly
149
Using Sticky Media
150
Preventing Ink Discharge Issues
151
Preventing Soiling of the Media, Dot Drop-Out, and Dot Displacement
151
Preventing Misaligned Media
152
Use Middle Pinch Rollers When Pulling Back or Feeding Media
152
Adjusting the Ink-Drying Method
153
What Is the Media Heating System
153
Setting the Print Heater Temperature
154
Setting the Dryer Temperature
155
Hints and Tips for Temperature Control
156
Setting the Temperature During Preheating
157
Drying the Trailing Edge of the Printing Area on the Dryer (When Only Printing)
158
Setting the Drying Time after Printing (When Only Printing)
159
Setting the Drying Time after Printing (When Printing and Cutting)
160
Switching off the Print Heater and Dryer Together
161
Using an Auxiliary Drying Unit
162
Using a Blower-Fan Unit
163
Accurately Adjusting the Cutting Settings
164
Fine-Tuning the Cutting Conditions
164
Accurately Adjusting the Cutting-In Amount
166
Performing Distance Correction During Cutting
167
Cutting to Make It Possible to Cut Corners Attractively (over Cut)
168
Prioritizing the Cutting Settings of this Machine over the Software RIP Settings
169
Accurately Adjusting the Settings for Printing and Cutting
170
Correcting the Misalignment of Printing and Cutting
170
Correcting the Misalignment of the Printing and Cutting Positions During Cutting
173
Accurately Adjusting the Settings for Cutting with Crop Marks
175
Aligning the Positions of Cutting with Crop Marks Manually
175
Correcting the Misalignment of Printing and Cutting with Crop Marks (Concurrent Test for Printing and Cutting with Crop Marks)
177
Correcting the Misalignment of Printing and Cutting with Crop Marks (Concurrent Test for Print- Ing and Cutting with Crop Marks)
177
Correcting the Misalignment of Printing and Cutting with Crop Marks (Separate Test for Printing/Cutting with Crop Marks)
180
Correcting the Misalignment of Printing and Cutting with Crop Marks
180
Ing/Cutting with Crop Marks)
180
Correct the Sensor for Reading Crop Marks
185
Adjusting the Level of the Sensor for Reading Crop Marks According to the Media
188
Resetting the Level of the Sensor for Reading Crop Marks
189
Optimizing Work Efficiency
190
Using Presets
191
Saving the Current Settings in Presets
191
Adjusting the Output-Start Location
194
Setting the Base Point
194
Reducing Output Time
196
Speeding up Output for Narrow Media
196
Using the Media Take-Up Unit
197
About the Media Take-Up Unit
197
Performing Operations from the Dedicated Mobile Operation Application
198
What Is the Dedicated Mobile Operation Application
198
Downloading the Operation Application
199
Using the Operation Application
200
Important Notes on Using the Operation Application
201
Other Useful Functions
203
Using the Print Light (Interior Light)
203
Performing Printing Tests Arranged Horizontally
204
Using Media Flanges for Paper Tubes (Cores) with an Internal Diameter of 2 Inches
205
Optimizing Work Efficiency
191
Loading and Outputting a Preset
193
Optimizing Operation Management
206
Managing the Operations Appropriately and Efficiently
207
Setting the Current Date/Time and Using It for Maintenance
207
Displaying the Amount of Media Remaining
208
Making Sure to Verify the Setting for the Amount Remaining Every Time the Media Is Changed
209
Printing the Amount of Remaining Media
210
Thoroughly Using the Middle Pinch Rollers
211
Setting the Activation Interval for Sleep Mode (Power-Saving Feature)
212
Managing the Basic Settings of the Printer
213
Setting the Menu Language and Units of Measurement
213
Turning on Bluetooth Communication
214
Viewing System Information
215
Returning All Settings to Factory Defaults
216
Chapter 4 Maintenance
217
Introduction
218
Important Notes on Handling and Use
219
Printer
219
Ink Pouches
220
Basic Maintenance Knowledge
221
Types and Timing of Maintenance
221
Measures When the Printer Is Not in Use for a Prolonged Period
222
Regular Maintenance
223
Cleaning the Machine
224
Cleaning the Media Path
224
Cleaning the Knife Carriage Roller
225
Disposing of Discharged Fluid
226
Precautions for Disposing of Discharged Fluid
226
If the Discharged Fluid Disposal Message Appears
227
If the Drain Bottle Exceeds Its Capacity Limit
228
Daily Print Head Check
229
Printing Tests and Normal Cleaning
229
When Normal Cleaning Is Not Effective
232
Medium Cleaning Method
232
Powerful Cleaning Method
234
Manual Cleaning
236
When Manual Cleaning Is Necessary
236
Manual Cleaning Method
237
Consumable Products and Parts Related to Manual Cleaning
243
If Colors Are Uneven
244
Mixing the Ink by Shaking the Pouch Tray
244
Advanced Maintenance
245
When Uneven Color Issues Occur with White Ink
246
Damper Cleaning Method
246
Handling Severe Dot Drop-Out and Dot Displacement
248
Super Cleaning Method
248
Partially Restricting the Print Heads Used for Printing
253
Emergency Measure) Cleaning the Print Head Surface
255
Replacing Consumable Parts
256
Replacing Parts for Maintenance
257
Replacing the Wiper and the Tray Pad
257
Cleaning the Wiper Tray
260
Replacing the Blade/Separating Knife
263
Replacing the Blade
263
Replacing the Separating Knife
270
Chapter 5 Troubleshooting Methods
272
Output Quality Problems
273
Printed Results Are Coarse or Contain Horizontal Stripes
274
Do the Print Heads Cause Dot Drop-Out
274
Is the Print Head Height Appropriate
274
Have You Carried out Feed Correction
274
Have You Carried out Correction of the Ink Landing Position (MEDIA GAP ADJ.)
274
Is the Printer Installed in a Level and Stable Location
274
Is the Media Heating System at a Suitable Temperature
274
Is the Temperature of the Room too Low
275
Is the Print Mode Suitable
275
Is the Media Loaded Correctly
275
Are the Settings for the [PRESET] Menu Item Appropriate
275
The Media Becomes Soiled When Printed
276
Do the Print Heads Come into Contact with the Media
276
Are the Print Heads Dirty
276
Are the Pinch Rollers or the Media Clamps Dirty
276
Colors Are Unstable or Uneven
277
Have You Tried Mixing the Ink by Shaking the Pouch Trays
277
Is the Media Wrinkled
277
Was Printing Paused Partway through
277
Is the Printer Installed in a Level and Stable Location
277
Is the Media Loaded Correctly
277
Are the Operating Parameters Set to Appropriate Values
277
Are the Settings for the [PRESET] Menu Item Appropriate
278
Cutting Is Misaligned or Skewed
279
Is the Media Loaded Correctly
279
Are the Settings for the Cutting Conditions Appropriate
279
Is the Length of Output too Long
279
Are You Using Media that Exhibits Large Expansion and Contraction
279
Is the Setting for the [CALIBRATION] Menu Item (under [CUTTING MENU]) Correct
279
Are the Pinch Rollers Placed on the Proper Locations
279
Printing and Cutting Are Misaligned
280
Have You Corrected the Misalignment of Printing and Cutting
280
Problems in Cutting with Crop Marks
281
Automatic Detection of Crop Marks Fails
282
Is the Media Wrinkled or Warped
282
Is the Media Size too Large
282
Are You Using Media that Is Likely to Reflect Light
282
Are You Using Transparent Media
282
Printing and Cutting Are Misaligned
283
Have You Corrected the Misalignment of Printing and Cutting with Crop Marks
283
Media Feed Problems
284
Media Wrinkles or Shrinks
285
Is the Media Loaded and Set up Straight and Securely
285
Was Loaded Media Allowed to Stand for some Time
285
Are the Media Clamps Attached
285
Was the Media Loaded While the Print Heater was Hot
285
Are the Media Heating System Temperatures too High
285
Is the Temperature of the Room too Low
285
Is the Humidity of the Room too High
285
Is the Media Sagging
285
Media Feeding Is Not Straight
286
Is the Media Loaded and Set up Straight and Securely
286
Media Feeding Is Not Smooth
287
Is some Other Object Coming into Contact with the Media
287
Is the Media too Thick
287
Are the Grit Rollers Dirty
287
A Media Jam Occurs
288
Is an Error Message Displayed
288
Is the Media Warped or Wrinkled
288
Is the Height of the Print Heads too Low
288
Are the Grit Rollers Dirty
288
Are the Media Clamps Attached
288
Is the Media Loaded and Set up Straight and Securely
288
Is some Other Object Coming into Contact with the Media
288
Is the Media too Thick
289
Machine Problems
290
The Print Heads Do Not Move
291
What to Do First
291
If the Heads Still Do Not Move
291
The Printer Unit Does Not Run
292
Is the Power Switched on
292
Is [SETUP] Lit
292
Are any Covers Open
292
Is the Top Menu Displayed
292
Is [PAUSE] Lit
292
Is a Message Displayed on the Screen
292
Are the Cables Connected
292
Is the LAN Routing Appropriate
293
Are the LAN Settings Correct
293
DID the Software RIP End Abnormally
293
Has the Ink Run out
293
The Media Heating System Doesn't Warm up
294
Is the Media Loaded
294
Is the Temperature of the Room too Low
294
Cannot Separate the Media
295
Is the Separating Knife Installed
295
Is the Cut Rail Installed
295
Printer Cannot be Operated from the Dedicated Application
296
Is the Printer's Operation Panel in Use
296
Is Printer-Side Bluetooth Communication Turned on
296
Is the Operation Application Connected to a Different Printer
296
Is the Printer-Side Bluetooth Communication Normal
296
Is the Distance between the Printer and the Mobile Terminal too Far
296
Are There any Obstacles between the Printer and the Mobile Terminal
297
Is the Mobile Terminal's Bluetooth Function Turned on
297
Is There a Wireless LAN Unit or Anything else in the Vicinity that Is Causing Bluetooth Communication to be Unstable
297
Is There a Wireless LAN Unit or Anything else in the Vicinity that Is Causing Bluetooth Communi- Cation to be Unstable
297
Messages on the Operation Panel
298
Messages
299
Close Cover (Front Cover/Cover L/Cover R)
299
Sheet Not Loaded Press Setup Key
299
Close Slot Cover
299
End of the Sheet
299
Empty Drain Bottle
299
Install Drain Bottle
299
Now Heating
299
Time for Maintenance
299
Time for Wiper Replace
300
Set Cl-Liquid for Wiper
300
Change Cl-Liquid for Wiper
300
Time for Tray Cleaning
300
Head Protection Activated
300
Error Messages
301
Align Point Position Invalid
301
Option Dryer Is Not Connected
301
Temperature Is too Low **°C
301
Temperature Is too High **°C
301
Cropmark Error Not Found
301
Can't Print Crop Continue
301
Sheet too Small Continue
302
Data Error Canceling
302
Sheet Set Error Set Again
302
Some MID.pinchs Not Set Right
302
Pinchroll Error Lower Pinchroll
302
Pinchroll Error Invalid Left(Right)Pos
302
Wrong Cartridge
303
Canceled for Pump Protection
303
Avoiding Dry-Up Turn Power off
303
Set Head Height to
303
Motor Error: Turn Power off
303
Service Call
303
Cleaning Error
304
Chapter 6 Appendix
305
Operations When Moving the Unit
306
Preparing to Move the Machine
307
Step 1: Removing Media and the Blade Holder
307
Step 2: Circulating the Ink (Only When Using White Ink)
309
Step 3: Discharging the Wiper Tray Cleaning Liquid
310
Step 4: Securing the Print Heads in Place Using the Retainer
312
Step 5: Reinstalling the Machine
313
Main Specifications
314
Printing/Cutting Area
315
Maximum Area
315
Maximum Printing Area When Using Crop Marks
316
Media Separation Location During Continuous Printing
317
About the Blade
318
Memo
319
Advertisement
Roland TrueVIS VG2-640 Setup Manual (68 pages)
Brand:
Roland
| Category:
Printer
| Size: 7 MB
Table of Contents
Table of Contents
3
Contents
3
To.ensure.safe.use
7
Pour.utiliser.en.toute.sécurité
14
Table of Contents
3
1. Introduction
21
1 Introduction
21
Checks.before.installation
22
1 Checks before Installation
22
About.the.user's.manuals.for.this.machine
22
About the User's Manuals for this Machine
22
About.placement.and.installation.work
23
About Placement and Installation Work
23
Deciding.on.an.installation.site
23
Deciding on an Installation Site
23
Temperature.and.humidity
24
Temperature and Humidity
24
Installation.space
24
Installation Space
24
Checking.included.items
25
2 Checking Included Items
25
2. Installation
27
2 Installation
27
Assembly.and.ink.filling
28
1 Assembly and Ink Filling
28
Checks.before.operations
28
Checks before Operations
28
Step.1:.Assembling.the.stand
29
Step 1: Assembling the Stand
29
Step.2:.Assembling.the.printer.unit.and.the.stand
32
Step 2: Assembling the Printer Unit and the Stand
32
Step.3:.Installing.the.media.holders.and.media.stays
36
Step 3: Installing the Media Holders and Media Stays
36
Step.4:.Installing.the.drain.bottle
42
Step 4: Installing the Drain Bottle
42
Step.5:.Removing.the.retainers
44
Step 5: Removing the Retainers
44
Step.6:.Adjusting.the.ink.tube.and.affixing.a.label
45
Step 6: Adjusting the Ink Tube and Affixing a Label
45
Step.7:.Connecting.the.cables
46
Step 7: Connecting the Cables
46
Step.8:.Initial.settings
47
Step 8: Initial Settings
47
Step.9:.Ink.filling
49
Step 9: Ink Filling
49
Step.10:.Adjustment.of.media.holder.adjuster
53
Step 10: Adjustment of Media Holder Adjuster
53
Installing.the.cutting.tool
54
2 Installing the Cutting Tool
54
Step.1:.Assembling.the.cutting.tool
54
Step 1: Assembling the Cutting Tool
54
Step.2:.Installing.the.cutting.tool
55
Step 2: Installing the Cutting Tool
55
Network.settings
57
3 Network Settings
57
Step.1:.Make.the.network.settings.for.the.computer
57
Step 1: Make the Network Settings for the Computer
57
Step.2:.Make.the.network.settings.on.the.printer
59
Step 2: Make the Network Settings on the Printer
59
Step.3:.Make.the.port.settings.for.the.software.rip
62
Step 3: Make the Port Settings for the Software RIP
62
3 Appendix
63
Locations.of.the.power.rating.and.serial.number.labels
64
Specifications.table
65
Roland TrueVIS VG2-640 Regular Maintenance Manual (34 pages)
Brand:
Roland
| Category:
Printer
| Size: 6 MB
Table of Contents
Table of Contents
3
Contents
3
1 Introduction
5
Important Notes on Handling and Use
6
Printer
6
Ink Pouches
7
Basic Maintenance Knowledge
8
Types and Timing of Maintenance
8
Measures When the Printer Is Not in Use for a Prolonged Period
10
2 Regular Maintenance
11
Cleaning the Machine
12
Cleaning the Media Path
12
Cleaning the Knife Carriage Roller
13
Disposing of Discharged Fluid
14
Precautions for Disposing of Discharged Fluid
14
If the Discharged Fluid Disposal Message Appears
14
If the Drain Bottle Exceeds Its Capacity Limit
15
Daily Print Head Checks
17
Printing Tests and Normal Cleaning
17
Daily Head Cleaning
17
When Normal Cleaning Is Not Effective
20
Medium Cleaning Method
20
Powerful Cleaning Method
22
Manual Cleaning
24
When Manual Cleaning Is Necessary
24
Manual Cleaning Method
25
Consumable Products and Parts Related to Manual Cleaning
32
If Colors Are Uneven
33
Mixing the Ink by Shaking the Pouch Tray
33
Advertisement
Advertisement
Related Products
Roland TrueVIS VG2-540
Roland TrueVIS VG-640
Roland TrueVIS VG-540
Roland TrueVIS VG3-640
Roland TrueVIS VG3-540
Roland VS-540i
Roland VersaCamm VP-300
Roland VersaCamm VP-540
Roland VersaWorks VS-300i
Roland TrueVIS VF2-640
Roland Categories
Musical Instrument
Synthesizer
Recording Equipment
Drums
Electronic Keyboard
More Roland Manuals
Login
Sign In
OR
Sign in with Facebook
Sign in with Google
Upload manual
Upload from disk
Upload from URL