Sign In
Upload
Manuals
Brands
Panasonic Manuals
Camcorder
AJ-PX5100G
Panasonic AJ-PX5100G Manuals
Manuals and User Guides for Panasonic AJ-PX5100G. We have
1
Panasonic AJ-PX5100G manual available for free PDF download: Operating Instructions Manual
Panasonic AJ-PX5100G Operating Instructions Manual (263 pages)
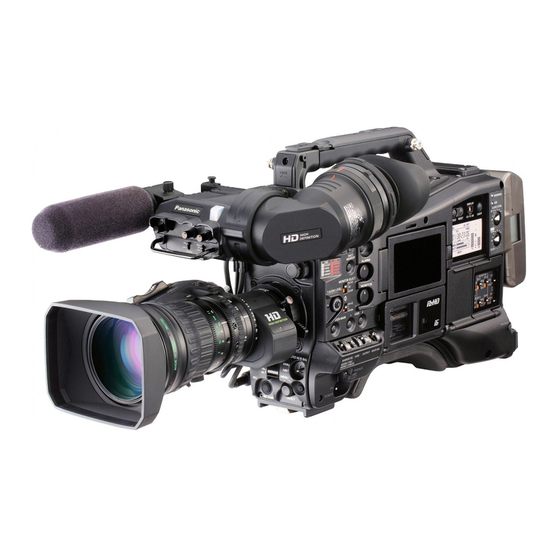
Memory Card Camera-Recorder
Brand:
Panasonic
| Category:
Camcorder
| Size: 21.5 MB
Table of Contents
Read this First
2
Table of Contents
9
Chapter 1 Overview
11
Before Using the Camera
12
Setting the Region of Use (Setting Frame Frequency, Etc.)
13
Accessories
14
Use of the Camera on a System
15
Basic Configuration Devices
15
Expanded Configuration Devices
15
Accessories
15
Chapter 2 Description of Parts
16
Power Supply and Accessory Mounting Section
17
Audio (Input) Function Section
19
Audio (Output) Function Section
21
Shooting and Recording/Playback Functions Section
22
Shooting and Recording (Camera Unit)
22
Shooting and Recording/Playback Functions Section (Recording Unit)
24
Menu Operation Section and Thumbnail Operation Section
26
Time Code Section
27
Warning and Status Display Section
28
Status Display
29
P2 Card, Battery Charge Level, Audio Level Display
29
Memory Operation/Status Related Display
29
Chapter 3 Preparation
31
Power Supply
32
Using Batteries
32
Mounting and Setting Battery
32
Using External DC Power Supply
33
Mounting and Adjusting the Lens
35
Mounting the Lens
35
Flange Back Adjustment
35
White Shading Compensation
36
Chromatic Aberration Compensation Function (CAC)
37
Preparing for Audio Input
40
Using the Front Microphone
40
Using a Wireless Microphone Receiver
40
Using Audio Devices
41
Mounting Accessories
42
Mounting the Camera on a Tripod
42
Attaching the Shoulder Strap
42
Attaching the Rain Cover
43
Connecting the <DC OUT> Terminal with the External Recording Start/Stop Switch
44
Charging the Built-In Battery
45
Setting the Date/Time of the Internal Clock
46
Inspections before Shooting
48
Preparing to Inspect
48
Inspecting the Camera Unit
48
Inspecting the Memory Recording Functions
48
P2 Card
51
Inserting a P2 Card
51
Removing a P2 Card
51
Preventing Accidental Erasure
52
P2 Card Access Leds and Status of P2 Cards
52
P2 Card Recording Time
53
CPS (Content Protection System)
54
How to Handle Data Recorded on P2 Cards
54
Chapter 4 Shooting
55
Basic Procedures
56
Power Supply Setup to P2 Card Insertion
56
Shooting and Recording Switch Settings
56
For Shooting
57
Standard Recording
58
Native Recording
58
Adjusting the White and Black Balance
59
Adjusting the White Balance
59
Adjusting the Black Balance
61
Setting the Electronic Shutter
63
Shutter Mode
63
Setting the Shutter Mode and Speed
63
Setting the Synchro Scan Mode
64
Flash Band Compensation (FBC) Function
65
Setting the Flash Band Compensation Function
65
Setting the High Dynamic Range (HDR)
66
Recording in High Dynamic Range (HDR)
66
Playing Back the Signal Recorded in High Dynamic Range (HDR)
66
Recording to the External Input Signal of High Dynamic Range (HDR)
67
Assigning Functions to <USER> Buttons
68
Selectable Functions
68
[USER SW GAIN] Switching Setting
69
Selecting Audio Input and Adjusting Recording Levels
70
Selecting Audio Input Signals
70
Adjusting the Recording Levels
70
Special Recording Functions
73
Pre-Recording
73
Interval Recording
73
One-Shot Recording
74
Loop Recording
75
One-Clip Recording
75
Simultaneous Recording
77
Hot Swap Recording
77
Recording Check Function
77
Shot Mark Recording Function
78
Text Memo Recording Function
78
Multi Formats
79
Selecting Recording Signals
79
System Modes and Recording Functions
79
List of Recording Settings and Recording Functions
83
Selecting Video Output
83
List of Recording/Playback and Output Formats
84
Dual Codec Recording
86
Setting the Dual Codec
86
Recording the Proxy Data
87
Recording to the SD Memory Card
88
Checking the Proxy Data
88
Error Displays about Proxy Data Recordings
89
Streaming Function
91
Setting the Network Connection
91
Using the Streaming Function
91
List of System Modes and Supported Streaming Output
92
List of Streaming Modes and Resolution/Frame Rates
92
Selection of External Reference Signal and Generator Lock Setting
93
Locking the Video Signal to the External Reference Signal
93
Setting the Time Data
94
Definition of Time Data
94
Recording and Output of Time Codes and User Bits
94
User Bits Settings
95
How to Input User Bits
95
Setting the Time Code
96
Externally Locking the Time Code
97
Setting the Camera ID
100
CTL Counter Setting and Display
101
Viewfinder Status Display
102
Lamp Display in the Viewfinder
102
Configuration of Status Display on Viewfinder Screen
102
Selecting Display Items on Viewfinder Screen
103
Screen Display
103
Checking and Displaying Shooting Status
109
Mode Check Display
111
Display Modes and Setting Changes/Adjustment Result Messages
113
Setting the Marker Display
113
Display of Marker Confirmation Screen (Marker Select Function)
114
Confirmation of Return Video Signal in the Viewfinder
114
Zebra Patterns Display
114
Focus Assist Function
115
Waveform Monitor Function
115
Adjusting and Setting the LCD Monitor
116
Using the LCD Monitor
116
Mirror Shooting
116
Adjusting and Setting the Viewfinder
117
Using the Viewfinder
117
Handling Setting Data
118
Setting Data File Configuration
118
Handling SD Memory Cards
119
Performing Operations on SD Memory Cards
119
How to Use User Data
121
How to Use Scene File Data
122
How to Restore Menu Setting Status to Factory Setting Values
122
Lens File
123
Writing and Reading Lens Files to and from SD Memory Card
124
Chapter 5 Playback
126
Normal and Variable Speed Playback
127
Thumbnail Operations
128
Thumbnail Operation Overview
128
Thumbnail Screen
128
Selecting Thumbnails
130
Thumbnail Screen Display Settings
131
Playing Back Clips
132
Changing Thumbnails
133
Shot Mark
134
Text Memo
134
Deleting Clips
136
Restoring Clips
136
Reconnecting Incomplete Clips
136
Copying Clips
136
Setting Clip Metadata
137
Formatting a P2 Card
139
Formatting SD Memory Cards
139
Properties
140
Connecting to External Devices Using the <USB3.0> Terminal (Host) (USB Storage Mode)
144
Chapter 6 Menu Operations
151
Setting Menu Structure
152
Menu Types and How to Open Them
152
Main Menu Structure
152
[OPTION MENU] Structure
152
Setting Menu Display
153
Setting Menu Basic Operations
153
Setting [USER MENU]
154
Menu List
155
[Paint]
155
[Camera]
169
[Clip]
174
[Rec/Pb]
178
[I/F Setup]
182
[File]
192
[Maintenance]
194
[System]
195
[User Menu Sel]
197
[Option Menu]
197
Setting Items to [USER MENU] and Loading/Reading the Settings to a Data File
198
Chapter 7 Connecting to External Devices
216
Linking to External Devices
217
Connecting the External Device to the <USB2.0> Terminal (Device)
217
Connecting the External Device to the <USB3.0> Terminal (Host)
217
Connecting the Video and Monitor
217
Recording Images of External Devices
217
Connection Function Via <USB2.0> or <USB3.0> Terminals
218
Connecting to a Computer in the USB Device Mode
218
USB Storage Mode
219
External Device Connection and Recording Control Function Using HD SDI
220
HD SDI Remote Function
220
Connecting to the Extension Control Unit (AG-EC4G)
221
Switch Functionality in Remote Control Mode
221
Recording and Playback Operations in Remote Control Mode
221
Remote Control Unit Connected to the Camera
221
Connecting to Remote Operation Panel (AK-HRP200G)
222
Switch Functionality in Remote Control Mode
222
Recording and Playback Operations in Remote Control Mode
222
Remote Control Unit Connected to the Camera
223
Connecting to P2 ROP Application
224
Switch Functionality in Remote Control Mode
224
Recording and Playback Operations in Remote Control Mode
224
Chapter 8 Network Connection
225
Network Connection
226
Available Functions
226
Operating Environment
226
Preparing for Connection
227
For the Wireless Module AJ-WM30/AJ-WM50
227
For Wired LAN
228
For Wireless Module Other than AJ-WM30/AJ-WM50
228
Network Settings
229
Wireless LAN Settings
229
Wired LAN Settings
231
Network Function
233
P2 Browser Function Settings and Connection Status Check
233
P2 Playlist Edit Function Setting
234
Setting for Connection with P2 ROP Application
234
Setting for IP Connection with the Remote Operation Panel (AK-HRP200G)
235
Connection Settings for the Streaming Function
235
Using FTP Client Function
237
FTP Client Function Setting
237
FTP Server Folder List (FTP Explorer Screen)
238
Deleting Clips on the FTP Server
239
Viewing Information of Clips on FTP Server
240
Transferring from a P2 Card to an FTP Server (Copy)
240
Writing Back from an FTP Server to a P2 Card (Copy)
240
Transferring from an SD Memory Card to an FTP Server (Export)
241
Writing Back from an FTP Server to an SD Memory Card (Import)
241
Rec During Upload Function
243
Transferring Recorded Clips Automatically (Automatic Transfer Mode)
243
Transferring Selected Clips Automatically (Manual Selection Mode)
243
Displaying the Upload List
244
Chapter 9 Maintenance
246
Warning System
247
Warnings Description List
247
Error Code
249
Warning Information Display
249
Warning/Error Displays in the Thumbnail Operation, Menu Operation, and USB Storage Mode
251
Updating the Camera Firmware
253
Chapter 10 Specification Dimensions/Specifications
255
Dimensions/Specifications
255
Dimensions
255
Specifications
255
Details of the Connector Signals
258
Index
261
Advertisement
Advertisement
Related Products
Panasonic AJ-PX5000G
Panasonic AJ-PX270
panasonic AJ-PX800G
Panasonic AJ-PX270EJ
Panasonic AJ-PX380G
Panasonic AJ-PX230 Series
Panasonic AJ-PX230E
Panasonic AJ-PD900W
Panasonic AJ-P2C016RG
Panasonic AJ-P2C002SG
Panasonic Categories
Air Conditioner
Camcorder
TV
Digital Camera
Cordless Telephone
More Panasonic Manuals
Login
Sign In
OR
Sign in with Facebook
Sign in with Google
Upload manual
Upload from disk
Upload from URL