Sign In
Upload
Manuals
Brands
NEC Manuals
Storage
LL060F
NEC LL060F Manuals
Manuals and User Guides for NEC LL060F. We have
1
NEC LL060F manual available for free PDF download: User Manual
NEC LL060F User Manual (254 pages)
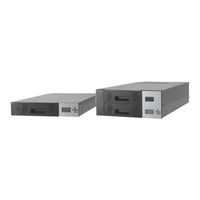
Tape Library
Brand:
NEC
| Category:
Storage
| Size: 6.35 MB
Table of Contents
Chinese Acceptance Statement
2
Handling of Laser Product
2
Taiwan Acceptance Statement
2
Weee
2
FCC Acceptance Statement
3
Other
3
Rohs Compliance
3
Warning Labels
15
The Mark of this Manual
16
Table of Contents
17
Figures
22
Preface
25
Remarks
25
Exemptions
26
Use Limitation
26
Chapter1 General Description
28
Handling Precautions
28
Notes on Use
28
Transfer of Library
28
Names and Features of Components
29
Front View
29
Figure 1-1 Front of the Library (Above: T30A/Below: T60A)
29
Operator Panel
30
Status LED
30
Figure 1-2 Operator Panel
30
Table 1-1 Status LED on Operatorpanel
30
Lcd
31
Button
31
Table 1-2 Button on Operatorpanel
31
Magazine Operation Panel
32
Magazine Status LED
32
Button
32
Figure 1-3 Magazine Operation Panel(Left:t30A,Right:t60A)
32
Table 1-3 Status LED on Magazine Operation Panel
32
Table 1-4 Button on Magazine Operation Panel
32
Ethernet Connector for Maintenance
33
Magazine
34
Slot Number
34
Figure 1-4 Slot Number of Magazine(Above:t30A,Below:t60A)
34
Active Slot
35
I/O Station
35
Escape Slot
35
Cleaning Slot
35
Inactive Slot
35
Rear View
36
Figure 1-5 Components on the Rear of the Library(T30A)
36
Figure 1-6 Components on the Rear of the Library(T60A)
36
Drive Sled Ingicator
37
Table 1-5 Drive Sled Ingicator
37
Power Module LED
38
Encryption
39
Disposal of the Product and Comsumables
40
Unpacking
41
Installing the Rack Mounting Kit
43
Components
43
Figure 1-7 Components of Rack Mount Kit Parts
43
Table 1-6 Component List of Rack Mount Kit Parts
43
Caution Points for Rack Mounting
44
Figure 1-8 Illustration of Rack Bars
44
Figure 1-9 Rack Dimensions
45
Table 1-7 Internal Dimension Requirements for Rack
45
Rack Mount Rail Attachment Position
46
Figure 1-10 Rack Mount Rail Attachment Position
46
Attachment of Rack Mount Rail L/R
47
Figure 1-11 Attachment of Rack Mount Rails
47
Attachment of Rack Mount Bracket L/R
48
Figure 1-12 Attachment of Rack Mount Bracket R(Left:t30A , Right :T60A)
48
Figure 1-13 Attachment of Rack Mount Bracket L(Left:t30A , Right :T60A)
48
Installation of Library
49
Figure 1-14 Mounting of Library Onto Rack
49
Figure 1-15 Attachment of Rack Ears
50
Attachment of Rack Ear
51
Figure 1-16 Fastening of Library's Front Side
51
Attachment of Label Plate
52
Figure 1-17 Attachment of Label Plate
52
Removal of Shipment Stabilizer
53
Chapter2 Setup
54
Connection of a Interface Cable
54
Connection of SAS Cable
54
Connection of FC Cable
55
Connection of AC Power Cable
56
Power-On and Self Test
56
Setting Drive Configuration
56
Setting Library and Drive Configuration
56
Table 2-1 Setting Item
56
Diagnostic Test
57
Operation Checks after Installation
57
Chapter3 Power-On And Power-Off
58
Power-On and Power-On Sequence
58
Starting the System
58
Shutting down the System
58
Power-Off and Power-Off Sequence
58
Chapter4 Operator Panel
59
Panel Indications
59
Menu Screen
59
Figure 4-1 Menu Screen
59
Status Display Screen
60
Library State
60
Figure 4-2 Component of Operator Panel
60
Figure 4-3 Accessor Icon
61
Table 4-1 Library Status Displayed in the Operation Panel
61
Figure 4-4 Magazine Icon
62
Figure 4-5 Magazine Icon(Magazine Is Opened)
62
Figure 4-6 Magazine Icon(I/O Station Is Set)
62
Figure 4-7 Magazine Icon (I/O Station Is Opened)
63
Figure 4-8 Magazine Icon(Slot Image)
63
Table 4-2 Drive Status Icons
63
Drive State
64
Table 4-3 Drive Status Icons
64
Table 4-4 Drive Message
64
Asynchronization Message Screen
66
Table 4-5 Asynchronization Message
66
Menu Tree
67
Table 4-6 Menu Tree of Commands
67
Table 4-7 Menu Tree of Configuration
68
Table 4-8 Menu Tree of Current Information
69
Table 4-9 Menu Tree of Service
70
Table 4-10 Menu Tree of Logout
70
Login
71
Service Login
72
Top Menu
73
Figure 4-9 Root Screen of Top Menu
73
Commands
74
Table 4-11 Commands Submenus
74
Configuration
75
Table 4-12 Configuration Submenus
75
Library Settings
76
Table 4-13 Library Setting Submenu
76
Network Settings
77
Table 4-14 Network Setting Submenu
77
Table 4-15 Ipv4 Setting Submenu
77
Table 4-16 Ipv6 Setting Submenu
77
Drive Settings
78
Table 4-17 Drive Settings Submenu
78
Table 4-18 Port Setting Submenu
78
OP Panel Settings
79
Date / Time
79
Set Default
79
Table 4-19 OP Panel Settings Submenu
79
Table 4-20 Date / Time Submenu
79
Current Information
80
Setting Information
80
Slot Information
80
Table 4-21 Current Information Submenu
80
Table 4-22 Information to be Displayed on Setting Information Menu
80
Table 4-23 Information to be Displayed on Slot Information Menu
80
Service
81
View Error Status
81
Diagnostics
81
Table 4-24 Service Submenu
81
Table 4-25 Information to be Displayed on View Error Status
81
Table 4-26 Diagnostics
81
Statistics
82
Telnet Service Port
82
View Revision
82
Drive Replacement
82
Table 4-27 Information to be Displayed on Statistics
82
Table 4-28 Information to be Displayed on View Revision
82
Advanced Service
83
Library Log
83
Logout
83
Table 4-29 Test to be Displayed on Advanced Service
83
Table 4-28 Information to be Displayed on View Revision
83
Configuring the Library
84
Viewing Configuration Data of the Library
84
Change Password
84
Setting of Drive
86
Setting of Serial Attached SCSI
86
Setting of Fibre Channel
87
Setting Robot Control Path
88
Power Save Mode
89
Switching between ONLINE and OFFLINE
89
Setting of I/O Station
90
Setting of Active Slot
90
Insertion and Removing Cartridge by Operator Panel
91
Magazine Operations
91
Removing Magazine
91
Insertion of Cartridges into Magazine
93
Removal of Cartridges from Magazine
93
Emergency Removal of Magazine
94
I/O Station Operations
95
Using the Operation Panel to Move Cartridges
96
Load Cartridge into Drive
96
Figure 4-10 Move Cartidge
96
Figure 4-11 Select Source Screen
96
Figure 4-12 Select Destination Screen
97
Figure 4-13 Select Execute
97
Removing from the Drive
98
Figure 4-14 Move Cartridge
98
Figure 4-15 Select Source Screen
98
Figure 4-16 Select Destination Screen
99
Figure 4-17 Select Execute
99
Cleaning
100
Cleaning by Operation Panel
100
Auto Cleaning
100
Rebooting the Library
101
Figure 4-18 Reboot Library
101
Rebooting Drive
102
Chapter5 Remote Manager Interface
103
Connection Configuration
103
Connection Settings
104
Table 5-1 Connection Setting (Ipv4)
104
Table 5-2 Connection Setting (Ipv6)
104
Startup of Remote Manager Interface
105
Figure 5-1 Input URL
105
Connection of Https
106
Login Formats
107
Web
108
Web
109
Menu Windows
109
Table 5-3 Menus Available at Various User Access Levels
109
Login
110
Figure 5-2 Login Page(before Entry)
110
Figure 5-3 Login Page(after Entry)
110
Library Information Viewing Menu(Monitor Sytem)
111
Library Basic Information(System Summary)
111
Figure 5-4 Library Basic Information Window
111
Library Detailed Information Window (Library Map)
113
Figure 5-5 Library Map
113
Figure 5-6 Detail(Magazine)
114
Figure 5-7 Accessor Information
115
Figure 5-8 Library Information
116
Figure 5-9 Network Information
117
Figure 5-10 Notification Information
118
Figure 5-11 Drive Information
119
Library Management Menu (Manage Library)
120
Move Cartridge Window (Move Cartridge)
120
Figure 5-12 Move Cartridge
120
Unload Drive Window (Unload Drive)
122
Figure 5-13 Unload Drive
122
Clean Drive Window (Clean Drive)
123
Figure 5-14 Clean Drive
123
Library State (Offline/Online)Switching Window(Library State)
124
Figure 5-15 Library State
124
Figure 5-16 Confirmation Screen
124
Library Setting (Configure Library)
125
Account Setting (User Access)
125
Figure 5-17 Useraccess
125
Figure 5-18 Add a User
126
Figure 5-19 Remove a User Confirmation Screen
127
Physical View (Physical)
128
Figure 5-20 Physical
128
Library Setup Window (Logical)
129
Figure 5-21 Logcal
129
Network Setup Window (Network)
132
Figure 5-22 Network Setup
132
Date and Time Setup Window (Date and Time)
134
Figure 5-23 Date and Time Setup
134
Event Notification Setup Window(SMTP)
135
Figure 5-24 SMTP Setup
135
Event Notifications Setup Window (SNMP)
136
Figure 5-25 SNMP Setup
136
Figure 5-26 Snmpv3 Setup
137
Figure 5-27 Trap List
138
Encryption Basis
139
Figure 5-28 Encryption Basis Setup
139
Encryption Detail
140
Figure 5-29 Encryption Detail Setup
140
Licenses Registration
141
Figure 5-30 Licenses Registration
141
Saving the File Setting / Restore Screen (Save and Restore)
142
Figure 5-31 Save/Restore
142
Library Maintenance (Service Library)
144
View Library Logs
144
Figure 5-32 View Library Logs
144
Download Library /Drive Logs (Download Logs)
145
Figure 5-33 Download Logs
145
Reset (Reset Library / Drive)
146
Figure 5-34 Reset Library / Drive
146
Firmware Refresh Screen (Firmware Update)
147
Figure 5-35 Firmware Update
147
Statistical Information (Usage Statistics)
148
Figure 5-36 Usage Statistics
148
Web Shell (Web Shell)
149
Figure 5-37 Web Shell
149
Event List
150
Table 5-4 Event List
150
Table 5-5 Event List
151
Chapter6 Encryption Key Management Function
152
General Information
152
Features of Encryption Key Management Option
152
Encryption Mechanism
152
Types of Keys
152
Master Key
153
Encryption Key
154
Backup of Encryption Key
154
Basic Operation of Encryption Key Management Function
155
Setup
155
Registering the Activation Key
156
Checking the License Key Registration Status
156
Figure 6-1 Activation Key Is Not Registered
156
Figure 6-2 Activation Key Is Registered
156
Enabling the Encryption Key Management Function
157
Figure 6-3 Encryption Enable
157
Figure 6-4 Master Key Is Registered
157
Registering (Importing) the Master Key
158
Figure 6-5 Manual Input of Master Key
158
Figure 6-6 File Input of Master Key
159
Exporting (Backing Up) the Master Key
160
Figure 6-7 Export of Master Key
160
Operation
161
To Create Encrypted Medium
161
Figure 6-8 Encryption Detail
161
Checking Tape Media Information
162
Sharing Tape Medium Among Multiple Libraries
162
Maintenance
162
Backup of Encryption Key (Basic Operation)
162
Executing Set Default
163
Checking the Encryption Log
163
Advance Operation of Encryption Key Management Function
164
Using LTO2 / LTO3 Tape Medium
165
Enabling or Disableing Enctyption for each Tape Medium
165
Figure 6-9 Encryption Detail
165
Setting Tape Medium Encryption
166
Figure 6-10 Encryption Setting
166
Sharing Tape Medium Among Multiple Libraries (Advanced)
167
Importing and Exporting the Encryption Key(for each Tape Medium)
167
When to Import the Encryption Key
168
To Import the Encryption Key
168
Figure 6-11 Manual Inputting of the Encryption Key
168
Figure 6-12 File Inputting of the Encryption Key
169
To Export an Encryption Key
170
Figure 6-13 Export of the Encryption Key
170
Disabling the Encryption Management Function for the Library
171
Figure 6-14 Disabling the Encryption Management Function
171
Changing the Master Key
172
Backing up and Restoring the KEY Database
172
Figure 6-15 Changing Master Key
172
Figure 6-16 Backup or Restore of KEY Database
172
Backing up the KEY Database
173
Restoring the KEY Database
173
Figure 6-17 Backup of KEY Database
173
Clearing Encryption Information
174
To Clear Encryption Information
174
Figure 6-18 Clear of Encryption Information
174
Points to Check When a Failure or Abnormality Occurs
175
Table 6-1 Troubleshooting Table
175
FAQ about Encryption Key Management Function
176
List of Encryption Event Log Messages
177
Chapter7 Installation Of Option
178
Install of Drive
178
Install of Power Module
178
Install of Activation Key
179
Chapter8 Cartridges
179
Figure 8-1 Names of Cartridge Parts
179
Data Cartridge
180
WORM Cartridge
180
Cleaning Cartridge
180
Diagnosis Cartridge
180
Table 8-1 Drive/Cartridge Compatibility
180
Cartridge Label
181
Figure 8-2 Data Cartridge Label
181
Table 8-2 Cartridge Label Code
181
Attaching a Cartridge Label
182
Figure 8-3 Attaching a Cartridge Label
182
Write Protection
183
Figure 8-4 Write Protection of Cartridge
183
Notes on Handling
184
Notes on Use
184
General
184
Use Protection Standard
184
Service Life
185
Cartridge Storage
185
Chapter9 Maintenance
186
Drive Cleaning
186
Auto Cleaning
186
Diagnosis Test
187
Cleaning of Device
187
Cleaning of Magazine Filter
188
Cleaning of Cartridge
188
Updating the Firmware
189
Confirming the Firmware Version
189
Figure 9-1 Confirming the Firmware Version
189
Updating the Library Firmware
190
Figure 9-2 Firmware Update Window (Library Firmware Update)
190
Updating the Drive Firmware
191
Figure 9-3 Firmware Update Window (Drive Firmware Update)
191
Troubleshooting Procedures
192
Moving the Library
193
Chapter10 Replacing Maintenance Parts
194
Table 10-1 Maintenance Parts List
194
Saving and Restoring Maintenance Information
195
Saving Maintenance Information
195
Figure 10-1 Save/Restore Window
195
Restoring Maintenance Information
196
Figure 10-2 Save/Restore Window
196
Replacing the Device
197
Replacing the Maintenance Chassis
197
Replacing the Contoller Board
198
Replacing the Drive Module
200
Replacing the Power Supply Module
201
Replacing the Operator Panel PKG
202
Replacing the Escape Slot
204
Replacing the Front Magazine and Rear Magazine
204
Replacing the Air Filter
205
Replacing the Drive Fan
208
Replacing the Internal FC Cable
211
Replacing the Front Bezel L
212
Replacing the Front Bezel R
213
Chapter11 Self-Diagnosis Function
214
Mechanism Test
214
Demo (Slot-Drv-Slot)
214
Demo (Slot-Slot)
214
MSBF Test
214
X-Move Test
214
Y-Move Test
214
Pick/Put Test
214
Pick/Put/Move Test
214
Vibration Test
214
Chapter12 Action In Breakdown and Abnormal Circumstances
215
Trouble Shooting
216
When You Request Maintenance
217
Advertisement
Advertisement
Related Products
NEC LL009F
NEC LL030F
NEC LLT75Z
NEC LCD4010-BK - MultiSync - 40" LCD Monitor
NEC LED-FE0019i2-165
NEC LED-FE019i2-165
NEC MultiSync LCD1700NC
NEC MultiSync LCD1880SX-BK
NEC LED-FC009i
NEC AccuSync LCD19V
NEC Categories
Monitor
Projector
Server
Telephone
Laptop
More NEC Manuals
Login
Sign In
OR
Sign in with Facebook
Sign in with Google
Upload manual
Upload from disk
Upload from URL