Sign In
Upload
Manuals
Brands
Digidesign Manuals
Recording Equipment
D-Command
Digidesign D-Command Manuals
Manuals and User Guides for Digidesign D-Command. We have
1
Digidesign D-Command manual available for free PDF download: Manual
Digidesign D-Command Manual (137 pages)
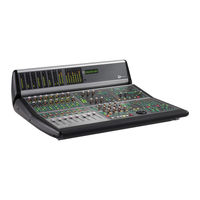
worksurface for Digidesign ICON system
Brand:
Digidesign
| Category:
Recording Equipment
| Size: 4 MB
Table of Contents
Important Safety Instructions
2
Table of Contents
5
Part I Introduction
7
D-Command Features
9
D-Command System Components
9
System Expansion Options
9
Chapter 1. Introduction to D-Command
9
Operational Requirements
10
Connection Requirements
10
System Requirements
10
Temperature and Ventilation
10
Mechanical Specifications
11
D-Command Side Dimensions
11
D-Command Top Dimensions (Main Unit)
11
D-Command Top Dimensions (Main Unit and Fader Module)
12
D-Command Main Unit
13
Main Unit Top Panel
13
Chapter 2. D-Command Overview
13
Dynamics and EQ Sections
14
Main Time Scale Display and Location Indicator
14
Meter Display
14
Monitor Section
14
AC Power
15
Ethernet Connector
15
Main Unit Back Panel
15
Power Switch
15
Channel Strip
16
D-Command Fader Module
16
Fader Module Top Panel
16
Meter Section
16
D-Command XMON Interface
17
MIDI Receive Indicator
17
Mute Indicator
17
XMON Front Panel
17
XMON Back Panel
18
Part II Installation
19
Assembling an Expanded System
21
Placement of D-Command Fader Module
21
Assembly Hardware
21
Chapter 3. Setting up the Fader Module
21
Attaching the Units
22
D-Command Connections
23
Ethernet Connections
23
Power Connections
23
Chapter 4. Connecting D-Command
23
Controlling Pro Tools Systems over a Network
24
Footswitch Connections
24
Using D-Command on an Ethernet Network
24
Audio Connections
25
To Connect the XMON to D-Command
25
XMON Monitoring System Connection
25
Control Room Monitoring Connections
26
Inputs
26
Outputs
26
Headphone/Cue System Connections
27
Example XMON Wiring Diagram
28
Wiring Diagram for 192 I/O and XMON
28
Software Configuration
29
Starting up and Shutting down the System
29
Updating System Firmware
29
Chapter 5. Configuring D-Command
29
Setting D-Command Preferences
30
Fader and Switch Preferences
30
Naming D-Command Units in Pro Tools
30
Faders On/Off
30
Touch Value
31
Select Switch Latch Mode
31
Custom Fader Preferences
31
Custom Fader Justification
31
Custom Fader Plug-In Mode View Definition
32
Encoder Preferences
32
Rotary Encoder Mode
32
Encoder Order
32
Meter Preferences
33
Send Meters On/Off
33
Insert Meter On/Off
33
VCA Slave Metering On/Off
33
System Calibration
34
Recalibrating D-Command Faders
34
Calibrating the Output Meters
34
Calibrating SPL Indication on the Monitor Section
34
Part III Reference
35
Channel Strip Controls
37
Channel Strips
37
Encoder Knob
37
Rotary Encoder Section
37
Chapter 6. Channel Strip Controls
37
Encoder Automation Mode Indicator
38
Encoder Display
38
Encoder LED Ring
38
VCA Master Tracks
38
Channel Strip Mode Controls
39
Instrument Tracks
39
MIC Pre
39
Page up and Page down Switches
39
Bypass/Mute Switch
40
MIC Pre Mode
40
Pan Switch
40
Channel Strip Function Controls
41
Input Monitor Mode Switch
41
Send Pan Mode
41
Sends Switch
41
Automation Mode Switch
42
Channel Display
42
Fader Section
42
Mute Switch
42
Automatch Indicators
43
Automation Mode Indicators
43
Custom Fader Mode Indicator
43
Group Status Indicator
43
Flip Mode
44
Flip Switches
44
Global Controls Section
44
Instrument Tracks and Flip Mode
44
All Switch
45
Automation Enable Controls
45
Automation Write Controls
45
Start Switch
45
Global Modifier Controls
46
Switch Info Switch
46
Switch Information Controls
46
Volume Switch
46
Applying Actions to Multiple Tracks in Pro Tools
47
Do to All and Do to Selected Switches
47
Select/Focus Mode Switch and Indicators
47
Automation Suspend Switch
48
Display Mode Switch
48
Set to Default Switch
48
Suspend Groups Switch
48
Focus Channel Display
49
Groups Switch
49
Map Switch
49
Tracks Switch
49
Automation Mode Controls
50
Latch Switch
50
Touch Switch
50
Write Switch
50
Assign Controls
51
Main Counter Switch
51
Miscellaneous Controls
51
Timeline Controls
51
Assign Inserts Switch
52
Assign Sends Switch
52
Inputs Inactive Switch
53
Make Inactive Controls
53
MIDI Inputs and Outputs on Instrument Tracks
53
Outputs Inactive Switch
53
Automation Safe Switch
54
Enable Parameters Switch
54
Plug-In Automation Controls
54
Plug-Ins and Sends
54
Assigning and Removing Plug-Ins
55
Plug-In Channel Formats
55
Plug-Ins and D-Command
55
Chapter 7. Plug-In Controls
55
Focusing Plug-Ins on D-Command
56
Opening Plug-In Windows On-Screen
56
Copying and Pasting Plug-In Settings
57
Making Plug-Ins Inactive or Active
57
Managing Multiple Plug-In Windows
57
Enabling Plug-In Automation
58
Displaying Dynamics Plug-Ins
59
Dynamics Plug-In Support
59
Dynamics Section
59
Attack/Q Control
60
Knee/Hysteresis/Q Control
60
Ratio/Range/Frequency Control
60
Release/Frequency Control
60
Gain/Hold/Input Control
61
Threshold/Output Control
61
Channel Select Switches
62
Dynamics Channel Select Controls
62
Dynamics Display
62
Lock Switch
62
Master Link Switch
63
Multi-Mono Plug-Ins
63
Multichannel Plug-Ins
63
Select/Link/Bypass Mode Switch
63
Automation Switch
64
Dynamics Edit and Display Controls
64
External Key Switch
64
Key Listen Switch
64
Dynamics Gain Controls and Meters
65
Gain Reduction Meter
65
Output Meter and Clip Indicator
65
Displaying EQ Plug-Ins
66
EQ Plug-In Support
66
EQ Section
66
Frequency Encoder
67
Low Filter and High-Pass Filter Controls
67
Low-MID Filter and MID Filter Controls
67
Notch/Shape Switches and Indicator
67
Frequency/Output Level Encoder
68
High Filter and Low-Pass Filter Controls
68
High-MID Filter and EQ Level Controls
68
Q/Input Level Encoder
68
EQ Channel Select Controls
69
EQ Displays
69
EQ Edit and Display Controls
71
Pro Tools Transport
73
Transport Section
73
Transport Switches
73
Chapter 8. Transport and Navigation Controls
73
Continuous Zooming in the Edit Window
74
Scrub/Shuttle Controls
74
Scrub/Shuttle Wheel
74
Selecting with the Scrub/Shuttle Wheel
74
Master Record Enable Switch
75
Scrub Switch
75
Shuttle Switch
75
Trim Switch
75
9-Pin Remote Switch
76
Audition Switches
76
Pro Tools Online Switch
76
Transport Mode Switches
76
Back Switch
77
Forward Mode
77
Locate Switches
77
Mark in and Mark out Switches
77
Arrow Switches (Up, Down, Previous, Next)
78
Navigate Mode Switch
78
Nudge/Bank Section
78
Zoom/Navigate Section
78
MIDI Event List Switch
79
Window Management Section
79
Workspace Browser Switch
79
Chapter 9. Management Sections
79
Session Management Section
80
Go to Switch
80
Clear Clip Switch and Plug-In Clip Indicator
80
All Notes off Switch
80
Soft Keys Section
81
Default Soft Key Display
81
Soft Keys Display with Pro Tools Dialogs
81
Exiting from Soft Key Modes
81
Management Controls
82
Snapshot Switch
82
Group Switch
82
Track Switch
82
Edit Controls
83
Edit Modes Switch
83
Edit Tools Switch
83
Memory/MIDI Controls
84
Memory Location Switch
84
MIDI Switch
84
Audio Files Switch
84
Console Preferences
85
User Switch
85
Meter Switch
85
Operation Switch
85
Automation Controls
86
Automatch Switch
86
Join Switch
86
Actions Switch
87
Modes Switch
88
Utility Switch
89
Track Size Switches
89
Monitor Section Controls
91
Chapter 10. Monitor and Meter Sections
91
Input Level Trim Mode
92
Input Source Switches
92
Input Source Switches and Output Controls
92
Sum Switch
92
Assign Talkback Switch
93
Cue Input Source Switches
93
Cue Output On/Off Switches
93
Headphone/Cue Controls
93
Individual Output Trim Mode
94
Output Channel Select Controls
94
AFL and PFL Switches
95
Broadcast Mode for AFL and PFL Monitoring
95
Setting AFL and PFL Levels
95
Talkback Controls
96
Talkback Level Control
96
Talkback Switch
96
Talkback/Listen System
96
DIM Level Control
97
Listen Control
97
Listen MIC Select Switches
97
Monitor Output Mode Controls
97
DIM Switch
98
Meter and Time Code Displays (Main Unit)
99
Time Scale Display Format Indicators
99
Time Scale Displays
99
Setting D-Command Meters for Different Reference Levels
100
Assigning Elements to Tracks
101
Normal Mode
101
Chapter 11. Operating Modes
101
Assigning Inputs in Sessions with Multiple Plug-In Outputs
102
Making Elements Active or Inactive
102
To Toggle Input Paths Active/Inactive
102
To Toggle Output Paths Active/Inactive
102
Focusing a Track
103
Selecting a Track
103
To Toggle a Send or Plug-In Active/Inactive
103
To Toggle a Track Inactive/Active
103
Automation Safe Mode
104
Bypassing Plug-Ins
104
Focus Channel Strip
104
Focusing Tracks When Soloing
104
Assigning Inserts and Sends While in Flip Mode
105
Making Plug-Ins Active/Inactive
105
Muting Sends
105
Setting Send Pre-/Post-Fader Operation
105
Custom Fader Modes
106
Custom Fader Controls
107
Custom Groups Mode
107
MIX/Edit Groups Mode
108
To Delete a Custom Group
108
To Edit a Custom Group
108
To Name a Custom Group
108
To Activate/Deactivate a MIX/Edit Group
109
To Activate/Deactivate a MIX/Edit Group from the Soft Keys
109
To Create a MIX/Edit Group
109
To Edit a MIX/Edit Group
109
Displaying MIX/Edit Group Tracks On-Screen
110
Plug-In Mode
110
To Spill VCA Slave Tracks in Custom Faders
110
Tracks Mode
110
Custom Faders and Display of Plug-In Parameters
111
Display of Parameter Types in the Rotary Encoders
111
Expanded Plug-In View
111
Multi-Mono Plug-Ins and Expanded Plug-In View
111
Custom Fader Flip Mode
112
Custom Fader Map Modes
112
How Plug-In Mapping Is Stored
112
Map Mode for Custom Groups or MIX/Edit Groups
112
Exporting and Importing .Pim Files
113
Setting the Automation Mode of Channels
113
To Set the Automation Mode of All or All Selected Channels
113
Working with Automation
113
Capturing and Recalling Automation
114
Capturing Automation Values
114
Displaying the Automation Playlist for Control
114
Previewing Automation
114
Punching Recalled Automation Values
115
Storing and Recalling Captured Automation Values
115
Using Snapshots in Preview Mode
115
Automatching Automation Values
116
Automatching Individual Controls
116
Joining Automation Values
116
Entering Utility Mode
117
Navigating Utility Mode
117
Appendix A. Utility Mode
117
Exiting Utility Mode
118
D-Command System Info Page
118
D-Command Name Page
118
D-Command Test Pages
119
Ethernet Test Page
119
To Display the Ethernet Test Page
119
To Exit the Ethernet Test Page
119
Switch and LED Test Page
120
Display Test Page
120
LED Test Modes (Red, Yellow, Green)
120
Text (Display) Test
120
Time Code Display Test
121
Fader Test Page
121
Cycle Test Mode
121
Group Test Mode
121
D-Command Preferences
122
Rotary Test Page
122
Resetting D-Command to Factory Defaults
122
Display Contrast Page
123
Footswitch 1 and 2 Settings Pages
123
Sleep Mode Settings Page
123
25-Pin Female Connector Pinouts
125
Cue Inputs
125
Main Inputs
125
Appendix B. Audio Connections and Pinouts
125
Cue Outputs
126
Main Speaker Outputs
126
Stereo Inputs
126
Surround Inputs
126
15-Pin Connector Pinouts
127
Alt Speaker Outputs
127
Talkback/Listenback Pinouts
127
XMON to D-Command Connector Pinouts
127
Index
129
Advertisement
Advertisement
Related Products
DigiDesign DIGI 1
Digidesign Digi 002 & Digi 002 Rack
Digidesign Digi 002
DigiDesign Digi 002 Rack
DigiDesign Digi 001
Digidesign D-Control
Digidesign DigiRack Plug-ins
Digidesign Focusrite d3
Digidesign Drawmer Dynamics
DigiDesign D-Show Profile
Digidesign Categories
Recording Equipment
Music Mixer
Software
Accessories
Sound Card
More Digidesign Manuals
Login
Sign In
OR
Sign in with Facebook
Sign in with Google
Upload manual
Upload from disk
Upload from URL