Sign In
Upload
Manuals
Brands
Canon Manuals
All in One Printer
LaserBase MF3220 Series
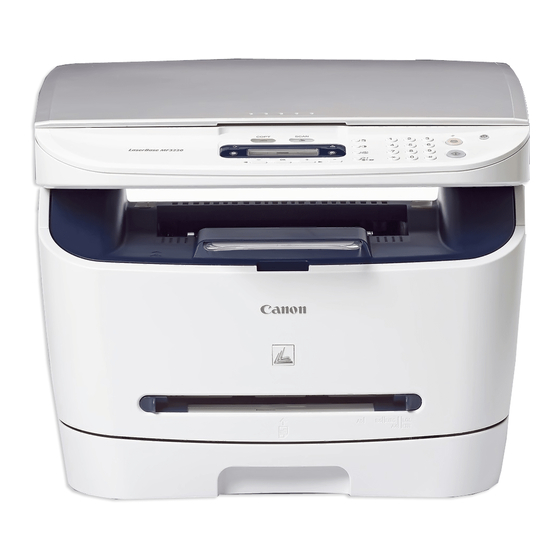
Canon LaserBase MF3220 Series Manuals
Manuals and User Guides for Canon LaserBase MF3220 Series. We have
1
Canon LaserBase MF3220 Series manual available for free PDF download: Service Manual
Canon LaserBase MF3220 Series Service Manual (124 pages)
Brand:
Canon
| Category:
All in One Printer
| Size: 6.58 MB
Table of Contents
Table of Contents
7
Service Manual
1
External and Controls System
8
Laser Exposure System
10
Fixing System
11
Chapter 1 PRODUCT DESCRIPTION
15
Table of Contents
17
Detailed Specifications
19
Printing Speed
19
Stack Upon Delivery
20
System Requirements for Printer Driver
20
Product Specifications
19
Product Specifications(EU/AE/CN/KOR)
19
Names of Parts
20
External View
20
Operation Panel
21
Safety
22
Safety of Laser Light
22
Regulations under the Center for Devices and Radiological Health (CDRH)
22
Handling the Laser Unit
22
Safety of Toner
22
Backup Battery
23
Chapter 2 TECHNICAL REFERENCE
25
Table of Contents
27
Document Feed and Exposure System
29
Overview/Configuration
29
Overview
29
Laser Exposure
30
Overview/Configuration
30
Overview
30
Image Formation
31
Overview/Configuration
31
Overview
31
Pickup and Feed System
32
Overview/Configuration
32
Overview
32
Other Control
32
Cassette Pickup Control
32
Manual Pickup Control
32
Detection Jams
33
Delay Jams
33
Delivery Delay Jam
33
Delivery Stationary Jam
33
Jam Detection Outline
33
Other Jams
33
Pickup Delay Jam
33
Pickup Stationary Jam
33
Stationary Jams
33
Type so Jams
33
Fixing Unit
34
Overview/Configuration
34
Overview
34
Protection Function
34
Detecting a Fault in the Fixing Assembly
34
Protective Mechanisms
34
External and Controls
35
Power Supply
35
Backup Battery
35
Chapter 3 DISASSEMBLY and ASSEMBLY
37
External and Controls System
39
Removing the Top Cover
41
Removing the Front Cover
42
External and Controls System
45
Front Cover
45
Removing the
45
Removing the Cassette
45
Rear Cover
45
Removing the Left Cover
45
Removing the Rear Cover
45
Removing the Right Cover
45
Top Cover
46
Removing the
46
Removing the Cassette
46
Removing the Left Cover
46
Removing the Rear Cover
46
Removing the Right Cover
46
Removing the Scanner Unit
46
Removing the Top Cover
47
Right Cover
47
Removing the
47
Removing the Cassette
47
Removing the Right Cover
47
Left Cover
47
Removing the Left Cover
47
Operation Panel Unit
48
Removing the
48
Removing the Left Cover
48
Removing the Rear Cover
48
Removing the Right Cover
48
Removung the Cassette
48
Operation Panel Unit
49
Removing the Board Unit
49
Removing the Operation Panel Unit
49
Removing the Scanner Unit
49
Removing the
50
Removing the Left Cover
50
Removing the Rear Cover
50
Removing the Right Cover
50
Removing the Scanner Unit
50
SCNT Board
50
Removing the
51
Removing the Cassette
51
Removing the Left Cover
51
Removing the
52
Removing the Cassette
52
Removing the Left Cover
52
Removing the Rear Cover
52
Power Supply PCB
52
Removing the Right Cover
52
Removing the
53
Removing the Cassette
53
High-Voitage Power Supply PCB
53
Removing the Power Supply Assembly
53
Removing the Right Cover
53
Removing the Left Cover
54
Removing the Power Supply Board
54
Removing the Power Supply Shield Plate
54
Removing the Rear Cover
54
Removing the High-Voltage Power Supply Board
55
Top Sensor
55
Removing the
55
Removing the Cassette
55
Removing the Left Cover
55
Removing the Right Cover
55
Removing the Plate
56
Removing the Rear Cover
56
Removing the Right Frame
56
Removing the Scanner Unit
56
Removing the Top Cover
56
Removing the Left Frame
57
Removing the Power Supply Assembly
57
Removing the Power Supply Shield Plate
57
Removing the Top Sensor
57
Paper Delivery Sensor
58
Removing the
58
Removing the Cassette
58
Removing the Left Cover
58
Removing the Power Supply Shield Plate
58
Removing the Rear Cover
58
Removing the Right Cover
58
Removing the Scanner Unit
59
Document Feed/Exposure System
59
Scanner Unit
59
Removing the
59
Removing the Cassette
59
Removing the Paper Delivery Sensor
59
Removing the Plate
59
Removing the Rear Cover
60
Removing the Right Cover
60
Removing the Scanner Unit
60
Removong the Left Cover
60
Removing the Rear Cover
61
Removing the Scanner Unit
61
Scanner Cover Unit
61
Removing the
61
Removing the Cassette
61
Removing the Left Cover
61
Removing the Right Cover
61
Removing the Operation Panel Unit
62
Scanner Cover Unit
62
Contact Sensor
62
Removing the
62
Removing the Cassette
62
Removing the Right Cover
62
Removing the Left Cover
63
Removing the Operation Panel Unit
63
Removing the Rear Cover
63
Removing the Scanner Unit
63
Removing the Contact Sensor
64
Removing the Flatbed Motor Unit
64
Flatbed Motor Unit
64
Removing the
64
Removing the Cassette
64
Removing the Scanner Cover Unit
64
Removing the Left Cover
65
Removing the Rear Cover
65
Removing the Right Cover
65
Removing the Scanner Unit
65
Removing the Flatbed Motor Unit
66
Removing the Scanner Cover Unit
66
Laser Exposure System
66
Laser/Scanner Unit
66
Removing the Cassette
66
Removing the Operation Panel Unit
66
Removing the Left Cover
67
Removing the Rear Cover
67
Removing the Right Cover
67
Removing the Scanner Unit
67
Removing the Top Cover
68
Transfer Charging Roller
68
Removing the Transfer Charging Roller
68
Pickup and Feeding System
68
Cassette Pickup Roller
68
Removing the
68
Removing the Cassette
68
Removing the Laser/Scanner Unit
68
Image Formation System
68
Removing the Left Cover
69
Removing the Rear Cover
69
Removing the Right Cover
69
Removing the Scanner Unit
69
Removing the Top Cover
69
Removing the Left Frame
70
Removing the Plate
70
Removing the Power Supply Assembly
70
Removing the Power Supply Shield Plate
70
Removing the Right Frame
70
Removing the Gear Unit
71
Removing the Tooth-Missing Gear
71
Cassette Pickup Solenoid
71
Removing the
71
Removing the Cassette
71
Removing the Right Cover
71
Removing the Left Cover
72
Removing the Rear Cover
72
Removing the Scanner Unit
72
Removing the Top Cover
72
Removing the Left Frame
73
Removing the Plate
73
Removing the Power Supply Assembly
73
Removing the Power Supply Shield Plate
73
Removing the Right Frame
73
Removing the Cassette Pickup Solenoid
74
Cassette Separation Pad
74
Removing the Cassette
74
Removing the Cassette Separation Pad
74
Removing the Rear of the Cassette
74
Paper Feed Roller
74
Removing the
74
Removing the Right Cover
74
Removing the Left Cover
75
Removing the Rear Cover
75
Removing the Right Frame
75
Removing the Scanner Unit
75
Removing the Top Cover
75
Removing the Left Frame
76
Removing the Plate
76
Removing the Power Supply Assembly
76
Removing the Power Supply Shield Plate
76
Removing the Gear Unit
77
Removing the Manual Stay
77
Removing the Paper Feed Guide
77
Removing the Paper Feed Roller
77
Removing the Tooth-Missing Gear
77
Manual Pickup Solenoid
78
Removing the
78
Removing the Cassette
78
Removing the Left Cover
78
Removing the Rear Cover
78
Removing the Scanner Unit
78
Removing the Left Frame
79
Removing the Plate
79
Removing the Power Supply Shield Plate
79
Removing the Right Frame
79
Removing the Top Cover
79
Removing the Power Supply Assembly
80
Main Motor
80
Removing the
80
Removing the Cassette
80
Removing the Right Cover
80
Removing the Left Cover
81
Removing the Rear Cover
81
Removing the Scanner Unit
81
Removing the Top Cover
81
Removing the Left Frame
82
Removing the Plate
82
Removing the Power Supply Assembly
82
Removing the Power Supply Shield Plate
82
Removing the Right Frame
82
Gear Unit
83
Removing the
83
Removing the Cassette
83
Removing the Gear Unit
83
Removing the Right Cover
83
Fixing System
84
Fixing Film Unit
84
Removing the
84
Removing the Cassette
84
Removing the Left Cover
84
Removing the Rear Cover
84
Removing the Right Cover
84
Removing the Scanner Unit
84
Removing the Left Frame
85
Removing the Plate
85
Removing the Power Supply Shield Plate
85
Removing the Right Frame
85
Removing the Top Cover
85
Fixing Pressure Roller
86
Removing the
86
Removing the Cassette
86
Removing the Fixing Film Unit
86
Removing the Right Cover
86
Removing the Left Cover
87
Removing the Rear Cover
87
Removing the Scanner Unit
87
Removing the Top Cover
87
Removing the Right Frame
88
Removing the Plate
88
Removing the Left Frame
88
Removing the Power Supply Shield Plate
88
Removing the Fixing Film Unit
88
Removing the Fixing Pressure Roller
89
Table of Contents
93
Cleaning
95
Items Requiring Cleaning
95
Cleaning Method (External Covers)
95
Cleaning Method (Scanning Unit)
96
Cleaning Method (Printer Unit)
96
Periodical Service
95
Periodically Replaced Parts
95
Periodic Replacement Parts
95
Lubrications
97
Areas Requiring Application of Grease
97
Delivery Idler Gear
97
Wheel Shaft
98
Fixing Drive Transmission Gear
98
Large Gear
98
Feed Gear
99
Internal Gear
99
Large Gear Deceleration Gear/Plate R
99
Large Gear Bushing R
100
Main Motor
100
Drive Releasing Arm
101
FU Delivery Roller
101
Pickup Idler Gear
102
Feed Deceleration Gear
102
Fixing Deceleration Gear
102
FD Delivery Roller
103
Large Gear Bushing F
103
Pressure Roller
103
Cassette Pickup Roller
104
CIS Shaft
104
Table of Contents
107
Error Code
109
Outline
109
Error Code Outline
109
Measurement and Adjustment
109
Basic Adjustments
109
Items of Adjustment
109
Service Tools
109
Special Tools
109
Service Mode
111
Outline
111
Service Data Setting
111
Service Data Entry Method
112
Service Data Flowchart
112
Service Soft Switch Settings (SSSW)
112
Explanation of SOFT SWITCH
112
Outline
112
Details of Bit 1
113
Details of Bit 2
113
Details of Bit 2 and Bit 3
113
Detalis of Bit 5
113
Sssw-Sw02
113
Sssw-Sw10
113
Sssw-Sw16
113
Details of Bit 1 through Bit 6
114
Details of Bit 3
114
Details of Bit 4 and Bit 5
114
Details of Bit 7 and Bit 8
114
List of Functions
114
Sssw-Sw30
114
Sssw-Sw33
114
Sssw-Sw37
114
Details of Bit 3 and Bit 4
115
Details of Bit 6 and Bit 7
115
Details of Bit 8
115
List of Functions
115
Sssw-Sw51
115
Sssw-Sw54
115
Report Output (REPORT)
115
Service Data List
115
Test Mode (TEST)
115
Faculty Test
115
Outline of Electrical Components
119
Outline of Electrical Components
121
Chapter 6 APPENDIX
119
Advertisement
Advertisement
Related Products
Canon ImageCLASS MF3240 Series
Canon IMAGECLASS MF3200
Canon imageCLASS MF3010
Canon imageCLASS MF3111
Canon MF3110 - ImageCLASS Laser Multifunction
Canon imageCLASS MF 3222
Canon IMAGECLASS MF3241
Canon LaserBase MF3228
Canon Color imageCLASS MF8350Cdn
Canon imageCLASS MF6580PL
Canon Categories
Printer
Digital Camera
All in One Printer
Camcorder
Scanner
More Canon Manuals
Login
Sign In
OR
Sign in with Facebook
Sign in with Google
Upload manual
Upload from disk
Upload from URL