Sign In
Upload
Manuals
Brands
Bernina Manuals
Sewing Machine
700
Bernina 700 Manuals
Manuals and User Guides for Bernina 700. We have
4
Bernina 700 manuals available for free PDF download: Service And Maintenance Manual, Manual, User Manual, Advanced Technical Training
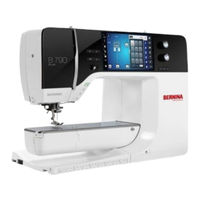
Bernina 700 Service And Maintenance Manual (225 pages)
Brand:
Bernina
| Category:
Sewing Machine
| Size: 12 MB
Table of Contents
Table of Contents
2
Chapter 1 - General Information
7
Kapitel 1 - General Information
7
Safety Regulations
7
Warning: Dangerous Voltage Levels
8
ESD-Related Note: Electrostatic Discharge
9
Tools and Gauges
10
Abbreviations / Names Used
13
Cleaning and Disinfection
14
Technical Details of 7 Series Since 2015
15
Chapter 2 - Electronics and Wiring
17
Kapitel 2 - Electronics and Wiring
17
PCBA-Base - General Information
17
PCBA-Base
17
PCBA EMC Screen Connection
17
PCBA-CPU-Module (ARM9) - General Information
18
PCBA-CPU-Module / ARM9
18
PCBA Front Covers
19
PCBA Left Front Cover
19
PCBA-Right Front Cover
20
PCBA-Power
21
PCBA Needle Threader
22
PCBA-Dual-Feed Sensor
22
PCBA Position
22
Pcba-Ret
23
PCBA Feed Dog Drop Detection
23
PCBA Lower Thread Observer (LTO)
24
PCBA Accessories Connector
24
PCBA Presser Foot Height Sensor
24
Sensor Support ABC (Presser Foot Recognition)
25
Cable Harness
26
BERNINA 7 Series Block Diagram
27
Handling of Electronic Components
28
Returning Defective Electronic Components
28
Repairs of Electronic Components (Pcba's)
28
Chapter 3 - Trouble Shooting
29
Kapitel 3 - Trouble Shooting
29
Electronic Troubleshooting - Flow Diagram
29
Symptoms Overview
29
Information about the Three Main Pcbas
30
PCBA Base
30
PCBA CPU Module
32
PCBA Power Supply
34
Error Codes
34
Error Code Description and Solutions
34
Troubleshooting
36
Symptoms and Repair Approach
36
Flow Charts
38
Thread Cutter: Possible Faults
53
If the Machine Is Mechanically Blocked after the Thread Cut
53
Only One Thread Is Cut During a Thread Cut
53
Sewing Fault after Thread Cut
53
Excessive Sources of Noise
54
Thread Detection
55
Upper Thread Observer
55
Lower Thread Observer
55
Alternative Access to Touchscreen Calibration
56
EEPROM Is Missing or Is Incorrectly Programmed
57
Pop-Up Messages Upon Starting the Machine in Customer Mode
58
The Machine Needs to be Cleaned/Lubricated
58
Cleaning the Thread Cutter
58
Machine Requires Maintenance
59
Error Message Even Though Embroidery Module Is Connected
59
Update Failed
60
Error Messages During Firmware FW Update
60
Other Reasons for Faulty FW Update
61
Case 2: the EEPROM Needs to be Replaced
61
Case 3: Machine Repeatedly Requests an FW Update
61
Case 4: the EEPROM Is Replaced and the Wrong Machine Identification Has Been Loaded
62
Case 5: Wrong FW on PCBA CPU Module
62
Sewing-Off Guideline
63
Straightstitch (Default Settings)
63
Zigzag Stitch (Default Settings)
64
Satinstitching (Stitch Width 5.0, Stitch Length 0.4)
64
Honeycomb Stitch (Default Settings)
65
Customer Sample
65
Standard Buttonhole (Default Settings, Max. Length 20.0 MM)
66
Chapter 4 - Removal and Refitting of Components
67
Covers
67
Head Cover
67
Rear Cover
67
Front Cover
68
Free Arm Cover
69
Free Arm Cover Plate
70
Base Plate Cover
71
Belt Cover
71
Electronics and Sensors
72
Left and Right PCBA Cover
72
Stitch-Length and Stitch-Width Adjusting Knobs
73
Winder Unit
73
Winder Motor
74
LC Display / Touchscreen
75
PCBA-Ret/Rubber Key Pad/Ribbon Cable
76
PCBA-Base
77
PCBA-CPU-Module
79
EEPROM (Electrically Erasable Programmable Read-Only Memory)
80
Free Arm LED Sewing Light
81
PCBA Power Including PCBA Housing
82
PCBA-Power
83
Head Frame LED Sewing Light
84
Overlift Presser Food Switch (Presser Foot Height Sensor)
85
PCBA Needle Threader
86
Sensor Support ABC (Presser-Foot Recognition Sensor)
86
PCBA-Dual-Feed Sensor
87
PCBA-Accessories-Interface
87
Embroidery Module Interface
88
Lower Thread Observer Unit
89
Mechanical Components
90
Hook Driver and Hook Guideway
90
Stitch Plate Support with Integrated Thread Cutter Unit
97
Blade Change on Mounted Thread Cutter Unit
98
Thread Tension
100
Mechanical Basic Setting of the Thread Tension
102
Clutch Carriage
104
Hook Driver Belt Pulley
106
Needle Bar Support
107
Needle Bar
109
Needle Clamp
109
Threader Mechanism
110
Main Motor
111
Dual Feed
112
Thread Take-Up
113
Base Shaft
114
Restraint-Guided Thrust Link
115
Stitch Length of Crank Shaft
117
Stitch Length Stepping Motor
119
Sideways-Motion Stepping Motor
120
Presser-Foot Pressure Stepping Motor
121
Stitch-Width Stepping Motor
122
Presser Foot Pressure - Toothed Rack Bearing
123
Chapter 5 - Settings
124
Kapitel 5 - Settings
124
Basics - General Information
124
Belt Tensions
125
Belt Tension of Main Shaft to Base Shaft
125
Drive Motor
126
Hook Driver Drive Belt Tension
126
Head-Frame Plate Position
127
Position of Head-Frame Plate/Stitch Plate in y Direction
127
Position of Head Frame Plate/Stitch Plate in X-Direction
127
Presser-Foot Settings
128
Darning Foot Height
128
Presser-Foot Fixation
129
Needle Settings
130
Distance between Needle Bar and Presser-Foot Bar
130
Needle Distribution
131
Zigzag Stitch Width Limiter
132
Mechanical Synchronization, Hook Settings, Needle Settings
133
Synchronization of Base Shaft and Main Shaft (Feed Dog Lift and Advance)
133
Loop Lift
135
Needle / Hook Distance
136
Needle Penetration in y Direction
136
Needle Height
137
Feed-Dog Settings
138
Position of Main Feed Dog Within Stitch Plate in X Direction
138
X-Direction Positioning against Main Feed Dog
139
Leveling of Main Feed Dog (0.9-1.0 MM)
140
Main Feeding Balance - Mechanical Basic Setting
141
Feed Dog/Dual Feed Synchronization
143
Dual Feed Balance - Basic Mechanical Setting
144
Clutch Carriage/Thread Cutter
145
Clutch Carriage Solenoid
145
Clutch Carriage
146
Timing of Clutch Carriage
147
Distance between Spring and Clutch Lever
148
Thread Cutter
148
Synchrinising Disc
149
Threader
150
Basting Device
151
Needle Bar Guide
151
Checking the Timing of Disengagement
152
Thread Regulator
153
Thread Tension
154
Upper-Thread Tension
154
Lower Thread Tension (Basic Setting)
155
Winder
156
Position of Lower Thread Observer
157
Chapter 6 - Service Program
158
Kapitel 6 - Service Program
158
Starting the Service Program
158
Menu 1 - Service Information
160
Machine Basic Data
160
Machine Soft- and Firmware Data
160
Machine Operating Time Data
161
Machine Stitch Counter Data
161
BSR (BERNINA Stitch Regulator) Data
161
Machine Servicing Data
162
Saving Customer Data
163
Customer Data
163
Dealer Data
164
Log Data
164
Reset Thread Cutter Counter
165
Menu 2 - Display, Buttons
166
Touchscreen Calibration
166
LC Display (Screen)
167
Blank Dark LC Display (Screen)
167
Blank White LCD (Screen)
167
RGB (Red, Green and Blue) Screen
168
Keyboard Lights
168
Led's and Brightness
169
Menu 3 - Sensors (Mounting Locations in the Machine)
170
PCBA Needle Threader
170
Presser Foot Height Sensor
171
Lower Thread Observer
172
Feed Dog Drop
173
Dual Feed Recognition Sensor
174
Bobbin Winder Switch
175
Free Hand System FHS
176
Menu 4 - Signals
177
Stitch Width and Stitch Length Knob(S)
177
Functions of Keys and Buttons on Machine
178
Start-/Stop Slide (SSU)
178
Foot Control
179
Upper Thread Observer
179
BERNINA Stitch Regulator (BSR)
180
PCBA-Position
180
Speaker
182
USB Host Interface
182
Basting Solenoid
183
Presser-Foot Recognition
184
BSR Foot Interface
186
Menu 5 - Stepping Motors (Mounting Locations in the Machine)
187
Stitch Width Stepping Motor
187
Presser Foot Pressure Stepping Motor
188
Upper Thread Tension Stepping Motor
188
Pinning Positions of All Stepping Motors
189
Bobbin Winder Motor
189
Stitch Length Stepping Motor
190
Sideways Motion Stepping Motor
191
Menu 6 - Settings
192
Sewing-Off (Customer's View)
192
Electronic Balance
193
Buttonhole Calibration
199
Thread Cutter Clamping Mechanism (Magnet)
200
Thread Cutter Cutting Process
201
Upper Thread Tension Reset to Default
202
Resetting to Factory Settings (Reset All)
203
Presser-Foot Height
203
Automatic Upper Thread Tension
204
Start-/Stop Unit (SSU) Slide Control Calibration
205
Normal SSU Sewing Speed
205
BSR Foot Sewing Program
206
Noise Level Check
206
Menu 7 - Embroidery Module (EMB)
207
Menu 11 - Check-Out
207
Chapter 7 - Lubrication Diagram
208
Kapitel 7 - Lubrication Diagram
208
Head Frame
208
Main Feed Dog
209
Threader Mechanism / Needle Drive
210
Toothed-Segment Needle-Bar Support
211
Upper Thread Tension Unit
211
Dual Feed Crank Shaft
212
Dual Feed Lift Cam and Feed Cam Main Shaft
212
Hook/Hook Driver
212
Feed-Dog Fork
213
Base Shaft/Lift Cam and Feed Cam of Main Feed Dog
213
Feed-Dog Crank Shaft
213
Chapter 8 - Firmware Update
214
Kapitel 8 - Firmware Update
214
Update Procedure
214
Alternative Update Process
215
Chapter 9 - Maintenance Guidelines
216
Kapitel 9 - Maintenance Guidelines
216
Purpose and Objective of the Maintenance Guidelines
216
Explanatory Notes on the Stitch- and Hour Counter
216
When Is a Cleaning Message Displayed
216
When Is a Maintenance Message Displayed
216
How Are the Stitches Counted
216
Calculation Table
217
Implementation of the Maintenance Intervals
217
Maintenance Intervals
217
Cleaning- and Service-Stitch Reset
217
Wear-And-Tear-Parts Definition
218
Non-Hour-Related Parts
218
Operating-Time-Related Parts
219
Maintenance Checklist
220
Measures to be Taken before the Service
220
Measures to be Taken after the Service
220
Functional Check
221
Maintenance Checklist BERNINA 7 Series
222
Embroidery Module
223
Kapitel 10 - Document Revision History
224
Advertisement
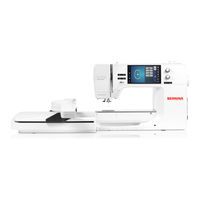
Bernina 700 Manual (168 pages)
Brand:
Bernina
| Category:
Sewing Machine
| Size: 28 MB
Table of Contents
Table of Contents
5
Important Safety Instructions
10
Important Information
12
1 My BERNINA
13
Introduction
13
BERNINA Quality Control
13
Welcome to the World of BERNINA
13
Explanation of Symbols
14
Overview Machine
15
Overview Front Controls
15
Overview Front
16
Overview Sideways
17
Overview Back
18
Overview Embroidery Module
19
Supplied Accessories
19
Overview Accessories Machine
19
Use of the Power Cable (Only Usa/Canada)
21
Accessory Box
21
Overview Accessory Embroidery Module
22
Overview User Interface
23
Overview Functions and Views
23
Overview System Settings
23
Overview Selection Menu
24
Overview Icons
24
Needle, Thread, Fabric
25
Overview Needles
25
Example for Needle Description
26
Needle/Thread Combination
26
Upper Thread
27
Bobbin Thread
27
Important Embroidery Information
28
Choosing the Embroidery Motif
28
Selecting the Embroidery File Format
28
Embroidery Test
28
The Size of the Embroidery Motif
28
Embroidering Motifs by Third-Party Providers
28
Underlay Stitches
28
Satin or Leaf Stich
29
Step Stitch
29
Connecting Stitches
29
2 Embroidery Preparation
30
Accessory Box
30
Accessory Box Free Standing
30
Storing Accessory
30
Connection and Switching on
31
Connecting the Foot Control (Optional Accessory)
31
Connecting the Machine
31
Fixing the Touchscreen Pen
32
Switching the Machine on
32
Switching on the Sewing Light
32
Foot Control (Optional Accessory)
32
Regulating the Speed Via the Foot Control
32
Raising/Lowering the Needle
33
Spool Pin
33
Swiveling Spool Pin
33
Horizontal Spool Pin
35
Attaching the Multiple-Spool Holder
35
Free Arm
35
Embroidery Foot
35
Adjusting the Presser Foot Position Via the Button «Presser Foot Up/Down
35
Attaching the Embroidery Foot
35
Selecting the Embroidery Foot in the User Interface
36
Needle and Stitch Plate
37
Inserting the Embroidery Needle
37
Selecting the Needle in the User Interface
37
Selecting Needle Type and Needle Size
38
Attaching the Stitch Plate
38
Selecting the Stitch Plate in the User Interface
39
Threading
39
Threading the Upper Thread
39
Winding the Bobbin Thread
42
Threading the Bobbin Thread
44
Thread-Up Command
46
Indicating Fill Level of Bobbin Thread
46
Attaching the Module
46
Selecting the Embroidery Motif
47
Embroidery Hoop
48
Overview Embroidery Hoop Selection
48
Selecting the Embroidery Hoop
48
Tear-Away Stabilizers
48
Cut-Away Stabilizers
48
Using Adhesive Spray
49
Using Spray Starch
49
Using Iron-On Interfacing
49
Using Paper-Backed Adhesive Stabilizer
49
Using Water-Soluble Stabilizer
49
Preparing the Embroidery Hoop
50
Attaching the Hoop
51
Overview Embroidery Functions
51
Centering the Embroidery Hoop to the Needle
52
Moving the Hoop to the Back
52
Moving the Embroidery Arm to the Left
52
Grid On/Off
52
Locating the Center of the Embroidery Motif
53
Virtual Positioning of the Embroidery Hoop
53
3 Setup Program
54
Embroidery Settings
54
Adjusting the Upper Thread Tension
54
Adjusting the Maximum Embroidering Speed
54
Centering or Opening Embroidery Motifs in the Original Position
54
Calibrating the Embroidery Hoop
55
Entering the Fabric Thickness
55
Activating/Deactivating the Function Thread Away
56
Programming the Securing Stitches
56
Adjusting the Thread Cut
57
Changing the Measuring Unit
57
Selecting Personal Settings
58
Monitoring Functions
59
Activating the Upper Thread Indicator
59
Activating the Bobbin Thread Indicator
59
Activating the Audio Signals
59
Machine Settings
60
Selecting a Language
60
Adjusting the Brightness of the Display
60
Adjusting the Sewing Light
60
Calibrating the Display
61
Back to Basic Setting
61
Deleting User Data
61
Deleting Motifs on the BERNINA USB Stick
62
Updating the Machine Firmware
62
Recovering Saved Data
63
Cleaning the Thread Catcher
63
Lubricating the Machine
64
Packing the Embroidery Module
64
Checking the Firmware Version
65
Reviewing the Total Number of Stitches
65
Registering Details of the Dealer
66
Saving Service Data
66
4 System Settings
67
Calling up the Tutorial
67
Calling up the Embroidery Consultant
67
Calling up the Help
67
Using Eco Mode
67
Cancelling any Alterations with «Clr
67
5 Creative Embroidering
68
Overview Embroidering
68
Selecting and Changing the Embroidery Motif
68
Checking the Embroidery Time and the Embroidery Motif Size
68
Regulating the Speed
68
Editing the Embroidery Motif
69
Overview Editing Embroidery Motif
69
Scaling up the Embroidery Motif View
69
Downsizing the Embroidery Motif View
69
Moving the Embroidery Motif View
70
Moving the Embroidery Motif in Enlarged View
70
Moving the Embroidery Motif
70
Rotating Motif
71
Altering the Embroidery Motif Size Proportionally
71
Altering the Embroidery Motif Size Disproportionally
71
Mirroring Embroidery Motifs
72
Bending the Text
72
Changing the Stitch Type
73
Altering the Stitch Density
73
Checking the Embroidery Motif Size and Position
73
Endless Embroidery
75
Duplicating the Embroidery Motif
77
Deleting an Embroidery Motif
77
Changing the Sequence Within an Embroidery Motif Combination
77
Undoing Entries
78
Grouping Embroidery Motifs
78
Pinpoint Placement
79
Positioning of Grid Points
79
Free Point Positioning
80
Combining Embroidery Motifs
81
Deleting a Single Embroidery Motif
82
Duplicating the Embroidery Motif
82
Duplicating a Combination
82
Creating Lettering
83
Overview Embroidery Alphabets
83
Creating Words/Sentences
84
Editing Words/Sentences
85
Changing the Colors of the Embroidery Motif
86
Overview Changing the Color
86
Changing the Colors
86
Altering the Colors Via the Color Wheel
87
Changing the Thread Brand
88
Embroidering the Embroidery Motif
88
Overview Embroidery Menu
88
Adding Basting Stitches
88
Moving the Hoop
89
Embroidery Sequence Control When Thread Breaks
89
Cutting Connecting Stitches
89
Reducing Color Changes
90
Multi-Colored Embroidery Motif On/Off
90
Endless Embroidery
90
Color Indication
91
Free Arm Embroidering
91
Administering Embroidery Motifs
92
Saving Embroidery Motifs in the Personal Memory
93
Saving the Embroidery Motif on the BERNINA USB Stick
93
Overwriting the Embroidery Motif in the Personal Memory
93
Overwriting the Embroidery Motif on the BERNINA USB Stick
93
Loading an Embroidery Motif from the Personal Memory
94
Loading an Embroidery Motif from the BERNINA USB Stick
94
Deleting an Embroidery Motif from the Personal Memory
94
Deleting an Embroidery Motif from the BERNINA USB Stick
94
6 Embroidery
95
Embroidering Via the Button «Start/Stop
95
Increasing the Embroidery Speed
95
Adjusting the Upper Thread Tension
96
Embroidering Via the Foot Control (Optional Accessory)
96
7 Attachment
97
Maintencance and Cleaning
97
Cleaning the Display
97
Removing Thread Remnants under the Stitch Plate
97
Cleaning the Hook
97
Lubricating the Hook
98
Troubleshooting
100
Error Messages
103
Storage and Disposal
107
Storing the Machine
107
Dispose of the Machine
107
Technical Data
107
8 Overview Stitch Patterns
108
Overview Embroidery Motifs
108
Editing Embroidery Motifs
108
Projects
108
Quilt Motifs
109
Borders and Lace
115
Children
120
Flowers
125
Seasons
130
Embellishment
134
Sport
139
Asia
142
Charming Monograms
145
Animals
152
Designworks Design
154
Monograms in Pink
156
Monograms in Blue
161
Index
166
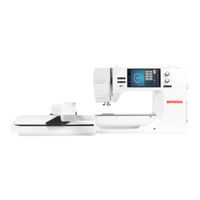
Bernina 700 User Manual (132 pages)
Brand:
Bernina
| Category:
Sewing Machine
| Size: 14 MB
Table of Contents
Table of Contents
4
Important Safety Instructions
7
Important Information
9
My BERNINA
11
Introduction
11
BERNINA Quality Control
11
Welcome to the World of BERNINA
11
Overview Machine
13
Overview Front Controls
13
Overview Front
14
Overview Sideways
15
Overview - Back Panel
16
Overview Embroidery Module
17
Supplied Accessories
18
Overview Accessories Machine
18
Accessory Box
20
Overview Accessory Embroidery Module
21
Overview User Interface
22
Overview Functions and Views
22
Overview System Settings
22
Overview Selection Menu
22
Software Operation
23
Needle, Thread, Fabric
25
Overview Needles
25
Example for Needle Description
26
Needle/Thread Combination
26
Upper Thread
26
Bobbin Thread
27
Important Embroidery Information
27
Choosing the Embroidery Design
27
Selecting the Embroidery File Format
27
Embroidery Test
28
The Size of the Embroidery Design
28
Embroidering Designs by Third-Party Providers
28
Underlay Stitches
28
Satin or Leaf Stich
28
Step Stitch
29
Connecting Stitches
29
Embroidery Preparation
30
Before Using the Machine for the First Time
30
Accessories Box
30
Accessory Box Free Standing
30
Storing Accessory
30
Connection and Switching on
31
Connecting the Foot Control (Optional Accessory)
31
Connecting the Machine
31
Fixing the Touch Screen Pen
32
Switching the Machine on
32
Switching on the Sewing Light
32
Foot Control (Optional Accessory)
32
Regulating the Speed Via the Foot Control
32
Raising/Lowering the Needle
33
Spool Pin
33
Swiveling Spool Pin
33
Horizontal Spool Pin
34
Attaching the Multiple-Spool Holder
34
Embroidery Foot
34
Adjusting the Presser Foot Position Via the Button "Presser Foot Up/Down
34
Attaching the Embroidery Foot
34
Selecting the Stitch Plate in the User Interface
35
Needle and Stitch Plate
35
Inserting the Embroidery Needle
35
Selecting the Needle in the User Interface
36
Selecting Needle Type and Needle Size
36
Attaching the Stitch Plate
37
Selecting the Stitch Plate in the User Interface
37
Threading
37
Threading the Upper Thread
37
Winding the Bobbin Thread
40
Threading the Bobbin Thread
41
Thread-Up Command
43
Indicating Fill Level of Bobbin Thread
43
Attaching the Module
43
Selecting the Embroidery Motif
44
Embroidery Hoops
44
Overview Embroidery Hoop Selection
44
Selecting the Embroidery Hoop
45
Tear-Away Stabilizers
45
Cut-Away Stabilizers
45
Using Adhesive Spray
45
Using Spray Starch
45
Using Iron-On Interfacing
45
Using Paper-Backed Adhesive Stabilizer
46
Using Water-Soluble Stabilizer
46
Preparing the Embroidery Hoop
46
Attaching the Hoop
47
Overview Embroidery Functions
48
Centering the Embroidery Hoop to the Needle
48
Moving the Hoop to the Back
48
Moving the Embroidery Arm to the Left
48
Grid On/Off
49
Locating the Center of the Embroidery Motif
49
Virtual Positioning of the Embroidery Hoop
49
Setup Program
50
Embroidery Settings
50
Adjusting the Upper Thread Tension
50
Adjusting the Maximum Embroidering Speed
50
Centering or Opening Embroidery Motifs in the Original Position
50
Calibrating the Embroidery Hoop
50
Entering the Fabric Thickness
51
Activating/Deactivating the Function Thread Away
51
Programming the Securing Stitches
51
Adjusting the Thread Cut
52
Changing the Measuring Unit
53
Selecting Personal Settings
53
Monitoring Functions
53
Activating the Upper Thread Indicator
53
Activating the Bobbin Thread Indicator
53
Activating the Audio Signals
54
Machine Settings
54
Selecting a Language
54
Adjusting the Brightness of the Display
54
Adjusting the Sewing Light
55
Calibrating the Display
55
Back to Basic Setting
55
Deleting User Data
55
Deleting Motifs on the BERNINA USB Stick
56
Packing the Embroidery Module
56
Reviewing the Total Number of Stitches
56
Registering Details of the Dealer
56
Saving Service Data
57
System Settings
58
Calling up the Tutorial
58
Calling up the Embroidery Consultant
58
Calling up the Help
58
Using Eco Mode
58
Cancelling any Alterations with "Clr
58
Creative Embroidering
59
Overview Embroidering
59
Selecting and Changing the Embroidery Design
59
Checking the Embroidery Time and the Embroidery Design Size
59
Regulating the Speed
59
Editing the Embroidery Design
60
Overview Editing Embroidery Motif
60
Scaling up the Embroidery Design View
60
Downsizing the Embroidery Design
60
Moving the Embroidery Design View
60
Moving the Embroidery Design in Enlarged View
61
Moving the Embroidery Design
61
Rotating the Embroidery Design
61
Altering the Embroidery Design Size Proportionally
62
Altering the Embroidery Design Size Disproportionally
62
Mirroring Embroidery Designs
63
Changing the Stitch Type
63
Altering the Stitch Density
63
Checking the Embroidery Motif Size and Position
64
Endless Embroidery
64
Duplicating the Embroidery Motif
66
Deleting an Embroidery Design
66
Changing the Sequence Within an Embroidery Motif Combination
66
Undoing Entries
67
Grouping Embroidery Motifs
67
Pinpoint Placement
68
Positioning of Grid Points
68
Free Point Positioning
69
Combining Embroidery Designs
70
Deleting a Single Embroidery Design
70
Duplicating the Embroidery Motif
70
Duplicating a Combination
71
Creating Lettering
71
Overview Embroidery Alphabets
71
Creating Lettering
73
Editing the Lettering
73
Changing the Colors of the Embroidery Design
74
Overview Changing the Color
74
Changing the Colors
74
Altering the Colors Via the Color Wheel
74
Changing the Thread Brand
75
Embroidering the Embroidery Design
76
Overview Embroidery Menu
76
Adding Basting Stitches
76
Moving the Hoop
76
Embroidery Sequence Control When Thread Breaks
76
Cutting Connecting Stitches
77
Reducing Color Changes
77
Multi-Colored Embroidery Design On/Off
77
Endless Embroidery
77
Color Indication
78
Freearm Embroidery
78
Administering Embroidery Designs
79
Saving Embroidery Designs in the Personal Memory
79
Saving the Embroidery Design on the BERNINA USB Stick
80
Overwriting the Embroidery Design in the Personal Memory
80
Overwriting the Embroidery Design on the BERNINA USB Stick
80
Loading an Embroidery Design from the Personal Memory
80
Loading an Embroidery Design from the BERNINA USB Stick
81
Deleting an Embroidery Design from the Personal Memory
81
Deleting an Embroidery Design from the BERNINA USB Stick
81
Embroidery
82
Embroidering Via the Button "Start/Stop
82
Increasing the Embroidery Speed
82
Adjusting the Upper Thread Tension
82
Embroidering Via the Foot Control (Optional Accessory)
83
Care and Maintenance
84
Firmware
84
Restoring Saved Data
84
Checking the Firmware Version
84
Updating Firmware
84
Machine
85
Cleaning the Display
85
Removing Thread Remnants under the Stitch Plate
85
Cleaning the Hook
85
Lubricating the Hook
86
Cleaning the Thread Catcher
88
Errors and Faults
89
Error Messages
89
Troubleshooting
93
Storage and Disposal
96
Storing the Machine
96
Dispose of the Machine
96
Technical Data
97
Overview Stitch Patterns
98
Overview Embroidery Desings
98
Editing the Embroidery Design
98
Projects
98
Quilt Designs
99
Borders and Lace
101
Children
104
Flowers
107
Seasons
110
Embellishment
112
Sport and Hobbies
115
Asia
117
Charming Monograms
118
Animals
121
Designworks
123
Monograms in Pink
124
Monograms in Blue
127
Index
130
Advertisement
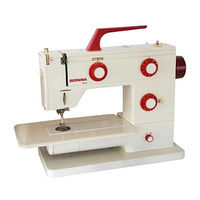
Bernina 700 Advanced Technical Training (79 pages)
Service Procedure
Brand:
Bernina
| Category:
Sewing Machine
| Size: 1 MB
Advertisement
Related Products
Bernina 707
Bernina Serger 700D
Bernina 700 E
Bernina 740 Favorite
Bernina 720
Bernina 770 QE
Bernina 790 PLUS
Bernina 770 QE PLUS
Bernina 770
Bernina 7 Series
Bernina Categories
Sewing Machine
Sewing Machine Accessories
Industrial Equipment
Accessories
Software
More Bernina Manuals
Login
Sign In
OR
Sign in with Facebook
Sign in with Google
Upload manual
Upload from disk
Upload from URL