
Subscribe to Our Youtube Channel
Related Manuals for Master Bilt GT-30


Summary of Contents for Master Bilt GT-30
- Page 1 GT-30 & GT-40 Installation & Operations Manual J-Version Master-Bilt Products 908 Highway 15 North New Albany, MS 38652 Phone: (800) 684-8988 PN 029-90000 Rev 03/12/07 LN...
-
Page 3: Table Of Contents
INTRODUCTION...4 STORE CONDITIONS ...4 WARNING LABELS AND SAFETY INSTRUCTIONS...5 PRE-INSTALLATION INSTRUCTIONS ...6 Inspection for Shipping Damage...6 INSTALLATION INSTRUCTIONS...6 General Instructions ...6 Electrical...6 MECHANICAL ...7 Leveling Cabinet ...7 Grille Removal and Compressor Check...7 START UP ...7 Fan Operation and Vibration; Voltage Check ...7 Thermostat Check...7 Defrost and Temperature Control ...8 AUTOMATIC EXPANSION VALVE ...9... -
Page 4: Introduction
INTRODUCTION Thank you for purchasing a Master-Bilt cabinet. This manual contains important instructions for installing, using and servicing a Master-Bilt GT case. A parts list is included in with this manual. Read all these documents carefully before installing or servicing your equipment. STORE CONDITIONS he Master-Bilt GT cases are designed to operate in the controlled environment of an air-conditioned store. -
Page 5: Warning Labels And Safety Instructions
WARNING LABELS AND SAFETY INSTRUCTIONS This symbol is the safety-alert symbol. When you see this symbol on your cabinet or in this manual, be alert to the potential for personal injury or damage to your equipment. Be sure you understand all safety messages and always follow recommended precautions and safe operating practices. -
Page 6: Pre-Installation Instructions
PRE-INSTALLATION INSTRUCTIONS INSPECTION FOR SHIPPING DAMAGE You are responsible for filing all freight claims with the delivering truck line. Inspect all cartons and crates for damage as soon as they arrive. If damage is noted to shipping crates or cartons or if a shortage is found, note this on the bill of lading (all copies) prior to signing. -
Page 7: Mechanical
MECHANICAL Leveling Cabinet Level the cabinet so as to insure proper drainage of the drain pan and proper operation of the lids and refrigeration system. The GT cabinet condenser has cooling air entering and discharging through the front grille. This allows the cabinet to be placed against a wall or solid object without blocking the flow of condenser air. -
Page 8: Defrost And Temperature Control
DEFROST AND TEMPERATURE CONTROL SETTINGS The GT cabinet has a temperature control that is adjustable from #1 (warmest setting) to #9 (coldest setting). Turn the control knob in line with the punch mark to the desired setting. The temperature control is located near the condensing unit at the bottom of the cabinet. -
Page 9: Automatic Expansion Valve
AUTOMATIC EXPANSION VALUE GT SERIES CABINETS After the cabinet has been in operation for a short time the high pressure or discharge pressure of the refrigeration system should be 250 pisg to 270 pisg in a 75 F ambient room. The suction pressure at the compressor should be approximately 7 to 9 pisg *** . -
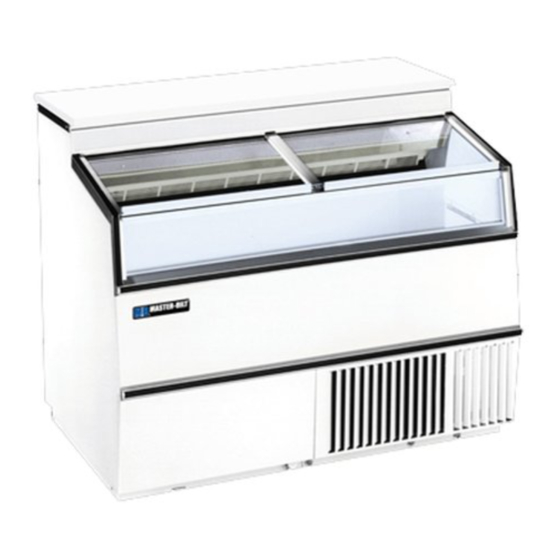
Page 10: Exterior Parts Nomenclature
EXTERIOR PARTS NOMENCLATURE A. TOP DECK B. CENTER TRACK C. TRIM MOLDING D. GLASS RAIL E. GLASS LID F. FRONT GLASS Glass Lid and Top Deck Removal To remove the glass lid, start in the closed position and lift up on the front extrusion. Pull the glass lid towards you to remove it from the track. -
Page 11: Drain Pan And Light Shield Removal
Drain Pan and Light Shield Removal Drain Pan SERVICE INSTRUCTIONS OPERATION CONDITIONS AND PRESSURES With room ambient temperature of +80 Suction pressure – 5 to 9 psig. Head pressure – 210 to 260 psig. Typical operating pressures for a properly charged unit operating at 0°F or lower box temperature, check pressures immediately before normal off cycle expect a tolerance of ±... -
Page 12: Trouble Shooting Guide
TROUBLE SHOOTING GUIDE High head pressure and high back pressure: Condenser coil clogged or restricted. Condenser fan motor defective. Air in the system. Refrigeration overcharge. Low back pressure and low head pressure: Expansion valve restriction. Refrigerant undercharged. Leak in system. Pressures normal –... -
Page 13: Master-Bilt Part Numbers
Power Cord Price Tag Extrusion, 10’ Side Panel Heater, RH Side Panel Heater, LH Lamb holder Spring Lamb holder Fixed Temperature Control Timer Toggle Switch Toggle Switch (Lights and Heaters) GT-30 GT-40 49-01273 49-01126 49-01274 49-01121 49-01119 49-01117 49-01138 49-01138... -
Page 14: Accessories
If you sell or give away your Master-Bilt cabinet and you evacuate the refrigerant charge before shipment, Master-Bilt recommends that the refrigerant charge be properly recovered in compliance with section 608 of the Clean Air Act effective November 1995 and in accordance with all applicable local, regional, or national standards. GT-30 GT-40 A029-11140 (4) A029-11140 (4)
Need help?
Do you have a question about the GT-30 and is the answer not in the manual?
Questions and answers