
Subscribe to Our Youtube Channel
Related Manuals for Master Bilt J - Version GT-50


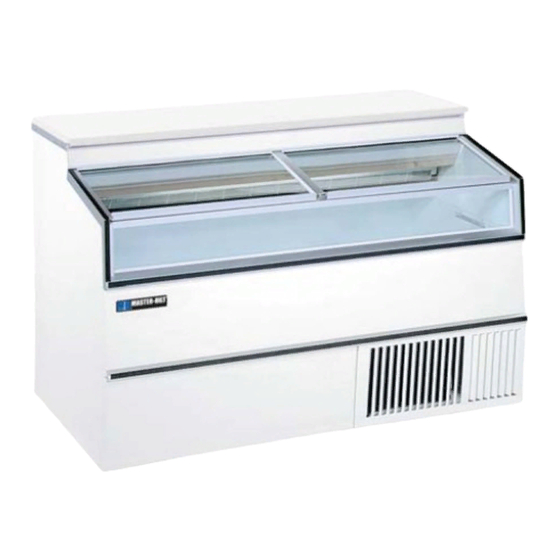
Summary of Contents for Master Bilt J - Version GT-50
- Page 1 GT-50, GT-60 & GT-80 Installation & Operations Manual J - Version Master-Bilt Products 908 Highway 15 North New Albany, MS 38652 Phone: (800) 684-8988 PN 029-91000 Rev _ 2-21-07...
-
Page 3: Table Of Contents
TABLE OF CONTENTS INTRODUCTION..............................4 STORE CONDITIONS ............................4 WARNING LABELS AND SAFETY INSTRUCTIONS..................5 PRE-INSTALLATION INSTRUCTIONS ......................5 Inspection for Shipping Damage ......................5 INSTALLATION INSTRUCTIONS ........................6 General Instructions ..........................6 Electrical..............................6 Mechanical ..............................6 Leveling Cabinet............................6 Grille Removal and Compressor Check....................7 Startup..............................7 Fan Operation and Vibration; Votlage Check..................7 Theromstat Check...........................7 Defrost and Temperature Control ......................7 REFRIGERATION SYSTEM AND OPERATION....................8... -
Page 4: Introduction
INTRODUCTION Thank you for purchasing a Master-Bilt cabinet. This manual contains important instructions for installing, using and servicing a Master-Bilt GT case. A parts list is included in with this manual. Read all these documents carefully before installing or servicing your equipment. STORE CONDITIONS The Master-Bilt GT cases are designed to operate in the controlled environment of an air-conditioned store. -
Page 5: Warning Labels And Safety Instructions
WARNING LABELS AND SAFETY INSTRUCTIONS This symbol is the safety-alert symbol. When you see this symbol on your cabinet or in this manual, be alert to the potential for personal injury or damage to your equipment. Be sure you understand all safety messages and always follow recommended precautions and safe operating practices. -
Page 6: Installation Instructions
INSTALLATION INSTRUCTIONS GENERAL INSTRUCTIONS 1. Be sure the equipment is properly installed by competent service people. 2. Keep the equipment clean and sanitary so it will meet your local sanitation codes. 3. Rotate your stock so that older stock does not accumulate. This is especially important for ice cream. -
Page 7: Grille Removal And Compressor Check
To comply with Sanitation requirements, the cabinet must be mounted on legs (6” high minumum) or the base must be sealed to the floor using N.S.F. listed RTV silicone sealant. Minimum clearance as follows: 0” rear and side, top and front are open required for compliance. GRILLE REMOVAL AND COMPRESSOR CHECK Remove grille and check refrigeration lines to see that they are free (not touching each other or compressor). -
Page 8: Refrigeration System And Operation
30 Hour Dial The unit defrost is controlled by a timer in the control box. After removing the condenser grille, the control box will slide out until the defrost timer is visible. The factory set defrost is two times in 24 hours with a maximum timed interval of 30 minutes. -
Page 9: Cleaning
CLEANING WARNING: DO NOT REMOVE FROST WITH A KNIFE, PICK, OR SHARP OBJECTS. DO NOT USE ABRASIVE CLEANERS OR CAUSTIC CLEANERS OR SCOURING PADS Every 30 to 60 days (depending on frost accumulation), the cabinet should be emptied, warmed up, and wiped down using a solution of 1 teaspoon of baking soda with 1 quart of water. -
Page 10: Drain Pan, Light Shield, And Lamp Removal/Replacement
Glass Lid and Top Deck Removal Top Deck To remove the glass lid, start in the closed position and lift up on the front extrusion. Pull the glass lid towards you to remove it from the track. Reverse Price Tag procedure to reinstall. -
Page 11: Trouble Shooting Guide
TROUBLE SHOOTING GUIDE High head pressure and high back pressure: Condenser coil clogged or restricted. Condenser fan motor defective. Air in the system. Refrigeration overcharge. Low back pressure and low head pressure: Restriction in system. Refrigerant undercharged. Leak in system. Pressures normal –... -
Page 12: Master-Bilt Part Numbers
Special service situations: If moisture or liquid is observed around or under a Master-Bilt cabinet, an immediate investigation should be made by qualified personnel to determine the source of moisture or liquid. The investigation made should determine if the cabinet is malfunctioning or if there is a simple housekeeping problem. Moisture or liquid around or under a cabinet is a potential slip/fall hazard for persons walking by or working in the general area of the cabinet. -
Page 13: Accessories
Timer 19-00818 19-00818 19-00818 Toggle Switch 19-01090 19-01090 19-01090 Toggle Switch (Lights and 19-00199 19-00199 19-00199 Heaters) ACCESSORIES Description GT-50 GT-60 GT-80 Casters 3” Dia. A029-11140 (4) A029-11140 (4) A032-11140 (6) Load Level Shelves A030-18027 A031-18027 A033-18027 Lid Locking Kits-Less Locks A029-11129 A029-11129 A032-11129...
Need help?
Do you have a question about the J - Version GT-50 and is the answer not in the manual?
Questions and answers