Advertisement
Advertisement
Table of Contents

Subscribe to Our Youtube Channel
Related Manuals for Fiilex Q1000


Summary of Contents for Fiilex Q1000
- Page 1 Q1000 Fiilex LED Light Quick Start Guide...
-
Page 2: Table Of Contents
Table of Contents What Is In The Box Parts Diagram Basic Operation Rear Panel Interface Operation Accessories Overview Specifications For Your Safety... -
Page 3: What Is In The Box
What Is In The Box Q1000 Light 4 Leaf Barndoor 5-Inch Fresnel Lens Cable Tie Clamp Mount External Power Adapter 19.5 ft. AC Cable... -
Page 4: Parts Diagram
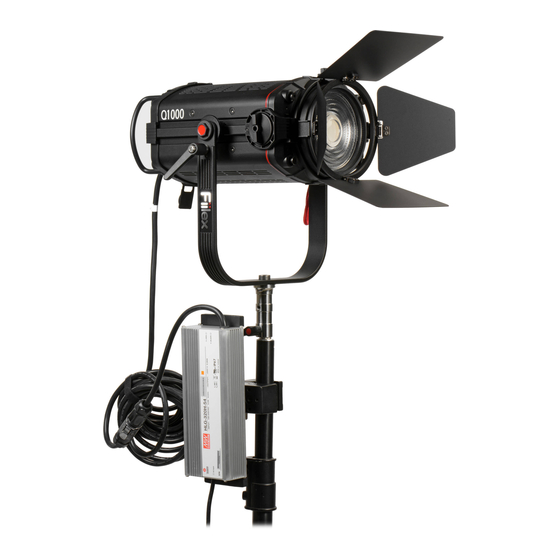
Parts Diagram Vent Holes Top Latch Size 3 Accessory Holder Magnetic Mount Light Source Focusing Knob Junior Pin Receiver Stand Locking Pin Yoke Tilt Lock Lever Handles DMX Address Knob LCD Display Yoke Bolt CCT Tuning Knob HUE Tuning Knob DMX Output (XLR Female 5-Pin) USB Port (Mini USB) -
Page 5: Basic Operation
• Positioning The Q1000 To adjust the Q1000, grasp the Handles (11) then loosen the Tilt Lock Lever (10). Adjust the angle to the desired position then tighten the Tilt Lock Lever (10) to secure. -
Page 6: Rear Panel Interface Operation
3. Once desired address is selected, click the DMX Address Knob to set the address. The new selected address will automatically be set after 3 seconds of inactivity. DMX address is selected the Q1000 will automatically assign the next two When a addresses.The Q1000 assigns the addresses in this order:... -
Page 7: Accessories Overview
Clamp Mount. Connect DC Power Adaptor to Q1000’s PowerCon Connection Port (19). Connect AC Connector and AC Cable. To disconnect the joint body, rotate the blue tube then pull apart. - Page 8 Q1000. Do NOT use the Magnetic Gel Holder with the Q1000. Size 3 accessories are designed to attach to the Q1000 by sliding into the Size 3 Accessory Holder (3) from the top side and then being secured with the Top Latch (2).
-
Page 9: Specifications
• Before first use, make sure to remove all protective membranes. • Do NOT use the gel holder designed for the P series of lights with the Q1000. • Do NOT mount the Q1000 in a hanging position without a separate safety cable. - Page 10 Any product, unit, or part returned to Fiilex must be packaged in a suitable manner to ensure the protection of such product, unit, or part. The package must be clearly and prominently marked with a Return Merchandise Authorization Number (RMA #) to indicate that the package contains returned products, units, or parts.
Need help?
Do you have a question about the Q1000 and is the answer not in the manual?
Questions and answers