HP StoreEasy 1000 Administrator's Manual
Hide thumbs
Also See for StoreEasy 1000:
- Administrator's manual (189 pages) ,
- User manual (150 pages) ,
- Reference manual (83 pages)
Table of Contents
Advertisement
HP StoreEasy 1000 Storage Administrator
Guide
This document describes how to install, configure, and maintain all models of the HP StoreEasy 1000 Storage and is intended
for system administrators. For the latest version of this guide, go to http://www.hp.com/support/manuals. Under Storage,
select File and Object Storage > Flexible File and Application Storage > HP StoreEasy 1000/X1000 Storage.
HP Part Number: B7D88-96319
Published: October 2013
Edition: 2
Advertisement
Table of Contents

Related Manuals for HP StoreEasy 1000


Summary of Contents for HP StoreEasy 1000
- Page 1 HP StoreEasy 1000 Storage Administrator Guide This document describes how to install, configure, and maintain all models of the HP StoreEasy 1000 Storage and is intended for system administrators. For the latest version of this guide, go to http://www.hp.com/support/manuals. Under Storage, select File and Object Storage >...
- Page 2 The information contained herein is subject to change without notice. The only warranties for HP products and services are set forth in the express warranty statements accompanying such products and services. Nothing herein should be construed as constituting an additional warranty. HP shall not be liable for technical or editorial errors or omissions contained herein.
-
Page 3: Table Of Contents
Contents 1 HP StoreEasy 1000 Storage.................6 Features..........................6 Hardware components......................6 HP StoreEasy 1430 Storage hardware components..............6 HP StoreEasy 1530 Storage hardware components..............9 HP StoreEasy 1630 Storage hardware components..............11 HP StoreEasy 1830 Storage hardware components..............14 Drive LED definitions......................16 Systems Insight Display LEDs....................17 Systems Insight Display LED combinations................18... - Page 4 File system elements......................50 File sharing elements......................50 Volume Shadow Copy Service overview................50 Using storage elements.......................50 Network adapter teaming......................50 Management tools........................51 HP Systems Insight Manager....................51 Management Agents......................51 5 File server management................52 File services management......................52 Storage management utilities....................52 Array management utilities.....................52 Array Configuration Utility....................52 Disk Management utility....................53...
- Page 5 Error codes..........................84 Storage Management Provider error codes................84 Pool Manager Provider error codes..................90 Management Web Service error codes.................92 HP Insight Management CSP WBEM Providers for Windows error codes........92 HP Support websites.......................93 Autonomy LiveVault.........................94 Microsoft Systems Center Operations Manager................94 Removing and replacing hardware components................94 7 Storage system recovery................96...
-
Page 6: Hp Storeeasy 1000 Storage
This section provides illustrations of the storage system hardware components. HP StoreEasy 1430 Storage hardware components The following figures show components and LEDs located on the front and rear panels of the HP StoreEasy 1430 Storage. Figure 1 HP StoreEasy 1430 Storage front panel components 1. - Page 7 Figure 2 HP StoreEasy 1430 Storage front panel LEDs and buttons Item Description Status UID LED/button Blue = Identification is activated. Flashing blue = System is being managed remotely. Off = Identification is deactivated. Power On/Standby button and system Green = System is on.
- Page 8 7. Serial connector 8. Video connector 9. USB connectors 10. NIC 1/shared iLO management connector 1 1. NIC connector 2 Figure 4 HP StoreEasy 1430 Storage rear panel LEDs and buttons Item Description Status NIC link LED Green = Link exists...
-
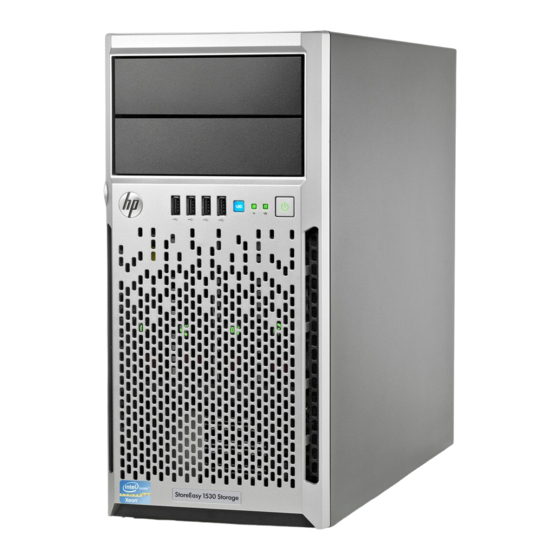
Page 9: Hp Storeeasy 1530 Storage Hardware Components
HP StoreEasy 1530 Storage hardware components The following figures show components and LEDs located on the front and rear panels of the HP StoreEasy 1530 Storage. Figure 5 HP StoreEasy 1530 Storage front panel components 1. Optical drive (optional) 2. Media drive bay 3. - Page 10 Amber = System is in standby, but power is still applied. Off = Power cord is not attached or power supply failed. Figure 7 HP StoreEasy 1530 Storage rear panel components 1. Non-hot-plug power supply 2. Slot 4 PCIe x16 (8, 4, 1) 3.
-
Page 11: Hp Storeeasy 1630 Storage Hardware Components
Power supply failed Power supply is in standby mode Power supply error HP StoreEasy 1630 Storage hardware components The following figures show components and LEDs located on the front and rear panels of the HP StoreEasy 1630 Storage. Hardware components... - Page 12 Figure 9 HP StoreEasy 1630 Storage front panel components 1. Video connector 2. LFF drives 3. USB connector Figure 10 HP StoreEasy 1630 Storage front panel LEDs and buttons Item Description Status NIC status LED Green = Linked to network...
- Page 13 9. NIC connectors (4- 1 ) 10. Torx tool 1 1. Serial connector 12. Video connector 13. USB connectors 14. iLO 4 connector Figure 12 HP StoreEasy 1630 Storage rear panel LEDs and buttons Item Description Status NIC status LED Green = Activity exists...
-
Page 14: Hp Storeeasy 1830 Storage Hardware Components
HP StoreEasy 1830 Storage hardware components The following figures show components and LEDs located on the front and rear panels of the HP StoreEasy 1830 Storage. Figure 13 HP StoreEasy 1830 Storage front panel components 1. Video connector 2. Quick release levers (2) 3. - Page 15 Flashing Green = Power On/Standby Button has been pressed; system is waiting to power on. Solid Green = System on Figure 15 HP StoreEasy 1830 Storage rear panel components 1. PCIe slots 1–3 (top to bottom) 2. PCIe slots 4–6 (top to bottom) 3.
-
Page 16: Drive Led Definitions
Off = No activity exists NIC link LED Green = Link exists Off = No link exists Drive LED definitions The following figure shows the drive LEDs. These LEDs are located on all HP ProLiant hot plug hard drives. HP StoreEasy 1000 Storage... -
Page 17: Systems Insight Display Leds
Solid amber The drive has failed. The drive is not configured by a RAID controller. Systems Insight Display LEDs The HP Systems Insight Display LEDs represent the system board layout. The display enables diagnosis with the access panel installed. Hardware components... -
Page 18: Systems Insight Display Led Combinations
Health LED System power LED Status Display LED and color Processor (amber) Amber One or more of the following conditions may exist: Processor in socket X has failed. Processor X is not installed in the socket. HP StoreEasy 1000 Storage... -
Page 19: Software Components
Windows Storage Server 2012 Standard Edition comes preinstalled and activated on the HP StoreEasy 1000 Storage. The storage system configuration also includes the HP Initial Configuration Tasks window, Windows Server Manager, and HP StoreEasy tools, which are used to set up and manage your storage system. - Page 20 You can switch to Server Core Installation mode; however, Server Core Installation mode is only supported on an HP StoreEasy 1000 Storage HP StoreEasy Storage system when the operating environment does not require user interaction (such as in a data center). Any activity that requires the use of a GUI must be done in Server with a GUI mode.
-
Page 21: Installing And Configuring The Storage System
2 Installing and configuring the storage system Setup overview The HP StoreEasy 1000 Storage comes preinstalled with the Microsoft Windows Storage Server 2012 Standard Edition operating system with Microsoft iSCSI Software Target included. Verify the kit contents Remove the contents, ensuring that you have all of the following components. If components are missing, contact HP technical support. -
Page 22: Cabling The Storage System
If you ordered the HP Tower to Rack Conversion Tray Universal Kit for the purpose of installing the 1530 tower model in a rack, use the provided tower-to-rack conversion kit installation instructions to install the tower hardware into the rack. - Page 23 Figure 20 HP D2700 Disk Enclosure I/O module ports 1. Port 1 2. Port 2 3. I/O module A 4. I/O module B Figure 21 D6000 I/O modules 1. Primary I/O module (Drawer 2) 2. Primary I/O module (Drawer 1) 3.
-
Page 24: Cabling Guidelines
Cabling guidelines When connecting disk enclosures to the StoreEasy system, consider the following guidelines: In a single domain configuration, the secondary I/O modules on the D6000 are not used, so they may or may not be installed. The cabling diagrams in this section show the secondary I/O modules installed. - Page 25 Figure 22 HP StoreEasy 1430 with the P822 controller 1. D6000 enclosure 1 2. D6000 enclosure 2 3. Connection to SAS port 1 on the primary I/O module (Drawer 2) of D6000 enclosure 2 4. P822 controller 5. Connection to SAS port 1 on the primary I/O module (Drawer 2) of D6000 enclosure 1 6.
- Page 26 Figure 23 HP StoreEasy 1430 with P421 and P222 controllers 1. D6000 Disk Enclosure 2. Connection between SAS port 1 on the primary I/O module (Drawer 2) and the P421 controller 3. P421 controller 4. P222 controller 5. Connection between SAS port 1 on the primary I/O module (Drawer 1) and the P421 controller 6.
-
Page 27: Single Domain Cabling Diagrams With D2000 Disk Enclosures
Figure 24 HP StoreEasy 1630 with the P822 controller 1. D6000 Disk Enclosure 1 2. D6000 Disk Enclosure 2 3. Connection between the P822 controller and SAS port 1 on the primary I/O module (Drawer 2) of D6000 Disk Enclosure 1 4. - Page 28 Figure 25 HP StoreEasy 1530 with the P222 controller 1. D2600 Disk Enclosure 1 2. D2600 Disk Enclosure 2 3. D2600 Disk Enclosure 3 4. D2600 Disk Enclosure 4 5. P222 controller 6. Connection from P222 controller to port 2 of I/O module A on disk enclosure 4 7.
- Page 29 Figure 26 HP StoreEasy 1830 with the P822 controller 1. Group 1 of 4 D2600 Disk Enclosures 2. Group 2 of 4 D2600 Disk Enclosures 3. Connection from P822 controller to port 2 of I/O module A on the top disk enclosure in Group 1 4.
- Page 30 NOTE: The cabling diagram in Figure 27 (page 31) illustrates the HP StoreEasy 1630 but the cabling is exactly the same for the HP StoreEasy 1430 and 1830 using the P822 controller. Installing and configuring the storage system...
- Page 31 Figure 27 Alternate single domain configuration for better fault tolerance 1. Group 1 of 2 D2600 Disk Enclosures 2. Group 2 of 2 D2600 Disk Enclosures 3. Group 3 of 2 D2600 Disk Enclosures 4. Group 4 of 2 D2600 Disk Enclosures Cabling the storage system...
-
Page 32: Dual Domain Cabling Diagrams With D6000 Disk Enclosures
Disk Enclosures. Figure 28 (page 32) shows the HP StoreEasy 1430 system with the P822 controller in a dual domain configuration. In this configuration, the worst case scenario (besides a controller failure) is losing ½ of the D6000 if there is an I/O module failure. - Page 33 I/O module in a disk enclosure if any I/O module fails. NOTE: Thr cabling diagram in Figure 29 (page 34) is exactly the same for the HP StoreEasy 1430 and 1830 using the P822 controller. Cabling the storage system...
- Page 34 Figure 29 HP StoreEasy 1630 with the P822 controller in a dual domain configuration (best fault tolerance) 1. Group 1 of 4 D2600 Disk Enclosures 2. Group 2 of 4 D2600 Disk Enclosures 3. Connection from the P822 controller to port 1 of I/O module B on the bottom D2600 in Group 1 4.
- Page 35 NOTE: The cabling diagram in Figure 30 (page 36) is exactly the same for the HP StoreEasy 1430 and 1630 using the P822 controller. Cabling the storage system...
- Page 36 Figure 30 HP StoreEasy 1830 with the P822 controller in a dual domain configuration (best performance) 1. Group 1 of 4 D2600 Disk Enclosures 2. Group 2 of 4 D2600 Disk Enclosures 3. Connection from the P822 controller to port 2 of I/O module B on the top D2600 in Group 1 4.
-
Page 37: Connect To The Storage System
Using the default user information provided on the iLO Network Settings tag, log on to iLO, and then launch a remote console to the storage system. For detailed instructions on using iLO remote management software, see the HP iLO 4 User Guide. -
Page 38: Configure The Storage System
Create virtual disk Create volumes HP StoreEasy Pool Manager is used to create one or more storage pools from the internal drives of the StoreEasy system. If any external storage enclosures are attached, Pool Manager is used to create storage pools there as well. The internal drives of StoreEasy models 1430 and 1530 are already pooled and contain the operating system, so no further pool management is necessary on these drives. -
Page 39: Complete System Configuration
Adjusting logging for system, application, and security events. Installing third-party software applications—For example, these might include an antivirus application that you install. Registering the server — To register the server, refer to the HP Registration website (http:// register.hp.com). Using Server Core The Server Core interface is a command prompt with PowerShell support. -
Page 40: Configuring Failover Properties For Multi-Site Environments
PS C:\Users\Administrator>dism /online /enable-feature /featurename:OEM-Appliance-OOBE Then, install HP ICT from C:\hpnas\Components\ManagementTools. Configuring failover properties for multi-site environments You can configure failover properties for multi-site environments using DFS Management, which is available from the Tools menu in Windows Server Manager (Tools→DFS Management). -
Page 41: Using The Remote Desktop Method
Using the Remote Desktop method Remote Desktop provides the ability for you to log on to and remotely administer your server, giving you a method of managing it from any client. Installed for remote administration, Remote Desktop allows only two concurrent sessions. Leaving a session running takes up one license and can affect other users. -
Page 42: Administration Tools
Windows Server Manager can be launched from the storage system desktop by clicking the icon on the left end of the task bar. The local HP StoreEasy Storage system as well as other Windows servers may be managed, as described in the... -
Page 43: Data Deduplication
Administrators can use the File and Storage Services role to setup and manage multiple file servers and their storage by using Server Manager or Windows PowerShell. Some of the specific applications include the following: Use Data Deduplication to reduce the disk space requirements of your files, saving money on storage. -
Page 44: Print Management
UNIX, Linux, or Mac OS operating systems. NFS is supported on all HP StoreEasy 1000 Storage systems. All of the following types of NFS account mapping are supported: Active Directory® Domain Services (AD DS) mapped user access, Active Directory®... -
Page 45: Storage Management Overview
4 Storage management overview This chapter provides an overview of some of the components that make up the storage structure of the storage system. Storage management elements Storage is divided into four major divisions: Physical storage elements Logical storage elements File system elements File sharing elements Each of these elements is composed of the previous level's elements. -
Page 46: Physical Storage Elements
Figure 31 Storage management process example Physical storage elements The lowest level of storage management occurs at the physical drive level. Minimally, choosing the best disk carving strategy includes the following policies: Analyze current corporate and departmental structure. Analyze the current file server structure and environment. Plan properly to ensure the best configuration and use of storage. -
Page 47: Arrays
To protect against data loss from hard drive failure, storage systems should be configured with fault tolerance. HP recommends adhering to RAID 5 configurations. The table below summarizes the important features of the different kinds of RAID supported by the Smart Array controllers. -
Page 48: Online Spares
There are two types of LUN presentation: basic disk and dynamic disk. Each of these types of disk has special features that enable different types of management. The HP Pool Manager is used to create, edit, grow, shrink and delete storage pools. -
Page 49: Partitions
Through the use of basic disks, you can create primary partitions or extended partitions. Partitions can only encompass one LUN. Through the use of dynamic disks, you can create volumes that span multiple LUNs. You can use the Windows Disk Management utility to convert disks to dynamic and back to basic and to manage the volumes residing on dynamic disks. -
Page 50: File System Elements
File system elements File system elements are composed of the folders and subfolders that are created under each logical storage element (partitions, logical disks, and volumes). Folders are used to further subdivide the available file system, providing another level of granularity for management of the information space. -
Page 51: Management Tools
HP Systems Insight Manager HP SIM is a web-based application that allows system administrators to accomplish normal administrative tasks from any remote location, using a web browser. HP SIM provides device management capabilities that consolidate and integrate management data from HP and third-party devices. -
Page 52: File Server Management
Click Start and then right-click anywhere. Select All apps→HP System Tools→HP Array Configuration Utility. If the Execution Mode for ACU is set to Remote Mode, log on to the HP System Management Homepage. The default user name is administrator and the password is the Windows Storage Server 2012 administrator password that is set by the storage system administrator. -
Page 53: Disk Management Utility
This is a reserved volume and must be maintained as it exists. HP does not recommend spanning array controllers with dynamic volumes. The use of software RAID-based dynamic volumes is not recommended. Use the array controller instead; it is more efficient. -
Page 54: Scheduling Defragmentation
Scheduling defragmentation Defragmentation is the process of analyzing local volumes and consolidating fragmented files and folders so that each occupies a single, contiguous space on the volume. This improves file system performance. Because defragmentation consolidates files and folders, it also consolidates the free space on a volume. -
Page 55: Adding Storage
For more information about RAID levels, see the Smart Array Controller User Guide, or the document titled Assessing RAID ADG vs. RAID 5 vs. RAID 1+0. Both are available at the Smart Array controller web page or at http://h18000.www1.hp.com/products/servers/proliantstorage/arraycontrollers/ documentation.html. Extend volumes using Disk Management The Disk Management snap-in provides management of hard disks, volumes or partitions. -
Page 56: Expanding Storage Using The Array Configuration Utility
The unused space is obtained either by expanding an array or by deleting another logical drive on the same array. For more information, use the ACU online help, or the “Extend logical drive” procedure in the HP Array Configuration Utility User Guide. -
Page 57: Identifying The Volume
Identifying the volume Shadow copies are taken for a complete volume, but not for a specific directory. Shadow copies work best when the server stores user files, such as documents, spreadsheets, presentations, graphics, or database files. NOTE: Shadow copies should not be used to provide access to previous versions of application or e-mail databases. -
Page 58: Identifying The Storage Area
Identifying the storage area To store the shadow copies of another volume on the same file server, a volume can be dedicated on separate disks. For example, if user files are stored on H:\, another volume such as S:\can be used to store the shadow copies. Using a separate volume on separate disks provides better performance and is recommended for heavily used storage systems. -
Page 59: Managing Shadow Copies
users can access previous versions of \\server1\data and \\server1\users but not \\server1\data\users. Managing shadow copies The vssadmin tool provides a command line capability to create, list, resize, and delete volume shadow copies. The system administrator can make shadow copies available to end users through a feature called “Shadow Copies for Shared Folders.”... -
Page 60: Enabling And Creating Shadow Copies
The cache file location can be altered to reside on a dedicated volume separate from the volumes containing files shares. (See Figure 37 (page 60)). Figure 37 Shadow copies stored on a separate volume The main advantage to storing shadow copies on a separate volume is ease of management and performance. -
Page 61: Set Schedules
Select Properties. Select Shadow Copies tab. All shadow copies are listed, sorted by the date and time they were created. NOTE: It is also possible to create new shadow copies or delete shadow copies from this page. Set schedules Shadow copy schedules control how frequently shadow copies of a volume are made. There are a number of factors that can help determine the most effective shadow copy schedule for an organization. -
Page 62: Disabling Shadow Copies
Disabling shadow copies When shadow copies are disabled on a volume, all existing shadow copies on the volume are deleted as well as the schedule for making new shadow copies. CAUTION: When the Shadow Copies Service is disabled, all shadow copies on the selected volumes are deleted. -
Page 63: Smb Shadow Copies
Shadow Copies for Shared Folders is required. The client-side application is available for Windows XP, Windows 2000 SP3+, and later operating system versions. No additional software is required to enable UNIX users to independently retrieve previous versions of files stored on NFS shares. NOTE: Shadow Copies for Shared Folders supports retrieval only of shadow copies of network shares. -
Page 64: Nfs Shadow Copies
Figure 39 Client GUI When users view a network folder hosted on the storage system for which shadow copies are enabled, old versions (prior to the snapshot) of a file or directory are available. Viewing the properties of the file or folder presents users with the folder or file history—a list of read-only, point-in-time copies of the file or folder contents that users can then open and explore like any other file or folder. -
Page 65: Recovery Of Files Or Folders
.@GMT-2003.04.27-04:00:00 .@GMT-2003.04.28-04:00:00 .@GMT-2003.04.29-04:00:00 Access to NFS shadow copy pseudo-subdirectories is governed by normal access-control mechanisms using the permissions stored in the file system. Users can access only those shadow copies to which they have read access at the time the shadow copy is taken. To prevent users from modifying shadow copies, all pseudo-subdirectories are marked read-only, regardless of the user's ownership or access rights, or the permissions set on the original files. -
Page 66: Backup And Shadow Copies
Click either Copy or Restore. Clicking Restore enables the user to recover everything in that folder as well as all subfolders. Clicking Restore does not delete any files. Backup and shadow copies Shadow copies are only available on the network via the client application, and only at a file or folder level as opposed to the entire volume. -
Page 67: Folder Management
Folder management Volumes and folders on any system are used to organize data. Regardless of system size, systematic structuring and naming conventions of volumes and folders eases the administrative burden. Moving from volumes to folders to shares increases the level of granularity of the types of data stored in the unit and the level of security access allowed. - Page 68 Figure 40 Properties screen, Security tab Several options are available on the Security tab: To add users and groups to the permissions list, click Add. Follow the dialog box instructions. To remove users and groups from the permissions list, highlight the desired user or group, and then click Remove.
- Page 69 Figure 41 Advanced Security settings screen, Permissions tab Other functionality available in the Advanced Security Settings screen is illustrated in Figure 41 (page 69) and includes: Add a new user or group—Click Add, and then follow the dialog box instructions. Remove a user or group—...
- Page 70 Figure 42 User or group Permission Entry screen Another area of the Advanced Security Settings is the Auditing tab. Auditing allows you to set rules for the auditing of access, or attempted access, to files or folders. Users or groups can be added, deleted, viewed, or modified through the Advanced Security Settings Auditing tab.
- Page 71 Figure 43 Advanced Security Settings screen, Auditing tab Click Add to display the Auditing Entry screen. Figure 44 Auditing Entry for New Volume screen Click Select a principal to display the Select User or Group screen. Folder and share management...
- Page 72 Figure 45 Select User or Group screen NOTE: Click Advanced to search for users or groups. Select the user or group. Click OK. Select the desired Successful and Failed audits for the user or group. 10. Click OK. NOTE: Auditing must be enabled to configure this information. Use the local Computer Policy Editor to configure the audit policy on the storage system.
-
Page 73: Share Management
If it is also necessary to take ownership of subfolders and files, enable the Replace owner on subcontainers and objects box. Click OK. Share management There are several ways to set up and manage shares. Methods include using Windows Explorer, a command line interface, or Server Manger. -
Page 74: Comparing Administrative (Hidden) And Standard Shares
This method results in a hierarchical security model where the network protocol permissions and the file permissions work together to provide appropriate security for shares on the device. NOTE: Share permissions and file-level permissions are implemented separately. It is possible for files on a file system to have different permissions from those applied to a share. -
Page 75: Quota Management
Quota management On the Quota Management node of the File Server Resource Manager snap-in, you can perform the following tasks: Create quotas to limit the space allowed for a volume or folder and generate notifications when the quota limits are approached or exceeded. Generate auto quotas that apply to all existing folders in a volume or folder, as well as to any new subfolders created in the future. -
Page 76: Troubleshooting, Servicing, And Maintenance
The ProLiant SNMP agents are enabled on the storage system by default and should not be disabled as they are used for internal management functions. If they are enabled for external client consumption, HP SIM must be configured so it does not attempt to communicate with these agents. -
Page 77: Determining The Current Storage System Software Version
You can find the current version using the HP StoreEasy tools or the registry. From the HP StoreEasy tools: Open the HP StoreEasy tools (either from the desktop folder or from the Tools menu in Windows Server Manager). Select Manage Storage Pools. -
Page 78: Starting The System Management Homepage Application
Status and the Component Status Summary sections to review the status of the storage system hardware. By aggregating the data from HP web-based agents and management utilities, the SMH provides a common, easy-to-use interface for displaying the following information: Hardware fault and status monitoring... - Page 79 The Component Status Summary section displays links to all subsystems that have a critical, major, minor, or warning status. If there are no critical, major, minor or warning items, the Component Status Summary section displays no items. Network This section shows the status of the network connections. HP System Management Homepage...
- Page 80 Storage This section displays information about the Smart Array and storage controllers within the storage system. The Storage System page is organized as a left panel and a main page: Figure 49 Storage system The left panel provides links to information about the following items: Controller Select a storage controller to view its type, status, firmware version, and serial number.
-
Page 81: Certificate Of Authenticity
Tape Drives This section provides information about tape drives, if they are included. Storage Boxes This section provides an overview of the disk drives that are listed individually in the Physical Drives section. System This section displays status for various system components. Version Control This section provides information about the Version Control Agent. - Page 82 To install the license key, see “Installing a The SmartArray controller license key with ACU” in the Configuring Arrays on HP Smart Array Controllers that supports the Reference Guide which can be downloaded from the following website: operating system drive is not licensed for RAID6.
- Page 83 An operation fails because it requires a service restart or cache update. The HP Storage Management Service has stopped running. To resolve the issue, restart the HP Storage Management Service using one of the following methods: From the desktop, navigate to the Services window (services.msc) and locate HP Storage Management Service.
-
Page 84: Verifying Services Are Running
Right-click the HP StoreEasy Management website and select Manage Website. If it is running, the Start option will be disabled. If these steps do not resolve the issue, contact HP Technical Support. Error codes This section contains the error codes that may occur. - Page 85 Table 5 Storage Management Provider errors Error code Error message Recommended action 0x24005001 Error during discovery. Please restart HP Storage Management Service. 0x24005003 Error while parsing CLI output. Please restart HP Storage Management Service. 0x20005003 Error while parsing CLI output.
- Page 86 Windows PowerShell command Update-StorageProviderCache. 0x2400501D Failed to get the associated subsystem for the Please restart HP Storage Management Service. storage object from cache. 0x2500501D Failed to get the associated subsystem for the Please update the storage management provider cache by storage object from cache.
- Page 87 Please update the storage management provider cache by invoking Windows PowerShell command Update-StorageProviderCache. 0x24005038 The cache is out of date. Please restart HP Storage Management Service. 0x25005038 The cache is out of date. Please update the storage management provider cache by invoking Windows PowerShell command Update-StorageProviderCache.
- Page 88 Error message Recommended action 0x24005043 Failed to get physical disk in the pool. Please restart HP Storage Management Service. 0x25005045 Failed to get physical disk in the subsystem. Please update the storage management provider cache by invoking Windows PowerShell command Update-StorageProviderCache.
- Page 89 0x2100506D SMP assembly file not found. Please re-install HP Storage Management Provider. 0x2700506E The registry key The system is in an invalid state. Please contact HP Support. HKLM\HARDWARE\Description\System\BIOS was not found. 0x2700506F The registry key The system is in an invalid state. Please contact HP Support.
-
Page 90: Pool Manager Provider Error Codes
Table 5 Storage Management Provider errors (continued) Error code Error message Recommended action 0x21005070 SmartArray.dll file not found. Please re-install HP Storage Management Provider. 0x21005071 Raptor.dll file not found. Please re-install HP Storage Management Provider. 0x21005072 Failed to get the library name to load. - Page 91 Table 6 Pool Manager Provider errors (continued) Error code Error message 0x20006006 Failed to use WMI to call the SMP Provider. 0x20006007 Failed to connect to the SMP Provider. 0x20006008 General WMI error in the Pool Manager Provider. 0x20006009 The first healthy disk size within the virtual enclosure exceeded the maximum drive capacity allowed for a pool by the virtual enclosure.
-
Page 92: Management Web Service Error Codes
Please retry the operation. HP Insight Management CSP WBEM Providers for Windows error codes The HP Insight Management CSP WBEM Providers for Windows error codes are listed in Table 8 (page 92). -
Page 93: Hp Support Websites
(http:// www.hp.com/go/support) to troubleshoot problems with the storage system. After entering the storage system name and designation (for example, HP StoreEasy 1000 Storage) or component information (for example, SAS I/O module), use the following links for troubleshooting information: Download drivers and software—Provides drivers and software for your operating system. -
Page 94: Autonomy Livevault
HP ProLiant Servers Troubleshooting Guide IMPORTANT: Some troubleshooting procedures found in ProLiant server guides may not apply to the storage system. If necessary, check with your HP Support representative for further assistance. For HP StoreEasy 1000 Storage guides, go to http://www.hp.com/support/manuals, select NAS Systems under storage, and select HP StoreEasy 1000 Storage. - Page 95 NOTE: After replacing the server blade, you must ensure that the correct product name is installed on the replacement part. The correct product name is important for applications such as System Insight Manager and Insight Remote Support. To install the correct product name, browse to the C:\hpnas\components\support\naming folder.
-
Page 96: Storage System Recovery
During system recovery, you can replace the existing drives with drives of the same size or larger. HP recommends that the replacement drives be the same type as the original drives, but it is not required. However, drives in the same RAID group must all be the same type (you cannot mix drive types in a RAID group). -
Page 97: Restoring The Factory Image With A Dvd Or Usb Flash Device
Restoring the factory image with a DVD or USB flash device Do one of the following: For direct access, attach the SUV cable (supplied with the System) to the port on the front of the server blade you want to recover. Connect a monitor and USB mouse to the SUV cable. - Page 98 13. Enter assign letter=<drive letter> to assign a drive letter to the USB drive (for example, assign letter=U). 14. Enter exit to quit diskpart context commands. 15. Insert the System Recovery DVD into the computer. 16. Using Windows Explorer or a comparable utility, open the DVD so that all contents are visible, including hidden and system files.
-
Page 99: Support And Other Resources
Operating system type and revision level Detailed questions Subscription service HP recommends that you register your product at the Subscriber's Choice for Business website: http://www.hp.com/go/e-updates After registering, you receive email notification of product enhancements, new driver versions, firmware updates, and other product resources. -
Page 100: Rack Stability
HP customer self repair (CSR) programs allow you to repair your storage product. If a CSR part needs replacing, HP ships the part directly to you so that you can install it at your convenience. Some parts do not qualify for CSR. Your HP-authorized service provider will determine whether a repair can be accomplished by CSR. -
Page 101: Documentation Feedback
9 Documentation feedback HP is committed to providing documentation that meets your needs. To help us improve the documentation, send any errors, suggestions, or comments to Documentation Feedback (docsfeedback@hp.com). Include the document title and part number, version number, or the URL... -
Page 102: A Operating System Logical Drives
Physical Drives 24–25 NOTE: In the HP Array Configuration Utility (ACU), mapping of logical disks begins at 1. In Microsoft Disk Manager, mapping begins at 0. If the operating system has a failure that might result from corrupt system files, a corrupt registry, or the system hangs during boot, see “Storage system recovery”... -
Page 103: B Regulatory Information
Hewlett-Packard Company, 3000 Hanover Street, Palo Alto, California 94304, U.S. Local Representative information Russian: HP Russia: ЗАО “Хьюлетт-Паккард А.О.”, 125171, Россия, г. Москва, Ленинградское шоссе, 16А, стр.3, тел/факс: +7 (495) 797 35 00, +7 (495) 287 89 05 HP Belarus: ИООО «Хьюлетт-Паккард Бел», 220030, Беларусь, г. Минск, ул. - Page 104 HP Enterprise Servers http://www.hp.com/support/EnterpriseServers-Warranties HP Storage Products http://www.hp.com/support/Storage-Warranties HP Networking Products http://www.hp.com/support/Networking-Warranties 104 Regulatory information...
-
Page 105: Glossary
(such as a server that hosts Exchange or SQL Server) and a target device (such as the HP All-in-One Storage System). By carrying SCSI commands over IP networks, iSCSI is used to facilitate data transfers over intranets and to manage storage over long distances. - Page 106 mount point A host's file system path or directory name where a host volume (device) is accessed. Network attached storage. Network file system. The protocol used in most UNIX environments to share folders or mounts. Network interface card. A device that handles communication between a device and other devices on a network.
-
Page 107: Index
GPT partitions, groups, adding to permissions list, cache file, shadow copies, Certificate of Authenticity (COA), hardware components configuration HP StoreEasy 1430 Storage, server, HP StoreEasy 1530 Storage, contacting HP, HP StoreEasy 1630 Storage, customer self repair, HP StoreEasy 1830 Storage,... - Page 108 LUNs in volumes, storage reports, summary of methods, Subscriber's Choice for Business, recovering the system, Support websites system recovery DVD, contacting HP, USB flash drive, HP, 93, regulatory information, Subscribers's Choice for Business, Turkey RoHS material content declaration, Subscription service,...
- Page 109 Volume Shadow Copy Service, volumes planning, vssadmin tool, warning rack stability, warranty information HP Enterprise servers, HP Networking products, HP ProLiant and X86 Servers and Options, HP Storage products, websites customer self repair,...
Need help?
Do you have a question about the StoreEasy 1000 and is the answer not in the manual?
Questions and answers