Antari Z-1200II User Manual
Hide thumbs
Also See for Z-1200II:
- User manual (8 pages) ,
- User manual (48 pages) ,
- User manual (18 pages)

Related Manuals for Antari Z-1200II


Summary of Contents for Antari Z-1200II
- Page 1 Z-1200II / Z-1500II / Z-3000II Fog Machine User Manual English Français Deutsch • • • 中文 © 2014 Antari Lighting and Effects Ltd.
- Page 3 ANTARI Z-Series II FOG MACHINE. Introduction Thank you for choosing a ANTARI Z-Series II Fog Machine. You now own a rugged and powerful state-of- the-art machine. Prior to use, we suggest that you carefully read all of the instructions. By following the suggestions found in this user manual, you can look forward to the reliable and satisfactory performance of your ANTARI Fog Machine for years to come.
- Page 4 In the event that the unit’s housing or cable is damaged, do not plug it in and do not attempt to use it until after contacting your ANTARI dealer for assistance. Setup •Remove all packing materials from shipping box.
-
Page 5: Technical Specifications
15 min./ liter (100% output) Fluid Consumption Weight 10.9 kgs L458 W243 H177 Dimensions (mm) Remote Included 9 mins Warm-up Time Remote Control Operation Z-8: 25 feet wired multi-function remote control with 4-PIN plug for ANTARI Fog Machine model Z-1200II. - Page 6 Z-1200II will fog continuously. The manual function overrides all functions. When depressed and held down the Z-1200II will fog at maximum volume for as long as the button is held down, regardless of the machine’s setting at the time.
- Page 7 Warm-Up Time Z-20 Control Module Operation: A 2 meter wired multi-function remote control with 5-pin XLR connector for ANTARI Fog Machine models Z- 1500II and Z-3000II. Its interface allows the operator to customize fog machine functions by adjusting fogging duration, interval and volume. Its LCD displays current operating parameters, which are automatically stored in non-volatile memory, allowing the machine to be powered down without losing function settings.
- Page 8 S etting time intervals for timer operation Press the button FUNCTION until the display indicates »Interval Set«. Use the buttons UP and DOWN to adjust the intervals between the individual fog outputs in timer mode within the range of 1 and 200 seconds. S etting the output duration for timer operation Press the button FUNCTION until the display indicates »Duration Set«.
- Page 9 * Transmitter: With the transmitter it is possible to emit fog via radio over a distance of up to 50 meters. The transmitter is compatible to any receiver of the Z-30PRO and can control an unlimited number of machines in parallel. Press the button “A”, to emit fog.
- Page 10 -Battery change on the transmitter If the range of the transmitter decreases, the battery is probably exhausted and must be replaced. For this purpose, take off the housing cover and remove the used battery. Insert a fresh DC 12V battery as indicated in the battery compartment and refit the housing cover.
-
Page 11: Dmx Connector Pin Assignment
Function Ground Data- Data+ Antari Z-1200II, Z-1500II, Z-3000II on-board DMX settings C hannel A 0 - 5 = OFF 6 – 249 = Volume Control ( 5% - 95%) 250 – 255 = Maximum Volume Output (100%) The Z-1200 II, Z-1500II & Z-3000II Fog Machines have on-board DMX control. These models use 1 channel to control volume output operation. - Page 12 In general, Antari fog machines with onboard DMX conform to the following performance specifications: 1. Average Operating temperature = 250ºC 2. Fogger can maintain maximum output for 30 seconds or more 3. Fogger can maintain constant output at 25% volume setting (roughly a value of 75).
-
Page 13: Risques D'électrocution
à fumée ANTARI. Introduction Nous vous remercions d’avoir choisi une machine à fumée ANTARI Z. Vous êtes en possession d’un produit robuste et puissant. En vue d’utiliser correctement votre nouvel appareil, veuillez lire attentivement ce mode d’emploi. Si vous respectez les instructions suivantes, vous profiterez d’une performance solide et convaincante de votre machine à... - Page 14 Placez la machine à fumée sur une surface plane et dévissez le couvercle du réservoir du liquide à fumée. Remplissez le réservoir de liquide à fumée ANTARI ou d'un autre liquide à fumée de haute qualité à base d'eau. Refermez le réservoir.
- Page 15 Temps de chauffage 9 Mins Maniement avec télécommande La Z-8 est une télécommande multifonctionelle qui contrôle le modèle Z-1200II d’Antari par un câble de 25 pieds ayant une fiche à 4 pôles. ․ Le bouton intervalle ajuste le temps entre les décharges, quand la fonction de timer est engagée. La bande est de 10 secondes ~ 250 secondes.
- Page 16 Pour des informations complémentaires concernant le maniement de votre machine à fumée ANTARI, voir la partie intitulée "Maniement avec télécommande". Important: Surveillez toujours toujours le niveau de liquide à fumée dans le réservoir pendant les jets de fumée.
- Page 17 Après de mettre en service, l'écran LCD indique brièvement » Antari Z-20« et la machine commence à réchauffer et l'écran LCD indique » Warming Up« . Pendant la phase de chauffe, l'appareil ne peut pas encore dégager de la fumée.
- Page 18 1. Appuyez sur le bouton FUNCTION jusqu'à l'écran indique »Volume Out« [réglage du volume de fumée]. Utilisez les boutons UP et DOWN pour ajuster le volume de fumée pour le fonctionnement continu entre 1 % à 100 %. 2. Pour choisir fumée continu pour le fonctionnement continu, choisissez »NON STOP BURST« sous un valeur de 1 % ou au dessus d'un valeur de 100 %.
- Page 19 Pour dégager la fumée, appuyez sur la bouton “A”. Le volume de fumée dépend de l'ajustement sous l'entrée de menu »Volume Out« [réglage du volume de fumée]. L'écran indique »Volume« et la valeur ajustée ou Nonstop Burst quand fumée continu est ajusté. Comme contrôle additionnel, la LED bleu et allumée. Pour désactiver le débit de fumée, appuyez sur la bouton “B”.
-
Page 20: Nettoyage Et Maintenance
Remarques de fonctionnement Toutes machines à fumée dégagent une condensation autour de son bec de sortie qui pourrait mener à une accumulation d'humidité au-dessus de l'appareil. Prenez cela en considération lors du choix de l'emplacement de votre appareil. Pendant son fonctionnement ou quelque temps après, il se peut de temps à... - Page 21 250 – 255 = Débit de fumée maximal ( 100%) Les machines à fumée Z-1200II, Z-1500II et Z-300II possèdent un contrô le DMX. Tous les trois modèles peuvent être réglés par un canal DMX en ce qui concerne le débit de fumée. Chaque canal varie entre les valeurs DMX 0 à...
- Page 22 C odage de l‘appareil (Z-1200II) 2 2 B Chaque appareil occupe 1 canal de contrôle. Pour que les signals de commande s’adressent correctement à chaque appareil, les appareils doivent être codés. Le codage doit être effectué séparément à chaque appareil: régler les minirupteurs selon le relévé...
- Page 23 ANTARI Z II NEBELGERÄ TES. Einleitung Vielen Dank, dass Sie sich für ein ANTARI Z Nebelgerät entschieden haben. Sie sind nun Im Besitz eines robusten und leistungsstarken Nebelgerätes. Vor Benutzung des Gerätes bitte unbedingt diese Bedienungsanleitung sorgfältig lesen. Wenn Sie die Hinweise in dieser Bedienungsanleitung beachten, können Sie sich in den nächsten Jahren auf eine...
- Page 24 Wenn Ausrüstungsteile fehlen sollten, nehmen Sie bitte sofort mit Ihrem ANTARI-Händler Kontakt auf. Bevor Sie mit der Inbetriebnahme Ihres ANTARI Z-1200II, Z-1500II und Z-3000 II Nebelgerät, beginnen, stellen Sie sicher, dass kein offensichtlicher Transportschaden vorliegt. Falls das Gehäuse der Einheit oder das Kabel beschädigt sein sollte, stecken Sie es nicht in die Steckdose und versuchen Sie nicht, es zu benutzen, bevor...
-
Page 25: Technische Daten
Bedienung ü ber eine Fernbedienung ․ Die Z-8 ist eine Multifunktions-Fernbedienung, mit der sich über ein 25 Füß e-Kabel mit 4-poligem XLR- Stecker das Modell ANTARI Z-1200II ․ Mit dem Intervallknopf kann die Zeit zwischen den Nebelproduktionen eingestellt werden, wenn der... - Page 26 ․ Der zweite Knopf mit der Aufschrift Volume steuert das Volumen des produzierten Nebels. Der Bereich beträgt 0% ~ 100% des Maximaldurchsatzes. ․ Der gelbe TIMER-Knopf steuert die Timerfunktion. Drücken Sie den Knopf, um ihn zu aktivieren. Bei Aktivierung leuchtet das gelbe Licht auf. Durch die Einstellung des Intervallknopfes wird die Zeit zwischen dem Nebelausstoß...
- Page 27 12 Mins Z-20 Bedienung ü ber eine Fernbedienung Die Z-20 ist eine Fembedienung, mit der sich über ein 2 Meter-Kabel mit 5-poligem XLR-Stecker die ANTARI- Nebelgeräte Z-1500II und Z-3000II bedienen lassen. Die Schnittstelle der Fernbedienung ermöglicht persönliche Einstellungen bei Nebeldauer, Zeitabstand und Volumen. Das LCD Display zeigt die aktuellen Parameter an.
- Page 28 -Tastenbelegung (Z-30PRO only) -Menü einstellungen mit der Taste FUNCTION Zeitintervalle für den Timer-Betrieb einstellen Drücken Sie die Taste FUNCTION, bis auf der Anzeige »Interval Set« [Intervall einstellen] erscheint. Verwenden Sie die Tasten UP und DOWN, um die Zeitintervalle (d.h. die Pausen zwischen den einzelnen Nebelausstöß en) für den Timer-Betrieb zwischen 1 und 200 Sekunden einzustellen.
- Page 29 -Manueller Betrieb Für sofortigen Nebelausstoß mit maximaler Nebelmenge, halten Sie die Taste MANUAL gedrückt. Auf dem Display erscheint »Manual 100 %«. Sobald Sie die Taste wieder lösen, wird der Nebelausstoß gestoppt. Der manuelle Betrieb hat Vorrang vor dem Dauerbetrieb und dem Timer-Betrieb. Selbst wenn eine dieser Betriebsarten eingestellt ist, stöß...
- Page 30 -Sendeeinheiten adressieren Um eine andere Sendeeinheit als die mitgelieferte zur Steuerung der Maschine zu verwenden oder um die Maschine mit bis zu 5 verschiedenen Sendeeinheiten zu steuern, muss jede Sendeeinheit zuvor adressiert werden. Schalten Sie dazu die Maschine ein. Drücken Sie die Taste “A” 1 Sekunde auf jeder Sendeeinheit, wenn auf der Anzeige »Wireless Setup«...
- Page 31 Die Maschine verfügt über 3-polige und 5-polige XLR-Anschlüsse für den Anschluss an einen DMX-Controller. Die nachfolgende Grafik zeigt die Belegung der Buchsen. Kontakt Funktion Masse Signal- Signal+ Antari Z-1200II, Z-1500II, Z-3000II DMX-Einstellungen 0 - 5 = Aus 6 – 249 = Ausstoß regulierung ( 5% - 95%)
- Page 32 2 50 – 255 = Maximaler Nebelausstoß ( 100%) 1 2 B Die Nebelgeräte Z-1200II, Z-1500II, Z-3000II verfü gen ü ber DMX-Ansteuerung. Sie lassen sich über einen DMX-Kanal im Ausstoß regulieren. Jeder Kanal bewegt sich innerhalb der DMX-Werte 0 bis 255.
- Page 33 使用手冊 Antari Z-1200II, Z-1500II & Z-3000II 煙霧機 恭喜您成為 Antari Z 系列第二代 專業煙霧機的使用者. 感謝您選用 Antari 煙霧機產品,現在您已經擁有高科技的專業煙霧機,在開始使用之前,我 們建議您先仔細閱讀本說明書,遵循使用手冊中的說明,這會有助於您在使用 Antari 煙霧機 時得心應手,達到最滿意的煙霧效果,對於機器的使用壽命也更為延長。 特別注意: 請在連結電源之前, 先填裝好煙霧油, 機器使用完畢及搬運前, 請先確認清空煙霧油桶. 避免觸電的安全使用方式: ■ 請保持機器乾燥,僅於室內使用,本產品非為室外使用所設計。 ■ 使用前請小心判定電壓級數,伏特及機型,並應配合三向接地型插座使用。 ■ 填充煙霧油至油桶前,請先拔掉插頭。 ■ 請保持機器橫放,勿傾斜放置。 ■ 不使用時請關機, 長時間不使用時請拔掉插頭。 ■ 本產品之設計為不防水,遇潮濕或浸水或煙霧油滲出時請即刻拔掉插頭並擦乾。 ■ 本包裝中未附服務零件,敬請聯繫 Antari 代理商,或洽詢合格技術人員。...
- Page 34 之外。 清潔、從事維護及收納機器時,請先確認機器已經完全冷卻。 ■ 避免爆炸的安全使用方式: 請勿將任何可燃性液體( 例如油脂, 瓦斯, 香水),放置於煙霧油槽中,並請使用前詳細閱讀 ■ 說明書。 請使用代理商所推薦的 Antari 高品質水性煙霧油,任意使用其他煙霧油產品,可能導致 ■ 堵管現象甚至造成內部零件腐蝕。 請確認煙霧油槽中有足夠的煙霧油,以免造成煙霧機幫浦空轉過熱。 ■ 請記得在運送或郵寄本產品前,確定完全傾倒出所有在油桶中的煙霧油。 ■ 煙霧油不能飲用,誤飲時,如有任何不適請立即就醫,若不甚接觸眼睛,請即刻以水清 ■ 洗。 建議:在使用本機之前,詳細的閱讀一次印刷在機器上蓋板及後背板的警語標示。 拆除包裝及檢視機器 請打開包裝確認機器運作的所有設備齊全,請參考配置圖,確認您所購買的機型應包括之項 目,倘若有缺少任何項目,請即刻聯絡 Antari 經銷商。 機器出廠時應包含以下物件: 1. Z -II 系列機器 一部 2. 電源線一條 3. 吊架及螺絲包 (Z-1200II 機種附有)
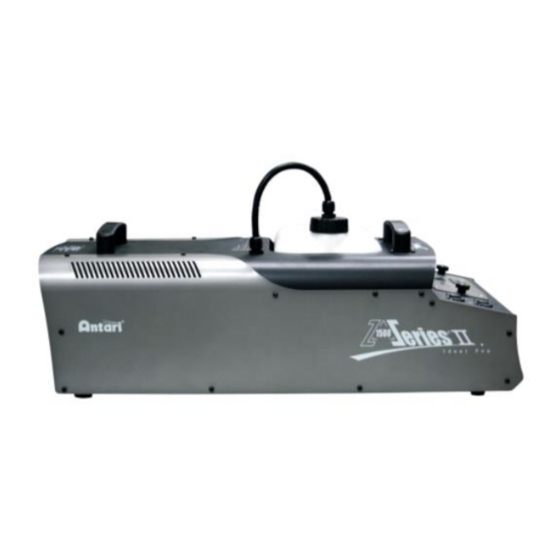
- Page 35 在開始安裝機器之前,請先確認本產品未因運送過程造成外部的損壞,若機器外殼、控制器或 電源線有任何損壞,請勿插上插頭,並請勿使用,馬上與 Antari 代理商或經銷商聯繫。 機器的安裝 1. 拆開包裝,小心的移除所有的 PE 墊片,特別是機器噴嘴的部分。 2. 將煙霧機平放,安裝吊架 ( 依以下圖示 ) 3. 將煙霧油管與機器連結 ( 依以下圖示 ) 4. 取下煙霧油容器的蓋子,注入 Antari FLR 或 FLG 煙霧油至八分滿,並仔細蓋上油蓋。 5. 在機器後方堅固的將 Z- 8 或 Z-20 控制器線插入正確的位置,並確定連結。 Z-1200II 機器規格說明 型號 Z-1200II 適用電源供應 AC 100~120V or AC 220~240V, 50/60 Hz 瓦數...
- Page 36 Z-1200II 機器外觀說明 Z-1200II 機器操作 ■ 將電源線插在有接地的插座上,再將機後方之電源開關打開至 ”ON”,溫機直至 Z-8 控 制器上顯示綠色燈持續亮 ( 噴煙準備就緒) 為止。 ■ 設定 Z- 8 遙控器上適當的按鍵以調整需要的噴煙時間、煙量大小及噴煙間距。 ■ 更進一步的 Z-1200II 煙霧機操作資訊,請參考 Z- 8 控制器操作說明。 ■ Z-1200II 機型含有吊架,可方便安裝或吊掛使用,但倘若您將煙霧機裝吊掛使用,請加上 鋼索穿過馬達安全吊環,並請特別注意勿讓煙霧直接噴在任何人的臉上,無論採取何種安 裝方式,請勿傾斜超過 25 度。.
- Page 37 倘若發生煙霧量過少、機器運轉時產生噪音或無法順暢噴煙的動作,請立即拔掉插頭,檢查是 否有足夠的煙霧油、外部保險絲、控制器連結、電源等處,若以上皆無問題,再插上插頭,若 持續無法正常運作,請檢查連結煙霧油桶的管子是否通暢,有無液體流通,若無法辨識原因, 請勿繼續讓機器運轉,以免損壞機器,應即關機冷卻,並將機器送至 Antari 代理商或指定的 服務處檢視,請勿自行拆卸。 控制器: Z- 8 定時定量控制器: 適用機種為 Z-1200II 的 Antari 煙霧機。使用時,請先將 25 英呎的有 線控制器末端的 4 Pin 插頭連接至煙霧機,並檢視控制器。 在控制器上有三個旋轉鈕及紅、黃、綠三個按鈕,便於操作者來設定調節持續噴煙的時間、間 隔及輸出量大小的功能: 先以黃色的定時按鈕 TIMER 來啟動每次噴煙的設定功能 1. 以間隔時間旋紐 INTERVAL 來調整每次噴煙間隔 (範圍在 10 秒 ~ 250 秒之間)。 2. 以持續噴煙旋紐 DURATION 調節持續噴煙時間 (範圍在 1 秒 ~ 15 秒之間)。...
- Page 38 ■ 設定 Z-20 遙控器上適當的按鍵以調整需要的噴煙時間、煙量大小及噴煙間距。 ■ 控制器上的顯示螢幕會依機器運轉溫度循環顯示 “Warming up” (加溫準備) 以及 “Ready to Fog” (準備就緒) 。 ■ 更進一步的 Z-1500II 及 Z-3000II 煙霧機操作資訊,請參考 Z-20 控制器操作說明。 ■ Z-1500II 及 Z-3000II 機型屬於高功率的大瓦數煙霧機, 操作時適宜平穩放置,如因特殊需 要而傾斜時,請加以完全的固定方式,傾斜的角度以不超過 15 度為宜. 其他重要注意事項: 請隨時注意煙霧油桶的油量以確保煙霧油桶在機器運轉時有足夠的煙霧油。 若機器運轉時已無任何煙霧油,仍強制啟動機器運轉可能會造成機器永久損壞。 倘若發生煙霧量過少、機器運轉時產生噪音或無法順暢噴煙的動作,請立即拔掉插頭,檢查是 否有足夠的煙霧油、外部保險絲、控制器連結、電源等處,若以上皆無問題,再插上插頭,若 持續無法正常運作,請檢查連結煙霧油桶的管子是否通暢,有無液體流通,若無法辨識原因, 請勿繼續讓機器運轉,以免損壞機器,應即關機冷卻,並將機器送至 Antari 代理商或指定的 服務處檢視,請勿自行拆卸。...
- Page 39 Z- 20 液晶螢幕控制器: 控制面板操作說明 Antari Z-20 的控制器上共有 6 個按鍵,分別是 FUNCTION、Up、Down、Timer、Volume 和 Manual。使用者可以隨著喜好而設定以下功能: 當機器預熱完成時,LCD 螢幕會顯示「Ready To Fog」 當 LCD 螢幕顯示「Ready To Fog」時,按 FUNCTION 鍵一下,LCD 螢幕會顯示 「INTERVAL SET」(間隔噴煙),在此模式之下,使用者可以透過 Up (上)與 Down (下) 來設定噴煙的時間間隔(範圍是 1 到 200 秒)。 當 LCD 螢幕顯示「Ready To Fog」時,按 FUNCTION 鍵兩下,LCD 螢幕會顯示...
- Page 40 5. 當 LCD 液晶營幕顯示 「Ready To Fog」時, 按 FUNCTION 鍵五下, 此時 LCD 液晶營幕會 顯示「 DMX512 Add.1」此時,可利用 Up (上) 或 Down (下)鍵,設定機器的 DMX 位址。 當 LCD 液晶螢幕顯示「Ready To Fog」時,按住 Manual 鍵不放,可以讓煙霧以 100% 煙霧量輸出,一旦放開 Manual 鍵煙霧即可馬上停止。 Z-30PRO 無線控制器使用說明 * 發射器: - 發射器: 使用 DC 12V 電池 - 接收距離: 50 公尺的開放空間(無障礙物)...
- Page 41 設定範例 (1): 若使用者希望設定三組發射器對一台機器,當機器啓動且 LCD 螢幕顯示「Wireless Setup」 (無線設定),請在 15 秒內分別按下這三組發射器的 A 鈕,即可完成設定配對。 請注意若 LCD 螢幕顯示「Wireless Setup OK」時,則表示 15 秒的時間已到,機器已 離開無線設定的模式,之後將無法再新增配對任何控制器。 設定範例 (2): 若使用者想用一個發射器配對兩台、或多台機器使用,可將希望控制的機器個別打開電 源,當 LCD 螢幕顯示「Wireless Setup」(無線設定)時,在 15 秒之內按下控制器的 A 鈕 來完成設定配對。 5. 機器具有記憶功能,若在機器啓動也完成設定之後,沒有再設定其他組控制器時,機器可自 動記憶最後設定的控制器組,在機器下次使用開機時,請勿按壓任何控制器的按鈕,經過 15 秒的設定時間之後,即可以上次所記憶的控制器組來控制機器。 6. 請注意當有新的發射器要與機器對頻時,無論先前有幾組完成設定的控制器都會被洗掉。 註 1: 若希望關閉或重啟無線控制功能,可將 LCD 液晶螢幕選擇至「Wireless On-Off」此頁面, 然後利用...
- Page 42 Z-1500II & Z-3000II 機器規格說明 型號 Z-1500II 煙霧機 Z-3000II 煙霧機 適用電源供應 AC 100~120V or AC 220~240V, 50/60 AC 220~240V, 50~60 Hz 瓦數 1500 W 3000 W 輸出功率 (立方英尺/ 每分鐘) 20,000 cu.ft/min. 40,000 cu.ft/min. 煙霧油桶容量 (公升) 6 Liters 6 Liters 最大耗油量 ( 分鐘/ 公升) 9 min./Liter 5 min./Liter 重量...
- Page 43 功能 接地 數據- 數據+ Antari Z-1200II, Z-1500II & Z-1500II 內鍵式 DMX 設定說明 頻道說明 A 0 - 5 = Off / 關 6 – 249 = Volume Control 輸出量 ( 5% - 95%) 250 – 255 = Maximum Volume Output 最大噴煙輸出量 (100%) Z -1200II, Z-1500II &...
- Page 44 附注: 從以上的說明舉例:如果煙霧機器被分派到第 124 的 DMX 位址,頻道 A 的功能運 作將完全符合 DMX 第 124 頻道的控制要求。 整體而言, Antari 的內鍵 DMX 功能的煙霧機,都能配合所有專業演出的控制要求。 1. 煙霧機內部的平均運作溫度是攝氏 250 度。 2. Z-1200II 可以在最大 100%輸出量時維持持續噴煙動作約 50 秒。 3. Z-1500II 可以在最大 100%輸出量時維持持續噴煙動作 40 秒,Z-3000II 可以在最大 100% 輸出量時達到持續噴煙動作 55 杪。 4. 希望 Z-1500II 和 Z-3000II 煙霧維持一直的持續噴煙動作,只需切換至 Volume 功能,...
- Page 45 Z30PRO Z30PRO...
- Page 46 *Note: It is highly recommended to use ANTARI fog liquid for best fog effect. **Warranty Warranty shall be valid only if the product is purchased from Antari’s authorized distributors or dealers. For warranty service, send the product only to an authorized distributor or dealer.
- Page 48 C08Z007P2...
Need help?
Do you have a question about the Z-1200II and is the answer not in the manual?
Questions and answers