Table of Contents
Advertisement
0 6
TO
YEARS
MONTHS
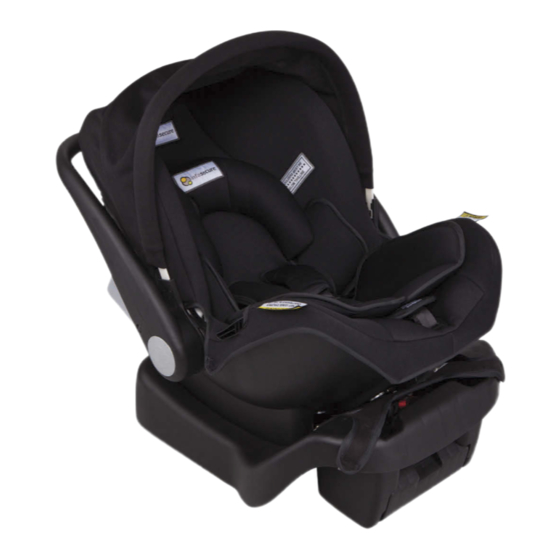
Infant Carrier
R E A R WA R D FA C I N G I N FA N T S E AT
CS2013 / CS2113
REARWARD FACING
Suitable for children from birth to approximately 6 months* of age.
Instruction Manual
IMPORTANT: KEEP THIS BOOKLET IN THE PLACE PROVIDED
ON THE CHILD RESTRAINT
*All references to age are to an average proportioned child. Children vary in shapes and sizes.
The ages outlined above is an approximation only.
The photo displayed is indicative of the type of restraint and may vary slightly depending on the model.
1754:2013
Licence No. 25324
1
Advertisement
Table of Contents

Related Manuals for Infasecure CS2013


Summary of Contents for Infasecure CS2013
- Page 1 MONTHS Infant Carrier R E A R WA R D FA C I N G I N FA N T S E AT CS2013 / CS2113 REARWARD FACING Suitable for children from birth to approximately 6 months* of age. Instruction Manual...
-
Page 2: Table Of Contents
Please read carefully the whole of the instructions for installation and, in the event of doubt about the method of installation, to consult InfaSecure or agent, or a child restraint fitter, or in New Zealand, to consult the agent for the vehicle. -
Page 3: Information
Information This instruction manual covers various models under the Model number CS2013 / CS2113. These child restraints are installed in the rear of the vehicle and can only be used rearward-facing which offers the best level of protection for your child in a vehicle crash. They can either be installed in the vehicle using the vehicle seatbelt &... -
Page 4: Warnings
Warnings WARNINGS • Use the restraint exactly as shown in the instructions. • Supervision of children is needed because they may be able to undo buckles. • DO NOT LEAVE CHILDREN UNATTENDED IN THE CAR. • Do not alter or modify this restraint. •... - Page 5 • IF AN AIRBAG IS FITTED IN THE SEATING POSITION WHERE THE CHILD RESTRAINT IS TO BE FITTED, FOLLOW THE VEHICLE MANUFACTURER’S WARNINGS AND INSTRUCTIONS. CS2013 IMPORTANT This child restraint is not approved for use with any connectors that connect to the car’s ISOFIX Low anchorages.
-
Page 6: Restraint Guide
Research has shown that the likelihood of an accessory child safety harness being used incorrectly is very high and the risk of injuries when incorrectly used is much higher compared to a lap-sash seat belt. InfaSecure recommend that an accessory... -
Page 7: Padding - Combination Guide
(Small Infant) REARWARD FACING INFANT SEAT (Large Infant) REARWARD FACING CS2013 Infant Carrier seatbelt installation only CS2113 Infant Carrier both seatbelt and ISOFIX compatible installations The Padded Insert/s (if fitted) are designed to provide extra support and comfort for small babies. Discontinue use when the insert is a tight fit or creates discomfort for larger babies/children. -
Page 8: Infant Seat
Continue to use this child restraint until the child reaches this limit. Infants are at risk of serious injury if they face forward too early. CS2013 TO BE USED WITH A LAP-SASH/LAP-ONLY SEAT BELT IN THE BACK OF MOST CARS WITH FORWARD FACING SEATS. -
Page 9: Cs2013 Child Restraints (Itemised List)
Infant Seat Model CS2013 CS2113 Infant Carrier CS2013 Infant Carrier seatbelt installation only CS2113 Infant Carrier both seatbelt and ISOFIX compatible installations 11. Carry Handle 1. Comfort Cover 2. Pillow (if fitted) 12. ISOFIX Compartment 3. Shoulder Height Marker 13. “REARWARD-FACING SEAT BELT PATH” Marker (each side of restraint - coloured blue) 4. - Page 10 Infant Seat Model CS2013 CS2113 Seatbelt Seatbelt BASE 23. Small Bracket 13. “REARWARD-FACING SEAT BELT PATH” Marker (each side of restraint - coloured blue) 24. Top Tether Strap (Loop) 14. Base 25. Top Tether Guide 15. Sun Hood 26. Infant Carrier Release 16.
- Page 11 Infant Seat Model CS2113 ISOFIX Compatible CS2113 MODEL ONLY ISOFIX Compatible BASE 23. Small Bracket 12. ISOFIX Compartment 13. “REARWARD-FACING SEAT BELT PATH” Marker 24. Top Tether Strap (Loop) (each side of restraint - coloured blue) 25. Top Tether Guide 14.
-
Page 12: Shoulder Height Marker
Infant Seat Shoulder Height Markers Small Infant Shoulder height markers are provided on this restraint for a visual indication that the child is safe to travel in this restraint. VIEW A VIEW A Front of Car LABEL LABEL Shoulder height markers may be hidden under a pillow in the lowest position REACH To be used only in a rearward-facing position for an infant until their shoulders shoulder height marker (approximately 6 months of age). - Page 13 Infant Seat Shoulder Height Markers Larger Infant Shoulder height markers are provided on this restraint for a visual indication that the child is safe to travel in this restraint. Do not change to a forward facing restraint until the child’s shoulder reaches the label. VIEW A Front of Car LABEL...
-
Page 14: General
Australian/New Zealand Standard with an inbuilt anti rebound feature and does not require additional anti rebound bars or mechanisms to fulfil these requirements. The CS2013/CS2113 Child restraint has also been designed to be a compact restraint to enable multiple restraints to be used in the rear of most vehicles. -
Page 15: Adjusting The Handle Position
General Adjusting the handle position The CS2013/CS2113 Infant Carrier features a sturdy carry handle which can be used in conjunction with the curved base to convert it to a rocker. At the base of the handle there are two large levers which control the four positions of the handle. -
Page 16: Installing The Hood
Infant Seat General Installing Hood (if fitted) Place the carry handle in the ‘TRAVEL’ position Step 1: (Refer to Page 12), this will allow clear access to install the hood. (Refer Figure 1) • Ensure the hood attachment points are upright and both sides aligned. -
Page 17: Setup
Infant Seat Setup Base The Base Unit contains the installation method for your vehicle. CS2013 Infant Carrier seatbelt installation only CS2113 Infant Carrier both seatbelt and ISOFIX compatible installations You can use either; Seatbelt Assembly – refer to ‘Installing Using Vehicle Seatbelts’ (Refer to Page 21) - Page 18 Infant Seat Setup Base The vehicle installation is controlled by the angle of the vehicle seat, and these angles vary greatly between vehicles.The vehicle seat angle or the contours of the vehicle seat could place the Infant Carrier either too upright or too recline. A rearward facing restraint should always be installed so that the back surface is reclined just enough to allow the infant’s head to lie back comfortably, but not more than 45º...
-
Page 19: Base Adjustment
Infant Seat Setup Base Base Adjustment Place the Base and Infant Carrier on the vehicle seat, in a seating position where a child restraint anchor fitting is installed. Check the Level indicator on the Base (refer Figure 1 Figure 1). Adjustment can be achieved by either using the recline foot for more recline, or alternatively the ADJUST BASE SO THIS LINE IS LEVEL WITH THE GROUND... - Page 20 Infant Seat Setup Base Base Adjustment More Upright For some vehicles with flat seats some packing may be required at the front edge of the Base to obtain a better recline angle. Place a firm packing (ie packing can be firmly rolled up Step 1: 10º...
-
Page 21: Installation
Infant Seat Installation Installing Base Using Vehicle Seatbelts An anchor fitting is required to attach the top tether strap and to complete the installation of the Infant Carrier into your vehicle (refer Page 28). IMPORTANT • Consult the car owner’s handbook for the location of the top tether anchorage points. If there is no child restraint anchor fitting or child restraint anchor point refer to Page 49-50 for the installation of the anchor fitting. - Page 22 Infant Seat Installation Installing Base Using Vehicle Seatbelts Engage the buckle and tongue assembly (listen for Step 6: the “CLICK”). Check the buckle engagement with a gentle pull. Step 7: Push down on the Base (with knee or hand) whilst pulling the sash section of the vehicle belt firmly in direction of the blue arrow in Figure 5.
-
Page 23: Isofix Compatible Restraint
Infant Seat ISOFIX Compatible Restraint ISOFIX lower anchorages CS2113 MODEL ONLY Newer vehicles have one or more seating positions with ISOFIX anchorages. If the vehicle is equipped with ISOFIX anchorage, the lower anchor points may be visible at the vehicle seat bight . If not visible, they may be marked with this symbol. -
Page 24: Installing Base Using Flexible Isofix Lower Anchorage Connectors
Infant Seat ISOFIX Compatible Restraint Installing Base Using Flexible ISOFIX Lower Anchorage Connectors (LAC) IMPORTANT • Consult the car owner’s handbook for the location of the ISOFIX anchorages • Consult the car owner’s handbook for the location of the top tether anchorage points. If there is no child restraint anchor fitting or child restraint anchor point refer to Page 46-47 for the installation of the anchor fitting. - Page 25 Infant Seat ISOFIX Compatible Restraint Installing Base using flexible ISOFIX Lower Anchorage Connectors (LAC) PULL PUSH Step 5: Push down on the Base (with knee or hand) whilst pulling the adjuster strap firmly. Remove all slack from the LAC straps by pulling the adjuster strap GREEN firmly.
-
Page 26: Set Up
The Infant Carrier is supplied with the internal harness set-up in the lowest shoulder slot height. InfaSecure recommend that you use the infant insert and pillow for a small new born. NOTE: Discontinue to use the padded insert and pillow, if the continued use causes overheat- ing, discomfort or you require room for the infant to grow. - Page 27 Infant Seat Setup Infant Carrier Adjusting Shoulder Strap Height Figure 3 Pull the harness shoulder straps through the Step 3: shoulder slot holes in the seat shell and cover. They should now be loose in the front of the seat (refer Figure 4).
- Page 28 Infant Seat Setup The Carrier Adjusting Shoulder Strap Height Figure 6 IMPORTANT The shoulder straps must be in the slots which are nearest to the infant’s shoulders, but not lower than the infants shoulders. METAL Step 5: The harness shoulder straps go directly from the SPREADER shoulder slot holes to the spreader plate.
-
Page 29: Top Tether Strap
Infant Seat Setup Top Tether Strap Consult the car owner’s handbook for the location of the top tether anchorage points. If an extension strap is required then refer to Extension Straps on page 44. An anchor fitting is required to attach the top tether strap and to complete the installation of the Infant Carrier into your vehicle. -
Page 30: Adjustable Top Tether Strap
Infant Seat Setup Top Tether Strap Adjustable Top Tether Strap NOTE: connects the Loop Tether Strap to the vehicle anchor fitting. Step 1: Lengthen the Top Tether Strap, tilt the adjuster and pull the strap, so that the Top Tether Strap is ready to attach to the Infant Carrier (Loop Tether Strap) . -
Page 31: Use
Infant Seat Preparing the Harness Step 1: Place the Infant Carrier on a flat surface. Step 2: Ensure the carry handle is folded out of the way and the Hood is fully opened, to enable complete access to the seat (refer Figure 1). Step 3: Loosen the harness straps by pressing the harness adjuster whilst pulling on both harness straps (refer... -
Page 32: Using Harness
Infant Seat Using Harness Following the Preparing the Harness (refer Page 26) Place the Infant Carrier on a flat surface. Step 1: Step 2: Ensure the carry handle is folded out of the way and the Hood is fully opened, to enable complete access to the seat (refer Figure 1). - Page 33 Infant Seat Using Harness Insert either tongue into the buckle followed by the Step 7: other tongue until a “CLICK” is heard. Should the second tongue not insert, press the red button and reinsert the tongues. Ensure secure engagement by pulling the harness strap (refer Figure 5).
- Page 34 Infant Seat Using Harness IMPORTANT PINCH TEST A LOOSE HARNESS IS DANGEROUS. The Padded Insert/s (if fitted) are designed to provide extra support and comfort for small babies. Discontinue use when the insert is a tight fit or creates discomfort for larger babies/children.
-
Page 35: Placing Infant Carrier Into Base
Infant Seat Placing Infant Carrier into Base Step 1: Lift the Infant Carrier by the carry handle and position over the top of the Base (refer Figure 1). Make sure the harness adjustment strap is secured on the securing slot on the plastic adjuster cover (see Using Harness in Figure 10 on Page 33). - Page 36 Infant Seat Placing Infant Carrier into Base Rotate the Carry Handle towards the vehicle seat Step 4: back and place the carry handle in the ‘TRAVEL’ position (refer Figure 4). Step 5: Take the elastic section of the Hood, at the back of the Infant Carrier, and fold to expose the Loop Tether Strap contained in the storage pocket (refer Figure 4 &...
- Page 37 Infant Seat Placing Infant Carrier into Base Take the Hood cover and extend the elasticated Step 7: section over the back of the Infant Carrier (refer Figure 7). Step 8: Connect the adjustable top tether strap to the loop tether strap by using the attachment clip (refer Figure 8). Step 9: Pull the adjuster strap to tighten the top tether strap and remove all slack (refer Figure 9).
-
Page 38: Removing Infant Carrier From Base
Infant Seat Removing Infant Carrier from Base Step 1: Loosen the Adjustable Top Tether Strap by tilting the adjuster (refer Figure 1). Figure 1 Step 2: Disconnect the attachment clip from the Loop Tether bracket (refer Figure 2 & 3). TILT PULL Step 3:... -
Page 39: Removing Infant From Infant Carrier
Infant Seat Removing Infant from Infant Carrier Step 1: Place the Infant Carrier on a flat and secure surface. Rotate the Carry Handle to the ‘Non –Rocking Step 2: Position’ (refer to Page 14) and the Hood is fully opened, to enable complete access to the seat (refer Figure 1). -
Page 40: Aircraft Use
Infant Seat Aircraft Use How to Install into the Aircraft The Infant Carrier without base is suitable for use on aircraft. The Infant Carrier must be used in accordance with the aircraft operators procedures, and any directions from the aircraft operator, pilot or crew. - Page 41 Infant Seat Aircraft Use Fit the Infant Carrier to the Aircraft Seat IMPORTANT • Do not use the restraint with aircraft seatbelts that contain airbags unless the aircraft operator has a method to disable the airbag. STORE • Lengthen the seatbelt or use an extension Storage seatbelt to reposition the buckle to the side Pocket...
-
Page 42: Care Of Restraint
1. Main Cover VERY IMPORTANT Only replace the cover with a InfaSecure supplied replacement cover with identical shoulder height markers or a replacement cover meeting AS/NZS 8005. Care and Maintenance Regular care of the restraint will ensure safety of your child. -
Page 43: Cleaning
Cleaning IMPORTANT Use only mild soap and water to clean all parts of the CS2013 / CS2113 Convertible Car Seat. Do not use chemicals or cleaning agents Cold water only to be used and to be rinsed well Do not dry clean or tumble dry Do not bleach. -
Page 44: Harness Buckle
Harness Tongues and Buckle, then repeat cleaning several times. If the Harness Buckle cannot be returned to its original working condition then contact InfaSecure Customer Service 02 4720 8090. Step 5: Refit the harness buckle to the restraint with the red... -
Page 45: Remove And Replace Covers
Remove Cover. *Replace in reverse. Figure 1 Extension Straps If required contact InfaSecure for nearest supply location. Extension straps, not included in this package, may be required for vehicles without a fixed parcel shelf. TYPE A TOP TETHER STRAP INFANT SEAT... -
Page 46: Accessories
Use of unauthorised aftermarket accessories (i.e items not provided in this box with the child restraint), can reduce the safety provided by the child restraint and may cause injury or death. Accessories provided by InfaSecure for CS2013/CS2113 comply with all the requirements with AS/NZS 1754:2013. PADDED INSERTS (if fitted) The padded inserts are designed to add extra comfort for your child. - Page 47 Step 1: Refer to Set-Up (Infant Carrier on Page 25 - 27). Figure 1 PULL Figure 2 HARNESS STRAPS METAL SPREADER PLATE DELUXE InfaSecure provide accessory items that are suitable for use with models CS2013/CS2113 Hood and Insert Sets. Figure 3...
- Page 48 Accessories HEAD PILLOW/INFANT PILLOW (if fitted) The head pillow/infant pillow (if fitted) is designed to provide extra comfort. Step 1: Refer to Set-Up (Infant Carrier on Page 25 - 27). SUN HOOD (if fitted) The Sun Hood (if fitted) is designed to provide additional sun shade.
- Page 49 Accessories SEAT PROTECTOR (if fitted) The seat protector is designed to protect your car’s seat. STANDARD STANDARD Step 1: Position the front flap with pockets, at the front of the rear seat and position the mat rearwards to obtain a flat fit. FULL LENGTH Step 1: Position the front flap with pockets, at the...
-
Page 50: Anchorage Fittings
ANCHORAGE POINTS. REFER TO A CHILD restraint) RESTRAINT FITTING STATION IF NO CAR If so ring InfaSecure on (Aust) (02) 4728 8090 for ANCHORAGE POINTS ARE IN THE MOTOR CAR. nearest supply location. • THIS RESTRAINT IS NOT SUITABLE FOR... - Page 51 Anchorage Fittings For cars not fitted with a child restraint anchorage point For Sedans Only Drill a 9mm diameter hole in the parcel shelf on the centre line of the seating position as shown in Figure 1C. Hole must be no closer than 200mm from the front of the back seat.
-
Page 52: Insurers Information
NOTICE TO INSURANCE COMPANY CHILD RESTRAINT INVOLVED IN AN ACCIDENT All InfaSecure child restraints are manufactured to Australian/New Zealand Standards AS/NZS1754 which requires us to advise users of child restraints to "Destroy the entire restraint if it has been in use in a severe crash, even if no damage is obvious". - Page 53 Notes:...
- Page 54 Notes:...
- Page 55 Notes:...
- Page 56 INFASECURE PTY LTD ABN: 52 149 173 660 Head Office and Registered Address 110-114 Old Bathurst Rd, Emu Plains, NSW 2750 P.O. Box 487, Emu Plains, NSW 2750 HEAD OFFICE Phone No: +61 2 4728 8000 Fax No: +61 2 4728 8040 Email: admin@infa.com.au...
Need help?
Do you have a question about the CS2013 and is the answer not in the manual?
Questions and answers