Table of Contents
Advertisement
Quick Links
Advertisement
Table of Contents

Subscribe to Our Youtube Channel
Related Manuals for Siqura hsdpa Series


Summary of Contents for Siqura hsdpa Series
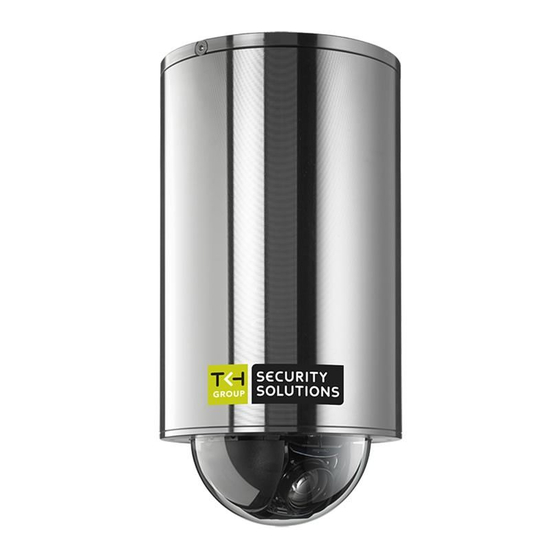
- Page 1 HSD820 Series Full HD IP speed dome camera...
- Page 2 Any brand names mentioned in this manual are registered trademarks of their respective owners. Liability Siqura accepts no liability for claims from third parties arising from improper use other than that stated in this manual. Although considerable care has been taken to ensure a correct and suitably comprehensive description of all relevant product components, this manual may nonetheless contain errors and inaccuracies.
-
Page 3: Table Of Contents
System requirements ................Connect via web browser ..............Find the unit with Siqura Device Manager ..........Change the network settings with Siqura Device Manager ......Log on to the unit ................Install Siqura Viewer ................The HSD820 web interface .............. - Page 4 Contents 6.3.3 SNMP ..................... 6.3.4 UPnP ....................DDNS ....................Mail ....................FTP ....................HTTP ....................Events ....................6.8.1 Application ..................6.8.1.1 Alarm trigger actions ..............6.8.1.2 Specifying file name conventions ..........6.8.2 Motion Detection ................6.8.2.1 Motion detection area ..............6.8.2.2 Motion detection window ............
- Page 5 8.12 Camera - Profile .................. 8.13 Camera - Default ................. Appendix: Enable UPnP ................Appendix: Delete the existing Siqura Viewer software ......Appendix: Set Up Internet Security ............Appendix: NTCIP Configuration ..............Supported conformance groups ............. Configuration .................. CCTV configuration ................
-
Page 6: About This Manual
About this manual What this manual covers This manual applies to the HSD820 series, Siqura's full HD IP speed dome cameras. It explains: ● How to communicate with the unit ● How to operate the unit ● How to adjust the unit's settings For instructions on camera installation and establishing connections, see the separate Quick Start Guide and Installation Manual provided with each HSD820 series model. -
Page 7: Safety And Compliance
Failure to comply with any precaution, warning, or instruction noted in the manual is in violation of the standards of design, manufacture, and intended use of the module. Siqura assumes no liability for the customer's failure to comply with any of these safety requirements. - Page 8 Safety and compliance Power source and temperature ratings Verify that the power source is appropriate before you plug in and operate the unit. Use the unit under conditions where the temperature remains within the range given in the Technical Specifications of this product. Optical safety The following optical safety information applies to HSD820 models with SFP interface.
-
Page 9: Cautions
European Union (EU) to enact the Directive on the Restriction of the use of certain Hazardous Substances (RoHS) (2002/95/EC). Siqura offers products that comply with the EU’s RoHS Directive. The full version of the Siqura RoHS statement can be viewed at www.siqura.com. -
Page 10: Compliance
Safety and compliance Do not use strong or abrasive detergents to clean the camera Use a dry cloth to clean the camera when it is dirty. If the dirt is hard to remove, use a mild detergent and wipe gently. To clean the lens, use lens tissue or a cotton tipped applicator and ethanol. -
Page 11: Product Overview
Product overview This chapter introduces the HSD820 models and their features. In This Chapter 3.1 Models.........................11 3.2 Description......................12 Models HSD820H2 full HD IP speed dome camera, 20x zoom ● Full HD 1080p resolution ● Quad stream H.264/H.264 or H.264/MJPEG ● 20x Optical zoom / 8x Digital zoom ●... -
Page 12: Description
Open standards Siqura provides multiple options to easily integrate the HSD820 series cameras with a video management system (VMS). In support of open standards, the HSD820 cameras are compliant with the ONVIF Profile S specification as well as the Siqura Open Streaming Architecture (OSA) HTTP API. - Page 13 Product overview Privacy masks Through the camera's web interface, administrators can configure privacy masks to conceal sensitive areas, such as point-of-sale keypads in retail or ATM applications as well as windows or other exposed areas appearing in city centre surveillance situations. Audio and I/O contacts The HSD820 series cameras combine streaming video with duplex audio, balanced audio inputs/outputs suitable for all industrial audio systems, and I/O contacts over IP.
-
Page 14: Access The Webpages
In This Chapter 4.1 System requirements.................... 14 4.2 Connect via web browser..................14 4.3 Find the unit with Siqura Device Manager..............15 4.4 Change the network settings with Siqura Device Manager...........16 4.5 Log on to the unit....................17 4.6 Install Siqura Viewer..................... 18 4.7 The HSD820 web interface.................. -
Page 15: Find The Unit With Siqura Device Manager
Find the unit with Siqura Device Manager With Siqura Device Manager - a tool included on the supplied Siqura Product CD - you can locate, manage, and configure Siqura IP cameras and video encoders. Note: Siqura Device Manager is also available for download at www.siqura.com. -
Page 16: Change The Network Settings With Siqura Device Manager
Change the network settings with Siqura Device Manager With Siqura Device Manager, you can directly change the network settings of the HSD820. To assign a static IP address Go to the list of detected devices, and then right-click the entry for the HSD820. -
Page 17: Log On To The Unit
Assign a static IP address To assign a DHCP server Record the HSD820's MAC address (see the Serial no. column in Siqura Device Manager) for future identification In the list of detected devices, right-click the device with the network property that you would like to change. -
Page 18: Install Siqura Viewer
The first time you access the webpages of the camera, you may be prompted about the installation of Siqura Viewer. This add-on is required to view camera images in the webpages. The Siqura Viewer installation file is named install.cab. It does not give rise to any security risks. You can install it safely. - Page 19 Access the webpages Home On the Home page (see "Home" on page 20), you can watch a live video stream from the camera and see stream details. System From the System tab (see "System" on page 25), administrators can view and configure system, security, and network related settings, and upgrade the embedded software.
-
Page 20: Home
Home This chapter gives an overview of the actions that you can perform from the home page of the camera: ● View live video ● Control PTZ functions ● Record live view images ● Save snapshots of live view images ●... -
Page 21: Features
Home When you want to Click this Set image display to standard size Set image display to half size Set image display to full screen Activate/deactivate the talk function Activate/mute audio Save a JPEG snapshot Pause/Resume video streaming Start/Stop Live View recording Show/Hide the PTZ panel Activate/Deactivate the manual trigger Adjust lens angle to wide angle / tele zoom position... - Page 22 Home Snapshots Pressing the Snapshot button saves a .jpg format snapshot of the video in the camera view to the configured location (default: C:\). For information about changing the storage location, see File location ( on page 61). Note: Users working with Windows 7 must log on as Administrator to implement the Snapshot function.
-
Page 23: Ptz Panel
Home PTZ Panel HSD820 home page with PTZ panel The PTZ panel offers an intuitive and convenient interface for easy camera operation. You can use this panel to pan, tilt, zoom, and focus the camera, control the iris, and set the pan tilt speed. -
Page 24: System Settings
System settings On the System tab, Administrators can set and modify the system parameters of the HSD820. This chapter offers a detailed description of settings, options, and values found on this tab. In This Chapter 6.1 System........................25 6.2 Security.......................26 6.3 Network.......................33 6.4 DDNS........................ -
Page 25: System
System settings System System > System Clicking the System option in the left-hand panel displays the host name, time zone, and time synchronisation setting of the HSD820. Remember to press Save after changing any settings. 6.1.1 Host name Specify a name to identify the camera on the network. If the alarm function is enabled and set to send alarm messages by mail or FTP the host name entered here is displayed in the alarm message. -
Page 26: Time Format
System settings 6.1.4 Time format To set a time format On the System tab, click System in the menu on the left. In the Time format list, select the desired format. Options: [yyyy/mm/dd], [dd/mm/yyyy] Click Save. The date and time format shown above the live video window will be changed according to the selected format. -
Page 27: User
System settings 6.2.1 User System > Security > User 6.2.1.1 Admin password The default user name is Admin. The default password is 1234. User name and password are case sensitive. It is recommended that the administrator change the default password. To change the administrator password On the System tab, click Security in the menu on the left. -
Page 28: Streaming Authentication Setting
System settings Privilege Description I/O access This privilege, granted by default, supports fundamental functions that enable users to view video when accessing the camera. Camera control This privilege allows the user to change camera parameters on the PTZ tab. Talk/Listen The Talk and Listen functions allow the user to communicate from the local machine with, for example, the administrator on a remote site. -
Page 29: Https
System settings ● Digest This type is a more secure option. It encrypts the password before sending it over the network. To enable streaming authentication On the System tab, click Security in the menu on the left. In the Security submenu, click User. In the Type list under Streaming Authentication Setting, click basic or digest, as desired. -
Page 30: Create A Self-Signed Certificate
System settings Note: The self-signed certificate does not provide the same high level of security as when using a CA-issued certificate. 6.2.2.1 Create a self-signed certificate To create a self-signed certificate On the System tab, click Security in the menu on the left. In the Security submenu, click HTTPS. -
Page 31: Ip Filter
System settings Under Upload signed certificate, click Browse. Browse to the folder containing the signed certificate and select the file. Click Upload. The certificate is installed and displayed under Installed Certificate. 6.2.3 IP filter System > Security > IP filter Using the IP filter, you can deny/allow access to the IP camera from specific IP addresses. -
Page 32: Ieee 802.1X
System settings 6.2.4 IEEE 802.1X System > Security > IEEE 802.1X The HSD820 is allowed to access a network protected by 802.1X/EAPOL (Extensible Authentication Protocol over LAN). Users need to contact the network administrator to obtain certificates, User IDs, and passwords. 6.2.4.1 CA certificate The CA certificate is created by the Certificate Authority (CA) for validation purposes. -
Page 33: Network
System settings Up to 16 characters can be used. In the Private key password text box, enter the password for your user identity. Up to 16 characters can be used. To enable IEEE 802.1X, select Enable IEEE 802.1x. Click Save. Network From the Network pages, the administrator can configure IP address assignment and settings for Quality of Service (QoS), the Simple Network Management Protocol (SNMP), and Universal... -
Page 34: Modify The Fixed Ip Address
Select the option Get IP address automatically. Click Save to confirm the new setting. The camera restarts automatically. Find the camera’s new IP address via the MAC address with the program Siqura Device Manager (see "Find the unit with Siqura Device Manager" on page 15). 6.3.1.2 Modify the fixed IP address The factory default IP address is in the 10.x.x.x range. -
Page 35: Use Pppoe
System settings 6.3.1.3 Use PPPoE The Point-to-Point Protocol over Ethernet (PPPoE) enables users to securely transfer data. To use PPPoE On the System tab, click Network in the menu on the left. In the Network submenu, select Basic. Click Use PPPoE. Specify the PPPoE user name and password. -
Page 36: Qos
System settings In the Network submenu, select Basic. Under IPv6 Address Configuration, select Enable IPv6. Click Save. The IPv6 IP address is displayed. 6.3.2 System > Network > QoS DiffServ and QoS Differentiated Services (DiffServ, or DS) is a method for adding Quality of Service (QoS) to IP networks. -
Page 37: Snmp
System settings Note: Before enabling this function, make sure the switches/routers in the network support QoS. 6.3.3 SNMP System > Network > SNMP With the Simple Network Management Protocol (SNMP), part of the internet protocol suite, the HSD820 can be monitored and managed remotely by a network management system. SNMP v1/v2 To enable the version of SNMP to use, select the appropriate check box. - Page 38 System settings Valid characters: A-Z, a-z, 0-9, !#$%&’-.@^_~ In the Authentication Type list, click MD5 or SHA. SHA offers a higher security level. Type a password in the Authentication Password box. Length: Eight characters or more. For security purposes, characters/numbers are displayed as dots. Valid characters: A-Z, a-z, 0-9, !#$%&’-.@^_~ In the Encryption Type list, click DES or AES.
-
Page 39: Upnp
System settings 6.3.4 UPnP System > Network > UPnP Enable UPnP If enabled, Universal Plug and Play (UPnP) allows the HSD820 to advertise its presence and services to control points on the network. A control point can be a network device with embedded UPnP or a Video Management System (VMS). -
Page 40: Ddns
System settings DDNS System > DDNS The Dynamic Domain Name System (DDNS) allows a host name to be constantly synchronised with a dynamic IP address. In other words, it allows those using a dynamic IP address to be associated with a static domain name so that others can connect to it by name. To use DDNS From the Network page, set the camera to acquire its IP address via DHCP, as described in Acquiring an IP address automatically ( on page 33). -
Page 41: Mail
System settings Mail System > Mail (example settings) On the Mail page, administrators can configure SMTP settings for sending an email via the Simple Mail Transfer Protocol (SMTP) when an alarm is triggered. SMTP is a protocol for exchanging email messages between servers. SMTP is a relatively simple, text-based protocol, where one or more recipients of a message are specified and the message text is transferred. -
Page 42: Ftp
System settings System > FTP Administrators can configure the camera to send messages to one or two specific File Transfer Protocol (FTP) sites when an alarm is triggered. For FTP server details, contact your network administrator or network service provider, or install FTP software on a PC on the same network as the camera. -
Page 43: Http
System settings HTTP System > HTTP An HTTP Notification server can listen for notification messages from IP cameras triggered by events. Alarm triggered and motion detection notifications can be sent to the specified HTTP server. See also Application ( on page 44) and Motion Detection ( on page 48) for HTTP Notification settings. -
Page 44: Application
System settings 6.8.1 Application System > Events > Application HSD820 cameras provide two digital alarm inputs and two digital alarm outputs to be used with alarms and their specified trigger actions. For information about the alarm pin definition and connecting alarm devices, see the HSD820 Installation Manual. On the Application page, administrators can set the active state of the digital inputs and outputs (I/O), enabling the camera to trigger an alarm when the state of the alarm connectors changes. -
Page 45: Alarm Trigger Actions
System settings Alarm type The input type drives the alarm output. Normal close indicates that the connectors are normally closed and a disconnection will trigger a digital output signal. Normal open indicates that the connectors are normally open and a connection will trigger a digital output signal. See the relevant installation manual for more information. - Page 46 System settings Note: Normally, the range of the Pre-trigger buffer is 1-20 frames. This range will change accordingly if the MJPEG frame rate on the Video frame rate page (see "Video frame rate" on page 75) is 6 or slower. With the Post-trigger function, users can set a certain amount of images to be uploaded after the triggering of the alarm input.
-
Page 47: Specifying File Name Conventions
System settings Upload Image by E-mail When an alarm is triggered, a specified number of pre- and post-trigger buffer frames are sent to the configured email address. The Pre-trigger buffer function allows users to check what happened to cause the trigger. Note: Normally, the range of the Pre-trigger buffer is 1-20 frames. -
Page 48: Motion Detection
System settings The File Name text box allows users to specify the file name conventions for captured images. The following options are available for naming image files. ● File name Enter a file name for the uploaded images. For example, image.jpg. A suffix will be added unless Overwrite is selected. - Page 49 System settings The Motion Detection function supports up to four sets of Motion Detection settings. To enable and configure a Motion Detection set On the System tab, click Events in the menu on the left, and then click Motion detection. In the Motion Detection list, click the Motion Detection set that you want to configure.
-
Page 50: Motion Detection Area
System settings 6.8.2.1 Motion detection area Per Motion Detection set, up to ten motion detection windows can be added. A red frame displays in the camera view around the selected detection area. These areas can be added removed, moved, and/or resized. Motion detection with two windows configured To add a motion detection area ●... -
Page 51: Network Failure Detection
System settings Motion Detection alarms will not trigger if the Motion Detection function is disabled or while the Motion Detection settings are saving. In these cases, the motion indication window displays the text, Motion Detection Is Not Active. Motion detection is disabled. 6.8.3 Network Failure Detection System >... -
Page 52: Periodical Event
System settings Detection Type The IP address you specify here will be pinged at the interval entered for "every n minutes". Range: 1-99 minutes. Triggered Action Select the desired trigger actions which are to be performed in the event of an alarm. For more information, see Alarm trigger actions ( on page 45). -
Page 53: Manual Trigger
System settings 6.8.5 Manual trigger System > Events > Manual trigger On the Manual trigger page, administrators can activate manual alarm triggering and define the actions to be taken when the user clicks the Manual Trigger button on the Home page. Manual Trigger Click On or Off to enable or disable the Manual trigger, respectively. -
Page 54: Audio Detection
System settings 6.8.6 Audio detection System > Events > Manual trigger The Audio detection function allows the camera to detect audio and trigger alarms when the audio volume in the detected area reaches/exceeds the determined sensitivity threshold value. To enable Audio detection On the System tab, click Events in the menu on the left. -
Page 55: Storage Management
System settings Storage management Recorded video can be stored on a microSD card inserted into the camera or on a network share. 6.9.1 SD Card System > Storage management > SD Card You can implement local recording using a microSD/SDHC card up to 64 GB. On the Storage Management page, administrators can view capacity information of the microSD/SDHC card and a recording list with all the recording files that are saved on the memory card. -
Page 56: Device Information
System settings Device information The Device information section of the Storage Management page shows: ● The type of storage card ● The amount of free space available on the card ● The total amount of storage on the card ● Status - whether or not there is a card in the microSD slot of the camera ●... -
Page 57: Network Share
System settings A window appears with a link to the file. Click on the link to save the file locally or to play it in your default viewing software. 6.9.2 Network Share System > Storage management > Network Share The HSD820 supports recording video to a network share. On the Network Share page, administrators can view capacity information of the network share and a recording list with all the recording files that are saved on the network share. - Page 58 System settings Device information The Device information section of the Network Share page shows: ● The type of storage device ● The amount of free space available on the device ● The total amount of storage on the device ● Status - whether the device is offline or online ●...
-
Page 59: Recording
System settings A window appears with a link to the file. Click on the link to save the file locally or to play it in your default viewing software. 6.10 Recording System > Recording Recording schedules Administrators can configure up to 10 recording schedules that meet the surveillance requirements. -
Page 60: Schedule
System settings 6.11 Schedule System > Schedule On the Schedule page, Administrators can create up to ten time schedules that meet the surveillance requirements for functions, such as Motion detection, Application, and Network failure detection. To create a schedule On the System tab, click Schedule in the menu on the left. On the schedule overview, click on the row (1-10) representing the schedule that you wish to configure. -
Page 61: File Location
System settings 6.12 File location System > File location The HSD820 offers JPEG snapshot and MJPEG recording functionality. Users can specify a storage location for the snapshots and live video recordings. The default storage location is C: Note: For users with a Windows 7 operating system, it is required to log on as an Administrator to configure the Snapshot and Web Recording function. -
Page 62: Log File
System settings 6.13.1 Log file System > View information > Log file The system log provides useful information about the configuration and connections after system launch. To view the system log ● On the System tab, click View information in the menu on the left, and then click Log file. -
Page 63: User Information
System settings 6.13.2 User Information System > View information > User information The Administrator can view each added user’s login information and privileges. See also User. To view the list of user accounts ● On the System tab, click View information in the menu on the left, and then click User information. -
Page 64: Parameters
System settings 6.13.3 Parameters System > > View information > View parameters The HSD820 camera's parameters are stored in its configuration file. To view the system parameters ● On the System tab, click View information in the menu on the left, and then click Parameters. -
Page 65: Factory Default
System settings 6.14 Factory default System > Factory default The Factory default page enables administrators to reset the camera to the default factory settings. To perform a full restore to the default factory settings On the System tab, click Factory default in the menu on the left. Click Full Restore. -
Page 66: Software Version
System settings 6.15 Software version System > Software version To display software version of the camera ● On the System tab, click Software version in the menu on the left. Version information is shown in the web browser. Note that version numbers appearing in your webpage may differ from the numbers shown in the example above. -
Page 67: Maintenance
On the Windows Start Menu, click Control Panel, and then click Programs and Features. In the programs list, select Siqura Viewer, and then click Remove to uninstall the existing Siqura Viewer. Reopen your web browser, log on to the HSD820, and then allow the automatic download and installation of Siqura Viewer. - Page 68 System settings Administrators can use this page to export configuration files (.bin) to a specified location for future use. To export the configuration file On the System tab, click Maintenance in the menu on the left. Press Export. In the File Download dialog box, select Open or Save. If saving the file, choose the local directory where it should be saved.
-
Page 69: Video And Audio Streaming
Video and Audio Streaming This chapter describes the Streaming tab which can be used to view and modify settings related to video format, video compression, video text overlay, video stream protocol, frame rate, and audio transmission mode. Note: The Streaming tab can be accessed by administrators only. In This Chapter 7.1 Video format...................... -
Page 70: Video Resolution
Video and Audio Streaming 7.1.1 Video resolution The HSD820 series cameras have quad-stream capability for simultaneous streaming of H. 264/H.264 or H.264/MJPEG. Full HD 1080p streaming with a D1 second stream or dual 720p streaming is possible. To set up the video resolution for the HSD820 On the Streaming tab, click Video format in the menu on the left. -
Page 71: H.264 Profile
Video and Audio Streaming 7.1.4 H.264 Profile Users can set each H.264 profile to Baseline Profile, Main Profile, or High Profile according to the compression needs. The default setting is Main Profile. To set an H.264 profile On the Streaming tab, click Video format in the menu on the left. In the H.264-x list, select the desired profile. -
Page 72: Video Text Overlay
Video and Audio Streaming Range H.264-2: [64...2048] kbps. Default: 1024 kbps. Range H.264-3: [64...2048] kbps. Default: 1024 kbps. Range H.264-4: [64...2048] kbps. Default: 1024 kbps. Click Save to confirm settings. To display compression information on the home page On the Streaming tab, click Video compression in the menu on the left. Select the Display compression information in the home page check box. - Page 73 Video and Audio Streaming Include preset title: adds the name of the current camera preset. Include text string: type the text you wish to add. Align the text(s) as necessary and drag the text box(es) to the desired position on the preview.
-
Page 74: Video Stream Protocol
On the Video Stream Protocol page, users can select a protocol for streaming media over the network to the webpages via the Siqura Viewer application. Note: The protocols on this page only apply to streams going to a Siqura Viewer. Protocol... -
Page 75: Video Frame Rate
Video and Audio Streaming Video frame rate Streaming > Video frame rate On the Video frame rate page, the administrator can set the MJPEG, H.264-1, H.264-2, H. 264-3, and H.264-4 frame rate - that is, the number of frames per second. The default frame rate is 30 fps. - Page 76 Video and Audio Streaming On the Audio page, administrators can select the transmission mode and bit rate for audio streams. To configure audio settings On the Streaming tab, click Audio in the menu on the left. Under Transmission Mode, click to select one of the following options: Full-duplex –...
-
Page 77: Ptz&Image
PTZ&IMAGE From the PTZ tab, users can view a live video stream, control the camera's PTZ functions, and configure camera parameters. In This Chapter 8.1 Preset......................... 77 8.2 Cruise......................... 79 8.3 Autopan.......................80 8.4 Sequence......................81 8.5 Home........................83 8.6 Tilt Range......................84 8.7 Privacy Mask...................... - Page 78 PTZ&IMAGE The HSD820 series cameras support a total of 256 preset points. To set a preset point On the PTZ tab, click Preset in the menu on the left. Position the pointer on the live view pane. Keeping the left mouse button pressed, move the camera to the desired view by dragging the (red) pointer.
-
Page 79: Cruise
PTZ&IMAGE Cruise PTZ > Cruise Cruise is a route formed with manual operation (through adjusting the pan and tilt position), which can be stored and recalled to execute repeatedly. The HSD820 series cameras support up to eight programmable cruise paths. To record a cruise path On the PTZ tab, click Cruise in the menu on the left. -
Page 80: Autopan
PTZ&IMAGE The current cruise stops and is no longer repeated. Autopan PTZ > Autopan Autopan is the motion of scanning an area horizontally so the dome camera captures a horizontal view. The HSD820 series cameras support up to four programmable autopan paths. To record an autopan path On the PTZ tab, click Autopan in the menu on the left. -
Page 81: Sequence
PTZ&IMAGE Under Autopan run, select the desired autopan path from the Autopan path list. Press Run. The camera starts moving horizontally as recorded. To view the autopan path in full-screen mode, right-click the live view pane, and then select fullscreen. The autopan path is repeated at ten-second intervals. - Page 82 PTZ&IMAGE The sequence function executes prepositioning of the pan, tilt, zoom, and focus features in a certain sequence for a camera. The HSD820 series cameras support up to eight sequence lines. Up to 64 points can be specified for each sequence line. Note: Before setting this function, users must set at least two preset points.
-
Page 83: Home
PTZ&IMAGE Home PTZ > Home Users are able to set an operation mode to ensure constant monitoring; if the dome idles for a period of time, the preset function is activated automatically; this is the HOME function. The HOME function allows constant and accurate monitoring to avoid the dome stopping or missing events. -
Page 84: Tilt Range
PTZ&IMAGE Tilt Range PTZ > Tilt Range The tilt range of the HSD820 cameras is adjustable from minimum -10° to maximum 100°. To adjust the angle setting On the PTZ tab, click Tilt Range in the menu on the left. Enter the desired minimum and maximum tilt angle in the corresponding text boxes. -
Page 85: Privacy Mask
PTZ&IMAGE Privacy Mask PTZ > Privacy Mask The Privacy Mask function aims to avoid any intrusive monitoring. The HSD820 supports up to 16 privacy masks. To set a privacy mask On the PTZ tab, click Privacy Mask in the menu on the left. Under Mask Setting, click to open the Switch list, select On, and then click Set. -
Page 86: Camera - Exposure
PTZ&IMAGE Make the required changes as described above. Click Set. To remove a mask On the PTZ tab, click Privacy Mask in the menu on the left. Under Mask Clearing, click to open the Mask list. Select the number of the mask to be removed. Click Clear. -
Page 87: Camera - Wb
PTZ&IMAGE Iris Priority In this mode, the iris opening has the highest priority in exposure control. Iris opening values range from F1.6 to F28. The lower the number, the more light is let into the lens. Manual In this mode, the shutter speed [1/10000 to 1], iris opening [F1.6 to F28], and gain [1 to 15] settings can be specified manually. - Page 88 PTZ&IMAGE Auto The camera detects a colour temperature range and calculates an optimal white balance. The Auto White Balance mode is suitable for light sources with colour temperature ranges from 2700 to 7800 K. Indoor/Outdoor The white balance is adjusted to a colour temperature range for either indoor or outdoor lighting conditions.
-
Page 89: Camera - Misc
PTZ&IMAGE 8.10 Camera - Misc 1 PTZ > Cam - Misc1 On the Camera - Miscellaneous Setups Menu 1 (Misc1) page, users can set various camera parameters including Backlight Compensation, Sharpness, Exposure Compensation, Image Flip, Digital Zoom, Speed by Zoom, and Day/Night. Backlight Compensation (BLC) enhances the visibility of objects in the foreground of an image when there is a bright light in the background. -
Page 90: Camera - Misc 2
PTZ&IMAGE Note: To make the dome camera tilt between a specific range, such as -10° to +100° or -10° ~ +190°, go to the Tilt Range setting page (see "Tilt Range" on page 84) to set the tilt angle range. Otherwise, the dome camera will tilt 90° as the default setting. Digital zoom With digital zoom set to On, it is possible to zoom in further on the video when the lens is fully zoomed in using optical zoom. - Page 91 PTZ&IMAGE To enhance video display, the wide dynamic range (WDR) function solves high contrast or changing light issues by taking the best of two pictures with different exposure settings. WDR is especially effective in solving indoor and outdoor contrast issues. The user can enable or disable the WDR function, according to the application.
-
Page 92: Camera - Profile
PTZ&IMAGE TV System Select the video format that matches the TV system (either NTSC or PAL) associated with the camera. To select the camera's TV system For systems using the National Television System Committee standard, select one of the NTSC options. For those using the Phase Alternate Line system, select a PAL option. Click SET to confirm the new setting. -
Page 93: Camera - Default
PTZ&IMAGE Select the required profile number. The profile name is displayed in the Name box. Click Load. The profile takes a while to load. The camera adopts the settings associated with the profile. To delete a profile On the Camera - Profile page, click to open the Num list. In the Num list, select the profile to be deleted. -
Page 94: Appendix: Enable Upnp
Appendix: Enable UPnP With UPnP enabled in Windows, it is possible to see Siqura devices in Windows Explorer. You can double-click a device to open its webpages. To enable UPnP in Windows 7 In Control Panel, click Network and Sharing Center. -
Page 95: Appendix: Delete The Existing Siqura Viewer Software
Appendix: Delete the existing Siqura Viewer software Viewing camera images in the HSD820 Web pages requires Siqura Viewer software. You are strongly advised to remove a previous installation of Siqura Viewer from your computer before initial access to the camera over the network or when you encounter an "A new version is available"... -
Page 96: Appendix: Set Up Internet Security
Appendix: Set Up Internet Security If ActiveX control (Siqura Viewer) installation is blocked, set the Internet security level to default or change the ActiveX controls and plug-ins settings. To set the Internet Security level to default Start Internet Explorer (IE). -
Page 97: Appendix: Ntcip Configuration
Appendix: NTCIP Configuration The National Transportation Communications for ITS Protocol (NTCIP) provides a communications standard that ensures the interoperability and interchangeability of traffic control and Intelligent Transportation Systems (ITS) devices. This appendix provides information about the conformance groups which are supported by the HSD820. In This Chapter Supported conformance groups.................. -
Page 98: Cctv Configuration
The Motion Control group defines the variables that provide PTZ control. For details, refer to NTCIP 1205. Conformance requirement within the group is mandatory. ● presetGotoPosition ● presetStorePosition ● positionPan ● positionTilt ● positionZoomLens ● positionFocusLens ● positionIrisLens Note: Camera control through NTCIP on Siqura multichannel products is limited to video channel 1. -
Page 99: Snmp Mib
Appendix: NTCIP Configuration SNMP MIB NTCIP has its own SNMP MIB. This database is used to store information, which is used to control cameras and other devices in the transportation management system. An electronic version of the MIB is available from a NEMA FTP site. To get access to the FTP site, send your name, organisation name, and email address to ntcip@nema.org, and request access. -
Page 100: Index
Access the webpages......14 Features..........21 Acquiring an IP address automatically..33 File location........... 61 Adding and managing user accounts..27 Find the unit with Siqura Device Manager...15 Admin password........27 FTP............42 Advanced settings........35 Alarm trigger actions.......45 Appendix: Delete the existing Siqura Viewer GOV Settings......... - Page 101 Index Video resolution........70 Video rotate type........70 Parameters..........64 Video stream protocol......74 Periodical event........52 Video text overlay........72 Preset........... 77 View information........61 Privacy Mask..........85 Product overview........11 PTZ Panel..........23 PTZ&IMAGE........... 77 QoS............36 Recording..........59 Safety.............7 Safety and compliance......7 Schedule..........
Need help?
Do you have a question about the hsdpa Series and is the answer not in the manual?
Questions and answers