Table of Contents
Advertisement
Quick Links
Advertisement
Table of Contents

Subscribe to Our Youtube Channel
Related Manuals for Siqura HSD820 Series


Summary of Contents for Siqura HSD820 Series
- Page 1 HSD820 Series High-speed 1080p IP PTZ dome camera...
- Page 2 Any brand names mentioned in this manual are registered trademarks of their respective owners. Liability Siqura accepts no liability for claims from third parties arising from improper use other than that stated in this manual. Although considerable care has been taken to ensure a correct and suitably comprehensive description of all relevant product components, this manual may nonetheless contain errors and inaccuracies.
-
Page 3: Table Of Contents
Contents About this manual ..................Safety and compliance ................Safety ....................Cautions ..................... Compliance ..................Product overview ..................Models ....................Description ..................Package contents ................. Dimensions ..................Connect the camera .................. Connector definition ................Connect to power ................Connect to network ................Establish a network connection .............. -
Page 4: About This Manual
About this manual What this manual covers This manual describes how to install the HSD820, Siqura's high-speed 1080p IP PTZ dome camera. For configuration and operation instructions, refer to the User Manual. Who should read this manual This manual is intended for technicians involved in the installation of HSD820 cameras. -
Page 5: Safety And Compliance
Failure to comply with any precaution, warning, or instruction noted in the manual is in violation of the standards of design, manufacture, and intended use of the module. Siqura assumes no liability for the customer's failure to comply with any of these safety requirements. - Page 6 1. SELV: conforming to IEC 60950-1, <60 Vdc output, output voltage galvanically isolated from mains. All power supplies or power supply cabinets available from Siqura comply with these SELV requirements.
-
Page 7: Cautions
European Union (EU) to enact the Directive on the Restriction of the use of certain Hazardous Substances (RoHS) (2002/95/EC). Siqura offers products that comply with the EU’s RoHS Directive. The full version of the Siqura RoHS statement can be viewed at www.siqura.com. - Page 8 Safety and compliance Install electrical wiring carefully Ask a qualified electrician to perform the wiring for the installation. Please note that input electricity to the unit is at a tolerance of 24 Vac 50/60 Hz ± 10%. Ground the camera appropriately to prevent electric shock or damage.
-
Page 9: Compliance
Safety and compliance Compliance... -
Page 10: Product Overview
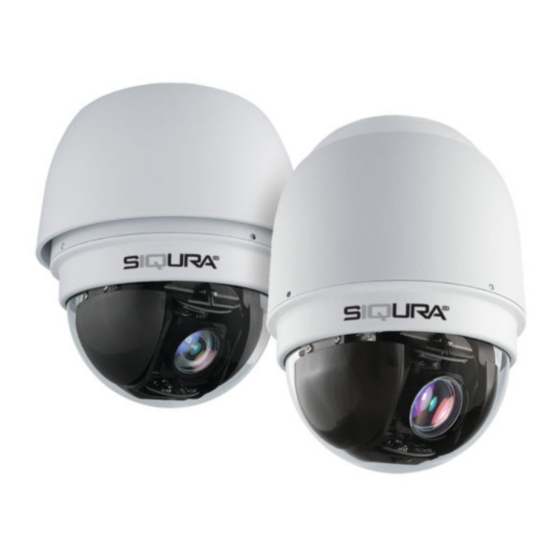
Product overview This chapter introduces the HSD820 models and their features. In This Chapter 3.1 Models.........................10 3.2 Description......................11 3.3 Package contents....................12 3.4 Dimensions......................13 Models HSD820H2 full HD IP speed dome camera, 20x zoom ● Full HD 1080p resolution ●... -
Page 11: Description
Architecture (OSA) HTTP API. High-speed dome The HSD820 series cameras have a 20x (H2 model) or 30x (H3 model) auto focus zoom lens. Precision 400° per second pan and tilt drive technology offers almost instant preset positioning. Support for many presets, cruises, and sequences provides for highly flexible manual or automatic operation. -
Page 12: Package Contents
Optical cover Ceiling mount RJ-45 connector SFP connector Security TORX M3 & M5 Screws Terminal block (2x) M4 Screws (5x) Siqura Product CD Quick Start Guide and and anchors (5x) (software/manuals) two leaflets Outdoor Camera body with Optical cover Waterproof rubber... -
Page 13: Dimensions
Product overview Screws (M3 & M5) Security TORX Siqura Product CD Quick Start Guide and (software/manuals) two leaflets Dimensions Indoor Outdoor... -
Page 14: Connect The Camera
Connect the camera It is necessary to connect the camera to power, network, audio and alarms before you install the camera. The connectors are located on the bottom of the camera body. Connector definition The connectors located on the HSD820 camera’s back plate are shown below. Note: You need to remove the outdoor tube adapter in order to expose the switches. -
Page 15: Connect To Power
Connect the camera Connect to power Refer to the illustration below to connect the power core through the supplied power adaptor. Definition AC 24_1 AC 24_2 HSD820 power connector Power over Ethernet (PoE+) The HSD820 can also use PoE+, which requires that IEEE 802.3at power sourcing equipment is available on the network. -
Page 16: Establish A Network Connection
Connect the camera Ethernet socket LEDs green/yellow Green on/off : 100/10 Mbit Yellow on/blink : link OK, active Yellow off/flash : link down, TX attempt Establish a network connection The webpages of the HSD820 provide a convenient way of accessing its settings. You can log on to the internal web server of the HSD820 from a PC which is on the same subnet as the unit. -
Page 17: Access The Webpages
Once you have established a network connection to the HSD820, you can log on to the camera and open its webpages using a standard web browser, Siqura Device Manager (supplied on the product CD) or UPnP. For more information, see the User Manual. -
Page 18: Connect Alarm Inputs And Outputs
Connect the camera Definition Line Out Line In HSD820 audio connector Connect alarm inputs and outputs Use the pin definition below for alarm system wiring. Definition Definition ALARM_OUT_NO_1 ALARM_OUT_COM_2 ALARM_OUT_NC_1 ALARM_OUT_COM_1 VIDEO_GND VIDEO_OUT ALARM_OUT_NO_2 ALARM_IN_2 ALARM_OUT_NC_2 ALARM_IN_1 HSD820 Alarm I/O connector... -
Page 19: Install The Camera
Install the camera Based on the installation environment, the HSD820 camera can be installed using a ceiling, wall, corner, or pole mount. This chapter describes various installation methods and installation procedures. Note: When using the SFP adapter to connect fiber to the camera, replace "Ethernet cable" with "fiber cable"... -
Page 20: Mini Pendant Wall Mount
Install the camera 5.2.1 Mini pendant wall mount Package contents ● Rubber washer - 8 x1 ● Pendant tube washer x1 ● Spring washer - 8 x1 ● M8x12 Screw x1 ● Sponge x1 Items needed ● Dome camera ● Power and Ethernet cables ●... -
Page 21: Standard Pendant Wall Mount
Install the camera Mini pendant wall mount 5.2.2 Standard pendant wall mount Package contents ● M8x12 Screw x1 ● Spring washer-8 x1 ● Pendent tube washer x1 ● Rubber washer-8 x1 ● Sponge x2 Items needed ● Dome camera ● Power and Ethernet cables ●... - Page 22 Install the camera Attach the waterproof boot to the standard pendant mount. Run the cable(s) through the standard pendant mount. Note: After threading the cables, block the cable entry hole with the supplied sponge(s) to prevent insects from entering the tube. Locations for insect protection sponge At this point, the dome can be suspended from the standard pendant mount using the safety wire.
-
Page 23: Wall Box Mounting
Install the camera 5.2.3 Wall box mounting Package contents ● M8x16 Screw x4 ● Washer-8 x4 ● Spring washer-8 x4 Items needed ● Dome camera ● Power and Ethernet cables ● Mini or standard pendant mount ● Wall box mount and other equipped items (optional accessory) ●... -
Page 24: Corner Mount
Install the camera Wall box mounting: wall box mount + pendant mount + waterproof boot + indoor tube adaptor Corner mount There are two ways to corner mount the HSD820 camera. ● Using a standard mount ● Using a thin/wide box mount 5.3.1 Corner standard mounting Package contents... - Page 25 Install the camera ● Screwdriver To mount the dome camera with the corner standard mounting plate and mini or standard pendant mount Make a cable entry hole on the wall to recess the cables. Otherwise, cables can be threaded through the cable entry hole on the tube. Fix the corner standard mounting plate on a corner with the proper screws and screw anchors.
-
Page 26: Corner Thin/Wide Box Mounting
Install the camera Corner wall mounting: corner standard mounting plate + pendant mount + indoor tube adapter + waterproof boot 5.3.2 Corner thin/wide box mounting With the corner standard mounting plate and pendant mount, the HSD820 can be mounted onto the corner or a wall. Package contents ●... - Page 27 Install the camera Fix the corner thin/wide box on a corner with the proper screws and screw anchors and run the cables through the hole in the mounting plate. Fasten the pendant mount to the thin/wide box with the supplied screws and washers. Thread the cable(s) through the pendant mount with the cable(s) coming out of the mount’s outlet.
-
Page 28: Pole Mount
Install the camera Pole Mount There are two ways to mount the HSD820 camera on a pole: ● Using a thin/wide direct mount as described in the section Pole thin/wide direct mounting. ● Using a thin/wide box mount as described in the section Pole thin/wide box mounting. 5.4.1 Pole thin/wide direct mounting The dome can be installed to a pole with a thin/wide direct mounting accessory and a pendant... -
Page 29: Pole Thin/Wide Box Mounting
Install the camera Locations for insect protection sponge Attach the waterproof boot to the pendant mount. Thread the cable(s) through the tube adapter and join the tube adapter to the pendant mount with the supplied screws and washers. Adjust the waterproof boot to the joint. Connect the cables to the dome camera and attach the dome to the indoor tube adapter and fasten them together with the supplied screws and washers. -
Page 30: Pendant Mount
Install the camera Items needed ● Dome camera ● Power and Ethernet cables ● Standard or mini pendant mount and other equipped items (optional accessory) ● Pole thin/wide box mounting (optional accessory) ● Indoor tube adaptor for the HSD820 (optional accessory) ●... - Page 31 Install the camera Pole box mounting: pole thin/wide box mounting +pendant mount+ indoor tube adapter + waterproof boot...
-
Page 32: System Integration
The HSD820 dome camera can be integrated into other suppliers' surveillance systems in two ways: ● Via the Open Streaming Architecture (OSA) application programming interface (API). For more information, see the Siqura Programming Interface specification. This document can be downloaded from www.siqura.com. ● Via the Open Network Video Interface Forum (ONVIF) standard. -
Page 33: Appendix: Camera Accessories
Appendix: Camera accessories Before installing the camera, compare your accessories to those listed in this section and ensure that you have all the parts you need for your installation. Important: If anything is missing, do not install the dome. Contact your supplier for assistance. - Page 34 Appendix: Camera accessories WM01A / Mini wall mount White; 184×104×115.2 mm (7.24×4.09×4.54 in.); 0.6 kg (1.2 lbs). PM05 / Swan-neck mount White, Iron, Height: 250/500 mm (9.8/19.7 in.), Diameter: 50 mm (2 in.) 1 kg (2.2 lbs) / 1.8 kg (4 lbs). CM01 / Straight tube White, Iron, Height: 250/500 mm (9.8/19.7 in.), Diameter: 50 mm (2 in.)
- Page 35 Appendix: Camera accessories WM05 / Corner standard mounting plate White, 222×204×117 mm (8.7×8×4.6 in.); 2 kg (4.4 lbs); Supplied with 8 mm washer ×4, spring washer×4, M8*16 screw×4, M8 nut×4. PM04 / Pole wide box White/Ivory, 270×166×155 mm (10.6×6.5×6.1 in.); 3.2 kg (7.1 lbs); Supplied with M8*16 screw×4, washer×4, spring washer×4, stainless steel straps×4.
- Page 36 Appendix: Camera accessories PM01 / Pole thin direct mounting White/Ivory, 232×136×60 mm (9.1×5.4×2.4 in.); Diameter: 112~140 mm (4.4~5.5 in.); 0.7 kg (1.6 lbs); Supplied with stainless steel straps×4, M8*16 screw×4, washer×4. PM02 / Pole wide direct mounting White/Ivory, 270×170×60 mm (10.6×6.7×2.4 in.);...
-
Page 37: Hsd820 Accessories
Appendix: Camera accessories HSD820 accessories DC02 / Vandal proof transparent cover (standard)/Smoke cover (optional) Sunshield (standard) White color Height: 129.5 mm (5.05 in.) Diameter: 190 mm (7.48 in.) Weight: 0.15 kg (0.33 lbs) PA02 / Power adapter (optional) ● Input: 100~115 Vac / Output: 24 Vac 72 VA ●... -
Page 38: Index
Index Standard pendant wall mount....21 System integration......... 32 About this manual........4 Access the webpages......17 Appendix: Camera accessories....33 Wall box mounting........23 Wall mount..........19 Cautions..........7 Compliance..........9 Connect alarm inputs and outputs.....18 Connect audio........17 Connect the camera........ 14 Connect to network.........15 Connect to power........
Need help?
Do you have a question about the HSD820 Series and is the answer not in the manual?
Questions and answers