Table of Contents
Advertisement
Quick Links
Advertisement
Table of Contents

Related Manuals for Ganz PixIPro ZN-MDI243M-IR


Summary of Contents for Ganz PixIPro ZN-MDI243M-IR
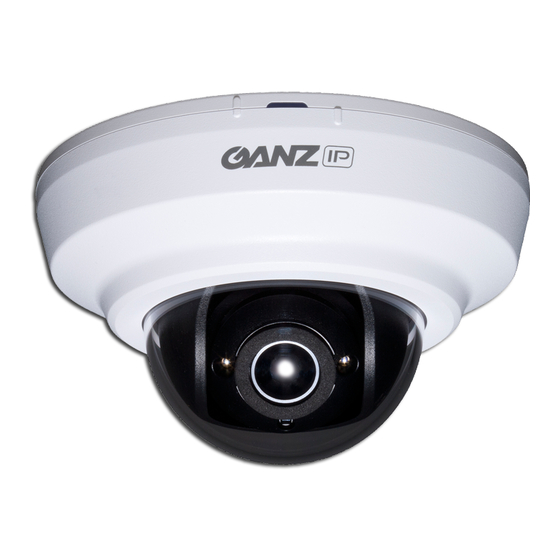
- Page 1 H.264 MINI DOME NETWORK CAMERA ZN-MDI243M-IR...
- Page 2 1) Read these instructions. 2) Keep these instructions. 3) Heed all warnings. 4) Follow all instructions. 5) Do not use this apparatus near water. 6) Clean only with a dry cloth. 7) Do not block any of the ventilation openings. Install in accordance with the manufacturer's instructions.
-
Page 3: Table Of Contents
Contents 1. PRODUCT FEATURES ........................4 2. ACCESSING THE CAMERA ......................9 2.1 A ....................... 9 CCESS FROM A BROWSER 2.2 A ................. 10 CCESSING THE CAMERA FROM THE NTERNET 2.3 A ......................10 DJUSTING THE MAGE ANGLE 2.4 T ........................ -
Page 4: Product Features
Megapixel progressive CMOS sensor and advanced image processing. Supported by the industry’s largest base of video management software, the GANZ PIxelPro provides the perfect solution for securing bank offices, airports and other facilities, and for traffic surveillance, over IP based networks. - Page 5 This analog video output is available. 5. Network connector The GANZ PixelPro (ZN-MB243M) connects to the network via a standard network cable, and automatically detects the speed of the local network segment (10BaseT/100BaseTX Ethernet). This socket could also be used to power the GANZ PixelPro via Power over Ethernet (PoE).
- Page 6 Installation Preparation 1) Remove Dome Cover - Please turn counterclockwise the dome cover by grasping the bottom of the camera. 2) Adjustment Image position ROTATE (±90°) TILT (0~75°) PAN (±178°)
- Page 7 Mounting to a Ceiling / Wall Secure the camera to ceiling or wall with supplied tapping screws like below. 1) In Ceiling Mount Tapping Screw M4x30 (2)
- Page 8 2) Surface Mount Anchor (2) Tapping Screw M4x30 (2)
-
Page 9: Accessing The Camera
2. Accessing the Camera Follow the instructions in the GANZ PixelPro Installation Guide to install the camera. The GANZ PixelPro could be accessed with most standard operating systems and browsers. The recommended browser is Internet Explorer for Windows with other operating systems. -
Page 10: Accessing The Camera From The Internet
2.2 Accessing the camera from the Internet Once installed, the camera is accessible on the local network (LAN). Configure the router/firewall to allow incoming data traffic to access the camera from the Internet. For security reasons this is usually done on a specific port. Please refer to the documentation for router/firewall for further instructions. -
Page 11: Video Stream Types
2.5 Video stream types H.264 protocols and communication methods • RTP (Real-time Transport Protocol) is a protocol that allows programs to manage the real-time transmission of multimedia data, via unicast or multicast. • RTSP (Real Time Streaming Protocol) serves as a control protocol, to negotiate the type of transport protocol to use for the stream. -
Page 12: The Setup
RTSP traffic. 3. The Setup The GANZ PixelPro is configured from the Setup link, which is available on the top left hand side in the web interface. This configuration could be done by: •... -
Page 13: Analog Output
NTSC, PAL: Analog Output is selectable. 5. Video The following descriptions show examples of some of the features available in the GANZ PixelPro. 5.1 Codec These are the tools for adjusting the H.264 settings and controlling the video bit rate. - Page 14 1 Mbit/s. The H.264 standard provides scope for a large range of different coding tools for use by various applications in different situations, and the GANZ PixelPro provides certain subsets of these tools.
- Page 15 Select Video Mirroring mode NONE/ HORIZONTAL / VERTICAL / FLIP(H+V) Bandwidth Limit Limit the bandwidth that the GANZ PixelPro can use during a network connection. Max Bandwidth Specify the maximum bandwidth that the GANZ PixelPro can use during a network connection.
-
Page 16: Camera
5.2 Camera This section allows you to adjust various camera settings. 5.2.1 Exposure Control Enable AE (Auto Exposure) ON: Use this setting for automatic exposure control. OFF: Use these settings to control camera exposure manually. To compensate for poor lighting conditions, you can adjust the Color level, Brightness, Sharpness, Contrast and Exposure control. -
Page 17: Day & Night Control
The GANZ PixelPro camera can be set to automatically identify the light source and compensate for its color temperature. If necessary, the type of light source could be set manually.. -
Page 18: Live
6. Live 6.1 Setup The GANZ PixelPro could support 10 simultaneous users. In case of multicast, the GANZ PixelPro could support unlimited number of users. If supported on the network, consider using multicasting, as the bandwidth consumption will be much lower. -
Page 19: Privacy Masking
6.2 Privacy Masking This uses masking to hide sections that you do not want to appear in the shooting screen. A maximum of 2 locations can be set. Mask Area All View:Shows the masking area both Area 1 and 2. Click the Masking Area 1 or 2 to make a masking. -
Page 20: Ftp
7. FTP 7.1 FTP > Config Server Configuration (This function is N/A on this model) External Server Configuration It is setting page to transmit the still shot to remote sites, using the FTP server. Specify the external FTP server information such as IP address, port number, Username and password. -
Page 21: Ftp > Periodical
Event FTP Sending It enables FTP transmission triggered by event. Directory : This folder will be created into external FTP server automatically. File Prefix : The file name will start from this prefix. Mapping : You can specify event mapping for Event FTP. Effective Period : You can specify “Always”... -
Page 22: Event
8. Event 8.1 Event > Motion Motion Detection Motion detection is used to generate an alarm whenever movement either occurs or stops in the video image. A maximum of 4 windows could be configured. Area Sensitivity:1(low) ~ 10(High) – The higher the number is, the higher the sensitivity level becomes. -
Page 23: Event > Mapping
8.2 Event > Mapping It is possible to define conditions that would cause the camera to respond with certain actions. A triggered event happens as a result of a trigger, which could be motion detection. For example, E-mail could be sent by video motion detection. -
Page 24: Network
Click the Setup > Network > IP Setup to see the current network settings. IP Address Configuration - The GANZ PixelPro supports both IP version 4 and IP version 6 (IPv6 will be supported in V3.00). Both versions may be enabled simultaneously, and at least one version should be always enabled. - Page 25 How to assign IP address Default setting is set to “DHCP” and “UPnP” function is set to ON. If your netw ork has DHCP server and UPnP function is enabled on your PC, you can find the network camera in “My network”. If DHCP server is not available in your network, please assign IP address as following process.
-
Page 26: Network > Service Port
9.2 Network > Service Port Service Port HTTP port- The default HTTP port number (80) could be changed to any port within the range 1-65535. This is useful for simple port mapping. RTSP port- The RTSP protocol allows a connecting client to start an H.264 stream. Enter the RTSP port number to use. -
Page 27: Network > E-Mail
9.4 Network > E-mail You must turn Notification to ‘On’ and then enter the host names or addresses for your mail servers in the fields provided, to enable the sending of event and error email messages from the camera to predefined addresses via SMTP. Note1) Frequency : Mail server may register the sender to SPAM list when frequency is set to “1 Min”. -
Page 28: Network > Upnp
How to setup the DDNS: 1) DDNS set to ON. “mac address.dvrlink.net” is registered to the DDNS server. User can connect to the camera with: “http://mac address.dvrlink.net”. 2) DDNS set to ON and user inputs “user-defined name”. “mac address.dvrlink.net” and “user-defined name.dvrlink.net” are both registered together. -
Page 29: System
Camera : Set UPnP to “ON” PC : Open “Control Panel” >”Network Connection” Select “Advanced” >”Optional Networking Components…” Select “Network Services” and click “Details”. Then select “UPnP user Interface” 10. System 10.1 System > User Access the camera and the Configure Root Password dialog appears. Enter the User name: ADMIN and password is 1234. -
Page 30: System > Date & Time
10.2 System > Date & Time Date & Time Format - specify the formats for the date and time (12h or 24h) displayed in the Live View video streams. Use the predefined formats or use your own custom date and time formats. -
Page 31: System > Maintenance
10.3 System > Maintenance System Name Choose a system name to identify the camera when using e-mail notifications. System Reboot Reboot the camera. Factory Default To reset the camera settings to the original factory default settings. Enable Firmware Upgrade / Firmware Updates To upgrade Firmware of the camera, follow the instruction below. - Page 32 3) When Firmware upgrade menu is displayed, browse to the desired firmware file on your computer. Click OK. NOTE: Do not disconnect power to the unit during the upgrade. The unit will restart automatically after the upgrade has completed. (1~5 minutes) System Reset (Factory Default Reset) There are two ways to reset the camera back to factory default.
-
Page 33: System > Information
10.4 System > Information System Information You can confirm the system information if the camera here. -
Page 34: Dimension (Mm)
11. Dimension (mm) <FRONT> 2-φ5.1 <BOTTOM>... -
Page 35: Specification
12. Specification H.264 / MJPEG Network Camera Dual Stream Motion Triggered Alarm Multi Language GUI support ONVIF Compliant 1/2.8" Sony IMX122 CMOS Sensor On The Fly supported @ GOP/Bitrate/FPS stetting 2D DNR. (Depends on CODEC configuration) Product Features DPC(Defective Pixel Correction) on the fly True Day &... - Page 36 Network 10BASE-T, 100BASE-TX, RJ45 H.264 Image Compression MJPEG : Image quality: 100 Steps(Q value) 1920 x 1080(Full HD), 1280 x 1024(SXGA), 1024x768(XGA), 1280 x 720(720p) Resolution 640 x 480(VGA), 640 x 360(HVGAW), 320 x 240(QVGA) 704x480/576(4CIF), 352x240/288(CIF) IPv4, HTTP, SMTP, UPnP, DNS, Protocol RTSP, DDNS, RTP, TCP, UDP, RTCP DHCP, ARP, ICMP,IGMP, NTP...
- Page 39 159-1.0...
Need help?
Do you have a question about the PixIPro ZN-MDI243M-IR and is the answer not in the manual?
Questions and answers