
Related Manuals for Kenwood KCA-DR300


Summary of Contents for Kenwood KCA-DR300
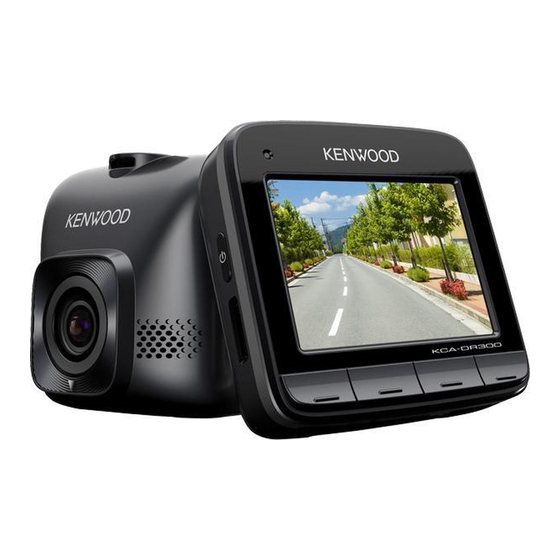
- Page 1 KCA-DR300 GPS INTEGRATED DASHBOARD CAMERA INSTRUCTION MANUAL © 2015 JVC KENWOOD Corporation B5A-0696-All(E)
-
Page 2: Table Of Contents
Playback mode ..........................13 System settings ............................14 Settings Menu ........................... 14 KENWOOD DRIVE-VIEW PLAYER ......................17 Installing KENWOOD DRIVE-VIEW PLAYER ................17 Playing the recording files ......................17 For more information ..........................20 Precautions and notices ........................ 20 Safety precautions ........................... 20 About GPS ............................ -
Page 3: Getting To Know The Recorder
Getting to know the recorder NOTE: The screenshots and other presentations shown in this manual may differ from the actual screens and presentations generated by the actual product. Device mount socket For the device mount. Mini-USB connector Connects to the charger or computer. -
Page 4: Power Key
Power key Once the vehicle engine is started, the recorder automatically turns on. By default, the recording will start right after the recorder turns on. You can perform the following using the Power key: ƒ To manually turn the recorder on and off, press and hold the Power key for 2 seconds. -
Page 5: Function Keys
Function keys The device provides four function keys to control the corresponding icons displayed at the bottom of the LCD screen. The key’s function may vary on different screens. For example, the device will display four icons as shown below while continuous recording is in progress. -
Page 6: System Icons
System icons Various System icons on the title bar at the top of the screen provide the status information of your device. The icons displayed will vary depending on your device model and state. Example: Icon Description The REC icon blinks while recording is in progress. Displays the current time. -
Page 7: Inserting A Memory Card
Inserting a memory card You must insert a memory card (may be sold separately) before you can start recording. 1. Hold the card by the edges and gently insert it into the slot with the label facing the rear side of the recorder. 2. -
Page 8: Using Your Recorder In A Vehicle
Using your recorder in a vehicle 1. Make sure that your car is parked on a level ground. 2. Follow the instructions below to mount your recorder in a vehicle securely. 3. Connect the car charger to the cigarette lighter. Route the cables through the top ceiling and the A-pillar so that it does not interfere with driving. - Page 9 4. When adjusting the angle of mounting, make sure that the camera’s view is parallel with the level ground, and the ground/sky ratio is close to 6/4. 5. When not using the recorder, follow the instructions below to remove the recorder from the holder.
-
Page 10: Connecting To Your Computer
Connecting to your computer You can connect the recorder to your computer to access data on the memory card. The Mini-USB connector is located on the right side of the device. Follow the instructions below to connect the rcorder to the computer via the USB cable (not supplied). -
Page 11: Operating Basics
Operating basics Turning the recorder ON and OFF Complete the installation according to the instructions in the “Using your recorder in a vehicle” section. ƒ Once the vehicle engine is started, the recorder automatically turns on. By default, the recording will automatically start in few seconds after start-up. ƒ... -
Page 12: Recording In Driving Mode
ƒ When you select Automatic, the system will display the time zone setting screen. to select your time zone and press . The system will set the correct date and time according to the time zone setting. ƒ When you select Manual, the system will display the date and time setting screen. to adjust the value of the selected field;... -
Page 13: Recording In Parking Mode
Emergency recording By default, if an event happens, such as sudden impact, high-speed driving, an aggressive turn or an accidental crash, the G sensor will prompt the recorder to start an emergency recording. ƒ If you want to manually start an emergency recording while continuous recording is in progress, press To stop emergency recording and resume continuous recording, press ƒ... -
Page 14: Camera Mode
To stop Parking mode and resume continuous recording, press ƒ Once the movements were detected and recorded during Parking mode, you will be asked to watch the video when you stop Parking mode. Follow the on-screen prompts to watch videos or resume continuous recording. ƒ... -
Page 15: System Settings
System settings Settings Menu To customise the system settings, press ƒ File Playback Plays the recorded videos and photos. For more information on playback, see the "Playback mode" section. ƒ Sound Recording Sets if you want to include sounds in the recordings. The default setting is On. ƒ... - Page 16 ƒ G-Sensor Sensitivity The G sensor detects the car's movement forwards/backwards (X), to the right/left (Y), and upwards/downwards (Z). In case of an event, the G sensor will prompt the recorder to start recording automatically. You need to adjust the G sensor sensitivity depending on your driving style and road condition.
- Page 17 to store the videos (including continuous recordings, emergency recordings and parking recordings) and photos. Select the proper configuration based on your usage. - Restore to Defaults: Restores system settings to factory defaults. - Version: Displays the software information. ƒ Format Formats a memory card.
-
Page 18: Kenwood Drive-View Player
KENWOOD DRIVE-VIEW PLAYER KENWOOD DRIVE-VIEW PLAYER is a tool for you to view the videos recorded on the recorder. Installing KENWOOD DRIVE-VIEW PLAYER Insert the attached CD-ROM into the disc drive of your computer. Double-click Setup.exe (Windows) or KENWOOD DRIVE-VIEW PLAYER_*****.dmg (MAC) and install KENWOOD DRIVE-VIEW PLAYER by following the on-screen prompts. - Page 19 ƒ G sensor chart displays data in 3-axis waveform about the car’s shift forward/ backward (X), to the right/left (Y) and upward/downward (Z). 3. By default, KENWOOD DRIVE-VIEW PLAYER shows the calendar and the file list on the right. ƒ When a recording file exists, you will see the date marked with “▲.
- Page 20 ƒ Click to open the Settings Menu. The Settings items are described as follows: Change Language: Sets the display language of KENWOOD DRIVE-VIEW PLAYER. Change Skin: Sets the color scheme of KENWOOD DRIVE-VIEW PLAYER. About: Displays the version and copyright information of KENWOOD DRIVE-VIEW...
-
Page 21: For More Information
For more information Precautions and notices Warning! Do not operate the device while driving. Using this product does not change the requirement for a driver to take full responsibility for his or her behavior. This responsibility includes observing all traffic rules and regulations in order to avoid accidents, personal injury or property damage. -
Page 22: About Gps
ƒ Connect the charger to a proper power source. The voltage requirements are found on the product case and/or packaging. ƒ Do not use the charger if the cord becomes damaged. ƒ Do not attempt to service the unit. There are no serviceable parts inside. Replace the unit if it is damaged or exposed to excess moisture. -
Page 23: Caring For Your Device
Caring for your device Taking good care of your device will ensure trouble-free operation and reduce the risk of damage. ƒ Keep your device away from excessive moisture and extreme temperatures. ƒ Avoid exposing your device to direct sunlight or strong ultraviolet light for extended periods of time. -
Page 24: Approximate Recording Time/Number Of Photos
Approximate recording time/number of photos Continuous Emergency Parking Setting SDHC card Photo recording recording recording 25 min 11 min 0 min Setting-1 50 min 22 min 0 min 1000 16GB 1 hour 40 min 43 min 0 min 2001 (Initial) 32GB 3 hour 20 min 1 hour 26 min... -
Page 25: Specifications
Specifications Image sensor Accessories Car Charger Adapter (code 3.5m) x 1 1/2.7inch 2Mega pixcel CMOS Car Mount Bracket x 1 Lens CD-ROM (PC Viewer/Detail user guide) x 1 f2.0 f=3.6mm Fixed focus Field of view D : Approx 126° H : Approx 100°V : Approx 55° LCD Screen 2.4 inch Color TFT Still image format / size... - Page 26 Con la presente JVC KENWOOD dichiara che questo “KCA-DR300” è Slovensko conforme ai requisiti essenziali ed alle altre disposizioni pertinenti S tem JVC KENWOOD izjavlja, da je ta “KCA-DR300” v skladu z stabilite dalla direttiva 1999/5/EC. osnovnimi zahtevami in ostalimi ustreznimi predpisi Direktive...
- Page 27 Bu vesileyle JVC KENWOOD, “KCA-DR300” ünitesinin, 1999/5/ EC Direktifinin başlıca gereksinimleri ve diğer ilgili hükümleri ile uyumlu olduğunu beyan eder. Hrvatski Ovime JVC KENWOOD izjavljuje da je ova jedinica “KCA-DR300” je u skladu s osnovnim zahtjevima i drugim relevantnim odredbama Direktive 1999/5/EC. Русский...
- Page 28 Information on Disposal of Old Electrical and Electronic Equipment and Batteries (applicable for countries that have adopted separate waste collection systems) Products and batteries with the symbol (crossed-out wheeled bin) cannot be disposed as household waste. Old electrical and electronic equipment and batteries should be recycled at a facility capable of handling these items and their waste byproducts.
Need help?
Do you have a question about the KCA-DR300 and is the answer not in the manual?
Questions and answers