Table of Contents
Advertisement
Quick Links
KENWOOD
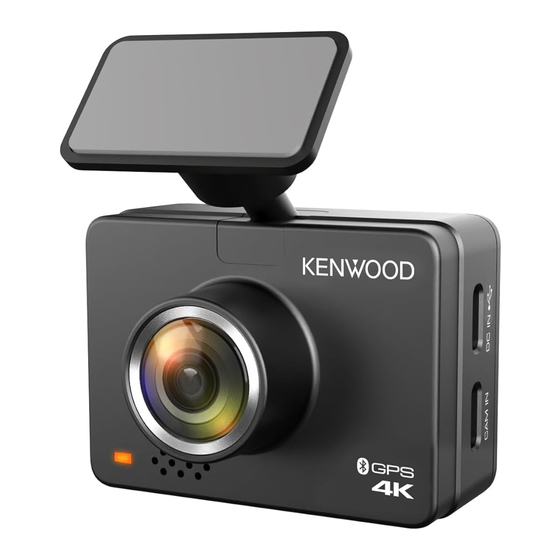
DRV-A610W
GPS Integrated Dashboard Camera
QUICK START GUIDE
Dashcam mit integriertem GPS
Schnellstartanleitung
Camera embarquee avec GPS integre
Guide de demarrage rapide
Dashboard Camera met GPS
Snelstartgids
Videocamera da cruscotto con GPS integrato
Guida di awio rapido
Camara
de
salpicadero con GPS integrado
Guia de inicio rapido
Camara
de
tablier com GPS inco1orado
Guia de lnicio Rapido
BHAeoperncrpaTop
c GPS-npHeMHHKOM
KpaTKoe pyKOBOACTBO no Ha1.tany pa6oTbl
Wideorejestrator ze zintegrowanym GPS
Skr6cona instrukcja
Kamera
do
auta svestavenym GPS
Rychla p0irueka
Camera de bord cu GPS integrat
Ghid de ini iere rapida
JVCKENWOOD Corporation
US Residents Only
Register Online
,
.
. .
,.
.
.
-
C
2024
JVCKENWOOD
Corporation
610WGD-V2.0.G.A-EN
Advertisement
Table of Contents

Related Manuals for Kenwood DRV-A610WDP


Summary of Contents for Kenwood DRV-A610WDP
-
Page 7: Register Online
Record the serial number, found on the back of the unit in the spaces designated on the warranty card, and in the space provided below. Refer to the model and serial numbers whenever you can upon your KENWOOD dealer for information or service on the product. Model DRV-A610W... -
Page 8: Table Of Contents
TABLE OF CONTENT Before Use........................01 Dashboard Camera Function Guide................01 Precautions for Use....................... 02 Accessories........................11 Key Features........................11 Parts Name and Functions.................... 12 Installation and Connection..................15 On Screen Notifcations....................27 Video Mode........................31 Video Menu........................32 Setup Menu........................34 Playback Mode...................... -
Page 9: Before Use
Before Use • The screen images and operation examples in this document were created for explaining the operating procedures. • There may be screen images that differ from the actual screens or examples of operations not actually performed. Disclaimer • Please note that JVCKENWOOD shall not be responsible for any damages suffered by the customer or a third party as a result of incorrectly using this product, a failure during use of this product, or other trouble, or due to the use of this product, unless such liability is acknowledged by law. -
Page 10: Precautions For Use
Precautions for Use Precautions and notices Warning! Do not operate the device while driving. Using this product does not change the requirement for a driver to take full responsibility for his or her behavior. This responsibility includes observing all traffc rules and regulations in order to avoid accidents, personal injury or property damage. -
Page 11: Precautions For Installation
• Do not store or carry fammable liquids, gases or explosive materials in the same compartment as your device, its parts or accessories. • To discourage theft, do not leave the device and accessories in plain view in an unattended vehicle. •... - Page 12 Information on Disposal of Old Electrical and Electronic Equipment and Batteries (applicable for countries that have adopted separate waste collection systems) Products and batteries with the symbol (crossed-out wheeled bin) cannot be disposed of as household waste. Old electrical and electronic equipment and batteries should be recycled at a facility capable of handling these items and their waste by products.
- Page 13 Declaração de Conformidade relativa à Diretiva RE Direktif 2014/53/EU ile ilgili Uyum Beyanı RE 2014/53/UE RoHS Direktif 2011/65/EU için Uyum Beyanı Declaração de conformidade relativa à Diretiva Üretici: RoHS 2011/65/UE JVCKENWOOD Corporation Fabricante: 3-12, Moriyacho, Kanagawa-ku, Yokohama-shi, JVCKENWOOD Corporation Kanagawa 221-0022, JAPONYA 3-12, Moriyacho, Kanagawa-ku, Yokohama-shi, AB Temsilcisi: JVCKENWOOD Europe B.V.
- Page 14 ˜eský Společnost JVCKENWOOD tímto prohlašuje, že rádiové zařízení DRV-A610W splňuje podmínky směrnice 2014/53/EU. Plný text EU prohlášení o shodě je dostupný na následující internetové adrese: Magyar JVCKENWOOD ezennel kijelenti, hogy a DRV-A610W rádióberendezés megfelel a 2014/53/EU irányelvnek. Az EU konformitási nyilatkozat teljes szövege az alábbi weboldalon érhető el: Hrvatski JVCKENWOOD ovim izjavljuje da je radio oprema DRV-A610W u skladu s Direktivom 2014/53/EU.
- Page 15 Директива 2014/53/ЕС. Пълният текст на ЕС декларацията за съответствие е достъпен на следния интернет адрес: URL: https://www.kenwood.com/euukdoc/ Declaration of Conformity with regard to the Radio Equipment Regulations 2017 (S.I.2017/1206) Declaration of Conformity with regard to the Restriction of the Use of Certain Hazardous Substances in Electrical and Electronic Equipment Regulations 2012 (S.I.
-
Page 16: Fcc Caution
FCC CAUTION Changes or modifcations not expressly approved by the party responsible for compliance could void the user’s authority to operate the equipment. FCC NOTE • This equipment has been tested and found to comply with the limits for a Class B digital device, pursuant to Part 15 of the FCC Rules. -
Page 17: Can Ices-3(B)/ Nmb-3(B)
(RF) CNR-102 de l’ISDE. Cet équipement doit être installé et utilisé en gardant une distance de 20 cm ou plus entre le radiateur et le corps humain. Supplier’s Declaration of Conformity Trade Name: KENWOOD Products: Dashboard Camera Model Name: DRV-A610W... - Page 18 Para cumplimiento de la IFT “La operación de este equipo esta sujeta a las siguientes dos condiciones: (1) es posible que este equipo o dispositivo no cause interferencia perjudicial y (2) este equipo o dispositivo debe aceptar cualquier interferencia, incluyendo la que pueda causar su operación no deseada.”...
-
Page 19: Accessories
If you wish to view videos, please remove the memory card and read it on a computer, or use the KENWOOD DASH CAM MANAGER APP on your mobile to view via wireless link, or use a third-party USB-A to USB-C cable with data transfer capabilities to connect and view on a computer. -
Page 20: Parking Mode
This feature requires hardwire kit CA-DR1031(optional accessory) to permanent power. 2K Rear Camera Recording (Optional) DRV-A610W supports the rear camera recording. You can purchase the rear camera as a front and rear 4K+2K dual-camera recording. (sold separately, please see KENWOOD website for more detail). Parts Name and Functions... - Page 21 • Menu / Mute Button Menu Press this button to open the Video or Setup menu. Mute Press and hold the button for 2 seconds to turn on or off the audio recording function while in video mode. • Record / Screenshot Button Record In Video mode, press to start or stop recording.
- Page 22 If you wish to view videos, please remove the memory card and read it on a computer, or use the KENWOOD DASH CAM MANAGER APP on your mobile to view via wireless link, or use a third-party USB-A to USB-C cable with data transfer capabilities to connect and view on a computer.
-
Page 23: Installation And Connection
Installation and Connection For the frst installation, follow the instructions below : 1. Insert Your microSD Card Into The Device The device is designed to allow a standard microSD card to record your footage. Before installing, make sure the gold end of the card is facing the LCD screen. Once it’s aligned with the slot, push the card in and listen for the CLICK that will confrm it is secure. - Page 24 KENWOOD USB car charger provides a 2.6A output current. We recommend using the USB car charger provided by us. Please do not use other USB ports in the car to connect the KENWOOD dash cam, as most car USB ports deliver less than 1A output, while the KENWOOD dash cam requires a 2A current for normal operation.
- Page 25 DO NOT wire DRV-A610W directly to the car cigarette outlet or any 12V outlet. Doing so will result in permanent damage to the camera. You can purchase our hardwire kit from the KENWOOD offcial website that will directly connect to your vehicle’s fuse box. This will allow you to have your 12V outlet available for other use.
- Page 26 4. ATTACH THE STATIC SIDE FILM AND MOUNT TO THE WINDSHIELD Select a location on the windshield where it won’t distract you. We recommend you place the mount behind the rearview mirror on the passenger side, within the windshield wiping area. CAM clearly needs to view through CAM clearly needs to view through Left-hand Drive...
- Page 27 Note: Do not reuse windshield sticker applicator flm repeatedly. This will reduce the adhesion performance and cause the static flm to fall off. TIP: When selecting a location for the mount, make sure it’s on a glass surface that is smooth and free of paint.
-
Page 28: Adjust The Angle
KENWOOD USB car charger provides a 2.6A output current. We recommend using the USB car charger provided by us. Please do not use other USB ports in the car to connect the KENWOOD dash cam, as most car USB ports deliver less than 1A output, while the KENWOOD dash cam requires a 2A current for normal operation. - Page 29 (1) SELECT A LOCATION ON THE REAR WINDSHIELD Select a location on the rear windshield, attach the adhesive mount, and place the rear camera in place. The rear camera mount is designed for sloping windows or vertical / fat windows. Note: It is recommended to place the rear windshield camera within the windshield wiping area at the top of the rear windshield to record as clear an image as...
-
Page 31: Rear Camera
(2) CONNECT THE REAR CAMERA CABLE Use the CAM IN port on the side of the front dash cam and plug in the rear camera cable. (3) ROUTE THE REAR CAMERA CABLE Route the rear camera cable through the vehicle to the rear windshield and tuck the cable away. - Page 32 Note: For hatch back trunk opening, leave about 3-5 inches of extra cable at the vehicle’s end to ensure adequate cable connections, and comfortably open the trunk without moving the rear camera. Check all airbags locations on the vehicle owner’s manual. DO NOT route cable over the airbags to avoid potential interference with airbag deployment and posing a problem with proper airbag operation.
- Page 33 (4) CONNECT THE REAR CAMERA CABLE TO THE REAR CAMERA When all the cable is in place, connect the rear camera cable to the rear camera, line up cable pins to secure the cable connection. Check the front dash cam to ensure the rear camera is working correctly.
- Page 34 Note: You can also connect the dash cam to your mobile device and download KENWOOD DASH CAM MANAGER on App Store / Google Play. Use its Live View function to adjust the rear camera. If you still fnd it too much trouble or don't want to do it yourself. It is...
-
Page 35: On Screen Notifcations
On Screen Notifcations The following information will help you better understand the On Screen Notifcations when corresponding alert is detected. • First Time Use SD Card Format: when the SD card is inserted into the device for the frst time, the device will ask you to format the card. Press OK button to format and LEAVE button to cancel. - Page 36 • Protected Files Over Written: When the protected space of SD card is full, the device will ask you to reformat the card, otherwise the frst protected fle will be overwritten when the protected space is full. Press OK button to format and LEAVE button to cancel.
- Page 37 • Insert SD card: This is a notifcation to remind you to insert the SD card. 00:00:00 Please insert SD card 11:17:01 04/25/2024 • Access Menu During Recording: When pressing MENU button during recording, you may need to press Record button to stop recording frst then you can press MENU button to access Menu.
- Page 38 • Screen Saver: When screen saver is turned on, the device will automatically turn off the screen after 30 seconds or 2 minutes of inactivity, and 5 seconds before the screen is turned off The display will indicate that the device is about to turn off the screen.
-
Page 39: Video Mode
Video Mode The following information will help you better understand the icons in VIDEO MODE and their relative functions. Some icons show up only when corresponding functions are activated. 00:22 11:17:01 04/25/2024 1. Microphone: When the audio recording function is off, there will be a red line across the icon. -
Page 40: Video Menu
Video Menu DRV-A610W’s default settings have been set for you to use the camera without needing to change the settings. If you need to make adjustments to the settings, the following instructions will help you. Press the MENU button and select Video Menu while in VIDEO MODE while DRV-A610W is not recording. - Page 41 Motion Detection: If the motion detection is turned on, the device will enter standby mode when the vehicle is turned off or when the device loses its power supply. In standby mode, if the device detects any moving objects, it will automatically record a 30-second video and then stop recording until there are no more moving objects.
-
Page 42: Setup Menu
KENWOOD Stamp: Turn the KENWOOD logo stamp ON or OFF on the recorded fles. • OPTIONS: On (default) / Off Time & Date Stamp: Turn ON or OFF the date stamp mark on the recorded fles. • OPTIONS: On (default) / Off •... - Page 43 OPTIONS: Front Camera: On / Off (default) Rear Camera: On / Off (default) • Restore Defaults: Reset all the settings to KENWOOD factory default. System Info: Displays the frmware version. • OPTIONS: System Info: Displays the current frmware version and the FCC ID and IC ID.
-
Page 44: Playback Mode
05:20:43 Model: DRV-A610W Firmware: V1.0_ABCDEF_A FCC ID: IOMDRVA6510W 282C-DRVA6510W Check updates: www.kenwood.com/cs/ce/ 11:17:01 04/25/2024 System Info System Info This device complies with part and (2) this device must accept 15 of the FCC Rules.Operation any interference received, is subject to the following two... -
Page 45: Video Files
VIDEO FILES Video Video 2 02 4 /04 / 2 5 11 :1 7: 0 1 Play 20240425_111701_F Protect 20240425_111801_F Delete 20240425_111901_F 20240425_111901_F Use the UP and DOWN buttons to select the video fle and press the OK button to select play this video. - Page 46 KENWOOD Stamp: Logo, can be turned on / off in VIDEO MENU. Time & Date Stamp: Date, Time, can be turned on / off in VIDEO MENU. Information Stamp: Accelerator Data, Speed, Latitude & Longitude, can be turned on / off in VIDEO MENU.
-
Page 47: Photo Files
PHOTO FILES Photo Photo 2 0 24 /04 / 2 5 11: 17 : 01 Play 20240425_111701_F Protect Delete 20240425_111801_F 20240425_111901_F 20240425_111901_F Use the UP and DOWN buttons to select the photo fle and press the OK button to select play this photo. Photo 11:17:01 04/25/2024... -
Page 48: Delete File
DELETE FILE Use the UP and DOWN buttons to select the video fle and press the OK button to select delete this video. Note: PROTECTED FILES CANNOT BE DELETED. You will have the following options: Video Play Protect Delete 20240425_111901_F Once selected, follow the on screen instructions to delete the current fle. - Page 49 PROTECT / UNPROTECT FILE Use the UP and DOWN buttons to select the video fle and press the OK button to select protect / unprotect this video. You will have the following options: Video Protected Video Play Play Protect Unprotect Delete Delete this Video 20240425_111901_F...
-
Page 50: Using The Desktop Software
Using the Desktop Software “KENWOOD VIDEO PLAYER” is a desktop software for displaying video recorded with the device. System Requirements for “KENWOOD VIDEO PLAYER” OS: Microsoft Windows 11, Windows 10* *Microsoft Visual C++ must be installed. *DirectX XAudio2 must be installed. - Page 51 1. Video time line : 12. Chart of G-sensor data : Drag the Video time line bar to Rewind or Display the G-data of the vehicle in the Forward to cue Video, Speed and G-Sensor video when it was recorded. date.
- Page 52 How to Edit the Video: KENWOOD VIDEO PLAYER Edit Mode Cancel 00:27 01:00 Remove Group Ungroup Cut Time : 00:07 ~ 00:37 File Date Size Duration Resolution 171129_191823_016 11/29/2017 96MB 01:00 1920*1080 Time Compass Compass 2018 / 08 / 14 , -19 : 33 : 03 -263.1...
-
Page 53: Image Processing
Image processing: Proceed with image processing once the image export options are setup. Export status (1): The image fle export progress is presented as a percentage symbol "%" and is synced with item 3. Export status (2): The image fle export progress is presented by a frame being flled with layered colors ink and synced with item 2. -
Page 54: Share Mode
Share Mode KENWOOD VIDEO PLAYER 00:27 Click Share → Share Videos in the software system bar at the top of the window or the community sharing icon in the interface to display the sharing window. 1. To share the current video: When two fles are playing, the one with the active speaker icon will be shared. - Page 55 3. Upload title: The title item will defne the name of the video when you upload the video, you can select the Auto: “DD/MM/YYYY (default) – Dash Cam – KENWOOD VIDEO PLAYER” or defne the title by yourselves. 4. Last step: Click to go back to the last step.
- Page 56 KENWOOD VIDEO PLAYER JVC VIDEO PLAYER File Edit Setup Share Help 00:27 1. File upload failure: This page displays if an upload failed or there is a server connection timeout. 2. Last step: Click to go back to the last step.
- Page 57 KENWOOD VIDEO PLAYER 00:27 1. Connect to community platform: The message "Connecting to Social Media…… Please Wait." displays when a connection is being initiated. Your default browser will display and connect to the selected community platform. You are required to bundle your account ID with the platform for connection the frst time only (no longer needed once bundled).
- Page 58 KENWOOD VIDEO PLAYER 1. Upload status (1): The fle upload progress is presented as a percentage symbol "%" and synced with item 2. 2. Upload status (2): The fle upload progress is presented by a frame being flled with layered colors ink and synced with item 1.
- Page 59 KENWOOD VIDEO PLAYER 1. Confrm: Click to go back to play mode information.
-
Page 60: Using The Smartphone App
Connect DRV-A610W with your mobile devices by using wireless link function. 1. DOWNLOAD KENWOOD DASH CAM MANAGER KENWOOD DASH CAM MANAGER is a completely free set of video playback application. Which can be used to remote control and live stream preview in a short distance or download and review videos from DRV-A610W. - Page 61 2. OPEN KENWOOD DASH CAM MANAGER APP ON YOUR MOBILE DEVICE The frst time you open the app, two notifcations will pop up. 1. You will need to allow "KENWOOD DASH CAM MANAGER" to access photos and videos on this device "Allow all".. (Android users only) 2.
-
Page 62: Device Page
3. Please select the MKII image to enter the MKII dedicated app © 2024 JVCKENWOOD Corporation Please select your dashcam. Press PEN icon on DASHBOARD page and then press + icon to enter ADD DEVICE page. Dashboard All Dash Cams (7) All Dash Cams (0) Default (0) Dashboard... - Page 63 The phone will start scanning for nearby devices. If any are found, they will be displayed in the list below. Next, please select the device you want to add and press the ADD button. Note: Please ensure that your dash cam is currently powered on and not in Menu or Playback mode.
- Page 64 4. READY TO GO Congratulations on successfully adding and pairing the device. Please press the Complete COMPLETE button to return to the DASHBOARD page. Add Device Pairing completed! You can now connect to the dashcam via Wireless Link. Complete...
- Page 65 After returning to the DASHBOARD page, you can see the device you just added has appeared. A green light indicates the device is within connection range. After clicking on the device, a window for entering the App Pairing PIN will pop up. If you use the default PIN on the device, the App has already entered the default PIN for you: 671514.
- Page 66 Wireless Link 00:22 Device Disconnect Device Connected SSID: DRV-A610W ba7 SSID: DRV-A610W ba7 Please open the KENWOOD Please open the KENWOOD DASHCAM MANAGER App and DASHCAM MANAGER App and select the SSID that matches select the SSID that matches your dash cam.
-
Page 67: Group Setup
MANAGE CONNECTED DEVICES (DASHBOARD PAGE) ADD / DELETE / RENAME / REGROUP connected devices on your mobile device. Press the connected device you just added on the DASHBOARD page. You will see a ● green light next to the device meaning the device is connecting to your mobile device correctly and then you will enter the DASH CAM page. - Page 68 After you enter DASH CAM page, you can fnd there will be three pages (DASH CAM / MENU / PLAYBACK) in the bottom navigation bar. You can always press it to switch the page. If you want to go back to DASHBOARD page, just simply press BACK TO PREVIOUS PAGE button.
-
Page 69: Menu Settings
ACCESS VIDEO AND SETUP MENU (MENU PAGE) ADJUST SETTINGS on your mobile device. These settings will be synced with the dash cam. Back to Dashboard page DRV-A610W ba7 Setup menu Video menu VIDEO SETUP EXPOSURE Front Camera Menu settings Rear Camera PARKING MODE SENSOR Vibration Detection Motion Detection... - Page 70 PLAYBACK AND DOWNLOAD FILES (PLAYBACK PAGE) PLAYBACK (PROTECT / UNPROTECT / DELETE) or DOWNLOAD the videos from the connected DRV-A610W on your mobile device. Back to Dashboard page DRV-A610W ba7 Playback photo fles Playback video fles VIDEO PHOTO The date you have 04/25/2024 video fles 01:00...
- Page 71 Back to previous page DRV-A610W ba7 Play / Stop the selected video Full screen Timeline of the selected video 00: 00 01: 00 04/25/2024 11: 00 Download fles 11: 17 11: 17 11: 18 The video you select Delete fles (Highlight) 11: 18 11: 19...
- Page 72 Back to previous page File name 20240425_111701_F Play / Stop the selected video Timeline of the Full screen selected video 00: 00 01: 00 Edit the selected fle Speed Speed : 56 MPH Share fles Google Maps tracking logs Share fles to phone's Photos(iOS) (Note : After downloading your video, please disconnect the device and...
- Page 73 How to edit the video: 1. Enter the Downloads page. 2. Click on the fle you want to edit. Dashboard Downloads All Dash Cams (7) All Dash Cams (1) VIDEO PHOTO Default 04/25/2024 11: 00 DRV-A610W ba7 Ready to Connect 11: 17 11: 17 Dashboard...
- Page 74 5. Click on the Edit icon. 6. Drag the time sliders on both sides to determine the range of the clip. 20240425_111701_F Downloads 00: 00 01: 00 00: 00 01: 00 20240426_111501_E Speed : 56 MPH 00: 31 00: 00 01: 00 04/25/2024 11: 00 11: 17...
- Page 75 If you are using an Android system, the video will automatically be saved in your Photos App. If you are using an iOS system, please transfer it to your Photos App by clicking on the Pen icon / Share to Phone's Photos icon.
-
Page 76: Connection With Computer
Connection with Computer When you use the third-party USB cable (Only support USB-A to USB-C) to connect DRV-A610W to your computer, the LCD screen will show two available options. USB Storage Dash Cam Use the UP and DOWN buttons to select the necessary function, and press the OK button to continue. -
Page 77: Firmware Update Instruction
Firmware Update Instruction Team KENWOOD will keep update the frmware to improve the better user experience for our valued customers. Once you register your product on KENWOOD website, we will send you information about our new frmware update. Or you can visit the link below once for a while to check if there is any new frmware update: https://www.kenwood.com/cs/ce/frmware/option/... - Page 78 2. Go to the ABOUT page, and you'll see the "Firmware Update" option showing "Update the latest frmware" accompanied by a yellow dot. Click on it and select the device you wish to update. About About APP SETTING APP SETTING Language English Language...
- Page 79 4. At this point, the phone will transmit the downloaded frmware to the device using the wireless link function. Firmware Update Firmware Update Downloading… Downloading… 100% Please wait Please press the "Next" button below for the next step. The firmware will be transmitted to the device through the Wireless Link function.
- Page 80 SETUP MENU and select the System Info and select Firmware Version to check if the Version is the latest one [V1.0_ABCDEF_A] as shown on website, then it is successfully updated. System Info Model: DRV-A610W Firmware: V1.0_ABCDEF_A FCCID: IOMDRVA6510W 282C-DRVA6510W Check updates: www.kenwood.com/cs/ce...
- Page 81 (B) Download the latest frmware from the internet and updating the device using a memory card with your PC 1. Make sure your SD card is formatted and copy the KWDFAZFW.BIN into the root directory of the SD card. Notice: Make sure the fle name is KWDFAZFW.BIN If you see KWDFAZFW.BIN(1) or so on, please rename the fle name to KWDFAZFW.BIN 2.
- Page 82 SETUP MENU and select the System Info and select Firmware Version to check if the Version is the latest one [V1.0_ABCDEF_A] as shown on website, then it is successfully updated. System Info Model: DRV-A610W Firmware: V1.0_ABCDEF_A FCCID: IOMDRVA6510W 282C-DRVA6510W Check updates: www.kenwood.com/cs/ce...
-
Page 83: Troubleshooting
DRV-A610W video fles can video player installed. Please refer to page 42. Download not be played Link: https://www.kenwood.com/cs/ce/ The memory card that we recommends for best quality is the UHS type 3 Video fles jump when they Max Endurance Micro SD Card. - Page 84 When I download fles from If this message appears, simply adjust your browser settings and allow for the KENWOOD website a the download to proceed. Once complete, reset your browser security to malicious software message protect your PC.
-
Page 85: Appendix
If you continue to have problems with your device, please reset your device to default settings in the setup menu and begin the process over again. If Unresolved Issues these problems remain, Please contact your store of purchase or a service center. -
Page 86: Specifcations
Specifcations Product Name / Model Number Dash Cam / DRV-A610W 5V / 1.5A ; 12-24V DC Power Requirements Input: 12-24V DC Power Supply Output: 5V DC (Car power cable) Fuse Type: SMD/4A Power Input(Car power cable) Built-in super capacitor Front Sensor Resolution 8M Pixel Rear Sensor Resolution 5M Pixel... - Page 87 DO NOT USE the other USB ports in the car Please to connect the KENWOOD dash cam, as most car USB ports deliver less than 1A output, while the KENWOOD dash cam requires a 2A current for normal operation. •...
- Page 89 Record the serial number, found on the back of the unit in the spaces designated on the warranty card, and in the space provided below. Refer to the model and serial numbers whenever you can upon your KENWOOD dealer for information or service on the product. Model KCA-R210...
- Page 91 Contents Before Use…………………………………………………………………………………... 01 Precautions for Use……………………………………………………………………..01 Accessories ………………………………………………………………………………….. 03 Parts Name ………………………………………………………………………………….. 03 Installation and Connection ……………………………………………………………... 04 Specifcations ……………………………………………………………………………….. 10 English...
-
Page 92: Before Use
Before Use • The screen images and operation examples in this document were created for explaining the operating procedures. • There may be screen images that differ from the actual screens or examples of operations not actually performed. Disclaimer • Please note that JVCKENWOOD shall not be responsible for any damages suffered by the customer or a third party as a result of incorrectly using this product, a failure during use of this product, or other trouble, or due to the use of this product, unless such liability is acknowledged by law. - Page 93 Precautions for installation • Install the device in a position where it will not block the view of the driver. • Install the device within the wiping range if equipped the wiper. • Take care not to install the device over the vehicle inspection sticker or other sticker. •...
-
Page 94: Adhesive Mount
Accessories Before you get started, check you have everything below. 2.5m Rear Camera 5.5m USB-C Cable Adhesive Pads and Double-joint Bracket screws * Product apperance may differ slightly from that shown above. Parts Name Rear Camera 1.Rear camera. 2.Rear camera cable connector. 3.Adhesive mount. - Page 95 Installation and Connection For the frst installation, follow the instructions below: Recommended installation position • Install the device in a position where it will not block the view of the driver. • Install the device within the wiping range if equipped the wiper. Caution When passing the power cord through the front pillar or another part, observe the points below when performing the wiring work.
- Page 96 Note: It is recommended to place the rear windshield camera within the windshield wiping area at the top of the rear windshield to record as clear an image as possible. Make sure the heating grid lines do not obstruct the view. The additional special double-joint bracket allows you to install the rear camera on a vertical surface, supporting various angles of installation and compatibility with various car models.
- Page 97 2. CONNECT THE REAR CAMERA CABLE Use the CAM IN port on the side of the front dash cam and plug in the rear camera cable. 3. ROUTE THE REAR CAMERA CABLE Route the rear camera cable through the vehicle to the rear windshield and tuck the cable away.
- Page 98 Note: For hatch back trunk opening, leave about 3-5 inches of extra cable at the vehicle’s end to ensure adequate cable connections, and comfortably open the trunk without moving the rear camera. Check all airbags locations on the vehicle owner’s manual. DO NOT route cable over the airbags to avoid potential interference with airbag deployment and posing a problem with proper airbag operation.
- Page 99 4. CONNECT THE REAR CAMERA CABLE TO THE REAR CAMERA When all the cable is in place, connect the rear camera cable to the rear camera, line up cable pins to secure the cable connection. Check the front dash cam to ensure the rear camera is working correctly.
- Page 100 Note: You can also connect the dash cam to your mobile device and download KENWOOD DASH CAM MANAGER on App Store / Google Play. Use its Live View function to adjust the rear camera. If you still fnd it too much trouble or don't want to do it yourself. It is recommended to fnd your local reliable Auto Dealer Service Department, Car stereo Installer, and Auto Mechanic shop to ask about dash cam installation.
-
Page 101: Operating Voltage
Specifcations Image Sensor 5M Pixel Frame Rate 30fps 2560 x 1440 (3.7M) Recording Resolution H.264 (MP4) Recording Format F=2.0 Fixed Focus Lens Lens Field of View Diagonal :123.6° Operating Voltage DC5.0V Current Consumption 400mA Operating Temperature -10°C to 60°C 2” x 1-1/16” x 1-1/4” Dimensions 50mm x 27mm x 32mm 10.6oz / 300g... - Page 102 Information on Disposal of Old Electrical and Electronic Equipment (applicable for countries that have adopted separate waste collection systems) Products with the symbol (crossed-out wheeled bin) cannot be disposed of as household waste. Old electrical and electronic equipment should be recycled at a facility capable of handling these items and their waste by products.
- Page 103 Declaração de Conformidade relativa á Diretiva EMC Direktif 2014/30/EU ile ilgili Uyum Beyanı EMC 2014/30/EU RoHS Direktif 2011/65/EU için Uyum Beyanı Declaração de conformidade relativa á Diretiva Üretici: RoHS 2011/65/EU JVCKENWOOD Corporation Fabricante: 3-12, Moriyacho, Kanagawa-ku, Yokohama-shi, JVCKENWOOD Corporation Kanagawa 221-0022, JAPONYA 3-12, Moriyacho, Kanagawa-ku, Yokohama-shi, AB Temsilcisi: Kanagawa 221-0022, JAPÃO...
- Page 104 FCC CAUTION Changes or modifcations not expressly approved by the party responsible for compliance could void the user’s authority to operate the equipment. Supplier’s Declaration of Conformity Trade Name: KENWOOD Products: Rear Camera Model Name: KCA-R210 Responsible Party: JVCKENWOOD USA CORPORATION 4001 Worsham Avenue, Long Beach, CA 90808, U.S.A.
Need help?
Do you have a question about the DRV-A610WDP and is the answer not in the manual?
Questions and answers
Can you change the recording time from 1 minute videos to longer for the DRV A610