Table of Contents
Advertisement
• Updated information (the latest Instruction Manual, etc.) is available from
<https://www.kenwood.com/cs/ce/>.
For your records
Record the serial number, found on the back of the unit in the spaces designated on the
warranty card, and in the space provided below. Refer to the model and serial numbers
whenever you can upon your KENWOOD dealer for information or service on the product.
Model DRV-A601W
Serial Number______________
US Residents Only
Register your KENWOOD product at www.kenwood.com/usa
© 2019 JVCKENWOOD Corporation
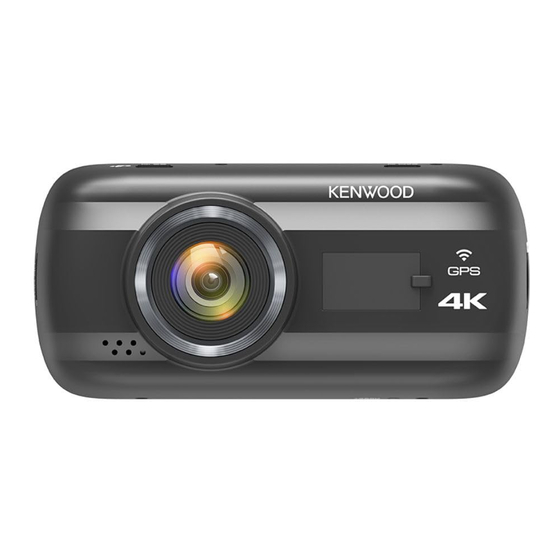
DRV-A601W
GPS Integrated Dashboard Camera
INSTRUCTION MANUAL
Register Online
601-V2.3.C.A-EN
Advertisement
Table of Contents

Related Manuals for Kenwood DRV-A601WDP


Summary of Contents for Kenwood DRV-A601WDP
- Page 1 Record the serial number, found on the back of the unit in the spaces designated on the warranty card, and in the space provided below. Refer to the model and serial numbers whenever you can upon your KENWOOD dealer for information or service on the product. Model DRV-A601W...
-
Page 3: Table Of Contents
Contents Before Use ......................... Dashboard Camera Function Guide ................. Precautions for Use ....................Accessories ......................... Key Features ......................Parts Name and Functions ..................Installation and Connection ..................Initial Settings ......................Basic Operation ......................Settings ........................Connection with Computer ..................Using the Desktop Software ..................Using the Smartphone App .................. -
Page 4: Before Use
Before Use The screen images and operation examples in this document were created for explaining the • operating procedures. There may be screen images that differ from the actual screens or examples of operations not • actually performed. Disclaimer Please note that JVCKENWOOD shall not be responsible for any damages suffered by the •... -
Page 5: Precautions For Use
Precautions for Use Precautions and notices Warning! Do not operate the device while driving. Using this product does not change the requirement for a driver to take full responsibility for his or her behavior. This responsibility includes observing all traffic rules and regulations in order to avoid accidents, personal injury or property damage. - Page 6 Precautions for installation • Install the device in a position where it will not block the front view of the driver (position where hidden by the rear-view mirror). • Install the device so that it is within the wiping range of the wiper. •...
- Page 7 Information on Disposal of Old Electrical and Electronic Equipment and Batteries (applicable for countries that have adopted separate waste collection systems) Products and batteries with the symbol (crossed-out wheeled bin) cannot be disposed of as household waste. Old electrical and electronic equipment and batteries should be recycled at a facility capable of handling these items and their waste by products.
- Page 8 Declaração de Conformidade relativa à Diretiva RE Direktifi 2014/53/EU ile ilgili Uyum Beyanı RE 2014/53/UE RoHS Direktifi 2011/65/EU için Uyum Beyanı Declaração de conformidade relativa à Diretiva Üretici: RoHS 2011/65/UE JVCKENWOOD Corporation Fabricante: 3-12, Moriyacho, Kanagawa-ku, Yokohama-shi, JVCKENWOOD Corporation Kanagawa 221-0022, JAPONYA 3-12, Moriyacho, Kanagawa-ku, Yokohama-shi, AB Temsilcisi: Kanagawa 221-0022, JAPÃO...
- Page 9 Èeský Společnost JVCKENWOOD tímto prohlašuje, že rádiové zařízení DRV-A601W splňuje podmínky směrnice 2014/53/EU. Plný text EU prohlášení o shodě je dostupný na následující internetové adrese: Magyar JVCKENWOOD ezennel kijelenti, hogy a DRV-A601W rádióberendezés megfelel a 2014/53/EU irányelvnek. Az EU konformitási nyilatkozat teljes szövege az alábbi weboldalon érhető el: Hrvatski JVCKENWOOD ovim izjavljuje da je radio oprema DRV-A601W u skladu s Direktivom 2014/53/EU.
- Page 10 Срок службы (годности), кроме срока хранения дополнительных косметических материалов, упомянутых в предыдущих двух пунктах, не затрагивает никаких других прав потребителя, в частности, гарантийного свидетельства KENWOOD, которое он может получить в соответствии с законом о правах потребителя или других законов, связанных с ним.
- Page 11 Информация о продукции Производитель : ДжейВиСи Кенвуд Корпорейшн 3-12, Морийячо, Канагава-ку, Йокохама-ши, Канагава 221-0022, Япония Видеорегистратор Модели: DRV-A601W ЕАЭС N RU Д-JP.РА01.В.30172/20 Документ о соответствии: RU Д-JP.РА01.В.09118/20 31.03.2020 Дата выдачи: 22.01.2020 30.03.2025 Действителен до: 21.01.2025 TP EAEC 037/2016 Соответствует требованиям TP TC 020/2011 «Об...
- Page 12 (RF) CNR-102 de l’IC. Cet équipement doit être installé et utilisé en gardant une distance de 20 cm ou plus entre le radiateur et le corps humain. Supplier’s Declaration of Conformity Trade Name: KENWOOD Products: Dashboard Camera Model Name:...
-
Page 13: Accessories
Accessories Before you get started, check you have everything below. Dashboard Camera Suction mount Cigar Lighter USB Cable Adhesive Mount Cable Clips PL Fliter (with 64GB microSD card) Adapter Cable * Product appearance may differ slightly to that shown above. Key Features - 3”... -
Page 14: Parts Name And Functions
Parts Name and Functions Power Button Press and hold the button for 3 seconds to turn the device on/off. Up/Mute Button Navigate up within menus or go to the previous file in playback mode. Mute Turn on or off the audio recording function while in video mode. Down/Screen Off Button Down Navigate down within menus or go to the next file in playback mode. - Page 15 Record/OK Button Record In Video mode, press to start or stop recording. In Photo mode, press to take a photo. The confirm button used to select options in menus. Mode/Screen Shot Button Mode This button allows you to navigate between video, photo and playback modes. Screen Shot While you are recording in video mode, press the button and you will be able to take a screenshot of the current frame.
- Page 16 microSD Card Slot Insert your microSD card here. Push your memory card into the slot until you hear a click. (microSD card is inserted into microSD Card Slot at the factory shipment condition) Insert Your microSD Card Into The Device The device is designed to allow a standard microSD card to record your footage.
-
Page 17: Installation And Connection
CAM-IN The device can be connected with the rear camera KCA-R200.(optional accessory) DC-IN/Data transfer Port By connecting the device with the supplied cigar lighter adapter cable you are able to charge the device. This will also be utilized to let you connect the USB cord to your computer. - Page 18 1. CONNECT THE DEVICE TO THE POLARIZER FILTER 1.1. Installing Circular Polarizer Filter Align the threaded side of the polarizer filter with device and turn it clockwise to make sure the rotation is smooth along the threaded metal area. 1.2. Adjusting Circular Polarizer Filter Rotate the polarizer filter outer metal ring clockwise and align arrow mark on the polarizer lens with the arrow mark on the device.
- Page 19 CONNECT THE DEVICE TO THE MAGNETIC MOUNT Attach the device onto (e) the magnetic connector on the mount. Make sure you align the device within the connector port for proper installation. REPLACE THE SUCTION MOUNT WITH THE ADHESIVE MOUNT: Suction Mount Adhesive Mount (a) Suction release tab (b) Locking lever...
- Page 20 How to use the Adhesive Mount: Loosen the (c) locking ring on the suction mount and pull the (e) magnetic connector out. Next, loosen the (c) locking ring from the adhesive mount, and plug the (e) magnetic connector into the adhesive mount. iii.
- Page 21 ADJUST THE ANGLE Loosen the (c) locking ring and adjust the device to the angle you want. When you find the perfect angle, remember to tighten the (c) locking ring again. CONNECTING TO CIGAR LIGHTER SOCKET Connect the cigar lighter adapter cable that is in the package to your vehicle’s 12 V outlet.
- Page 22 Connect the Rear Cam KCA-R200 (optional accessory) 1. Connect the Rear Cam Insert CAM-IN connector into the CAM-IN port on compatible dashboard camera. CAM-IN connector of rear camera 2. Select installation position Start the engine to power up the rear cam, then turn on Wireless Link mode to connect with mobile device.
-
Page 23: Initial Settings
Initial Settings THE FIRST-TIME SETUP When connecting the power, the device will turn on and display the first-time setup guide below. - Select the Language Language Language English Deutsch Français Nederlands Press OK to continue. - Select the Country and Time Zone Select Time Zone Select Country United States (EST) - Page 24 - Select the Speed Unit Select Speed Units Press OK to continue. - Set Wireless Link Password Set Wireless Link Password 1 2 3 4 5 6 7 8 Press OK to continue. TIP: You can reset the settings either by operating inside of the SETUP MENU, or by restoring defaults.
-
Page 25: Basic Operation
Basic Operation -Video Mode The following information will help you better understand the icons in VIDEO MODE and their relative functions. Some icons show up only when corresponding functions are activated. 00:59 00:59 11:17:01 02/13/2019 11:17:01 02/13/2019 Mode: Indicates the device is in video mode. Resolution: Displays the current resolution. - Page 26 Basic Operation -Video Menu Access the VIDEO MENU by pressing the MENU button while in VIDEO MODE. Resolution Video Length Exposure Parking Mode Sensor Enter Back MENU Use the UP and DOWN buttons to select setting options and press the OK button to enter the sub-menu.
- Page 27 Note: When Parking Mode is activated, after 2 minutes of recording, LCD Display will automatically turn off. (Parking mode LCD display time setting: N/A) KENWOOD Stamp: Turn the KENWOOD logo stamp ON or OFF on the recorded files. • OPTIONS: On (default)/Off Time &...
- Page 28 Basic Operation -Photo Mode While in VIDEO MODE, press the MODE button to enter PHOTO MODE. In PHOTO MODE, you are able to take stationary photos. The following instructions will explain the icons in PHOTO MODE. Some icons show up only when corresponding functions are activated. 11:17:01 02/13/2019 Mode: Indicates when the device is in photo mode.
- Page 29 Basic Operation -Photo Menu Access the PHOTO MENU by pressing the MENU button while in PHOTO MODE. Exposure Time & Date Stamp Enter Back MENU Use the UP and DOWN buttons to select setting options and press the OK button to enter the sub-menu.
- Page 30 Basic Operation -Playback Mode While in PHOTO MODE, press the MODE button to enter PLAYBACK MODE In PLAYBACK MODE, you are able to review the videos and photos you have stored. DIRECTORIES Press the UP or DOWN buttons to navigate through the menu. Protected: The directory for all protected videos.
- Page 31 Latitude & Data Longitude KENWOOD Stamp: Logo, can be turned on/off in VIDEO MENU Time & Date Stamp: Date, Time, can be turned on/off in VIDEO MENU Information Stamp: Accelerator Data, Speed, Latitude & Longitude, can be turned on/off in VIDEO MENU...
- Page 32 OK: PLAY/PAUSE. DELETE or PROTECT the video. MENU: UP: REWIND. DOWN: FAST FORWARD. MODE: STOP playing video and go back to Video/Protected directory. Charging Indicator: Indicates if the device is charging or not. Protected File: Indicates the selected file is protected. PHOTO FILES 80/80 20190213_111701_F...
- Page 33 Mode: Indicates when the device is in PLAYBACK MODE. File Type: Indicates the file type is photo. Date & Time: Indicates the date and time of the recorded file. Playback Controls: Use the device buttons as instructed below. UP: Previous file DOWN: Next file Charging Indicator: Indicates if the device is charging or not.
- Page 34 PROTECTING/UNPROTECTING FILES Highlight the PROTECT/UNPROTECT option and press the OK button. Protect/Unprotect Delete Enter Back MENU Menu Back Play MENU MODE Enter MENU Back You will have the following options: Protect File Protect File Unprotect File Unprotect File Protect All Files Protect All Files Unprotect All Files Unprotect All Files...
-
Page 35: Settings
Settings Access the SETUP MENU by pressing the MENU button twice. Wireless Link Format SD Card Device Sounds Time & Date Enter Back MENU Use the UP and DOWN buttons to select setting options and press the OK button to enter the sub-menu. - Page 36 NOTE: Make sure the Dash Cam is not recording. Press and Hold the File Protect button and the Menu button for 3 seconds on the device to enter the System Info. System Info 03:22:43 Model: DRV-A601W Firmware: V3.3_AIZGAA_D Check updates: www.kenwood.com/cs/ce FCC ID: IOMDRVA601W 282C-DRVA601W Next Back 11:17:01 02/13/2019 MENU System Info...
-
Page 37: Connection With Computer
Connection with Computer When you use the provided USB cable to connect the device to your computer, the LCD screen will show two available options. • USB Storage • Dash Cam Use the UP and DOWN buttons to select the necessary function, and press the OK button to continue. -
Page 38: Using The Desktop Software
Using the Desktop Software “KENWOOD VIDEO PLAYER” is a desktop software for displaying video recorded with the device. System Requirements for “KENWOOD VIDEO PLAYER” OS: Microsoft Windows 10, Windows 8.1, Windows 7* (except for the Windows 10 Mobile, Windows RT) *Windows 7 Service Pack 1 must be installed. - Page 39 Video time line : Chart of G-sensor data : Drag the Video time line bar to Rewind or Display the G-data of the vehicle in the video Forward to cue Video, Speed and G-Sensor date. when it was recorded. Video play control buttons : Video shot on : Available options from left to right are stop, last Display date and time of the video when it...
- Page 40 How to Edit the Video: KENWOOD VIDEO PLAYER JVC VIDEO PLAYER File Edit Setup Share Help Edit Mode Cancel 00:27 01:00 Remove Group Ungroup Cut Time : 00:07 ~ 00:37 File Date Size Duration Resolution 171129_191823_016 11/29/2017 96MB 01:00 1920*1080...
- Page 41 Image processing: Proceed with image processing once the image export options are setup. Export status (1): The image file export progress is presented as a percentage symbol "%" and is synced with item 3. Export status (2): The image file export progress is presented by a frame being filled with layered colors ink and synced with item 2.
- Page 42 -Share Mode KENWOOD VIDEO PLAYER 00:27 Click Share → Share Videos in the software system bar at the top of the window or the community sharing icon in the interface to display the sharing window. To share the current video: When two files are playing, the one with the active speaker icon will be shared.
- Page 43 You can select the privacy mode of Public, Private, and Unlisted when you upload the video. Upload title: The title item will define the name of the video when you upload the video, you can select the Auto: “DD/MM/YYYY (default) – Dash Cam – KENWOOD VIDEO PLAYER” or define the title by yourselves. Last step: Click to go back to the last step.
- Page 44 KENWOOD VIDEO PLAYER JVC VIDEO PLAYER File Edit Setup Share Help 00:27 File upload failure: This page displays if an upload failed or there is a server connection timeout. Last step: Click to go back to the last step.
- Page 45 KENWOOD VIDEO PLAYER 00:27 Connect to community platform: The message "Connecting to Social Media…… Please Wait." displays when a connection is being initiated. Your default browser will display and connect to the selected community platform. You are required to bundle your account ID with the platform for connection the first time only (no longer needed once bundled).
- Page 46 KENWOOD VIDEO PLAYER Upload status (1): The file upload progress is presented as a percentage symbol "%" and synced with item 2. Upload status (2): The file upload progress is presented by a frame being filled with layered colors ink and synced with item 1.
- Page 47 KENWOOD VIDEO PLAYER Confirm: Click to go back to play mode information.
-
Page 48: Using The Smartphone App
Using the Smartphone App “KENWOOD DASH CAM MANAGER” is a smartphone app for displaying video recorded with the device. System Requirements for “KENWOOD DASH CAM MANAGER” OS: Android 5.0.2 or later OS: iOS 9.0 or later Android is a trademark of Google Inc. in the U.S. and other countries. - Page 49 Long press the Wireless Link button on the device and enter the connecting mode. Open the KENWOOD DASH CAM MANAGER of the smartphone app. Press the Connect button and select from the network list to pair the dashboard camera device.
- Page 50 -Preview Click the preview display to enter the video mode, and click the video/photo icon to switch between these two modes. By clicking the red dot to start/stop recording and the white dot to take photos. Back Button Back to main screen. Dashboard Camera Image Preview Displays the streaming of the dashboard camera.
- Page 51 -Files on Dash Cam Click Files on Dash Cam to enter the Video Playback mode to review,protect/unprotect, and delete the files saved in the SD card. In addition, you can also download the important files to your mobile device. Back Button Back to main screen.
- Page 52 -Files on Mobile Click Files on Mobile to enter the Local Video Playback mode to review the downloaded videos with Google Maps, and also view the user’s route, speed, G-sensor and distance data. You can also shorten the video by using the edit function and share it to the other social media apps installed in your mobile device.
- Page 53 -How to Edit the Video: 1. Files on Mobile Device. 2. Press the Edit Mode button. 3. Select the video. 02:05 4. Press the Edit button and 5. Select the area of video. 6. Press the Check button to then press the Cut button. output the video.
- Page 54 -How to Share the Video: 1. Files on Mobile. 2. Press the Edit Mode button. 3. Select the video. 02:05 4. Press the Share button 5. Select the social media apps installed in your smartphone. and press the Check button. Android...
- Page 55 -Menu Click Menu to enter the Video/Photo/General menu and adjust settings. Switch between these three menu by clicking the icons at the bottom. -About Click About icon to view the software version and the app’s information.
-
Page 56: Troubleshooting
Troubleshooting Blurred Image (Video) The device comes with a protective lens cover for the camera lens, be sure to remove it. Wipe the lens with a soft cloth until any debris/stains are removed. Clean your vehicles windshield where the camera is placed. Unable to insert SD card Make sure the metal portion of the memory card faces the screen side. - Page 57 Auto power off function will turn off the device The device shuts down on its automatically after it loses its power supply. Make sure the device is connected properly to the car power cable. The device does not charge in If your cigar lighter adapter cable is not working properly with your device, check your car’s power fuses.
-
Page 58: Appendix
MENU feature will be accessible. When I download files from If this message appears, simply adjust your browser settings the KENWOOD website a and allow for the download to proceed. Once complete, malicious software message reset your browser security to protect your computer. - Page 59 On Wireless Link Security The Wireless Link communicating with radio wave, there is a benefit that you are able to access Link freely as far as the radio wave reaches. On the other hand, without security setting there may be a risk of hacking or abuseful invasion by a malignant third party. We recommend that you use Wireless Link after setting security of the devices connected.
- Page 60 Important Notice Concerning the Software About Open Source Software included in the Desktop Software The KENWOOD VIDEO PLAYER includes certain open source or other software originating from third parties that is subject to the GNU Lesser General Public License version 2.1 (LGPLv2.1) and different copyright licensees, disclaimers and notices.
-
Page 61: Specifications
Specifications Model Number / Name DRV-A601W / GPS Integrated Dashboard Camera Power Requirements 5V / 2A; 12-24V DC Input: 12-24V DC Power Supply Output: 5V DC (Car power cable) Fuse Type: 32mm/2A Current Consumption 650mA Sensor Resolution 8.48M Pixels Lens 8G / 130°...
Need help?
Do you have a question about the DRV-A601WDP and is the answer not in the manual?
Questions and answers