Table of Contents
Advertisement
For your records
Record the serial number, found on the back of the unit, in the spaces designated on the
warranty card, and in the space provided below. Refer to the model and serial numbers
whenever you call upon your Kenwood dealer for information or service on the product.
Model DRV-410
Serial number
US Residents Only
Register your Kenwood product at www.Kenwoodusa.com
© 2016 JVC KENWOOD Corporation
DRV-410
GPS Integrated Dashboard Camera
INSTRUCTION MANUAL
Camera de tableau de bord avec GPS integre
MODE D'EMPLOI
Camara de salpicadero con GPS integrado
MANUAL DE INSTRUCCIONES
Register Online
B5A-0959-02 b (K)
Advertisement
Table of Contents

Related Manuals for Kenwood DRV-410


Summary of Contents for Kenwood DRV-410
- Page 1 Record the serial number, found on the back of the unit, in the spaces designated on the warranty card, and in the space provided below. Refer to the model and serial numbers whenever you call upon your Kenwood dealer for information or service on the product. Model DRV-410...
-
Page 3: Table Of Contents
Disclaimer Please note that JVC KENWOOD shall not be responsible for any damages suffered by the customer or a third party as a result of incorrectly using this product, a failure during use of this product, or other trouble, or due to the use of this product, unless such liability is acknowledged by law. -
Page 4: Precautions And Notices
Precautions and notices Warning! Do not operate the device while driving. Using this product does not change the requirement for a driver to take full responsibility for his or her behavior. This responsibility includes observing all traffic rules and regulations in order to avoid accidents, personal injury or property damage. -
Page 5: Caring For Your Device
Caring for your device Taking good care of your device will ensure trouble-free operation and reduce the risk of damage. Keep your device away from excessive moisture and extreme temperatures. Avoid exposing your device to direct sunlight or strong ultraviolet light for extended periods of time. - Page 6 FCC WARNING This equipment may generate or use radio frequency energy. Changes or modifications to this equipment may cause harmful interference unless the modifications are expressly approved in the instruction manual. The user could lose the authority to operate this equipment if an unauthorized change or modification is made.
-
Page 7: Precautions For Use
Install the device so that it is within the wiping which they appear to be flickering or flashing range of the wiper. may be recorded. JVC KENWOOD assumes no Install the device in a position where it will not responsibility with regard to the distinguishing interfere with the movement of the rear-view or recording of traffic lights. -
Page 8: How To Install
How to Install Installation Procedure Perform the cord wiring work. Refer to "How to Wire" and then perform the Check that the vehicle is parked on a level wiring work. ( Á P.10) surface. Adjust the installation angle of the Attach the device to the mount device and then fix the device in place. - Page 9 Recommended installation position Install the device in a position where it will not block the front view of the driver (position where hidden by the rear-view mirror). Install the device so that it is within the wiping range of the wiper. Mounting the device to the center of the windshield behind the rear-view mirror will facilitate optimal video recording.
-
Page 10: How To Wire
How to Wire Connecting the cigarette lighter plug cord (accessory) Connect the drive recorder and power cord of the cigarette lighter plug cord. When disconnecting the power cord, disconnect Cord length (4 m) it while pressing the hook of the connector. Drive recorder Connect the cigarette lighter plug to the cigarette lighter socket. -
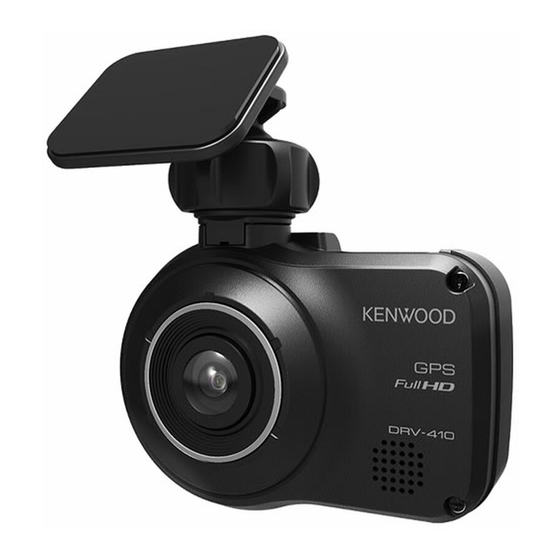
Page 11: Names And Functions Of Parts
Names and Functions of Parts Bracket attachment part button Attach the supplied mount bracket. Press this button dur ing continuous recording to take a photo. Camera lens Press this button during playback to play the Speaker next file. Outputs voice guidance, warning sounds, and Hold down this button during playback file playback audio. -
Page 12: Before Using The Driving Support Function
Before Using the Driving Support Function Adjusting the Settings to Match the Vehicle Use the [ ]/[ ] buttons to select <Detection range settings> and then Before using the driving support function, set press the [MENU/OK] button. the mounting height of the device from the road surface and adjust the horizon and bonnet front edge position settings to match the vehicle. -
Page 13: Basic Operations
Basic Operations Inserting and Removing an SD Card Formatting an SD Card Turn off the power of the device and then insert Before using an SD card, first format (initialize) it an SD card into the SD card slot until you hear with the device. - Page 14 Basic Operations Recording Modes The device has four recording modes. Turning on the power of the device starts continuous recording. The recorded video is recorded as files to the SD card. The recording files are sorted into a separate folder for each recording mode. Continuous recordings Turning on the power of the device starts continuous recording.
- Page 15 Event recording The detection of a sudden collision, unexpected collision, or other event during continuous recording starts event recording. The recording time of event recording is the 10 seconds before Á collision detection plus the time set in "Event recording time" ( P.20).
-
Page 16: Recording
Recording Recording at Any Location (Manual Taking a Photo Recording) Pressing the [ ] button on the device during continuous recording allows you to take a photo whenever you wish. Pressing the [ ] button on the device during continuous recording allows you to Press the [ ] button. -
Page 17: Playback
Playback Playing Files Use the [ ]/[ ] buttons to select the file you wish to play and then press Select a file such as a recording file or photo the [MENU/OK] button and press the and start playback. ] button. Press the [MENU/OK] button. -
Page 18: Protecting Or Deleting Files
Protecting or Deleting Files Operation with the Playback Press the [MENU/OK] button to end the procedure. Menu Protect or delete files such as event recording files or photos. You can also delete all of the files in a folder. Select a file or photo to play. Press the [MENU/OK] button, use the Continuous recording files cannot be [ ]/[ ] buttons to select an item, and... -
Page 19: Various Settings
Various Settings Operation with MENU The MENU screen of step 2 changes in the following order. Perform operations such as playback and configuring video recording settings on the MENU screen. Playback Press the [MENU/OK] button. MENU appears. Parking recording settings Use the [ ]/[ ] buttons to select an item and then press the [MENU/OK] button. - Page 20 Various Settings MENU * Factory default settings Playback Select the desired folder from the list screen and play a file. ( Á P.17) Continuous recordings Files can also be protected or deleted during playback. ( Á P.18) Manual recordings Event recordings Parking recordings Still images Parking recording settings...
- Page 21 Driving support settings Forward collision warning ON/OFF* Detects the distance between your vehicle and the vehicle in front and notifies with a warning sound to prevent a collision with the vehicle in front if a safe distance is not maintained. This operates at 30 km/h and faster. Lane departure warning ON/OFF* Detects the lane your vehicle is driving in and notifies with a warning sound...
- Page 22 Various Settings Setting the Date and Time Set the date and time Automatic automatically using the time Set the date and time of the device. received from a GPS satellite. Press the [MENU/OK] button. Manual Set the date and time manually. MENU appears.
- Page 23 Press the [MENU/OK] button to end the procedure. Update the system firmware of the device. For information regarding updates, visit the JVC KENWOOD website at http://www.kenwood.com/cs/ce/. Copy the system update file to the SD card and then insert the SD card into the SD card slot.
-
Page 24: Using The Pc Application
Using the PC Application KENWOOD DRIVE REVIEWER is a PC application Playing Files for displaying video recorded with the device. Remove the SD card from the device, The application can be downloaded from the insert it in the supplied SD card... - Page 25 File operations Video screen Perform file operations such as selecting files Displays the video of the selected file. and backing up the SD card files to your PC. Operate the playback bar to move to any location. Also, double-click the video screen SELECT Select the <JVCKENWOOD>...
- Page 26 An Internet connection is required to use Capture video at any location from the video MAP. currently playing as a still image. Start KENWOOD DRIVE REVIEWER. Start KENWOOD DRIVE REVIEWER. Select the <JVCKENWOOD> drive for Select the <JVCKENWOOD> drive for the SD card with <SELECT FOLDER...
- Page 27 Back up the SD card data to the hard disk of a PC, etc. Output a driving information file (kml/kmz) that can be used with the GoogleMaps map service Start KENWOOD DRIVE REVIEWER. or GoogleEarth map service. Select the <JVCKENWOOD> drive for Start KENWOOD DRIVE REVIEWER.
-
Page 28: Troubleshooting
Troubleshooting Find the corresponding symptom in the following table and then resolve the problem. If you are unable to find a solution, contact your dealer or a JVC KENWOOD service center. Common Symptom Cause/Solution Power does not turn on. The power of the vehicle cigarette lighter socket is not on. - Page 29 Message Cause/Solution SD card requires formatting* The SD card is not formatted in a format that can be recognized. å If necessary, refer to "Formatting an SD Card" and then format ( Á P.13) the SD card with the device. Formatting failed The SD card has malfunctioned.
- Page 30 Troubleshooting Message Cause/Solution File cannot be played A file that cannot be played was recorded for some reason. Data can no longer be read due to a failure of the SD card. å Back up any necessary data to a PC or other device, refer to "Formatting an SD Card, "...
-
Page 31: Appendix
GPS satellite signals cannot pass through the device is used correctly as described in the solid materials (except glass). GPS positioning instruction manual. Please note that JVC KENWOOD cannot be used in tunnels and buildings. Signal bears no responsibility whatsoever for any losses reception may be affected by conditions such incurred as a result. - Page 32 PARKING YYMMDDhhmmss.MOV may be lost due to the usage conditions of the (Parking YYMMDDhhmmss.MOV recordings) SD card. Please note that JVC KENWOOD cannot PICTURE compensate for any damages arising from the YYMMDDhhmmss.JPG (Still image recordings) loss of saved files. YYMMDDhhmmss.JPG...
- Page 33 For event recording, manual recording, and parking recording, old files are deleted for recording when the overwrite setting for each file type is set to "ON. " Back up required files to a PC or other device. System Requirements for KENWOOD DRIVE REVIEWER Windows 7 with Service Pack 1 (32-bit/64-bit) Windows 8.1/8.1 Pro (32-bit/64-bit)
-
Page 34: Specifications
Unit or Windows standard Window Media Player, QuickTime, etc. 1.5-inch, 110,000 pixels, full-color TFT Supports dedicated viewer software (download Image sensor from JVC KENWOOD website) 1/3-inch color CMOS Recording media Maximum recording angles of view microSDHC card Horizontal: Approx. 117 degrees, 8 to 32 GB supported (Class 6 or higher) Vertical: Approx.
Need help?
Do you have a question about the DRV-410 and is the answer not in the manual?
Questions and answers