Table of Contents
Advertisement
Quick Links
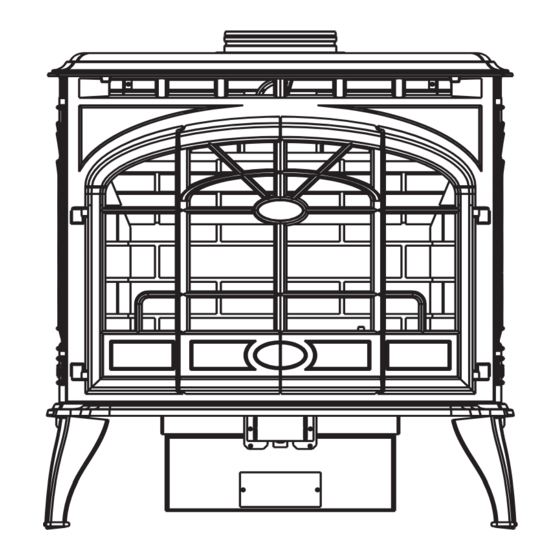
Quartet Front
• Important operating and
maintenance instructions
included.
WARNING: If the information in these
instructions is not followed exactly, a fi re
or explosion may result causing property
damage, personal injury, or death.
• Do not store or use gasoline or other fl ammable
vapors and liquids in the vicinity of this or any other
appliance.
• What to do if you smell gas
- Do not try to light any appliance.
Do not touch any electrical switch. Do not use any
phone in your building.
- Immediately call your gas supplier from a neigh-
bor's phone. Follow the gas supplier's instructions.
- If you cannot reach your gas supplier, call the fi re
department.
• Installation and service must be performed by a
qualifi ed installer, service agency, or the gas supplier.
This appliance may be installed as an OEM installation in
manufactured home (USA only) or mobile home and must be
installed in accordance with the manufacturer's instructions
and the manufactured home construction and safety standard,
Title 24 CFR, Part 3280 or Standard for Installation in Mobile
Homes, CAN/CSA Z240MH.
This appliance is only for use with the type(s) of gas indi-
cated on the rating plate.
TOPAZ
DIRECT VENT ROOM HEATER
Owner's Manual
Installation and Operation
Model:
839-1290
839-1320
839-1340
TOPAZ-D-CSB
CAUTION
DO NOT DISCARD THIS MANUAL
• Read, understand and
follow these instructions
for safe installation and
operation.
Quadra-Fire • Topaz • 7009-113 Rev. Q • 6/14
• Leave this manual with
party responsible for use
and operation.
WARNING
HOT SURFACES!
Glass and other surfaces are
hot during operation AND cool
down.
Hot glass will cause burns.
• Do not touch glass until it is
• NEVER allow children to touch glass
• Keep children away
• CAREFULLY SUPERVISE children in the same
room as appliance
• Alert children and adults to hazards of high
temperatures
High temperatures may ignite clothing or other
fl ammable materials.
• Keep clothing, furniture, draperies and other
combustibles away.
In the Commonwealth of Massachusetts:
• installation must be performed by a licensed plumber or gas
fi tter.
See Table of Contents for additional Commonwealth of Mas-
sachusetts requirements.
Installation and service of this appliance should be
performed by qualifi ed personnel. Hearth & Home
Technologies suggests NFI certifi ed or factory-trained
professionals, or technicians supervised by an NFI
certifi ed professional.
R
O-T L
Portland
Tested and
Listed by
Oregon USA
C
US
OMNI-Test Laboratories, Inc.
Solitaire Front
cooled
Advertisement
Table of Contents

Related Manuals for Quadra-Fire TOPAZ 839-1290


Summary of Contents for Quadra-Fire TOPAZ 839-1290
-
Page 1: Installation And Operation
Technologies suggests NFI certifi ed or factory-trained This appliance is only for use with the type(s) of gas indi- professionals, or technicians supervised by an NFI cated on the rating plate. certifi ed professional. Quadra-Fire • Topaz • 7009-113 Rev. Q • 6/14... - Page 2 Date of Manufacture / Date du Manufacturier Manufactured Date 2008 2009 2010 250-7141 DO NOT REMOVE THIS LABEL / NE PAS ENLEVER L’ÉTIQUETTE Made in U.S.A. / Fait Aux États-Unis Quadra-Fire • Topaz • 7009-113 Rev. Q • 6/14...
-
Page 3: Table Of Contents
C. Vent Components List ......46 A. Fuel Conversions ........23 D. Service Parts List ........48 B. Gas Pressures ........25 E. Limited Lifetime Warranty ....54 C. Gas Connection........26 F. Contact Information ......56 Quadra-Fire • Topaz • 7009-113 Rev. Q • 6/14... -
Page 4: Section 1: Listing And Code Approvals
Do NOT use this appliance if any part has been under water. Immediately call a qualifi ed service technician to inspect the unit and to replace any part of the control system and any gas control which has been under water. Quadra-Fire • Topaz • 7009-113 Rev. Q • 6/14... -
Page 5: Requirements For The Commonwealth Of Massachusetts
(1/2) inch in size, “GAS VENT DIRECTLY BELOW. KEEP CLEAR OF ALL OBSTRUCTIONS.” See Gas Connection section for additional Common- wealth of Massachusetts requirements. Quadra-Fire • Topaz • 7009-113 Rev. Q • 6/14... -
Page 6: Section 2: Getting Started
Phillips Screwdriver Framing Material Flat Blade Screwdriver Voltmeter Plumb Line Gloves Level Safety Glasses Manometer Tape Measure Non-corrosive Leak Check Solution or combustible gas detector Caulking material (300ºF minimum continuous exposure rating) Quadra-Fire • Topaz • 7009-113 Rev. Q • 6/14... -
Page 7: Selecting Appliance Location
Check with flooring • USE wood fl ooring, ceramic tile, brick hearth manufacturer for maximum temperature allowed on flooring or high pressure laminate fl ooring applied surfaces. directly over the sub-fl ooring material. Quadra-Fire • Topaz • 7009-113 Rev. Q • 6/14... -
Page 8: Vent Termination Minimum Clearances
In a staggered installation with both gas and wood or fuel oil terminations, the wood or fuel oil termination cap must be higher than the gas termination cap. Figure 4.2 Multiple Vertical Termination Quadra-Fire • Topaz • 7009-113 Rev. Q • 6/14... - Page 9 NOTE 3: Location of the vent termination must not interfere with access CAUTION: IF EXTERIOR WALLS ARE FINISHED WITH to the electrical service. VINYL SIDING, IT IS SUGGESTED THAT A VINYL PRO- TECTOR KIT BE INSTALLED. Figure 4.4 Quadra-Fire • Topaz • 7009-113 Rev. Q • 6/14...
-
Page 10: Section 5: Vent Information
Vertical terminations are measured to the top of the last May impair safe operation of this appliance or pipe before termination cap. other appliances connected to the fl ue. • Horizontal pipe installed level with 1/4 in. rise. Quadra-Fire • Topaz • 7009-113 Rev. Q • 6/14... -
Page 11: How To Use The Vent Graph
1/4 in (6mm) rise per foot. Must use Snorkel cap. For rear vent or top of 6 in. (152mm) Minimum starter pipe appliance for top vent Figure 5.2 Quadra-Fire • Topaz • 7009-113 Rev. Q • 6/14... -
Page 12: Horizontal Termination
• Maintain specifi ed slope (if required). the venting system is attached. If this is the case, you may want to adjust the location of the appliance. Improper support may allow vent to sag or separate. Quadra-Fire • Topaz • 7009-113 Rev. Q • 6/14... - Page 13 14 in. (356mm x 356mm) square around the pilot When installing in a rear vent configuration with no vertical hole in the siding. See Figure 5.7 on the next page. rise: a Snorkel Kit must be used. Figure 5.5 Quadra-Fire • Topaz • 7009-113 Rev. Q • 6/14...
- Page 14 1-1/4 in. (32mm). Secure the connection between the vent pipe and the vent termination cap by attaching the two sheet metal strips extending from the vent termination cap assembly into the outer wall of Quadra-Fire • Topaz • 7009-113 Rev. Q • 6/14...
-
Page 15: Vertical Termination
Maintain vent clearance to combustibles as speci- fi ed. • Do not pack air space with insulation or other materials. Failure to keep insulation or other materials away Figure 5.12 from vent pipe may cause fi re. Quadra-Fire • Topaz • 7009-113 Rev. Q • 6/14... - Page 16 Ensure the roofing material overlaps the top edge of the flashing as shown in Figure 5.14. Verify that the chimney is the required height above the roof. See roof pitch table, Figure 4.3, on page 8. Quadra-Fire • Topaz • 7009-113 Rev. Q • 6/14...
- Page 17 Do not fill any of the required air space with insulation. Quadra-Fire • Topaz • 7009-113 Rev. Q • 6/14...
- Page 18 Cathedral Clean out any combustible material from inside the support Ceiling box. Support Screws Figure 5.19 Quadra-Fire • Topaz • 7009-113 Rev. Q • 6/14...
- Page 19 Sheet Metal Screws Step 7. The connection between the appliance and the retro connector may be completed with sections of direct vent pipe. Figure 5.21 Quadra-Fire • Topaz • 7009-113 Rev. Q • 6/14...
- Page 20 The seal should be 6 in. (152mm) below the end of the 4 ft. (1m) Air Intake section. 4 ft. (1m) of 3 in. (76mm) Flex Liner Air Intake Section Figure 5.24 Quadra-Fire • Topaz • 7009-113 Rev. Q • 6/14...
- Page 21 (Figure 5.26). flex liner together. Connect the flex to the coupler by using four sheet metal screws for each side (Figure 5.27, on the next page). Quadra-Fire • Topaz • 7009-113 Rev. Q • 6/14...
- Page 22 Redrill larger holes on connector as needed. Be careful to ensure that the connector is centered in the opening and the mounting holes line up with the masonry wall. Quadra-Fire • Topaz • 7009-113 Rev. Q • 6/14...
-
Page 23: Section 6: Gas Information
.073 (49 DMS) .125 (1/8 in.) TOPAZ REAR VENT .063 .113 (33 DMS) Burner removal: Remove burner by fi rst remov- Figure 6.2 ing the two screws indicated and lifting the burner out. Quadra-Fire • Topaz • 7009-113 Rev. Q • 6/14... - Page 24 TH20, or slotted screwdriver, remove the three pressure reg- reinstall all the screws previously removed. ulator mounting screws (A), pressure regulator tower (B), and diaphragm (C). Reinstall logs, glass and front. Quadra-Fire • Topaz • 7009-113 Rev. Q • 6/14...
-
Page 25: Gas Pressures
Contact the manufacturer’s instructions supplied with local gas supplier if the regulator is at an improper pressure. the kit. Quadra-Fire • Topaz • 7009-113 Rev. Q • 6/14... -
Page 26: Gas Connection
• Gas build-up during line purge may ignite. • Purge should be performed by qualifi ed technician. • Ensure adequate ventilation. • Ensure there are no ignition sources such as sparks or open fl ame. Quadra-Fire • Topaz • 7009-113 Rev. Q • 6/14... -
Page 27: Section 7: Electrical Information
22 gauge 18 feet Keep wire lengths as short as possible by removing any excess wire length. Low voltage and 110 VAC voltage cannot be shared within the same wall box. Quadra-Fire • Topaz • 7009-113 Rev. Q • 6/14... - Page 28 Label all wires prior to disconnection when servicing controls. • Replace damaged wire with type 105 Wiring errors can cause improper and dangerous operation. rated wire. Verify proper operation after servicing. • Wire must have high temperature insulation. Quadra-Fire • Topaz • 7009-113 Rev. Q • 6/14...
-
Page 29: Section 8: Appliance Setup
Sharp Edges • Wear protective gloves and safety glasses during installation. Insert inner collar adapter to rear vent flue. Figure 8.5 Remove inner collar adapter Figure 8.2 Quadra-Fire • Topaz • 7009-113 Rev. Q • 6/14... -
Page 30: Leg Leveling System
Thread Allen bolts through nuts until fl ush. The Figure 8.8 Allen bolts and nuts are included in the component pack inside the appliance fi rebox. Quadra-Fire • Topaz • 7009-113 Rev. Q • 6/14... -
Page 31: Front Installation
Install rear panel by placing it behind the log pins, Figure 8.15 fl ush and centered against the back of the fi rebox. NOTE: Rear panel and top panel/baffl e are the same size. Quadra-Fire • Topaz • 7009-113 Rev. Q • 6/14... -
Page 32: Positioning The Logs
Install the remaining side panel and bend over the tabs to hold it in place. Rest top panel/baffl e on sides and slide top panel/baffl e left or right until centered. Quadra-Fire • Topaz • 7009-113 Rev. Q • 6/14... -
Page 33: Mineral Wool
Avoid stacking the embers on top of each other. NOTE: Do not block gas ports. Place right twig over the locator pins on the rear Figure 8.23 log and the right front log. Quadra-Fire • Topaz • 7009-113 Rev. Q • 6/14... -
Page 34: Glass Door Assembly Replacement
Attach blower from front with 4 screws to blower bracket. 5/16 nut nap isc Bracket Install snap disc in bracket. Attach bracket to fi re- Figure 8.27 box with 5/16 in. wrench. Quadra-Fire • Topaz • 7009-113 Rev. Q • 6/14... - Page 35 Thermal Disc WHITE WHITE Fan Speed Control Power Cord (110 VAC) BLACK BLACK GREEN Ground Strain Relief BLACK Bushing Fan Assembly Figure 8.31 Blower Wiring Diagram Quadra-Fire • Topaz • 7009-113 Rev. Q • 6/14...
-
Page 36: Damper Adjustment
It is recommended to make adjustment prior to installation. Remove front/glass/ logs and brick if installed. Loosen screws and slide up to suggested settings. Reinstall accordingly... Tighten screws. Quadra-Fire • Topaz • 7009-113 Rev. Q • 6/14... -
Page 37: Section 9: Operating Instructions
• CAREFULLY SUPERVISE children in same room as appliance. • Alert children and adults to hazards of high temperatures. • Do NOT operate with protective barriers open or removed. • Keep clothing, furniture, draperies and other combustibles away. Quadra-Fire • Topaz • 7009-113 Rev. Q • 6/14... -
Page 38: Lighting Appliance
1. Set the thermostat to lowest setting. 2. Turn off all electric power to the appliance if service is to be performed. 3. Push in gas control knob slightly and turn clockwise to "OFF" position. Quadra-Fire • Topaz • 7009-113 Rev. Q • 6/14... -
Page 39: After Appliance Is Lit
Noise is caused by metal expanding and contracting as it heats up and cools down, similar to the sound produced by a furnace or heating duct. This noise does not affect the operation or longevity of the appliance. Quadra-Fire • Topaz • 7009-113 Rev. Q • 6/14... -
Page 40: Section 10: Troubleshooting
With the pilot in the ON position, disconnect the thermopile leads from the valve. Take a reading at the thermopile leads. The reading should be 325 millivolts minimum. Replace the thermopile if the reading is below the minimum. Quadra-Fire • Topaz • 7009-113 Rev. Q • 6/14... - Page 41 Ensure that no debris has been placed at the base of, or in the area of the air holes in the center of the base pan beneath the burner. Ensure that the glass is tightened properly on the appliance, particu- larly on top corners. Quadra-Fire • Topaz • 7009-113 Rev. Q • 6/14...
- Page 42 • Exposure to combustion fumes • Odors WARNING Inspect external vent cap regularly. • Ensure no debris blocks cap. • Combustible materials blocking cap may ignite. • Restricted air fl ow affects burner operation. Quadra-Fire • Topaz • 7009-113 Rev. Q • 6/14...
-
Page 43: Maintenance Tasks
4. Inspect for corrosion or separation. 5. Verify weather stripping, sealing and fl ashing remains intact. Remote Controls 1. Verify operation of remote. 2. Replace batteries in remote transmitters and battery-powered receivers. Quadra-Fire • Topaz • 7009-113 Rev. Q • 6/14... -
Page 44: Appliance Dimension Diagram
Dimensions are actual appliance dimensions. Use for reference only. For clearances refer to Section 3. Location Inches Millimeter Location Inches Millimeter 27-3/8 19-3/8 16-7/8 27-3/4 22-1/2 27-1/2 3-1/8 13-3/4 29-1/2 8-3/8 5-1/8 23-1/8 22-5/8 Figure 12.1 Appliance Dimensions Quadra-Fire • Topaz • 7009-113 Rev. Q • 6/14... -
Page 45: Vent Components Diagram
23-3/4 in. (603mm) 12-17 in. (305-432mm) 3-3/4 in. (95mm) SLP36M SLP48M SLP4M SLP24M SLP6AM 4 in. (102 mm) inner pipe 6-5/8 in. (168 mm) outer pipe Figure 12.2 SL-D Series Vent Components Quadra-Fire • Topaz • 7009-113 Rev. Q • 6/14... -
Page 46: Vent Components List
Adjustable Length, 16”, Galvanized 46DVA-16A , ” ’ 2 ’ 3 ’ 5 ’ 0 ” 3 ’ 5 ” 4 ’ 5 ° 5 ° 5 ° 5 ° 5 Quadra-Fire • Topaz • 7009-113 Rev. Q • 6/14... - Page 47 Each pipe manufacturer has their own list of parts for kits. SL is not interchangeable with SLP. Stove Adaptor Kit (Vertical Cap Kit) Includes 30’-4” ex, adapters, wall thimble, masonry, ZC ashing, 991DA vertical cap. Quadra-Fire • Topaz • 7009-113 Rev. Q • 6/14...
-
Page 48: Service Parts List
Limited 3 years Firebox and heat exchanger Lifetime All replacement parts 90 Days beyond warranty period See conditions, exclusions, and limitations on next page. 4021-645F 02-18-13 Page 1 of 2 Quadra-Fire • Topaz • 7009-113 Rev. Q • 6/14... - Page 49 THE EXTENT PROVIDED BY LAW, HHT MAKES NO EXPRESS WARRANTIES OTHER THAN THE WARRANTY SPECIFIED HEREIN. THE DURATION OF ANY IMPLIED WARRANTY IS LIMITED TO DURATION OF THE EXPRESSED WARRANTY SPECIFIED ABOVE. 4021-645F 02-18-13 Page 2 of 2 Quadra-Fire • Topaz • 7009-113 Rev. Q • 6/14...
-
Page 50: Contact Information
Quadra-Fire, a brand of Hearth & Home Technologies 7571 215 Street West, Lakeville, MN 55044 www.quadrafi re.com Please contact your Quadra-Fire dealer with any questions or concerns. For the location of your nearest Quadra-Fire dealer, please visit www.quadrafi re.com. CAUTION Do NOT discard this manual.
Need help?
Do you have a question about the TOPAZ 839-1290 and is the answer not in the manual?
Questions and answers
Is there a switch to adjust run time on ****
The manual mentions an ON/OFF switch but does not indicate a switch specifically for adjusting the run time.
This answer is automatically generated